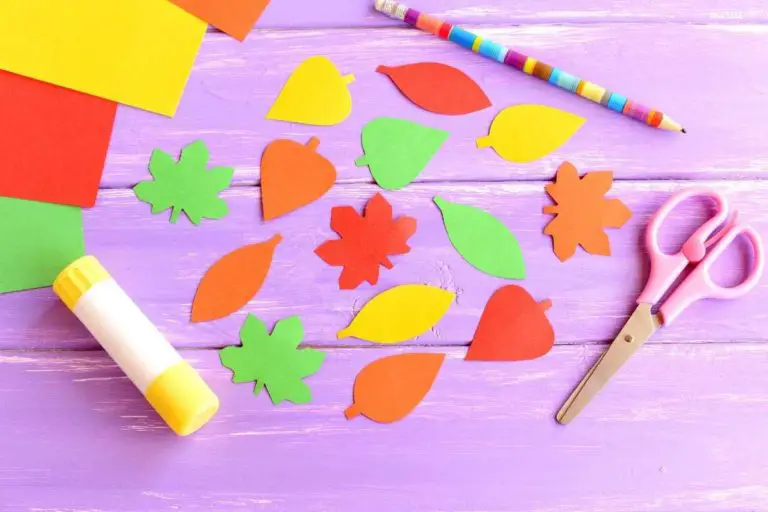
11 Water Art And Craft For Kids
11 Water Art And Craft For Kids Water is not just for drinking, it can be used to create beautiful art and craft projects.
These are all simple to do at home because they don’t require any special items or materials. They’re also easy enough that even toddlers can participate!
11 Water Art And Craft For Kids
Water Bubbles.
- What you will need.
Plastic cups, straws, and colored water (or you can use the colors of the rainbow)
- How to do it.
Fill a plastic cup with colored water and put it on a table. Give each child a straw and ask them to blow bubbles into the cup. Once all of the liquid has been blown out, fill another cup with clear or white water and repeat! This is also great for practicing fine motor skills as well as breath control!
Water Color Art
Watercolor art is a fun activity for kids. The paint of watercolors can be easily used by children to express their creativity and make amazing artwork.
You can use any type of watercolor paint in this art project. You can also choose different types of paper for these paintings, such as plain white paper, or even wallpaper samples (if you want to make some funky designs).
If you want your kid to learn more about painting techniques, then consider using a variety of brushes with different shapes and sizes.
Water and Oil
You will need.
- Water
- Oil (or vinegar)
A container to mix the two in. You could use a bowl or cup if you want, but it’s more fun to use something like this water and oil kit. It’s cheap, easy to find online, and comes with everything you need for mixing water and oil with ease.
Dyeing Paper or Fabric with Food Coloring
Dyeing paper or fabric with food coloring is a great way to get your kids involved with water art. The process is simple.
Soak the material in warm water and food coloring, then let it dry. Simple as that!
Food coloring is safe for kids
They’re used to eating it, so they know what happens when you put it in your mouth. Plus if you’re using a dye that’s not made from fruit or veggies, there’s no chance of any allergies developing!
It’s easy to clean up.
You can just wipe down whatever surface you used as part of the project (if you don’t want to get into too much science here). If it was just on your hands and clothes? Wash ‘em off!
Food coloring isn’t expensive
you can usually find big bottles at dollar stores or big box stores like Walmart or Target for only $1-$2 each! That makes experimenting cheap as well as easy since there won’t be any need for buying multiple colors in order to mix different shades together; just grab a few bottles at once and go nuts creating whatever styles come into mind!
Fireworks in a Mason Jar
You will need.
- A mason jar
- Water
- Food coloring or coffee grounds (optional)
- A funnel (optional)
First, you will need to create a firework in a mason jar. This can be done by pouring water into a mason jar and adding food coloring or coffee grounds for effect.
You may also choose not to add anything at all! If you are using food color, it is important that you only use natural dyes such as beet juice or turmeric powder because chemical dyes are poisonous when ingested by children under five years old.
Homemade Bubble Soap
If your kids are anything like mine, they love bubbles. Seriously, what kid doesn’t love bubbles? They’re fun, they’re colorful and they make all of us feel happy and carefree.
We recently discovered bubble soap at the store and my kids have been obsessed with it since we first got it out of the box. They’ve played with it so much that I decided to try making some homemade bubble soap for them instead of buying more from the store (which would soon be empty anyway). All you need is:
- 1/2 cup dishwashing liquid (dish soap)
- 3/4 cup water
- 2 tablespoons glycerin (available online or at pharmacies) and food coloring if desired.
Combine all ingredients in a bowl and stir until fully combined. Pour into individual containers or plastic bags with small holes punched into them for added fun!
Store in an airtight container or baggie when finished using up any leftovers quickly so that mold doesn’t start growing on top of it—this stuff should last about two weeks tops before turning greenish-brown due to bacteria growth on top which can lead to sickness if eaten by children under age 5 years old who still put things in their mouth often enough–so don’t wait too long before throwing away old batches of homemade bubble solutions!”
Homemade Puffy Paint
Ingredients.
- Glue
- Shaving cream (or a similar fabric softener)
- Food coloring
Instructions.
Put the glue into a jar and add some of the food coloring. You can also add water if you want it to be more fluid.
Add some shaving cream and mix until it looks like puffy paint, with no lumps or clumps of glue visible. If you want more shades, repeat step 1 with new colors and new amounts of shaving cream each time until you get the shade that you like best!
hen, simply squeeze out onto paper or other surfaces and paint away! Once you’re done painting, clean up any messes with soap and water (or just let them dry).
Rainbow in an Oven Tray
Place a piece of tissue paper in a baking tray and apply food coloring to it.
Put the tray in the oven at 350 F for 1 minute or until the colors have mixed (you can use your own judgment).
Let it cool down before removing it from the oven so that it doesn’t burn you! You should see a lovely rainbow on your tray!
Water Gun Painting
- Paint with water guns
- Use water guns for target practice
- Do pretend shooting
- Have a water fight with your friends or family
Make Your Own Bubbles!
You will need a bowl, a cup of water, and dish soap.
- Put the water in the bowl.
- Pour in some dish soap and mix it with a spoon until you get bubbles. If your bubble solution isn’t working right away, try adding more dish soap to make it thicker than just plain water with no bubbles at all!
- Let your child blow through the wand into their creation (or use your own breath if they won’t share). Try making different kinds of shapes and watching them float through the air!
Tie Dye Shirt or Fabric with Food Coloring and Vinegar.
To make your own tie-dye, you’ll need materials like food coloring and vinegar. You can also use lemon juice if you don’t have vinegar on hand. Here’s how it’s done.
Mix 1 tablespoon of white vinegar or 2 teaspoons of lemon juice into 1 cup of water in a bowl or plastic container. If you’re using a dye packet from an old shirt, add half of that packet now as well (the dye will be diluted).
Add drops of food coloring until the mixture reaches your desired color saturation level; more than one packet may be needed for darker colors such as red and blue. Stir until all ingredients are combined well.
Dip either cotton material or other fabric swatches into the dye mixture and let them soak for at least 5 minutes before removing them to dry on newspaper or paper towels—you can dunk them multiple times before moving on to another piece if you want different colors!
Diy Water Art And Crafts For Kids
Water and oil. You can set up a small aquarium to learn about water. Fill an aquarium with water and add some plants, toys, or food coloring.
Your kids will love watching their fish swimming around in their own private ocean!
Dyeing paper or fabric with food coloring. Fill containers with warm water, add some drops of food coloring then dip pieces of paper or ribbons into them for a fun project that looks great as wall art too!
Fireworks in a Mason Jar
Fill mason jars with different colored liquids (you can use food coloring) and watch them explode when you shake them!
Homemade bubble soap
Mix equal parts glycerin soap base and glycerin liquid hand cleaner until well blended (add essential oils if desired), pour it into an empty dishwashing liquid bottle; then put the lid on tightly before shaking vigorously until foamy bubbles appear at the top edge of your container (about 5 seconds).
Finally, screw off the cap again while holding onto its bottom edge so none spills out while you gently squeeze out each drop into smaller containers like baby shampoo bottles; tightly screw back on lids once filled so they don’t dry out before being used again later down the line.”
water art craft
Water art crafts are a delightful and creative way to engage children and explore their artistic abilities. With just a few simple materials, children can create stunning works of art using water as their medium.
One popular water art craft is watercolor painting. Using watercolor paints and brushes, children can blend vibrant colors and experiment with different techniques to create beautiful landscapes, abstract designs, or imaginative scenes. Another engaging water art craft is watercolor resist painting. By applying wax crayons or oil pastels on paper and then painting over them with watercolors,
children can witness how the wax or oil resists the water, creating unique and striking effects. Additionally, children can enjoy creating marbled art by dropping watercolor paints onto a tray of water and gently swirling the colors. They can then lay a piece of paper on the surface to transfer the marbled patterns onto their artwork.
Water art crafts not only provide a fun and sensory experience but also allow children to explore color theory, experiment with different techniques, and express their creativity. The best part is that these crafts can be done with minimal mess and are suitable for a range of ages, making them perfect for rainy days,
art classes, or simply fostering a love for art and imagination in children. So, gather your watercolors, brushes, and paper, and dive into the magical world of water art crafts!
water art ks2
Water art is an exciting and engaging activity for children in Key Stage 2 (KS2). It allows them to explore the properties of water and experiment with various techniques to create unique and visually appealing artworks. Here are a few water art projects suitable for KS2 students:
- Watercolor Landscapes: Encourage children to paint beautiful landscapes using watercolor paints. They can explore different brush strokes, blending techniques, and color mixing to create vibrant and expressive scenes. You can provide them with reference images or let them use their imagination to depict landscapes, seascapes, or even fantasy worlds.
- Bubble Wrap Printing: This activity combines water and texture. Children can dip a piece of bubble wrap into watercolor paint and press it onto paper, creating interesting patterns and textures. They can experiment with different colors and layering techniques to produce unique and eye-catching prints.
- Watercolor Resist: Introduce children to the concept of watercolor resist by having them draw or write with white crayons or oil pastels on paper. Then, using watercolor paints, they can apply washes of color over the surface, and the wax or oil will resist the water, revealing the hidden designs. This technique allows for intricate details and stunning effects.
- Splatter Painting: Let children have fun with splatter painting using watercolors. They can dip their brushes in watercolor paints, hold them over the paper, and tap the brush handle to create splatters of color. This technique can be used to add texture, create abstract designs, or enhance backgrounds in their artworks.
- Watercolor Collage: Children can create watercolor backgrounds by applying washes of color onto separate sheets of paper. Once dry, they can tear or cut out shapes or images from magazines, colored paper, or other sources and collage them onto the watercolor backgrounds. This technique allows for creativity and experimentation with composition.
These water art projects in KS2 not only foster creativity and artistic expression but also encourage exploration of different materials, techniques, and color theory. They provide an opportunity for children to develop their fine motor skills, visual perception, and artistic confidence. So, dive into the world of water art and let the creativity flow!
Conclusion
This is an amazing way to get kids engaged in art and crafts, especially if they’re not into painting or drawing. If you are looking for some fun water art and craft ideas that will keep your children entertained, then this list of DIY projects is sure to be helpful!