9 3d Wall Art Craft Ideas for Statement Pieces That Wow
Ready to transform plain walls into conversation starters? These 9 completely unique 3D wall art ideas are playful, doable, and totally share-worthy. Trust me, you’ll love how each piece adds texture, personality, and wow-factor to any room.
Let’s dive in and pick a few favorites you can start this weekend — because statement walls don’t have to be expensive or complicated.
1. Layered Geometric Shadow Box Panels
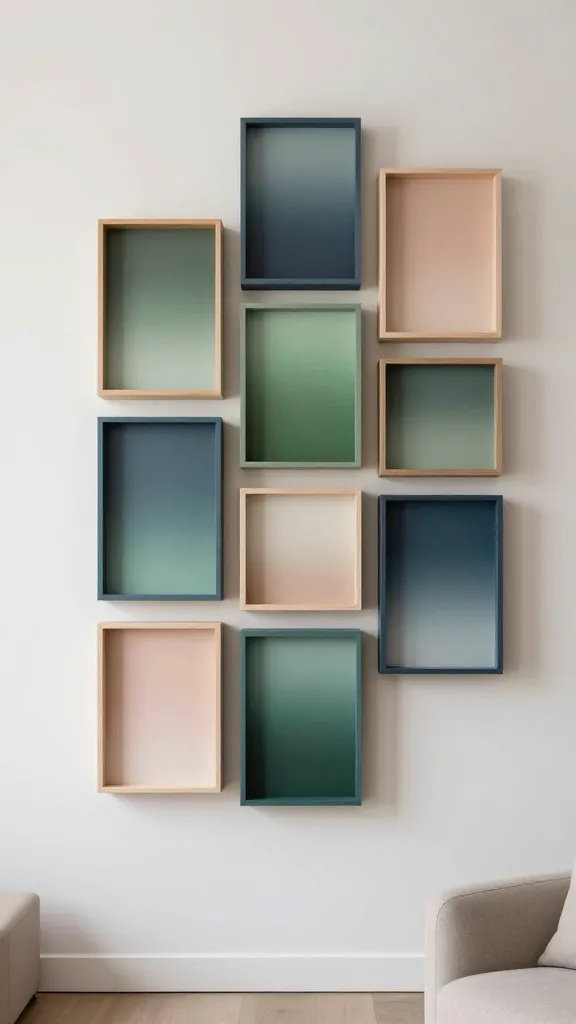
Picture this: a cluster of shallow shadow boxes arranged in a dynamic geometric pattern, each panel painted in a moody gradient. The result is a sophisticated, gallery-worthy focal point that looks like you hired a designer.
Materials
- Wooden shadow boxes (3–5, in varying sizes)
- Acrylic paints in gradient hues (cool blues, greens, or blush tones)
- Foam mounting board or cork for backing
- Double-sided tape or hot glue
- Picture hanging hardware
How to Make It
- Paint each box with a gentle color gradient, letting colors blend softly at the edges.
- Line up the panels on the floor to plan your arrangement, then mount lightweight backing behind each panel to add subtle depth.
- Hang in an eye-catching cluster on a feature wall, varying spacing for visual tension.
Pro Tips / Styling Ideas
- Keep shadows soft by using matte paint and avoiding glossy finishes.
- Group the set above a sofa or console for a dramatic horizontal sweep.
- Switch colors with seasons for an ever-evolving look.
Who will love it: Fans of modern minimalism and chic gallery vibes. It’s a stellar DIY for living rooms or hallways, seriously.
2. 3D Origami Lantern Wall Sculpt
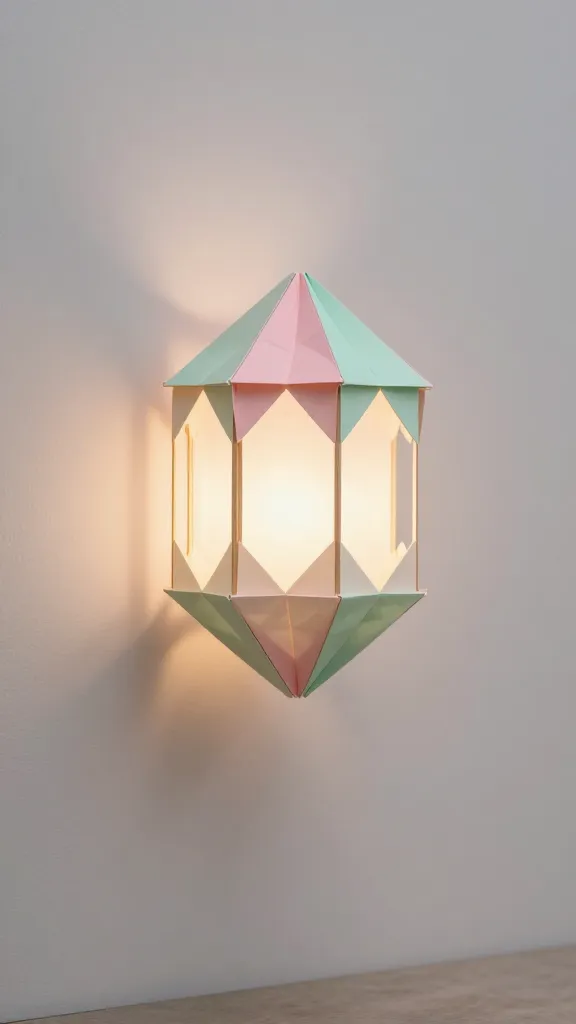
Think geometric paper cranes? In wall art form, this lantern sculpture casts beautiful shadows and adds cozy warmth to any space. It’s light, airy, and unbelievably easy to customize.
Materials
- Cardstock or thin cardboard in your chosen colors
- Strong adhesive or glue gun
- Thin wooden dowel rods or skewers
- Nail or adhesive hanging hook
How to Make It
- Cut interlocking origami shapes from cardstock, then fold and glue to create small 3D modules.
- Assemble modules around a lightweight frame (use dowels as the skeleton).
- Attach to wall with a hook, letting the modules cascade in a sunburst or cascading wave.
Pro Tips / Styling Ideas
- Pick colors that echo your room’s palette for a cohesive look.
- Dim lighting will make the lanterns glow softly, adding ambiance.
Who will love it: Cozy nooks, reading corners, and anyone who adores soft, sculptural decor. A charming DIY that feels luxe but is totally doable.
3. Floating Geo-Minish Wall Stars
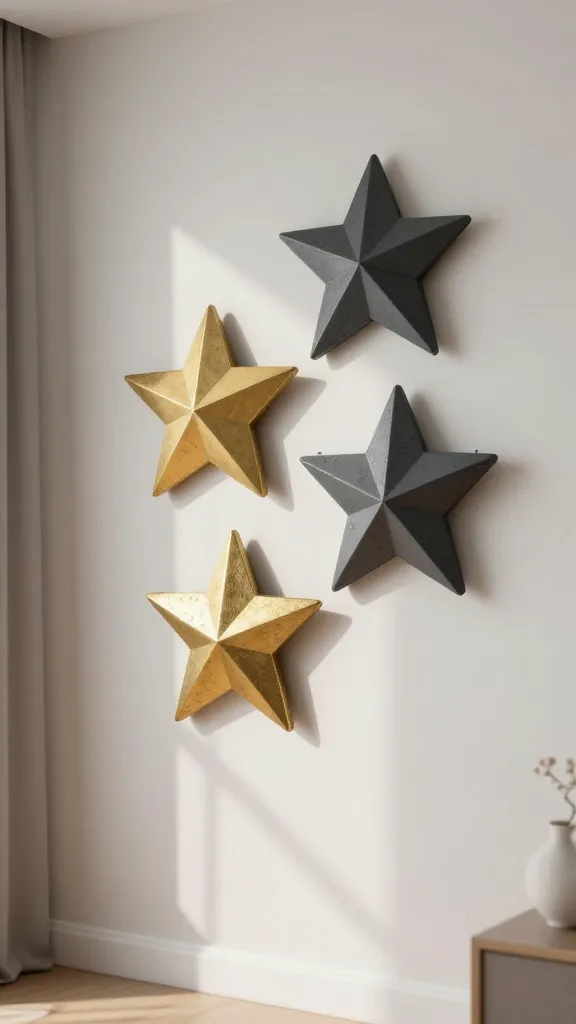
These three-dimensional star shapes float off the wall, catching light from every angle. It’s a playful, statement-making piece that works in bedrooms, nurseries, or entryways.
Materials
- Cardboard or lightweight wood cut into star shapes (various sizes)
- Foam or rubber spacers
- Acrylic paints or metallic spray paints
- Adhesive mounting strips
How to Make It
- Paint stars in a metallic or matte palette. Add subtle weathering for depth.
- Attach spacers to the back so the stars sit off the wall at a gentle distance.
- Mount in a staggered constellation pattern for a wow factor.
Pro Tips / Styling Ideas
- Go monochrome with a touch of metallic sheen for a high-end vibe.
- Place near light sources to maximize dimensional shadow play.
Who will love it: Night-sky dreamers and anyone who wants a playful yet polished install. Perfect for a child’s room or a modern living space.
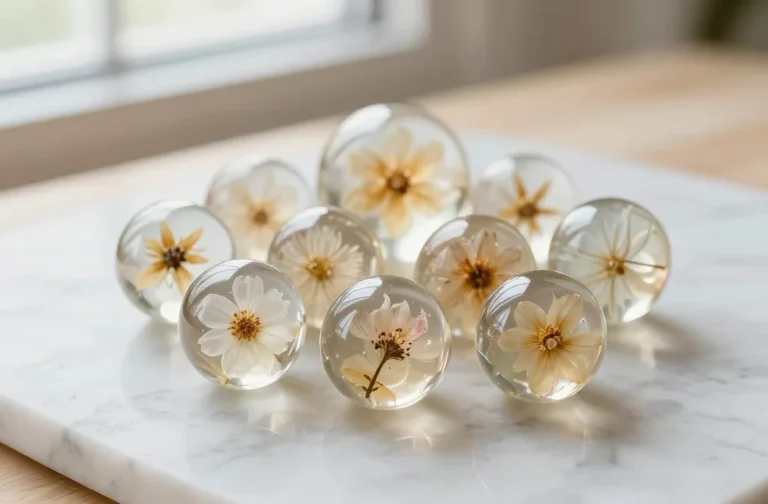
4. Resin-Backed Floral 3D Panels
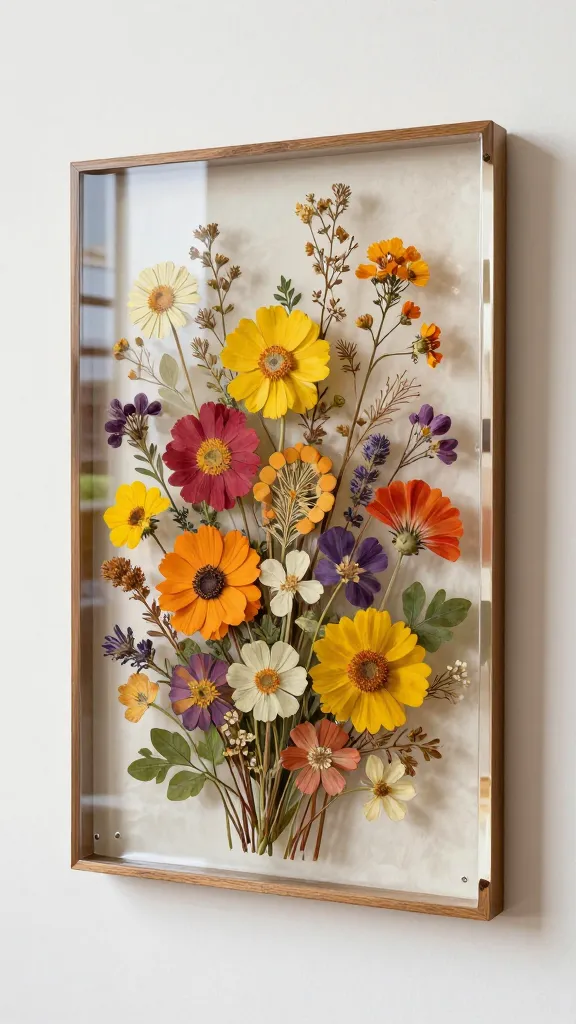
Bright, vivid florals with a glassy resin finish create a lush, tactile wall piece that’s as durable as it is gorgeous. This one is a weekend project that yields a gallery-worthy centerpiece.
Materials
- Pressed flowers or dried botanicals
- Clear epoxy resin kit with activator
- Wooden backing board
- Mixing cups, sticks, protective gloves
- Hanging hardware
How to Make It
- Arrange botanicals on the backing board in a pleasing composition.
- Pour resin in layers, letting each layer cure before adding the next to create depth.
- Seal edges and attach hardware for wall mounting.
Pro Tips / Styling Ideas
- Experiment with bold color tints in the resin for a vibrant look.
- Use the piece as a natural focal point above a console or bed.
Who will love it: Nature lovers and art enthusiasts who crave a striking, glossy finish. FYI, it’s an eye-catching conversation starter at gatherings.
5. Tactile Fiber-Celtic Weave Wall Panel
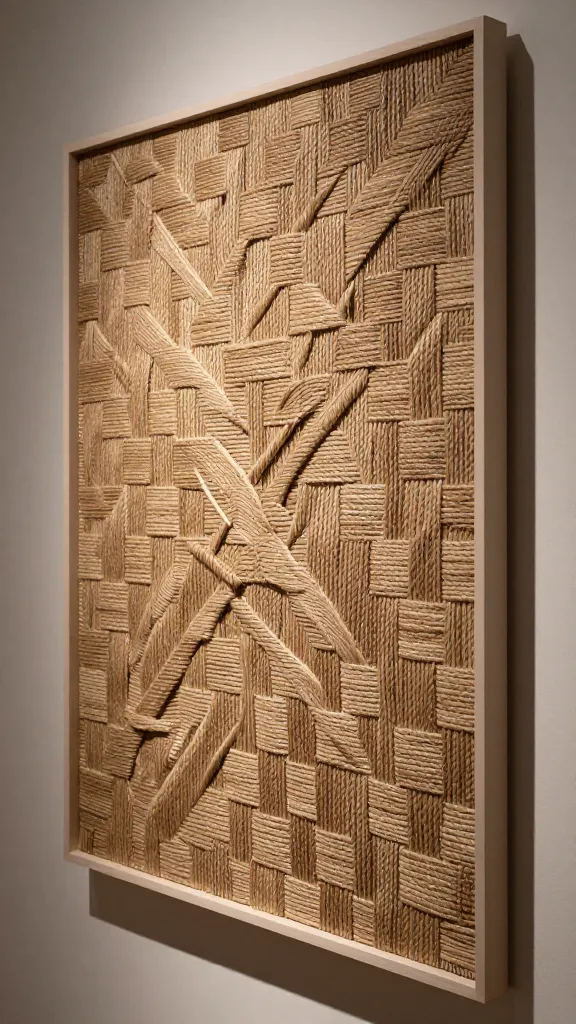
Texture meets modern sculpture in a woven panel that plays with light and shadow. This one invites you to touch (but don’t forget to tell guests not to).
Materials
- Rattan, jute, or thick twine in natural tones
- MDF or lightweight wooden frame panels
- Hot glue and scissors
- Sturdy mounting hardware
How to Make It
- Weave strands across the panel in a geometric, checkerboard, or wave pattern.
- Secure edges with hot glue and trim excess.
- Mount as a single bold panel or a small gallery of textural pieces.
Pro Tips / Styling Ideas
- Keep the color palette earthy for a Scandinavian-inspired vibe.
- Add a thin metallic thread for a hint of glam without overpowering the texture.
Who will love it: Texture seekers and fans of earthy, organic decor. It’s perfect for living rooms and entryways that need warmth and personality.
6. Sculpted Aquadrop Metal Cutouts
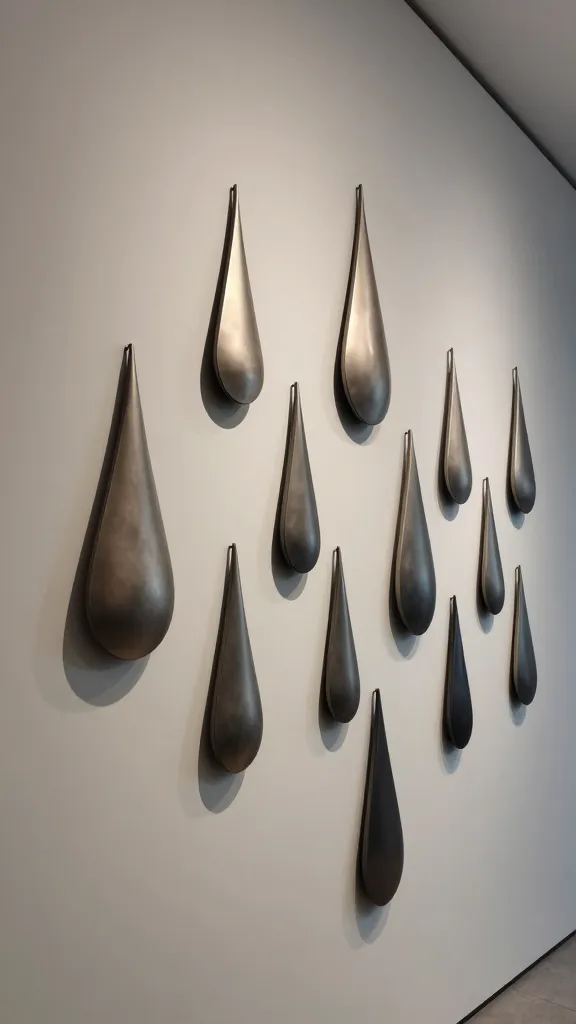
Fluid, droplet-like metal shapes protrude from the wall, catching light and offering a subtle, industrial-luxe mood. Modern, bold, and seriously impressive.
Materials
- Thin metal cutouts or lightweight aluminum sheets
- Powdered primer and spray paint in matte or satin
- Spacer blocks or small standoffs
- Wall mounting hardware
How to Make It
- Cut or source droplet-shaped pieces with clean edges.
- Paint and seal to protect from fingerprints and wear.
- Attach with standoffs so each piece sits slightly off the wall, creating depth.
Pro Tips / Styling Ideas
- Arrange in a loose arc or staggered vertical line for drama.
- Pair with a dark wall to make the metal pop.
Who will love it: Modernists and metalwork fans. It’s a striking statement for a bold, contemporary space.
7. 3D Felt Layered Landscape
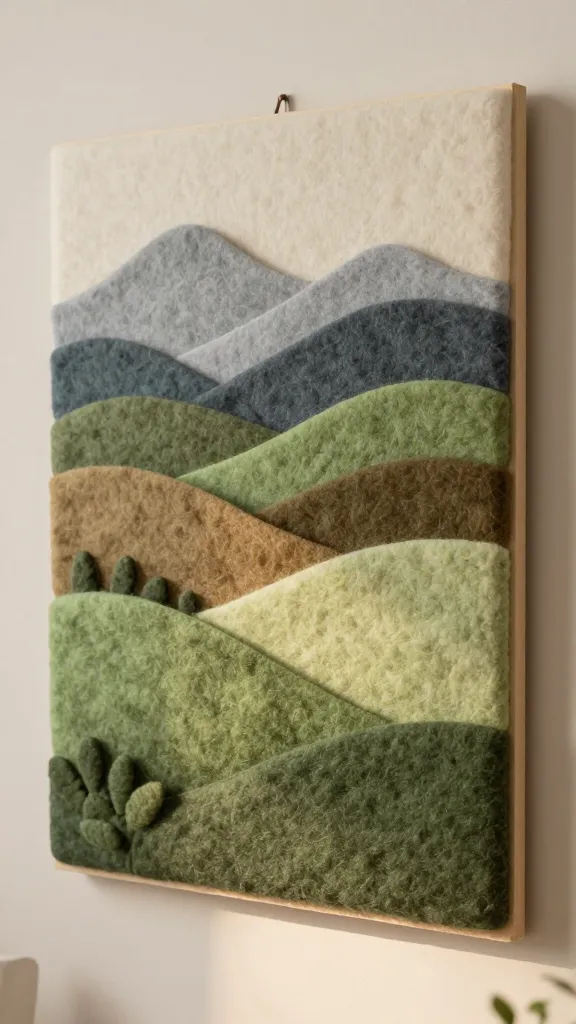
Soft, tactile, and unexpectedly dimensional, this faux landscape uses layered felt to form rolling hills and distant mountains. It’s cozy chic with a handmade vibe.
Materials
- Colored felt sheets in varying thicknesses
- Foam core board or lightweight plywood
- Adhesive spray or glue
- Hook-and-loop mounting or picture hook
How to Make It
- Cut felt into shapes representing layers of a landscape.
- Stack and glue each layer, creating natural silhouettes with generous depth.
- Mount on a board and hang with a simple, clean frame or let it float on the wall.
Pro Tips / Styling Ideas
- Choose a color gradient: dusk blues, earthy greens, or sunset pinks.
- Use soft lighting to emphasize the fabric texture.
Who will love it: Cozy cottage lovers and anyone who wants a soft, approachable wall piece. It’s like a warm hug for your wall.
8. 3D Monochrome Cutout Map
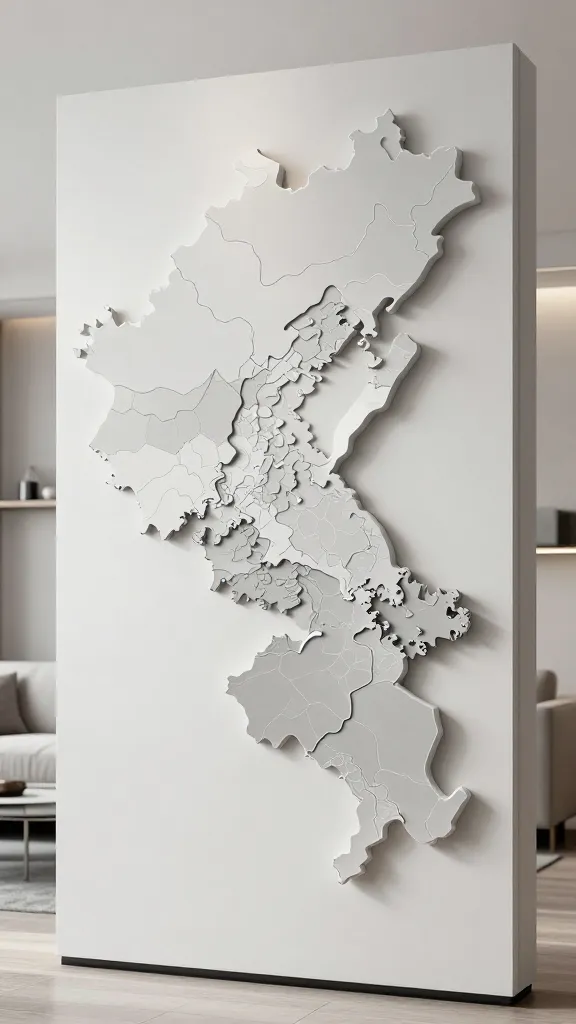
Turn geography into sculpture with a cutout map that projects from the wall. It’s educational, stylish, and endlessly customizable to your favorite places.
Materials
- Wooden or acrylic map outline
- Thin acrylic sheets or foam for depth layers
- Adhesive spacers
- Paints or stain to suit your aesthetic
How to Make It
- Cut layers of the map from acrylic or foam, each slightly smaller than the last to create a layered relief.
- Paint or stain each level to add dimension, then stack with spacers behind to push them forward.
- Mount as a bold, sculptural piece that reads as a modern topographic map.
Pro Tips / Styling Ideas
- Highlight your hometown or a dream destination for a personal touch.
- Pair with a muted wall color to let the cutouts pop.
Who will love it: Travel buffs and geometry lovers. It’s a conversation-worthy centerpiece for a study, hallway, or living room.
9. Epoxy Resin Ribbon Wave Wall Sculpture
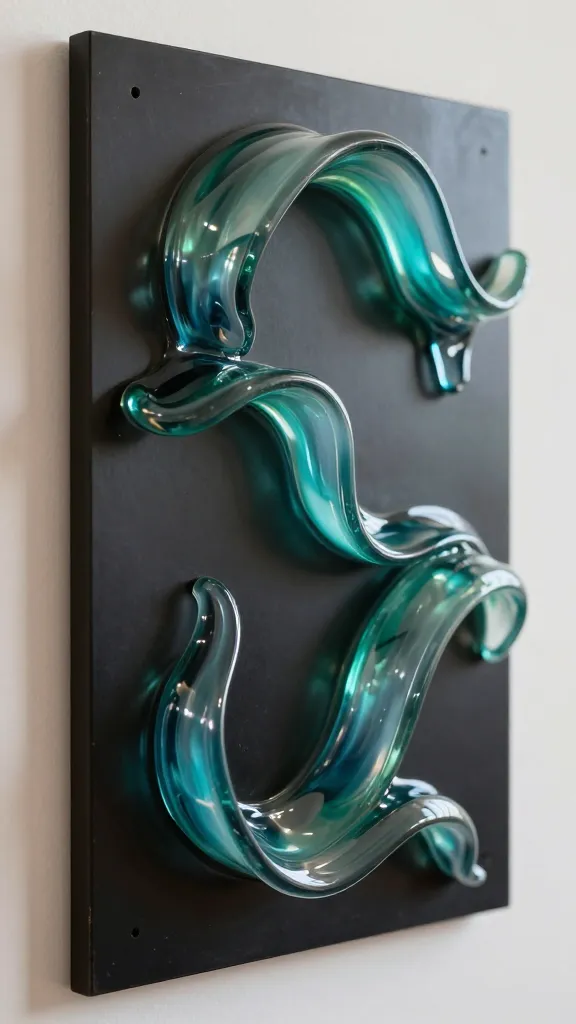
A single continuous resin ribbon coils across a backing board, forming a dramatic, glossy wave. It’s sleek, glossy, and delightfully kinetic in a stationary way.
Materials
- Backboard (rigid wood or MDF)
- Flexible resin or silicone ribbon forms
- Epoxy resin kit with color pigments
- Mounting hardware
How to Make It
- Fit the resin ribbon to the board and secure in a winding wave pattern.
- Pour tinted epoxy over the board and let layers cure to create a glass-like surface.
- Hang in a place where light can play through the resin’s curves.
Pro Tips / Styling Ideas
- Choose deep blues or emerald greens for a luxe coastal vibe.
- Keep surrounding decor minimal to let the sculpture shine.
Who will love it: Glossy lovers and modern coastal fans. It brings drama without clutter.
Conclusion
These nine ideas prove that 3D wall art can be approachable, highly personalized, and remarkably impactful. Pick your favorites, stock up on a few simple supplies, and start creating this weekend. You’ll end up with statement pieces that feel exclusive, yet totally doable—and you’ll pin every finish shot for future projects, seriously.