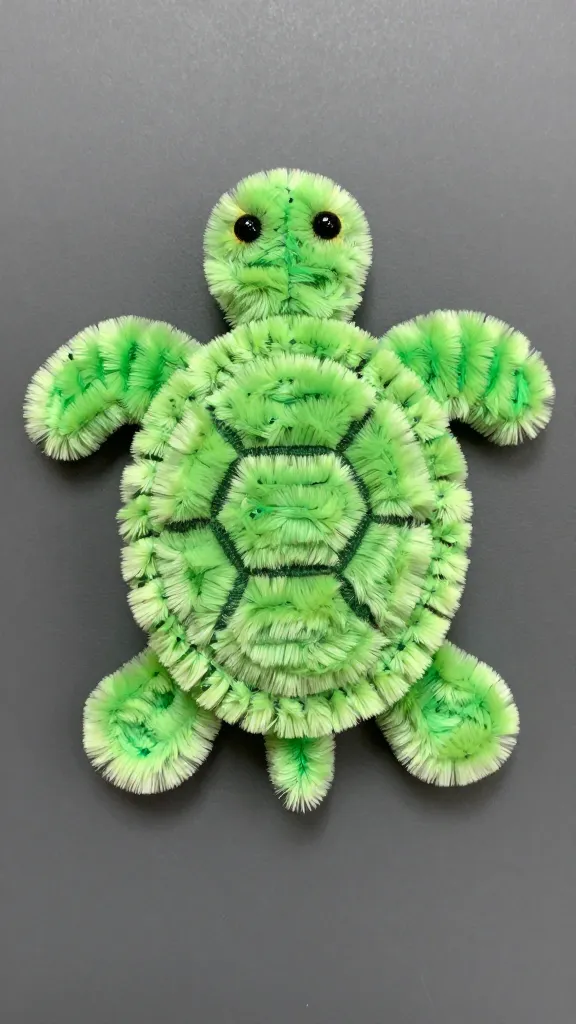
How to Make Pipe Cleaner Animals Step by Step
I love pipe cleaner creatures. They’re cheap, goofy, and surprisingly expressive once you loosen your grip on perfection. If you’ve ever stared at a boring pipe cleaner and wondered, “Can this thing be alive with a heartbeat and a personality?” you’re in the right place. We’re diving into step-by-step ideas that turn simple fuzz and wire into friendly animals you’ll actually want to display. Prepare to twist, bend, and laugh at your own glittery workshop chaos. FYI, this is the kind of craft that rewards experiments more than perfection, so bring your curiosity and a bit of patience.
What you’ll need (the bare minimum and then some)
Starting strong means stocking up without overdoing it. You’ll want:
- Assorted pipe cleaners in colors you actually like
- Wire cutters or sturdy scissors
- Googly eyes or buttons for faces
- Glue (hot glue works wonders, but craft glue also does the trick)
- Optional accents: pom-poms, beads, felt, small googly noses
- Finish with a little imagination and a lot of patience
- Choose two or three colors you love. You’ll be surprised how far a little color psychology goes in making your animal pop.
- Decide on your scale. Do you want tiny critters or bigger creatures? This change will guide how many pipe cleaners you use.
- Prep a clean workspace. Glitter has a loud personality and tends to sneak into every corner of life.
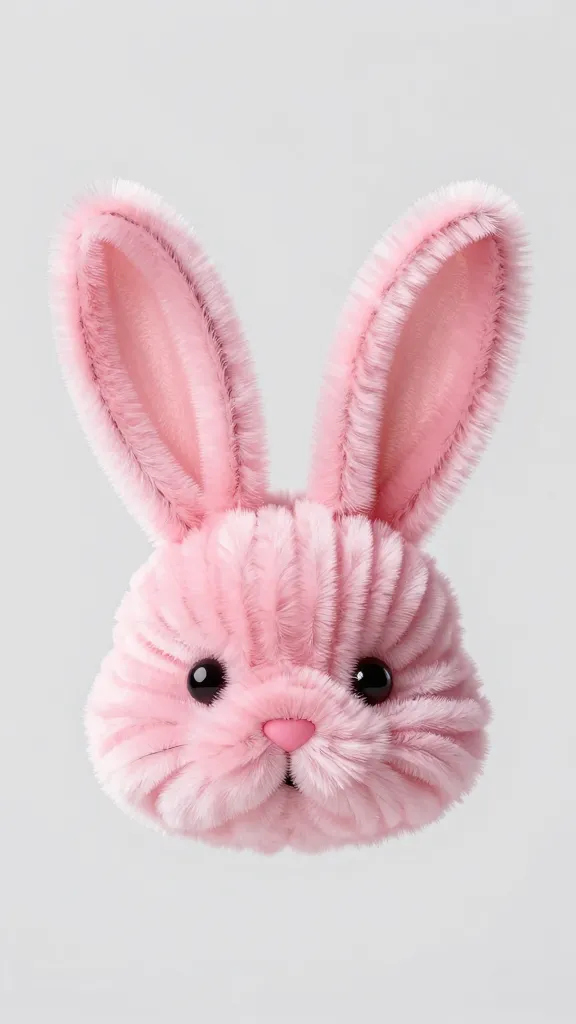
Step-by-step: the classic pipe cleaner bunny
If you want a friendly starter that’s instantly recognizable, a bunny is the perfect gateway. It’s all about ears, a twitchy nose, and a fluffy little tail.
Assembly basics
- Take one pipe cleaner and fold it in half. This gives you a little “body” and “head” section at the same time.
- Twist gently to form a rounded head, leaving about 2 inches of dangly ears. Don’t over-twist—soft is cute.
- Twist another shorter pipe cleaner around the middle to create the torso and the back legs.
Face and finesse
- Add googly eyes or beads about an inch from the top of the head. Try different eye placements to give your bunny personality.
- Wrap a tiny pink or red bead for a cute nose. You can also draw a tiny mouth with a permanent marker.
- Attach a cotton tail or a small puff of white yarn for that classic bunny fluff.
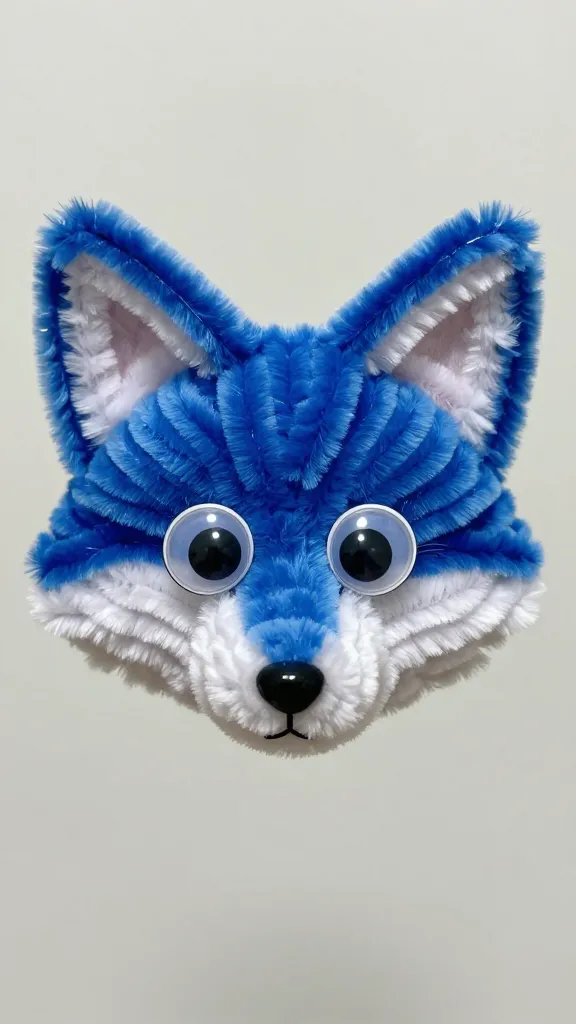
Birds, bugs, and beasts: diversify your zoo
The real magic happens when you branch out beyond the bunny. Here are three fast hits that take only a few minutes each.
1) A chirpy chick
- Bend one pipe cleaner into a teardrop shape for a body and head.
- Wrap a second cleaner as a tiny wing on one side. Do the same on the opposite side if you want a twin-winged look.
- Glue on a tiny eye and a bright beak cut from yellow felt or painted.
2) A cheeky beetle
- Double up two cleaner pieces to form a rounded shell and six little legs.
- Twist legs under the body so they look like they’re scuttling forward.
- Add two eyes with beads or buttons and a tiny line for a mouth if you’re feeling dramatic.
3) A goofy fish
- Shape a curved body with one cleaner and a smaller one as a tail fin.
- Use two tiny round beads for eyes and a marker line for the mouth. A dash of blue or teal paint never hurts.
- Optional: wrap a second clean around the middle to create shimmering “scales” texture.
Materials magic: grabbing the right tools for nicer results
If your animals look floppy, you might be fighting the wrong tools. Here are a few quick upgrades that actually help.
Stability without stiffness
- Use a dab of hot glue at joints for a sturdier hold. It makes your critters feel “born to stand.”
- Twist more than once to lock pieces, but don’t over-torque. Pipe cleaners remember where you bend them—literally.
Details that spark joy
- Clear a tiny space for eyes; misaligned eyes give personality, but wonky eyes can look off. aim for symmetry or deliberate quirk.
- Add tiny accessories: a scarf from a scrap of felt, a hat made from a pom-pom, or a mini bow from a ribbon.
Finishing touches: turning rough sketches into brag-worthy art
Your animals aren’t done until you’re proud to show them off. Here’s how to give them a final polish.
Texture and contrast
- Mix textures by layering pipe cleaners with felt or fabric scraps. A fluffy tail combined with a glossy bead eye is chaos in the best way.
- Consider a thin coat of clear nail polish for a subtle shine that holds things in place (careful with delicate pieces!).
Display ideas that actually get noticed
- Turn a few into a mini scene: a tiny pond (blue felt), a little bridge (a folded strip of cardboard), and a goofy frog perched on the edge.
- Use a cedar block or a painted popsicle stick as a stand. Your creatures deserve a stage, not a countertop confessional.
Common pitfalls and how to dodge them
Everybody stumbles a little during craft time. Here are the go-to missteps and quick fixes.
- Too-tight twists cause cracks or breakage. Loosen your grip and twist until it’s snug, not pretzel-level tight.
- Color clashes can steal the charm. If you’re using several hues, pick one dominant color and two accent shades.
- Glue ooze can ruin faces. Apply sparingly and let it dry clear before moving to the next step.
From practice to masterpiece: accelerating your pipeline
If you want to build a little ecosystem instead of one-off pieces, start batching.
Batch-building workflow
- Set up a “production line”: eyes on one station, bodies on another, glue on the third. It speeds things up and keeps you from losing your mind.
- Pre-cut or pre-twist several pieces so you can assemble quickly when you’re on a roll.
- Document your favorites. A quick photo log helps you reproduce beloved designs later.
Conclusion: you did it, artist of pipe cleaner life
You now have a toolkit for turning bendy wires into personality-filled critters. It’s not about perfection; it’s about the stories you tell with each twist and face you give them. Proudly display your little zoo, and don’t be afraid to name them after friends, pets, or totally ridiculous things. IMO, the best part is how easy this hobby is to pick up and put down between snacks and notifications. So grab a few more pipe cleaners, and let your imagination go wild. You’ve got this.
FAQ
How long do pipe cleaner animals last?
With careful handling and minimal glue, they’ll hold together for weeks or even months. If you’re displaying them, a dab of glue at joints helps. If they start to shed fuzz, replace the damaged piece and keep going.
Can I use yarn or felt instead of pipe cleaners?
Absolutely. Pipe cleaners give structure, but fabric scraps and yarn add softness and texture. Start with a basic pipe-cleaner frame and wrap fabric around it for a hybrid creature.
What’s the easiest animal to start with?
A bunny or a chick is a great first choice. They’re forgiving, instantly recognizable, and quick to whip up. If you want something a bit quirkier, a beetle or fish works just as well.
Any tips for kids or beginners?
Keep twists loose, use larger beads for eyes, and pick bold colors. Shorter sessions prevent frustration, and always supervise hot glue use. FYI, celebrate every tiny success—these little critters are victories.
How do I store my finished creatures?
Keep them in a shallow box or a display tray to protect delicate faces. If you have a lot, use dividers or mini bins so they don’t get tangled or crushed when you reach for them.