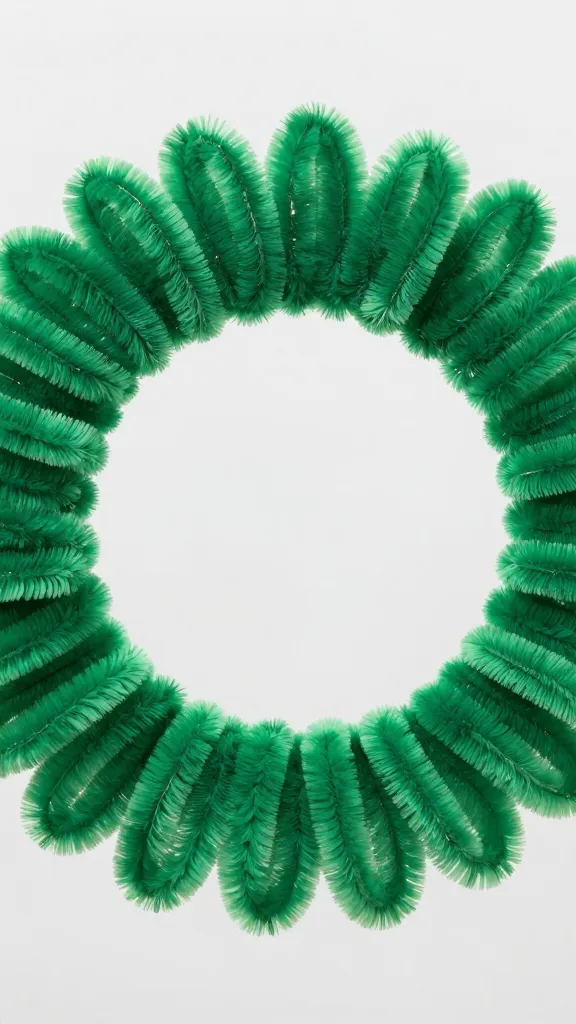
How to Make a Pipe Cleaner Wreath
A wreath should greet visitors with a wink, not a solemn nod. If you’ve ever stared at plain foam or tired old wreaths and thought, “There has to be a glittery, bendy solution,” you’re in the right place. Pipe cleaners are the unsung heroes of DIY decor—colorful, cheap, and delightfully bendy. In this guide, we’ll build a pipe cleaner wreath that’s sturdy, Pinterest-worthy, and surprisingly easy to customize. No fancy tools required, just a bit of imagination and a lot of fun.
Why a pipe cleaner wreath is the move you didn’t know you needed
Pipe cleaners are soft, twisty, and forgiving. They grip themselves and hold shapes without pinching or breaking. Want a wreath that changes with the seasons? Easy. Want a whimsical animal or floral pattern? Also easy. This project proves you don’t need wire, glue guns, or expensive materials to make something you’re proud of.
– They’re inexpensive. Your wallet will thank you.
– They’re versatile. Mix colors, textures, and sizes.
– They’re forgiving. Rework a shape without crying over spilled glue.
FYI: You can use pipe cleaners alone or mix them with a wire wreath base for extra oomph. Your call.
Choosing your base: wreath forms and the vibe you want

Your base sets the mood. Do you want a fluffy, pom-pom vibe or a clean, geometric look? Here are a couple of routes:
– Simple wire wreath form: Lightweight, sturdy, and easy to stack pipe cleaners on.
– Styrofoam or foam ring: Holds shapes well and is super beginner-friendly.
– Self-adhesive foam rings: Grab-n-go option if you’re short on time.
Subsection:
Color strategy: bold, pastel, or seasonal?
– Bold: Think teal, hot pink, lime green. The wreath becomes a statement piece.
– Pastel: Soft and classy; great for spring or weddings.
– Seasonal: Red and green for Christmas, orange and brown for fall—swap colors as the calendar turns.
Subsection:
Texture mix: chunky vs. fine
– Chunky pipe cleaners give you big, playful blobs of color.
– Fine or metallic pipes add sparkle and delicate lines.
– Mix textures for depth: matte brights with a few glittery accents.
Step-by-step: how to assemble a basic pipe cleaner wreath
Let’s break it down so you can start right away. No drama, just results.
– Gather your supplies: a wreath base (wire, foam, or foam ring), a pile of pipe cleaners in your chosen colors, scissors, and a pair of pliers if you’re using a wire base.
– Decide your pattern: Do you want a uniform look or a clustered, artful chaos? Decide early to avoid reworking forever.
– Attach the base: If you’re using a wire form, twist the ends of a pipe cleaner around the ring and secure with a few extra twists. Space them evenly or cluster them—your call.
– Build in layers: Start with a base layer of color around the ring, then add accents or secondary colors.
– Shape and fluff: Bend and fluff each pipe cleaner so the wreath feels full. Step back and squint at it like a judge on a talent show.
– Finish with a bow or hanger: Tie a ribbon through a couple of wire sections or attach a bow to the top for finishing flair.
Top tricks for making it sturdy and long-lasting
You want this wreath to survive a few seasons, not devolve into a sad pile of curly threads after a wind gust.
– Use multiple pipe cleaners per section: Twist two or three pieces together for a stronger hold.
– Overlap joints: Instead of attaching color A over color B, let them cross and lock to create natural seams.
– Consider a light spray sealant (optional): If your colors are particularly prone to shedding, a quick mist can help. Quick note: test on a small area first.
– Secure the hanger: If you’re hanging on a door, loop a sturdy pipe cleaner or a short length of ribbon around the top and glue or twist in place.
Creative variations to try next time
Once you’ve nailed the basic wreath, push the envelope a little. Here are some ideas that won’t require a PhD in craft science.
– Floral bouquet look: Create individual flower “blobs” with grouped pipe cleaners, then anchor them around the ring for a garden-party vibe.
– Seasonal shapes: Make seasonal icons—mini pumpkins for fall, snowflakes for winter, sun shapes for summer—then scatter them around the ring.
– Animal or character motifs: Eyes, ears, and little noses made from tiny extra pieces can turn your wreath into a friendly critter.
– Textured center: Use a different material in the middle, like a small fabric ball or a piece of burlap, to give the wreath depth.
Tips for a polished finish

Small details make a big difference. Here are some quick wins to level up your wreath.
– Symmetry is your friend: If you’re aiming for a balanced look, place focal colors opposite each other.
– Trim excess: Don’t let loose ends poke out—trim them close to the bend and tuck them away.
– Add a lightweight focal piece: A small sign, initial, or charm at the bottom can anchor the design.
– Keep a few extra pipe cleaners handy: You’ll regret not having a few on standby when you want to tweak.
Maintenance and display ideas
Your wreath isn’t a one-and-done deal. With a little care, it can stay fresh-looking for longer.
– Storage: Keep it in a dry, cool place. Bag it or wrap it in tissue to prevent dust buildup.
– Refresh: Swap out a few colors for a quick seasonal refresh. It’s like fashion for your door.
– Display options: On a door, use a simple over-the-door hanger or a nail hook. Inside, consider a wall hook or a stand for a table display.
Conclusion: you made a cheerful, bendy masterpiece
Pipe cleaners aren’t just for kids’ crafts; they’re a legit decor tool with personality. You pulled off a wreath that’s colorful, sturdy, and totally you. No fancy equipment required, just some patience, a dash of whimsy, and a willingness to tweak. If you’re proud of it, you should be! Now go show off your creation and maybe brag a little to your friends—“FYI, I made this with pipe cleaners, and it rocks.”
FAQ
Do I need a wreath base, or can I just wrap pipe cleaners around a ring?
Paragraph: You can absolutely wrap pipe cleaners around a ring alone, but a base helps keep shape and adds stability. A wire form is forgiving for beginners; a foam ring is quick and easy for fast results. If you want a super glossy finish, layering on top of a base gives you cleaner lines.
What colors should I choose for a seasonal wreath?
Paragraph: Pick a color story that matches the season. For spring, go with fresh pastels or bright florals. For summer, think vibrant tropical hues. Fall loves warm tones—pumpkin, amber, olive. Winter can lean on jewel tones or classic red/green. Mix in a neutral so it doesn’t clash with your door.
How long does it take to finish a wreath?
Paragraph: Plan for 30 to 90 minutes, depending on the complexity and how many colors you’re juggling. If you’re fiddling with tiny flowers, it might run longer. The good news is you can pop in and out as a relaxing break between chores.
Can I reuse the wreath for different holidays?
Paragraph: Totally. The trick is to keep a flexible base and swap out color accents or small motifs. Use neutral core colors and add seasonal pieces—easy peasy, less waste, more Wow.
What if my pipe cleaners keep slipping or unraveling?
Paragraph: Twist extra tightly around the base, and if you’re using a foam ring, a dab of hot glue at the first wrap can help—but be careful with heat. For a wire form, twist loops securely and distribute tension evenly to prevent sagging.
Is there a faster version for kids or quick gifts?
Paragraph: Yes. Use a plain foam ring and a limited color palette, then cluster a few larger shapes around the ring. It’s a delightful, low-effort project perfect for kids or a last-minute gift for neighbors. Bonus: it’s sturdy enough to survive a mailbox delivery.
If you want, I can tailor a color palette or motif to your door style or holiday. Just tell me your vibe, color preferences, and whether you’re team glitter or team matte.