5 Easy Christmas Crafts for Preschoolers (Fun & Festive!)
Hey little elves and curious crafters! Ready to sprinkle some holiday magic without the mess? These five crafts are simple, colorful, and totally teeny-tiny-hand-friendly, perfect for tiny artists to create their own festive joy. Trust me, you’ll both love watching tiny hands bring big smiles to the season.
1. Sparkly Paper Plate Santa Masks

Picture bright red cheeks, a fluffy white beard, and a goofy grin peeking out from a paper plate. This Santa mask is adorable, easy to assemble, and doubles as a silly photo prop for family moments. It’s a win for fine motor practice and fantastically festive vibes.
Materials Needed
- Paper plates (red if you want a quick Santa base, or white with red accents)
- White cotton balls or pom-poms for the beard
- Red construction paper for hat and nose
- Black marker, scissors, glue, and imagination
- Elastic cord or string to secure the mask
How to Make It
- Cut a face hole in the plate, leaving plenty of space for a cheerful Santa nose.
- Glue red construction paper around the plate to form Santa’s hat, trimming a fluffy white brim.
- Attach cotton balls or a cotton beard under the nose, then draw eyes with a marker.
- Glue a red pom-pom as the nose and add a black belt line for extra whimsy if you like.
- Attach elastic cord to the sides to wear the mask.
Pro Tips / Styling Ideas
- Let kids decorate with glitter glue or tiny jingle bells for extra sparkle (keep it low-glitz for sensitive kiddos).
- Hang these as a garland along a doorway or in a playroom for quick festive vibes.
End Note
This craft is a crowd-pleaser for preschoolers who love to imitate adults and make goofy faces. It’s cute, comfy, and totally wearable—perfect for a little Christmas playdate or a festive family photo moment.
2. Candy Cane Handprint Holiday Tree
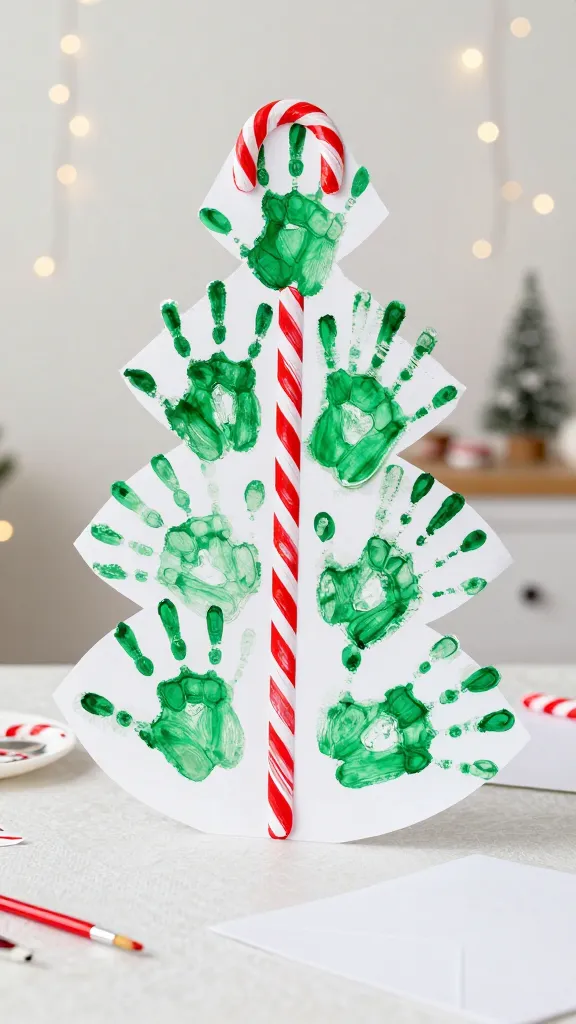
Turn tiny fingerprints into a towering pepperminty tree that brightens any fridge or bulletin board. The candy cane striped paint and the green handprint tree are irresistibly holiday-cheerful, plus it’s a gentle introduction to patterns and symmetry for toddlers and preschoolers.
Materials Needed
- Washable red and white paint, plus green paint
- Sheet of sturdy paper or a canvas panel
- Small brush or sponge for clean edges
- Plastic table cover or old newspaper to protect surfaces
How to Make It
- Help your child dip their hand into green paint to stamp a big tree shape on the paper.
- Once green dries a bit, guide them to add a white stripe along the tree’s trunk by drawing or brushing white paint in a curved pattern from top to bottom, mimicking candy cane stripes.
- Finish with tiny red circles or dots as ornaments using the tip of a brush or finger dab.
Pro Tips / Styling Ideas
- Add a glittery arrow or a small star on top with a dab of yellow paint for a finished tree look.
- Hang on the fridge with a magnet or display on a wall for a seasonal gallery.
End Note
Who would love this? The little artists who adore patterns, stripes, and a little edible-ice-cream vibe in their crafts. It’s a sweet keepsake that grows with every year you add a new leaf or ornament.
3. Snowflake Window Clings Using Water Beads
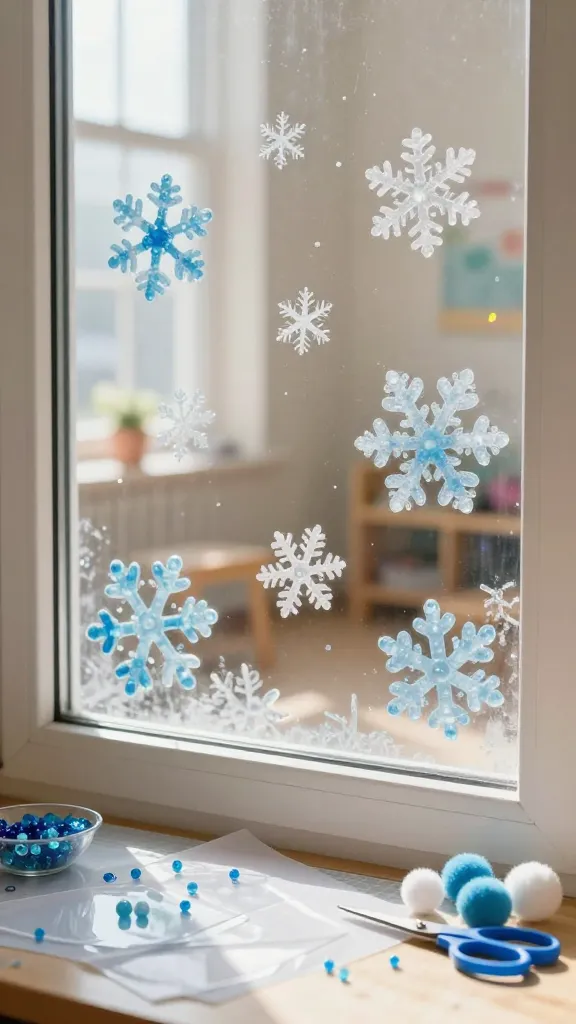
Snowflakes on the glass feel magical, especially when you can peel them off and reuse them. This window cling craft uses simple materials and creates shimmering, light-catching shapes that dance with the sun. It’s a gentle, sensory-friendly project that preschoolers can experiment with freely.
Materials Needed
- Clear contact paper or large sticky sheets
- Blue and white water beads (or mini pom-poms and sequins)
- Scissors and a cutting mat
- Optional: fine glitter, ribbons for extra sparkle
How to Make It
- Cut a snowflake template from paper and lay it on the sticky side of the contact paper.
- Decorate with water beads and glitter, pressing gently to make sure they stick.
- Place another sheet of contact paper on top and press flat.
- Cut out the snowflake shape and peel the backing to apply to a window.
Pro Tips / Styling Ideas
- Make a little winter scene by layering several snowflakes of different sizes.
- Turn some into a garland by trimming and stringing with a ribbon.
End Note
These clingy snowflakes are a sensory joy—crisp textures, soft colors, and a cheerful shimmer. They’ll glow with morning sun and brighten a room without leaving residue behind once you peel them off for storage.
4. Festive Pinecone Owls
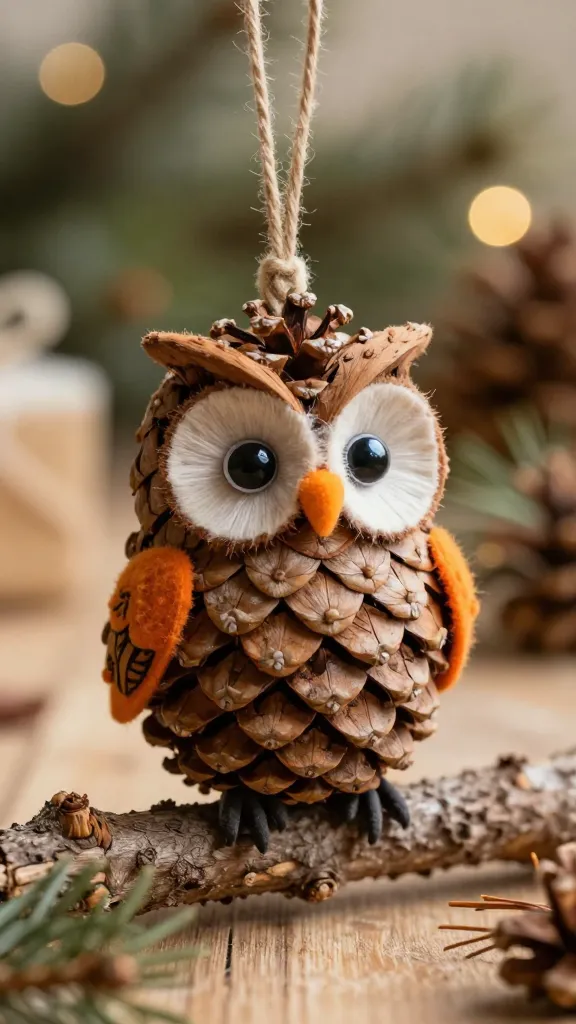
Nature meets whimsy in these tiny pinecone owls. They’re rustic, cute, and make wonderful ornaments or table decor. Each owl is a unique character—a little forest friend you can tuck into a seasonal shelf or give as a handmade gift to someone special.
Materials Needed
- Small pinecones (one per owl)
- Colorful felt scraps (orange beaks, wings, etc.)
- Googly eyes or small buttons
- Glue sticks or hot glue (adult supervision for hot glue)
- Paint or markers for details (optional)
- Twine or yarn for hanging if you want it as an ornament
How to Make It
- Base the pinecone with a touch of brown paint to give it a polished look and clear separation between scales.
- Cut small triangle shapes from felt for ears and wings; glue to the pinecone’s sides.
- Attach eyes and a small orange beak to create a friendly face.
- Add a bit of craft paint to add tips of wings or a small scarf if you want extra personality.
- If hanging, tie a loop of twine to the top and let it dry fully.
Pro Tips / Styling Ideas
- Pair with a few faux pine branches for a woodland table centerpiece.
- Kids can name each owl after their favorite holiday book character for a mini storytelling display.
End Note
These pinecone owls bring a touch of nature indoors with a dash of holiday whimsy. They’re simple, tactile, and absolutely adorable perched on a mantle or shelf.
5. Cozy Felt Christmas Banner Parade
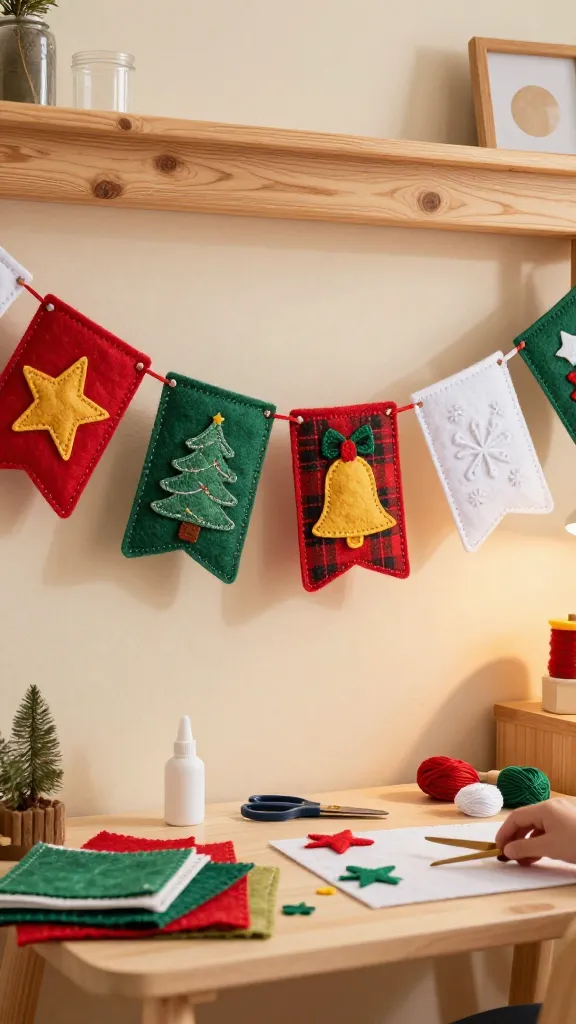
Banner making is a delightful way to involve preschoolers in festive decor without needing precise measurements. This soft, colorful felt banner is playful, reusable, and doubles as an invitation for guests to join the holiday fun. Each flag becomes a tiny scene—stars, trees, bells, or snowflakes—whatever sparks joy.
Materials Needed
- Assorted felt sheets in Christmas colors
- Needle and embroidery thread or glue (fabric glue works well)
- Scissors and a ruler
- Optional: fabric paint or fabric markers for faces or details
- String or ribbon to hang
How to Make It
- Cut several equal-sized triangles or pennant shapes from felt for the banner base.
- Cut simple shapes for each pennant: trees, stars, bells, candy canes, or snowflakes.
- Decorate with stitching or glued details to create tiny, friendly scenes.
- Attach each pennant to a long string or ribbon with even spacing.
- Hanging place: mantels, windows, or a doorway to greet guests.
Pro Tips / Styling Ideas
- Let kids practice color pairing—combine bold reds and greens with pops of metallic gold or silver.
- Switch out shapes seasonally—keep the banner year-round by adding new shapes for different holidays.
End Note
This felt banner is a soft, tactile project that yields a charming family keepsake. It’s ideal for quiet mornings or afternoon play, and it looks incredibly sweet draped across a doorway or above a sofa.
Conclusion
Five unique, kid-friendly crafts that bring the Christmas spirit into tiny hands—without heavy instruction or drama. Each project is designed for creativity, not perfection, so kids can explore textures, colors, and patterns while you cheer them on. Grab a glue stick, a stack of supplies, and a dash of festive curiosity—these ideas are ready to spark joy and sparkly memories. You’ll love the smiles, they’re seriously priceless.