13 Spooky Halloween Paper Crafts to Transform Your Porch This October: Diy Edition
October is calling with creaky porch vibes and cozy autumn winds. If you’re craving curb appeal that’s Pinterest-perfect and friendly to a DIY helper in you, you’re in the right place. These 13 paper-based projects are fun, easy, and totally transform your outdoor space without breaking the bank.
1. Harvest Moon Paper Lanterns With Silhouettes
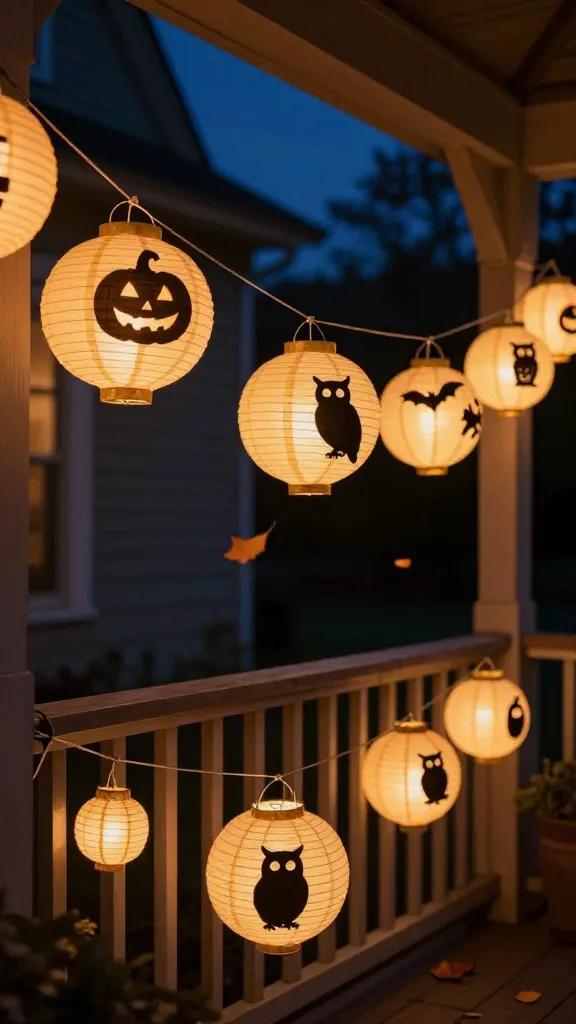
Picture a string of warm amber glows illuminating sweet silhouettes against a midnight sky. These paper lanterns feel magical, almost like you rented a tiny harvest moon for your porch. The best part? They’re lightweight, weather-friendly, and incredibly customizable.
Materials Needed
- Round paper lanterns (various sizes)
- Black craft paper or cardstock
- White chalk or pencil, scissors, craft knife
- Double-stick tape or glue
- LED tea lights or string lights
- Optional metallic gold washi tape for accents
How to Make It
- Trace spooky silhouettes (bats, cats, ghosts) on black paper and cut out.
- Attach silhouettes to the lanterns with tape, spacing them for a balanced look.
- Slide a warm LED light inside each lantern and perch them along your porch rail or column tops.
- Decorate a few with thin gold lines for a moonlit glow.
Pro Tips / Styling Ideas
- Cluster lanterns at varying heights for depth.
- Pair with soft fabric garlands and mini pumpkins for a cohesive scene.
Who’ll love this? Realistic, atmospheric vibes for porch dwellers who adore warm, approachable Halloween decorations.
2. Ghostly Paper Wreath
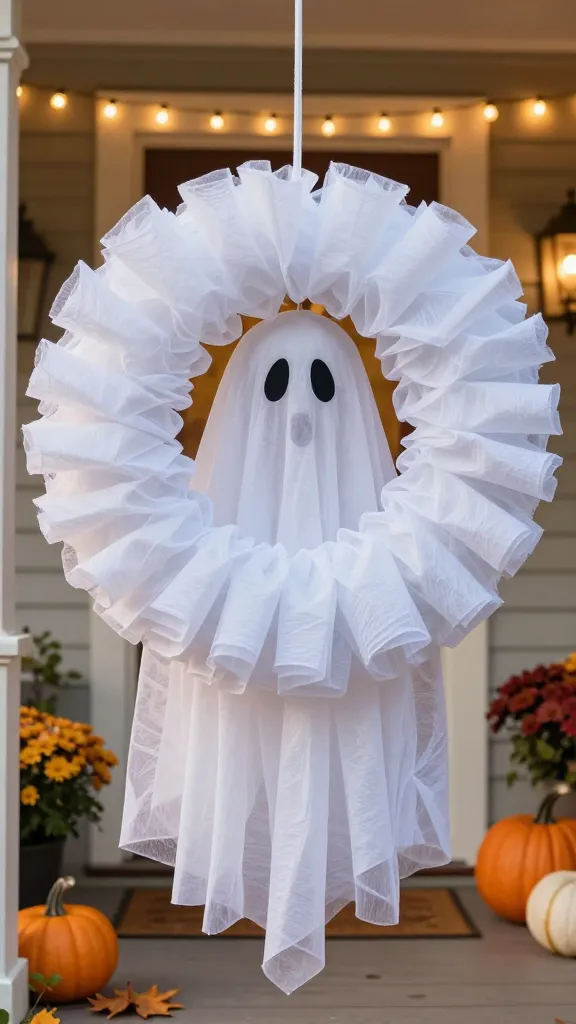
Welcome guests with a friendly haunt—the kind that’s not too spooky, just perfectly chic. A ghostly paper wreath is lightweight, expandable, and endlessly cute for year-round Halloween charm.
Materials Needed
- Foam wreath form or cardboard ring
- White tissue paper or crepe paper
- Black felt or cardstock for eyes
- Glue stick or hot glue
- Ribbon for hanging
How to Make It
- Layer tissue paper into ruffles around the wreath base for texture.
- Cut two small black circles for eyes and glue them near the center to form a shy ghost face.
- Hang on your front door with a ribbon bow for a playful peek from the outside.
Pro Tips / Styling Ideas
- Use sheer white fabrics for a delicate fluttery look on breezy days.
- Add a tiny metallic halo to mix modern with whimsy.
Who would love it? Porch charmers who want a friendly, low-maintenance statement piece.
3. Spider Web Window Cutouts
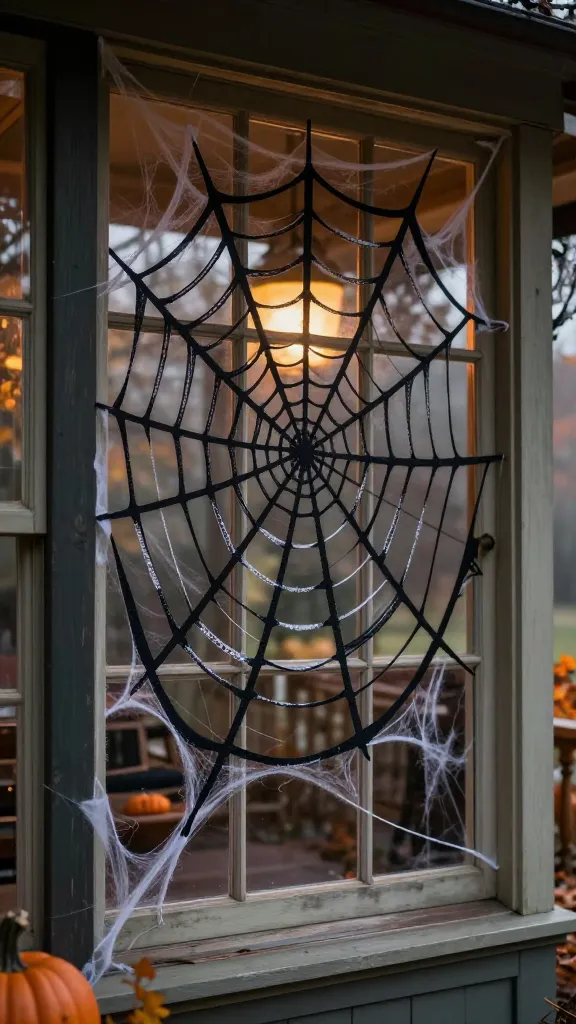
Your windows become a haunted stage with delicate spider webs crafted from paper. This project gives you intricate textures with minimal mess—perfect for a spooky-but-sophisticated vibe.
Materials Needed
- Black craft paper
- White chalk or gel pen
- Scissors, craft knife
- Masking tape or removable adhesive
How to Make It
- Draw a sprawling web pattern on black paper and carefully cut out the spokes and intersecting threads.
- Stick cutouts to the outer edges of your windows, creating a 3D lattice effect from the inside.
Pro Tips / Styling Ideas
- Backlight with a subtle lamp to highlight the lace-like web.
- Pair with tiny plastic spiders for a classic Halloween touch.
Who would love it? Anyone who loves architectural drama without overdoing the décor.
4. 3D Pumpkin Cone Garlands
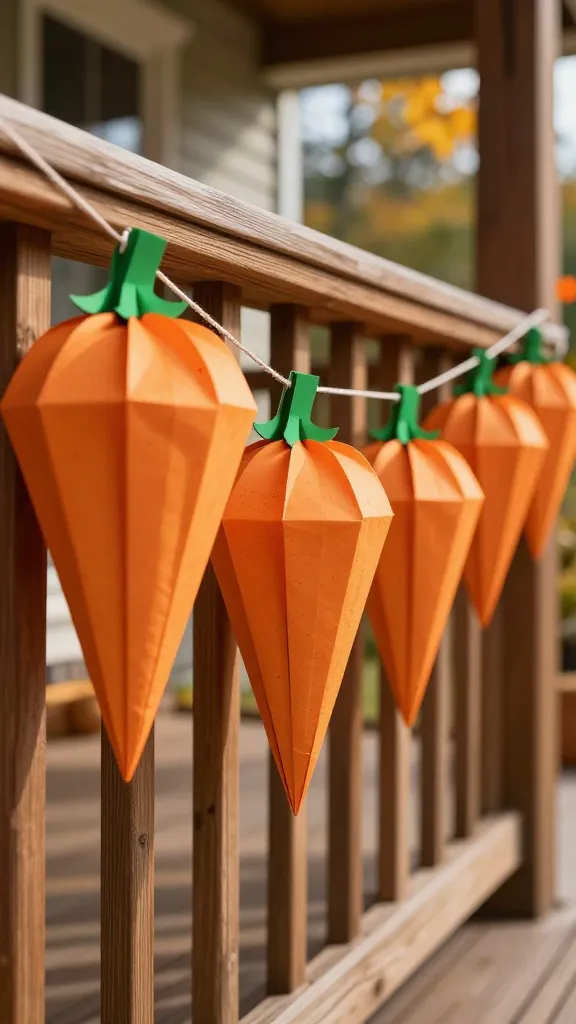
Juicy orange pumpkins in a delicate paper cone garland bring whimsy and warmth to your porch. The 3D aspect makes it feel handcrafted and special, even from a distance.
Materials Needed
- Orange craft paper or cardstock
- Green cardstock for stems
- Scissors, craft knife
- Glue or double-sided tape
- Jute or twine for stringing
How to Make It
- Cut orange circles, then accordion-fold and glue the edges to form cones.
- Attach small green stems at the top and string the cones along the twine.
Pro Tips / Styling Ideas
- Vary cone sizes for a dynamic garland trail.
- Drape along the banister or over a porch railing for a festive crawl.
Who would love it? Fans of bold color and playful textures who want a kid-friendly yet stylish vibe.
5. Haunted Book Stack Faux-Tire Stack
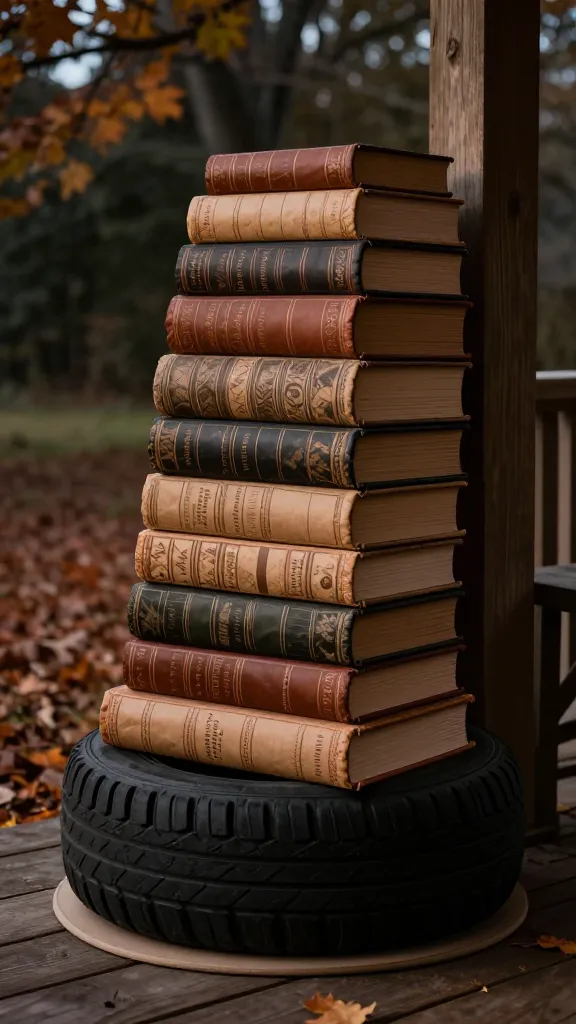
Turn old paper pages into a moody, literary centerpiece with faux tire-stack vibes. It’s quirky, unexpected, and surprisingly sturdy for outdoor display.
Materials Needed
- Sturdy cardboard or kraft paper for fake “books”
- Colored paper or magazine pages for covers
- Glue, scissors
- A lightweight circular platform (optional)
How to Make It
- Cut book shapes and stack them as if they’re leaning against a porch post.
- Wrap a few with patterned covers for a vintage library look.
Pro Tips / Styling Ideas
- Top with a plastic raven or a small skull for focal drama.
- Dust with a light spray of matte sealant to protect from humidity.
Who would love it? Readers and homebodies who adore clever, design-forward props with a wink.
6. Paper Tree Hitched to the Porch Light
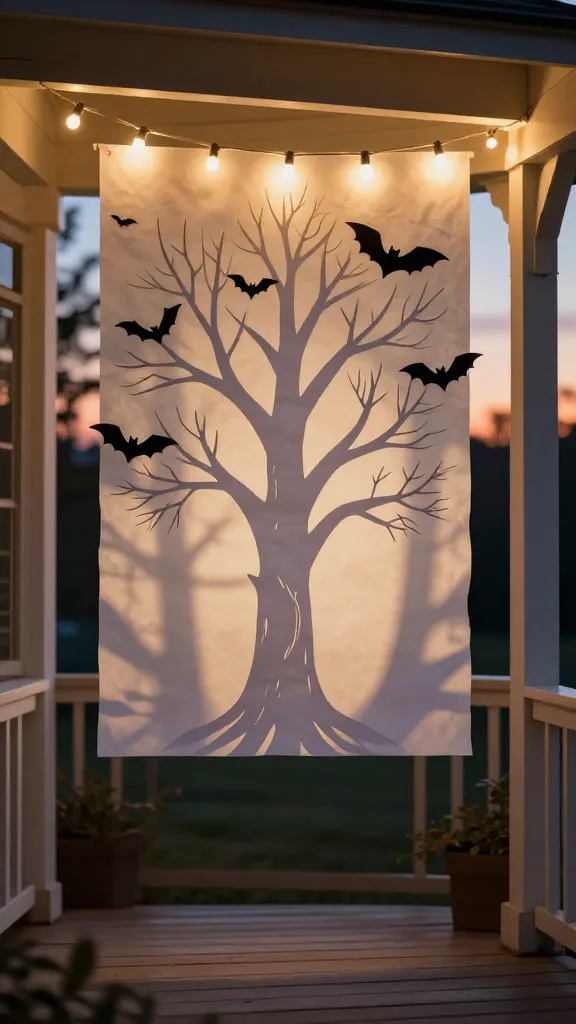
A delicate paper tree with hanging bat silhouettes sways above your porch light, creating an enchanted forest silhouette when the sun drops. It’s pretty, subtle, and unexpectedly easy.
Materials Needed
- White or black craft paper
- Branch templates or freehand tree shapes
- Twine
- Scissors, glue
- Battery-powered string lights
How to Make It
- Cut a tree trunk and branches, then fan them out across a sheet of parchment or inside a frame.
- Attach tiny bat silhouettes from black paper along the branches.
- Drape near your porch light to cast shadowy silhouettes on the wall.
Pro Tips / Styling Ideas
- Keep colors monochrome for a chic, modern look.
- Switch out bats for owls or witches’ hats for variety.
Who would love it? Minimalists who still crave a magical Halloween glow.
7. Creepy-Cute Paper Pumpkin Centerpieces
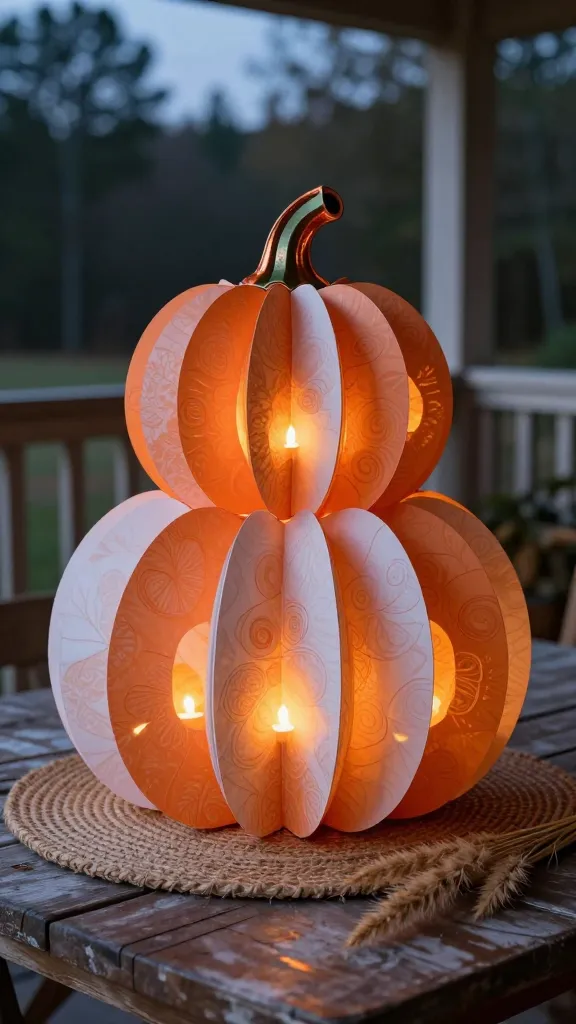
These mini pumpkins made from layered paper are adorably eerie and endlessly reusable. They glow softly at dusk and are perfect on a porch table or stair landing.
Materials Needed
- Orange, white, or patterned cardstock
- Scissors, glue, scoring tool
- Copper or green accents for stems
- LED tealights
How to Make It
- Cut circular petals in graduated sizes, roll and glue into a pumpkin shape.
- Layer petals inward to form the pumpkin’s curves and top off with a stem.
Pro Tips / Styling Ideas
- Place tealights inside to create a soft glow through the paper petals.
- Group in threes with a small garland of faux leaves.
Who would love it? Hosts who want a playful candlelit vibe with a crafts-to-table appeal.
8. Silhouette Banner: Night Sky Edition
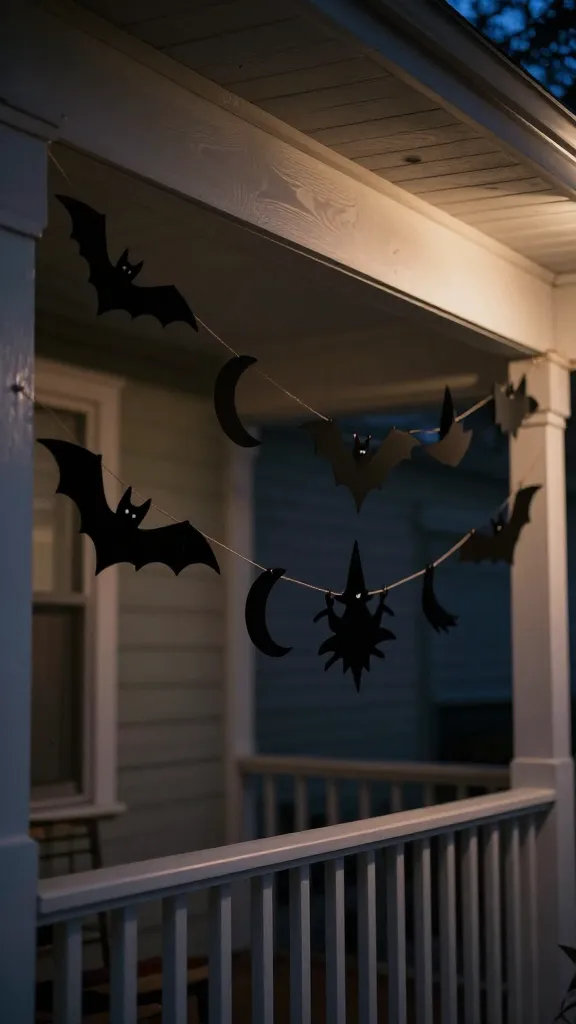
A long banner featuring flying bats, witches, and moons creates a dramatic black-on-navy night sky effect along your porch ceiling or railing. It’s bold, dramatic, and surprisingly simple.
Materials Needed
- Black or navy cardstock
- White gel pen for stars
- Twine or ribbon
- Scissors, craft knife
How to Make It
- Cut out shapes: bats, moons, witches, and stars.
- Attach shapes to a long string using tiny bits of tape or glue dots.
Pro Tips / Styling Ideas
- Alternate shapes for a balanced, kinetic feel.
- Hang across a porch ceiling for instant theater lighting when the lights are off.
Who would love it? Party planners and big-picture decorators who want maximum impact with minimal effort.
9. Paper Ghost Lanterns With Fringe Glow

Fringe adds motion to a classic ghost shape, making these lanterns feel lively and a touch spooky. They glow with a soft halo that’s perfect for October evenings.
Materials Needed
- White tissue paper or thin white craft paper
- Black marker for face
- Lantern forms or paper bags
- LED tea lights
How to Make It
- Wrap lantern frames with tissue paper; cut fringe into the bottom edge.
- Draw simple ghost faces and place LED lights inside.
Pro Tips / Styling Ideas
- Line a row of these along steps for a friendly ghost train effect.
- Mix in a few clear paper coats to add depth when lit.
Who would love it? Families who want approachable, kid-friendly Halloween decor.
10. Magnetic Paper Bats for Porch Rail
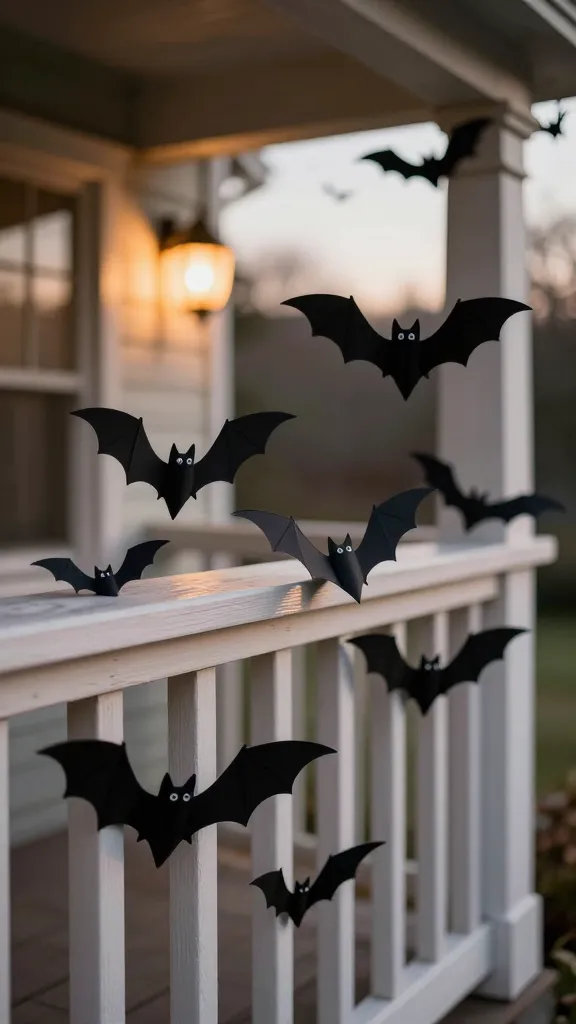
Small, lightweight bats with magnetic backs let you reinvent your porch rail any time. It’s modular, fun, and highly reusable for years of spooky season.
Materials Needed
- Black cardstock or construction paper
- Magnetic strips or discs
- Glue or double-sided tape
How to Make It
- Cut bat silhouettes and attach magnets to their backings.
- Decorate with white eyes and place along railing or garden fence.
Pro Tips / Styling Ideas
- Arrange them to look like they’re swooping in for a snack on the porch light.
- Create a climbing wall effect by staggering magnets at different heights.
Who would love it? Neat freaks who appreciate clean surfaces and easy changes.
11. Papercut Silhouette Sit-Ups: Monster Silhouettes
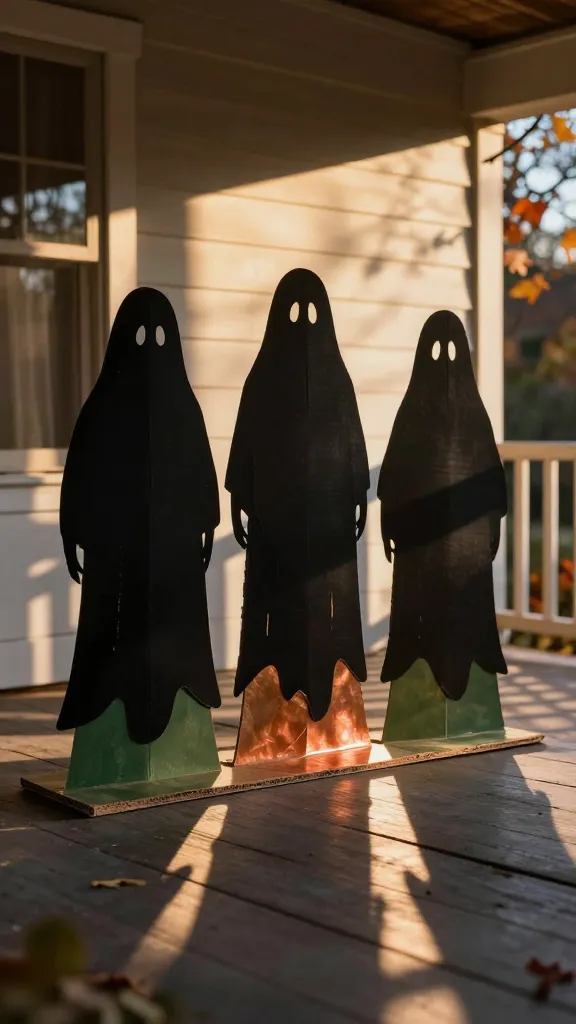
These vertical papercuts are basically mini theater props for your porch. They stand on a flat base and cast storybook shadows as the sun dips down.
Materials Needed
- Black cardstock
- Cardboard bases
- Glue, scissors
- Optional acrylic paint for base accents
How to Make It
- Cut out monsters, ghosts, or goblin shapes with wide bases for stability.
- Glue them to the base and position them along the porch edge to create a little paper audience.
Pro Tips / Styling Ideas
- Paint bases in moody greens or copper for extra pop.
- Light from behind to elongate shadows onto the wall.
Who would love it? Theater lovers and anyone who enjoys dramatic, sculptural pieces.
12. Fall-Leaf Paper Garland With a Spooky Twist
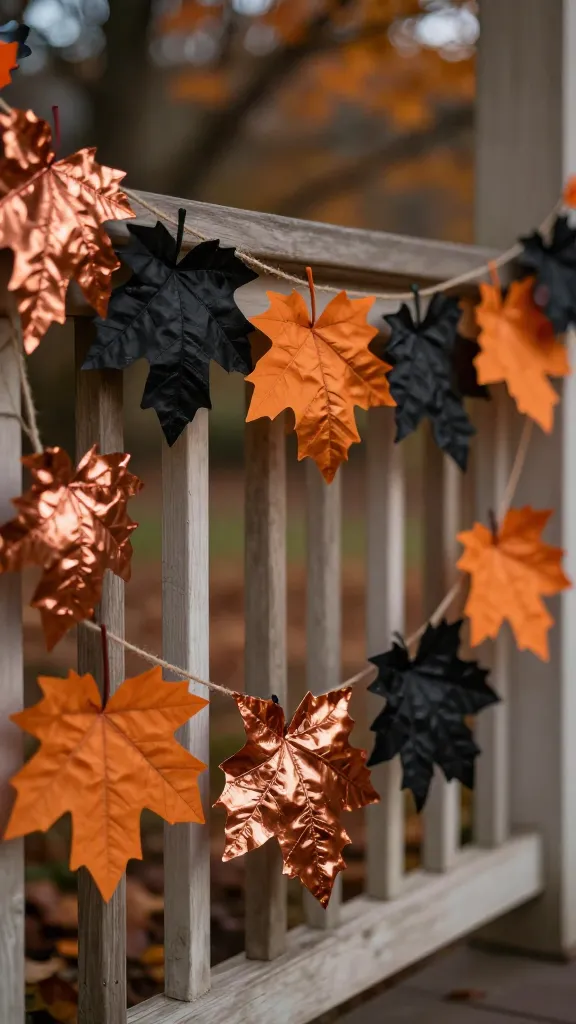
Autumn leaves get a Halloween twist in this garland—think textured copper, burnt orange, and a dash of black. It’s natural, festive, and endlessly chic.
Materials Needed
- Brown, orange, and black cardstock
- Scissors, scoring tool
- Glue or double-sided tape
- Twine or ribbon
How to Make It
- Cut leaf shapes with subtle veins for a realistic look.
- Gently fold or curl the edges to give dimension, then string along twine.
Pro Tips / Styling Ideas
- Alternate leaf colors to create a natural gradient effect.
- Hang across a doorway or along a railing for a gentle seasonal vibe.
Who would love it? Nature lovers who want Halloween to feel cozy, not creepy.
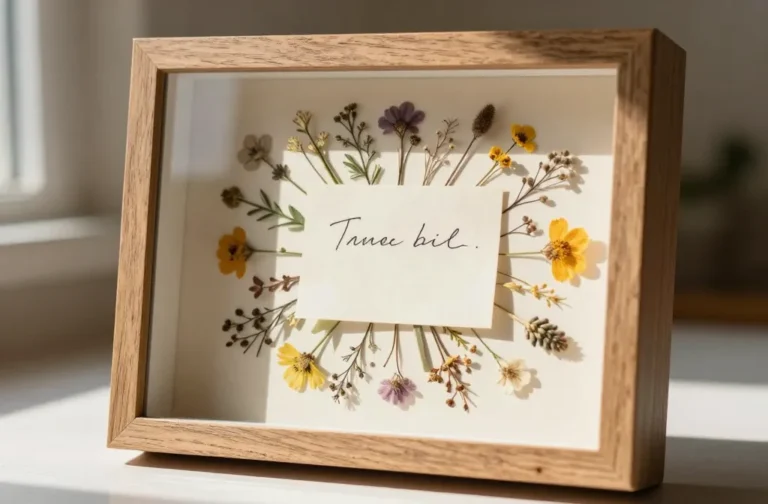
13. Paper-Walled Shadow Box Scenes

Shrink a living room diorama into a porch-friendly shadow box. Think haunted forest, friendly pumpkin patch, or a tiny graveyard—paper creates a story you can peek into from the doorstep.
Materials Needed
- One or more shadow boxes or reclaimed picture frames
- Colored cardstock and black craft paper
- Glue, scissors, craft knife
- Miniature props (optional): trees, tombstones, pumpkins
How to Make It
- Layer cutouts inside the shadow box to create a layered scene with depth.
- Paint or decorate the inner backboard for atmosphere—think moonlit blue or eerie charcoal.
Pro Tips / Styling Ideas
- Place a small LED light behind the scene to cast a gentle glow through the cutouts.
- Swap in seasonal backups for winter or spring to reuse year-round.
Who would love it? Small-space decorators and storytelling enthusiasts who want a portable piece of art.
Conclusion: Give these 13 completely unique, paper-based crafts a try this October. They’re all beginner-friendly, budget-smart, and incredibly satisfying to display on a porch that screams “curb appeal.” Save a few or tackle all 13—the results will be seriously wow-worthy and Pinterest-ready. Trust me, your porch will be the neighborhood’s favorite spooky spot this season.