7 Fun & Creative Craft Ideas for 9-Year-Olds
Ready to spark off a cascade of giggles and glitter? If you’re chasing projects that are light, playful, and totally doable, you’re in the right place. These crafts are designed for curious 9-year-olds who love hands-on fun and a little creative bragging afterwards. Trust me, they’re bound to become the week’s favorite activities.
1. Fairy-Tale Shadowboxes: Mini Scenes That Burst with Color
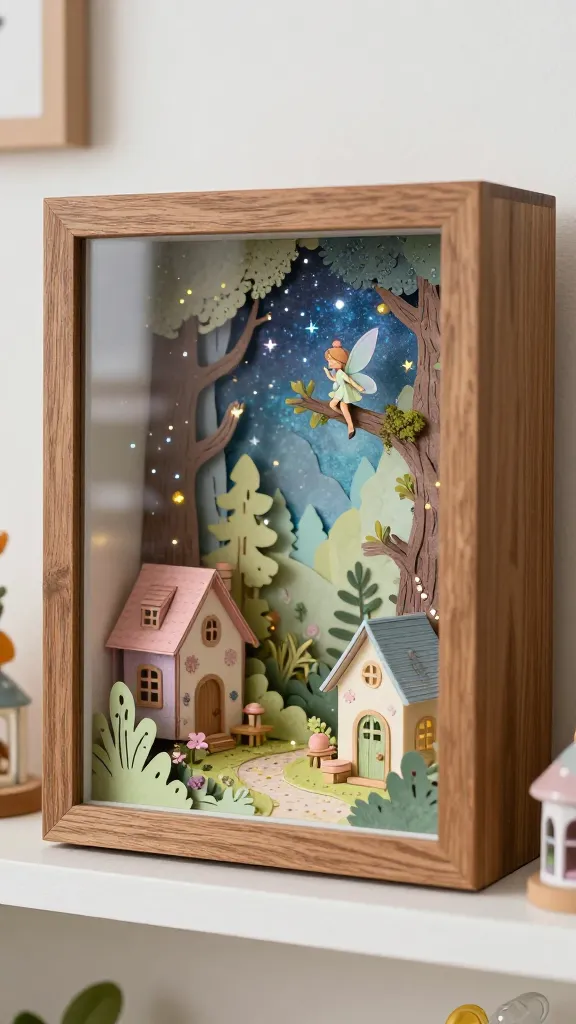
Imagine a tiny world you can hang on the wall or sit on a shelf. The finished piece looks magical, dimensional, and totally Instagram-worthy. This project shines with layers, textures, and little storytelling details.
Materials Needed
- Small wooden shadowbox frames
- Colored cardstock, scrapbook paper, and pastel paints
- Glow-in-the-dark stars, mini figurines, washi tape
- Mod Podge or clear-drying glue
- Scissors, craft knife, and a ruler
- Optional: fine-tip markers for doodling
How to Make It
- Trace and cut a few backdrop layers from colored paper to create depth inside the frame.
- Glue the back layers down, then position your tiny scene pieces between layers for a 3D effect.
- Add a sprinkle of stars and a subtle glow with glow-in-the-dark paint or stickers.
- Finish with a thin coat of Mod Podge to seal and keep everything in place.
Pro Tips / Styling Ideas
- Pick a theme—forest, underwater, or outer space—and collect tiny figurines or trinkets focused on that vibe.
- Use washi tape to frame the edges for a clean, playful border.
- Hang in a row with other shadowboxes to create a mini gallery wall.
Who would love it? Creative storytellers, budding designers, and anyone who adores whimsical displays. It’s perfect for a bedroom nook or a gift for a friend who loves tiny worlds.
2. Hand-Painted Tote Bags: Your Unique Everyday Canvas
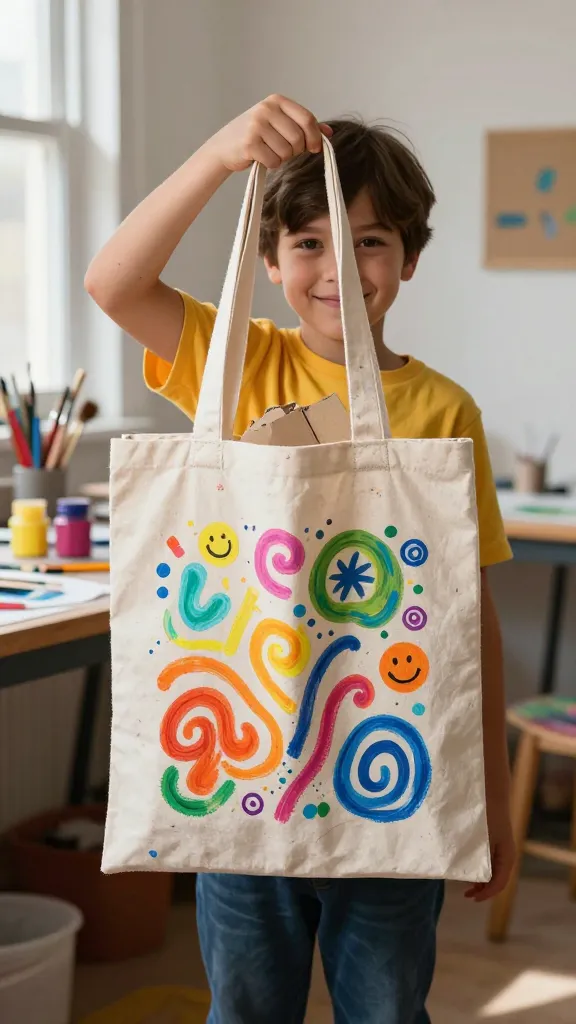
Carry art wherever you go. A kid-friendly tote bag becomes a rolling canvas for bold patterns, doodles, and positive messages. It’s practical, colorful, and a great confidence booster when you see your design come to life.
Materials Needed
- Plain canvas tote bag (medium size)
- Acrylic fabric paints or fabric markers
- Paintbrushes in various sizes
- Cardboard or freezer paper (to protect the bag), parchment paper for heat set
- Optional: stencils, masking tape
How to Make It
- Place cardboard inside the bag to prevent bleed-through. Sketch your design lightly with a pencil or use stencils.
- Paint bold shapes, patterns, or a funny quote. Go for high-contrast colors for a pop.
- Let dry, then set with heat if your paints require it. Finish by sealing edges with a light layer of clear fabric medium if available.
Pro Tips / Styling Ideas
- Try a nature-inspired theme: leaves, sunbursts, or waves for a breezy vibe.
- Kids can gift these to grandparents or teachers as a personal keepsake.
- Pair with a matching keychain to create a mini set.
Who would love it? Fashion-forward crafters and kids who like to show off their personality with practical art. It’s a fantastic project for back-to-school or a sunny Saturday craft session.
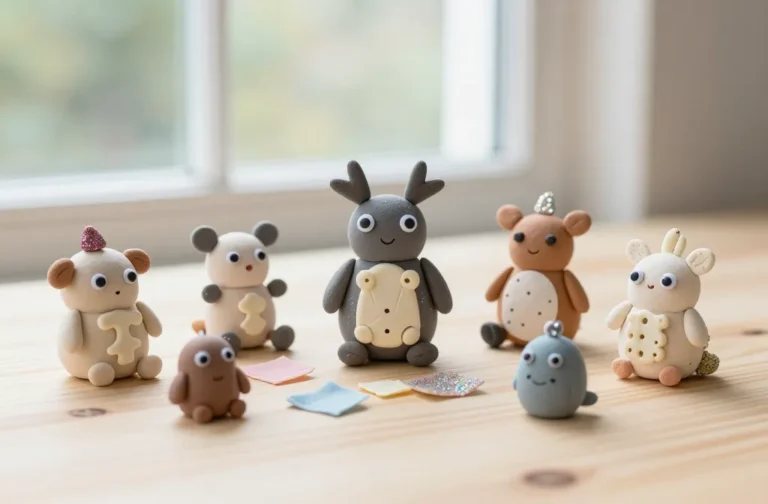
3. Clay Monster Planters: Playful Pots for Tiny Gardens
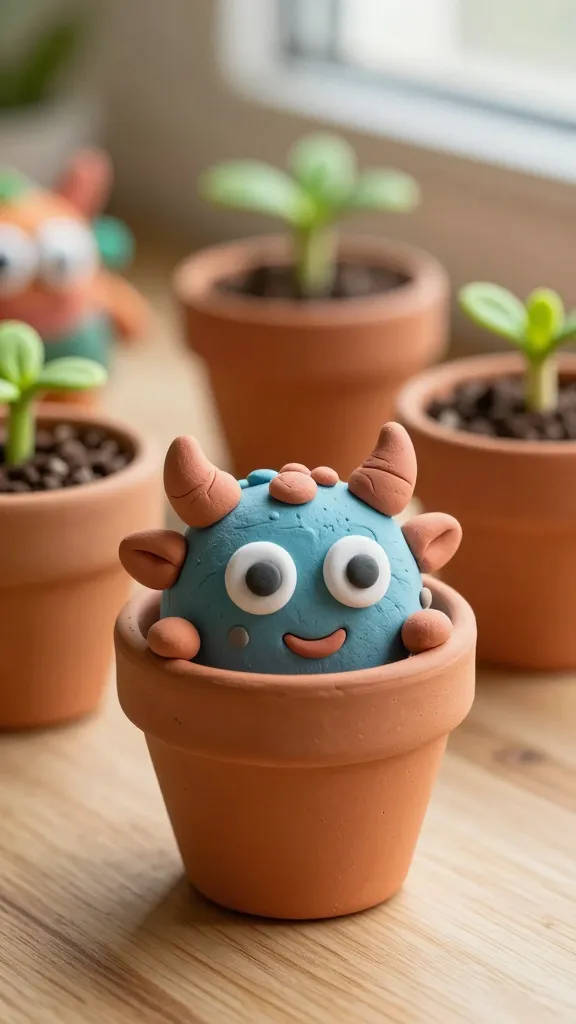
Transform simple clay into quirky little planters that look like friendly monsters. It’s tactile, imaginative, and surprisingly easy—even for first-timers. Plus, you get to watch tiny green things grow!
Materials Needed
- Air-dry clay or polymer clay
- Small terracotta pots or upcycled containers
- Acrylic paints, paintbrushes
- Googly eyes, buttons, beads for decorations
- Mod Podge or clear sealant
How to Make It
- Shape the clay into a few rounded monster faces per pot. Create little ears, horns, or antennae as you like.
- Attach the clay pieces to the pot edges and let dry completely.
- Paint the monsters in bright, contrasting colors. Add facial features and fun textures.
- Seal with a clear coat to protect from potting soil and moisture.
Pro Tips / Styling Ideas
- Plant small herbs or succulents for a mini indoor garden. It’s adorable and practical!
- Use different textures—glossy eyes, fuzzy mustaches, or dotted cheeks—for personality.
- Line a shelf with a mini forest of monster planters for a quirky decor moment.
Who would love it? Young builders who enjoy tactile crafts and a little whimsy. These make delightful desk companions or a cheerful centerpiece for a birthday party activity.
4. Nature-Pressed Journal Covers: A Boho-Leaf Keepsake
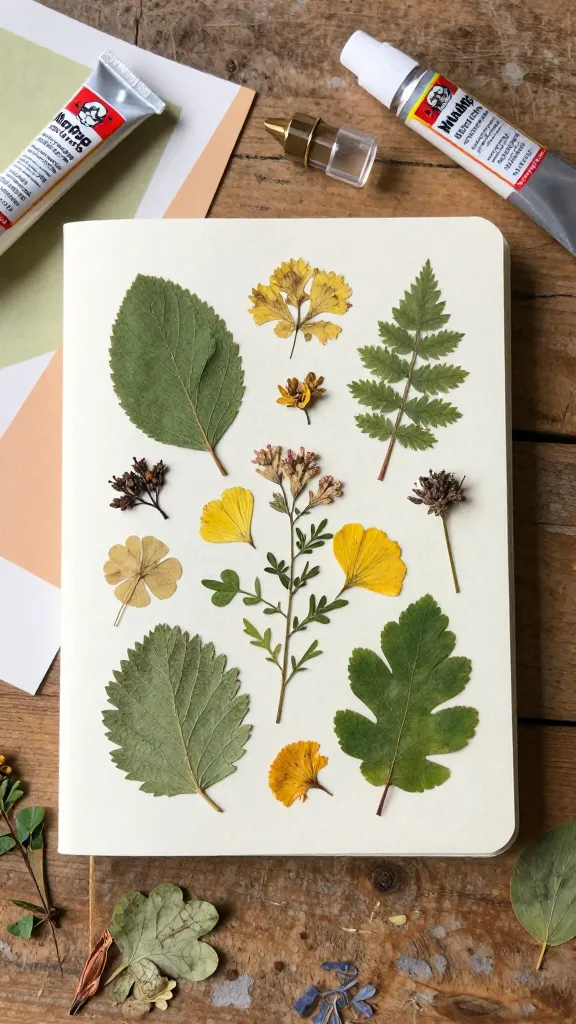
Pressed leaves and botanical vibes give a journal a dreamy, boho look. It’s nature-friendly, easy, and incredibly satisfying when the colors stay vibrant after pressing. Your child will love the instant nature-nostalgia this creates.
Materials Needed
- Small notebook or sketchbook with a plain cover
- Pressed leaves, petals, and tiny botanicals
- Mod Podge or craft glue, clear acrylic sealer
- Coloured cardstock or decorative paper
How to Make It
- Arrange pressed leaves and petals on the notebook cover to form a pleasing composition.
- Glue everything down, then seal with a thin layer of Mod Podge to keep textures intact.
- Cut a contrasting cardstock panel to frame the botanical art for a finished border.
Pro Tips / Styling Ideas
- Keep a tiny press kit handy for spontaneous finds on a nature walk.
- Customize with a name sticker or doodled accents for a personal touch.
- Use a soft satin ribbon as a bookmark attached to the spine for extra charm.
Who would love it? Nature lovers, journal keepers, and kids who like mellow, earthy aesthetics. Perfect for school binders, travel diaries, or a cozy gift for a friend who loves the outdoors.
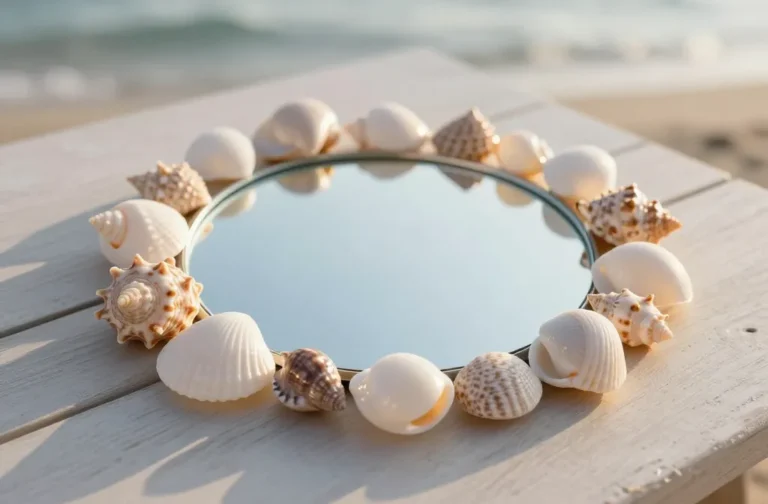
5. Rainbow Duct Tape Mosaic Frames: Bold Color Therapy

Frames get a couture upgrade with tape mosaics that scream color confidence. It’s quick, forgiving, and endlessly customizable. You’ll be amazed how satisfying it feels to peel and place tiny color blocks until the whole frame sparkles.
Materials Needed
- Plain wooden or plastic photo frames
- Assorted patterned or solid color duct tapes
- Scissors and a ruler
- Craft knife for fine lines (adult supervision recommended)
How to Make It
- Remove the glass and backing, lay the frame flat, and start applying tape in a mosaic pattern.
- Alternate colors and widths to create a dynamic look. Build out a gradient effect for extra drama.
- Trim any overhangs with a craft knife, then reassemble the frame with a tiny photo or artwork inside.
Pro Tips / Styling Ideas
- Go symmetrical for a modern vibe or go wild for a more playful feel.
- Pair a few frames in a row on a wall for a punchy gallery wall.
- Gift a completed mini-gallery frame to a friend who loves bold color palettes.
Who would love it? Color lovers, up-and-coming designers, and kids who crave quick, satisfying results. It’s a fantastic bedroom decor project or a lively party craft station activity.
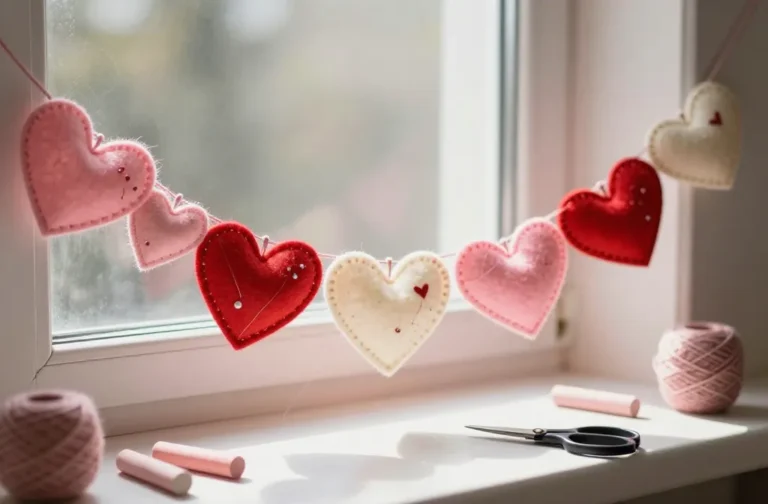
6. Stitched Felt Charms: Soft Accessories with Big Personality
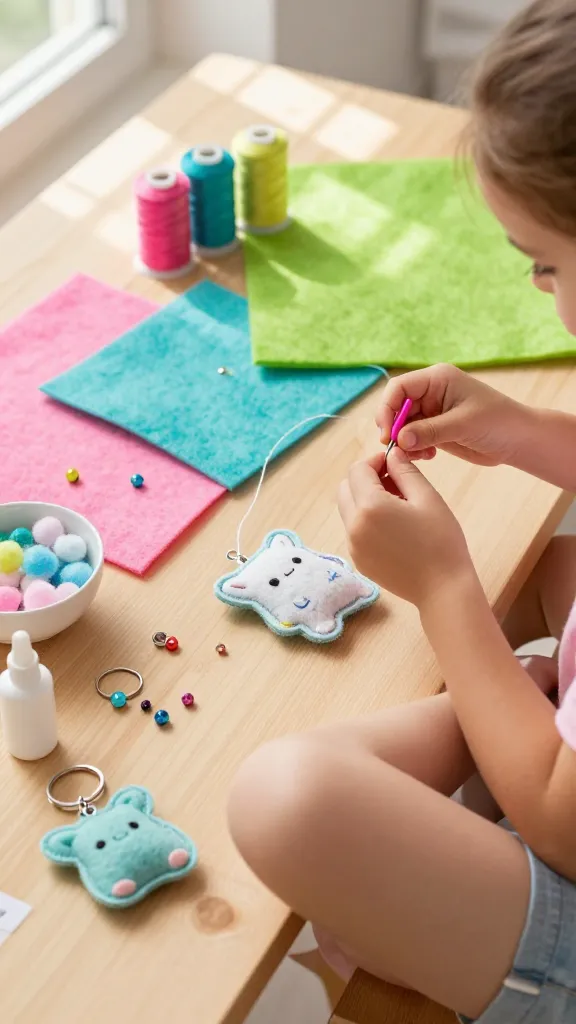
Soft, squishy, and oh-so-cute, felt charm digits become keychains, zipper pulls, or magnetic fridge friends. This project is soothing to sew, teaches basic stitching, and ends with an adorable little bundle that kids are proud to carry or gift.
Materials Needed
- Felt sheets in bright colors
- Embroidery thread and simple needle (or a kid-safe plastic needle)
- Polyfill stuffing, small beads for weight (optional)
- Key rings, magnets, or jingle bells for hardware
- Fabric glue (optional for no-sew version)
How to Make It
- Cut two small felt shapes for a cute character or simple shape (heart, star, carrot, etc.).
- Stitch around the edge, leaving a small gap to stuff with a pinch of polyfill.
- Stuff lightly, finish stitching, then attach hardware to turn into keychains or magnets.
Pro Tips / Styling Ideas
- Turn a batch into a charm garland for a playful door curtain or wall accent.
- Add beading or tiny embroidered features for extra pizzazz.
- Match characters to holidays—pumpkins for fall, hearts for Valentine’s, snowflakes for winter.
Who would love it? Young stitchers who appreciate soft textures and cute icons. It’s a calm, creative activity for rainy days or a craft club’s project box.
7. DIY Terrarium Jars: Tiny Ecosystems You Can Build
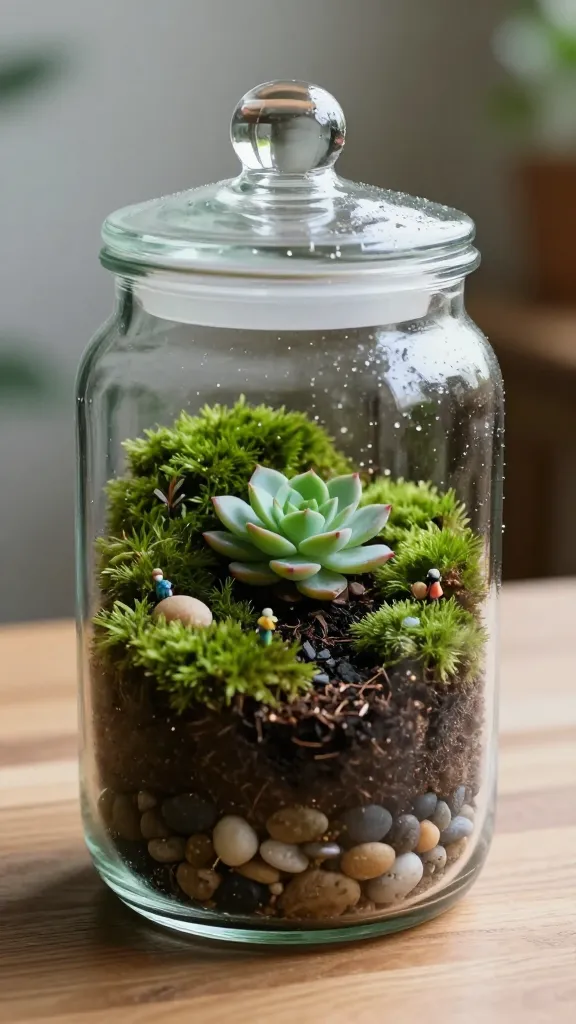
Bring a little nature indoors with a tiny, sparkling terrarium. It’s surprisingly simple and immediately satisfying to watch a miniature landscape come to life under a glass dome. Plus, it’s a great introduction to care, balance, and design.
Materials Needed
- Small glass jars or mason jars with lids
- Gravel or pebbles, activated charcoal (optional)
- Potting soil and a handful of small plants or moss
- Decorative stones, tiny figurines, or shells
- Spritz bottle for gentle mist
How to Make It
- Layer pebbles, a thin layer of charcoal (optional for drainage), and soil inside the jar.
- Plant small plants or lay down moss, arranging them into a tiny scenic patch.
- Add decorative elements to complete the scene, then lightly mist with water.
Pro Tips / Styling Ideas
- Label each terrarium with a small handmade tag for a cute, educational twist.
- Place in a sunny spot but avoid scorching midday sun to protect plants.
- Group several jars of differing heights for a striking display.
Who would love it? Nature enthusiasts, future landscapers, and kids who enjoy a little science-forward creative project. Terrariums make adorable room decor or personalized gifts for family and friends.
Conclusion
These seven ideas are designed to spark curiosity, build confidence, and give you delightful, share-worthy results. Pick one to start, or dive into all seven for a week of creative discovery. The joy is in the making—and the brag-worthy photos you’ll post after. Have fun crafting, and watch the creativity unfold!