6 Personalized Name Craft Ideas for Kids’ Rooms
Hey, crafty friends—ready to sprinkle a little personality across a kid’s space? These six name-based projects are playful, doable, and totally Instagram-worthy. Trust me, they’re the kind of decor that makes a room feel truly theirs.
Grab a cuppa, pick a project, and get ready to customize your kid’s world in bright, tactile, and totally kid-approved ways.
1. Floating Name Wall Planters
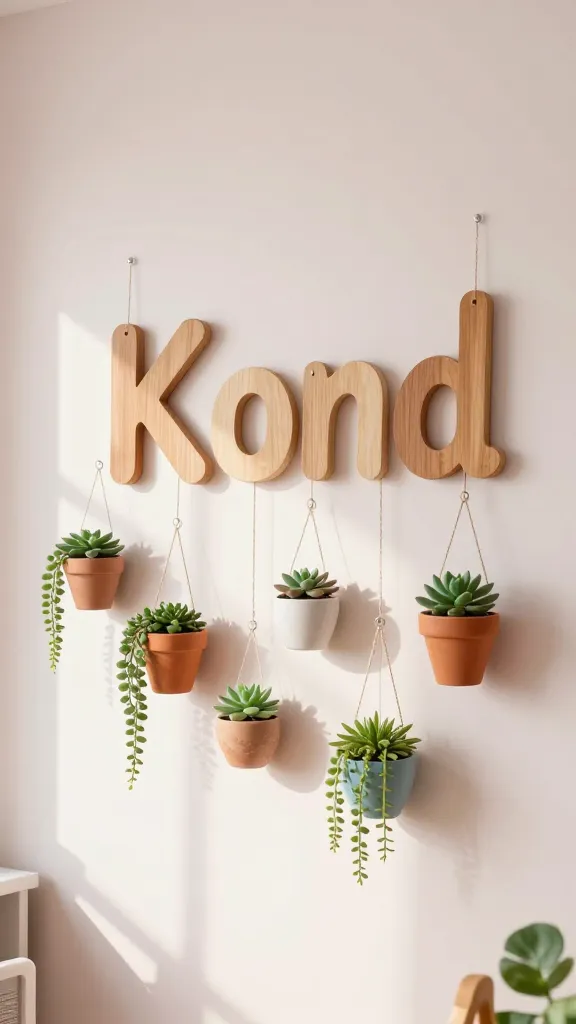
Imagine a wall that feels alive with plants and a bold, personalized name. These lightweight planters float on invisible hooks, casting gentle shadows and adding a touch of whimsy. It’s a fresh, modern look that still vibes with kids’ rooms.
Materials Needed
- Wood or kraft paper letters spelling the child’s name
- Mini terracotta pots or small ceramic planters
- Twine or thin rope
- Succulents or tiny hanging plants
- Double-sided tape or small mounting hooks
How to Make It
- Paint or decorate the name letters with bright colors or patterns.
- Attach a small length of twine to each letter to create a floating banner effect.
- Mount planters beneath the letters, staggering heights for visual interest.
- Plant tiny succulents in the pots and hang or lean the arrangement on the wall.
Pro Tips / Styling Ideas
- Coordinate colors with the room’s palette—think mint greens, sunny yellows, and blush pinks.
- Swap in seasonal mini-planters (pumpkins for fall, pastel eggs for spring) to keep it fresh.
- Play with scale: use a short banner for a low wall or a tall version for a dramatic corner.
Who will love it? Kids who adore nature and calming greenery, and parents who want a stylish, low-maintenance accent.
2. Custom Name Quilt Banner
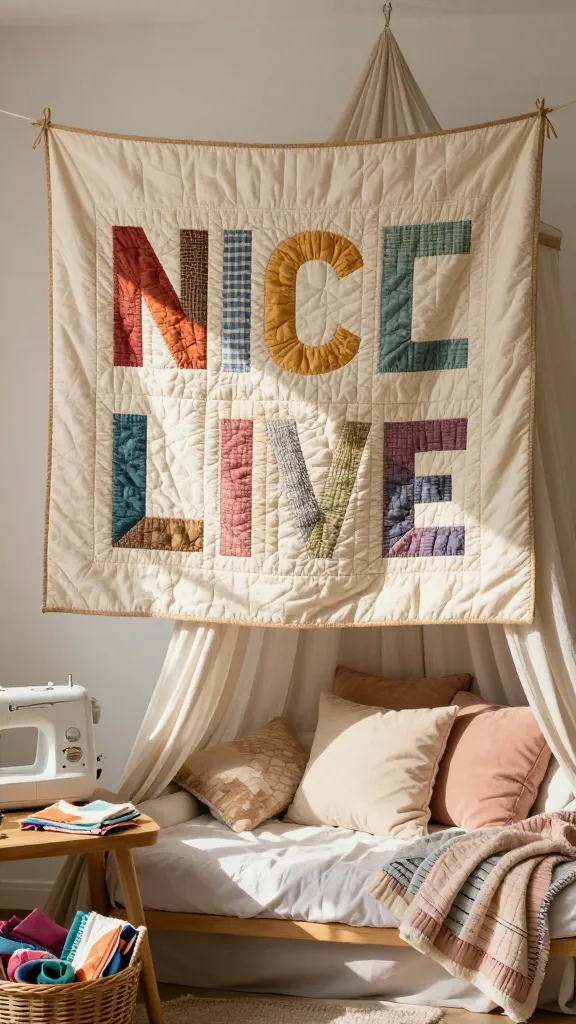
Cozy vibes and textile texture collide in this personalized name banner made from fabric swatches and a scrap-quilt vibe. It’s tactile, colorful, and adds warmth to a reading nook or bed canopy.
Materials Needed
- Fabric scraps in four to six colors
- Fusible web or fabric glue
- Neutral backing fabric (canvas or cotton)
- Ribbon or twine for hanging
- Iron and sewing machine or needle and thread
How to Make It
- Cut fabric into uniform squares or rectangles for a patchwork look.
- Arrange letters from the child’s name on the backing fabric and secure with fusible web.
- Sew or glue rows of fabric around each letter, creating a soft, quilted frame.
- Attach a hanging ribbon across the top and mount where you want focus.
Pro Tips / Styling Ideas
- Choose colors that match the bed linens or a chosen accent wall.
- Option to embroider small motifs on some squares for extra personality (stars, hearts, dinosaurs, etc.).
- Make it reversible: one side bright and bold, the other muted for different moods.
Who will love it? Little readers and anyone who gobbles up cozy, handmade textures in a room.
3. Neon-It-Yourself Name Lightbox
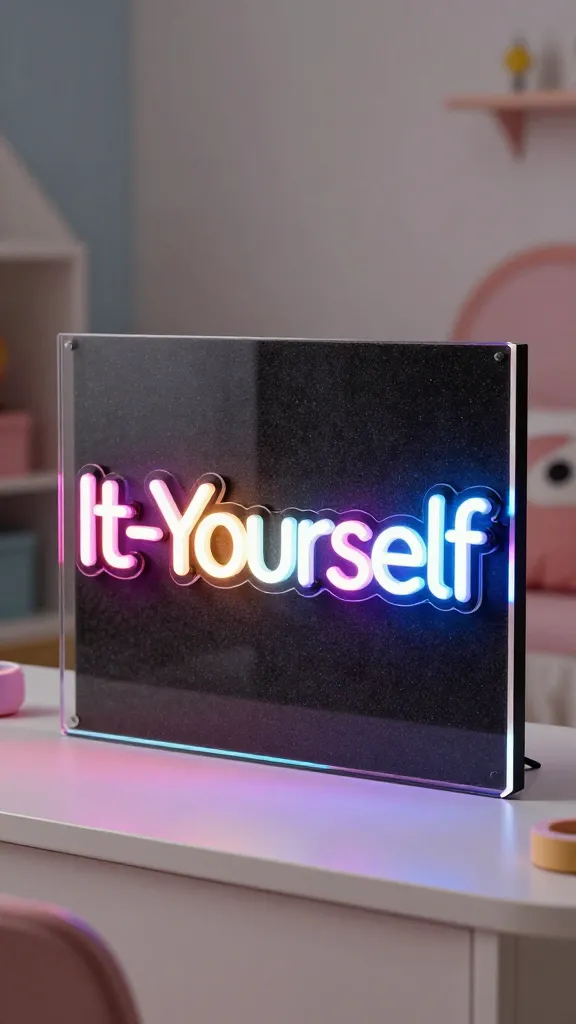
A punchy, glow-up piece that doubles as a nightlight and a fearless statement. This lightbox uses flexible LED neon tubing or bright LED strip lights for a clean, modern vibe with playful typography.
Materials Needed
- Plexiglass or sturdy acrylic panel
- Black foam board or wood backing
- Flexible LED neon tubing or LED strip lights
- Adhesive or mounting hardware
- Stencil or cutouts for letters
How to Make It
- Cut the acrylic to fit your backing and drill small holes for LEDs as needed.
- Attach LED tubing along the outline of each letter or use a ready-made neon font template.
- Power the lights with a compact transformer or USB power bank hidden behind the frame.
- Fill in any gaps with decorative elements like stars or doodles that echo the name’s vibe.
Pro Tips / Styling Ideas
- Mount above a bed or desk for a focal glow at night.
- Use a dimmer switch if possible to soften the ambiance before sleep.
- Try a color-changing LED option for mood shifts—calm blues for bedtime, warm whites for mornings.
Who will love it? Night owls who want a bright, modern touch and parents who love a dependable, stylish light source.
4. Name-Themed Wall Mosaic Panels
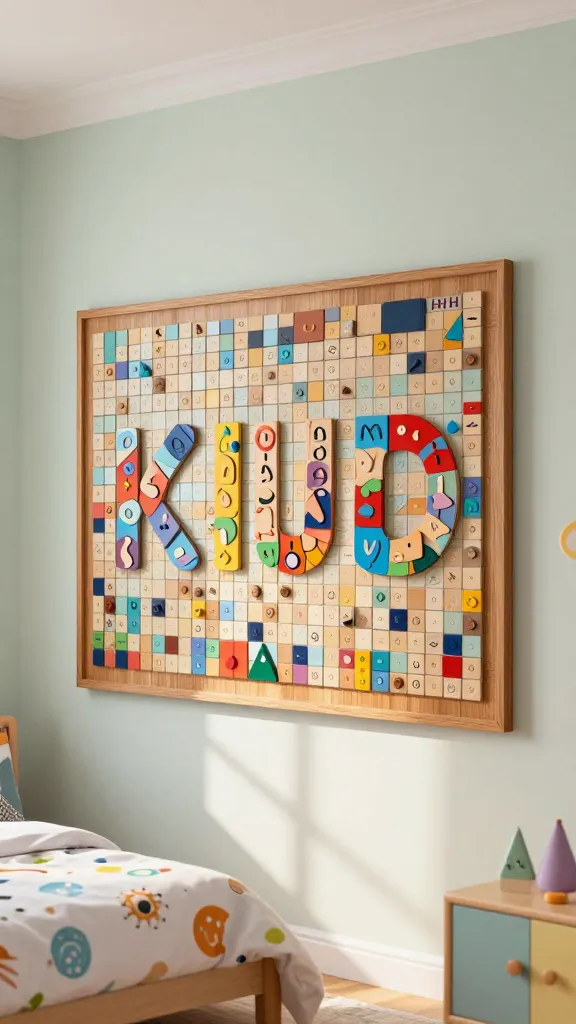
Turn a wall into a mini gallery with a mosaic panel that spells out the child’s name using tiny tiles, painted chips, or cut paper shapes. It’s art-meets-identity in a bold, graphic way.
Materials Needed
- Wood or heavy cardboard backing panel
- Small tiles, wood cutouts, colored paper shapes, or painted tiles
- Strong glue or adhesive spray
- Sealant spray (optional)
- Clear frame or edge trim for finishing
How to Make It
- Sketch the name across the panel in block letters or a playful script.
- Fill each letter with a different color or texture using small shapes.
- Let glue dry fully, then seal the surface for durability (especially in kids’ rooms).
- Framed or edge-trimmed, hang at kid-eye level for a gallery feel.
Pro Tips / Styling Ideas
- Keep a cohesive palette—choose 2–3 colors and mix textures within those shades.
- Rotate shapes or tiles seasonally to keep the panel fresh.
- Involve your kid: have them help place shapes to build their name—instant buy-in.
Who will love it? Tiny art enthusiasts and families who adore bold, graphic decor with a personal twist.
5. Personalized Light-Up Name Garland
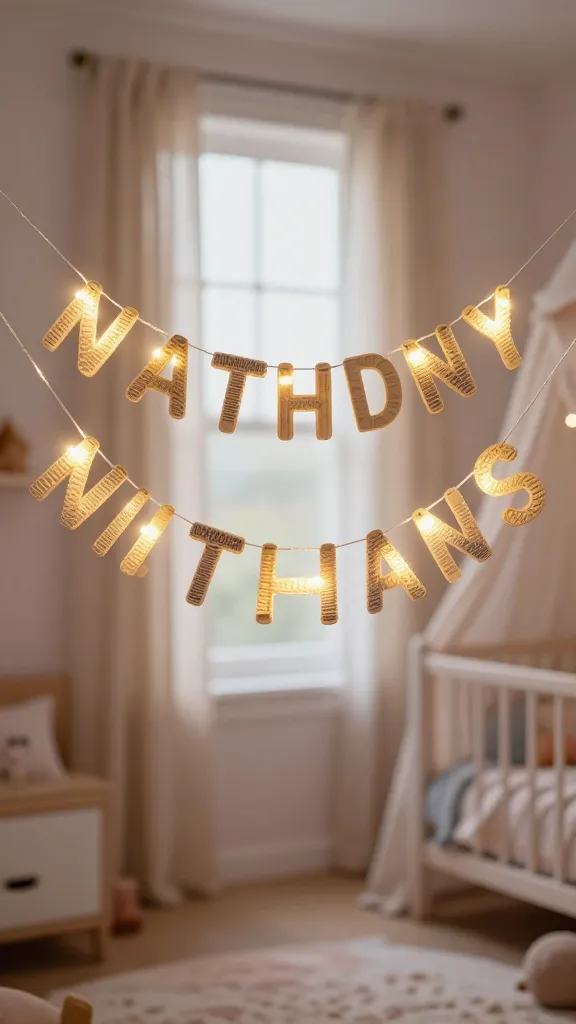
Soft steel-wire or crochet-lined letters strung into a warm garland that glows. It’s charming on a window, bed canopy, or door frame and adds a gentle, magical aura to any space.
Materials Needed
- Wire or thick craft cord
- Lightweight letter cutouts or individual wooden letters
- Battery-powered fairy lights or LED micro LEDs
- Hot glue or strong adhesive
- Ribbon for hanging tips
How to Make It
- Wrap lights around the wire or cord, leaving space between each letter.
- Attach letters along the string with glue, spacing evenly.
- Finish with a ribbon loop on each end for easy hanging.
Pro Tips / Styling Ideas
- Use warm white LEDs for a cozy glow; switch to cool white for a modern edge.
- Add tiny pearl beads or tassels between letters for extra texture.
- Hang above a reading nook, bed, or dresser for a dreamy focal point.
Who will love it? Sleepy-time lovers, dreamers, and kids who crave a soft, personal touch at night.
6. Name Stencil Wall Decals with Color Pop
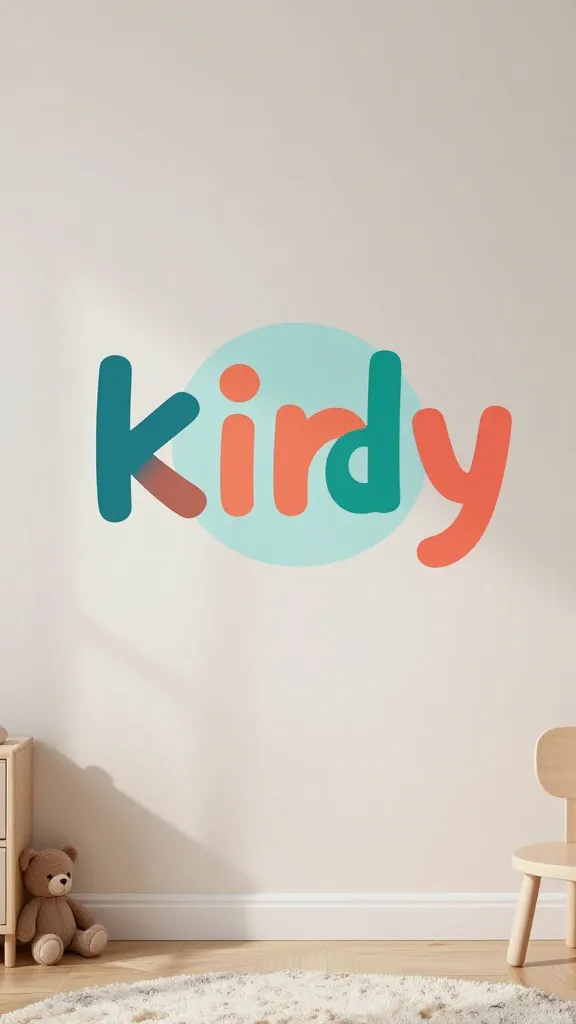
Graphic, bold, and super simple to swap in and out. These name decals become a chic focal point on a plain wall, especially when you pair them with a contrasting color block behind them.
Materials Needed
- Vinyl decals or stencil sheets
- Painter’s tape
- Acrylic paints and brushes or markers
- Clear sealant spray (optional)
How to Make It
- Cut or choose a font you love for the child’s name; size to fit your wall space.
- Position the letters on the wall using painter’s tape as guides.
- Paint or color fill the letters; let dry completely.
- Peel away the stencil or revise with decals for a clean finish.
Pro Tips / Styling Ideas
- Pair with a bold color block behind for maximum impact.
- Change colors by season—neon for playtime, pastels for a calm corner.
- Consider gloss finish decals for a shiny, modern look.
Who will love it? Minimalists who want graphic impact and parents who crave a quick, stylish upgrade without heavy crafting.
Conclusion
Six unique, name-centered crafts that bring personality, texture, and a touch of whimsy to any kids’ room. Which one calls to you—the glow of a neon name light, the softness of a quilt banner, or the bold statement of a mosaic panel? Pick one (or all) and start creating—your kid’s space will thank you with bright smiles and inspired play. You’ll love the process, and your space will feel unmistakably theirs.