7 Quick Crafts Ideas for Beginners
Hey crafty friend, ready to spark some serious creative mojo without the overwhelm? These 7 quick crafts ideas for beginners prove you don’t need a Pinterest-perfect studio to make something you’ll love. Each project is approachable, stylish, and totally doable on a weekend binge.
Let’s dive in and find your next favorite pastime. Trust me, you’ll be surprised how satisfying simple materials and a little imagination can be.
1. Rustic Mason Jar Lantern With Fairy Lights
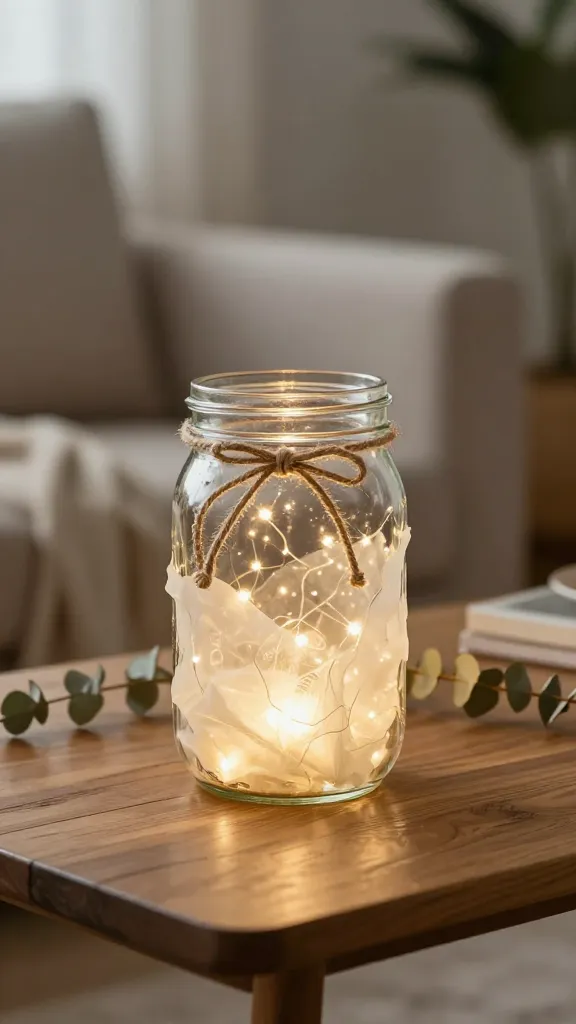
Imagine a softly glowing mason jar lantern filling your living room with cozy vibes. This project turns ordinary jars into warm, chic accents that blend farmhouse charm with modern minimalism. It’s the kind of piece that makes you look like you spent hours crafting—when, in reality, you didn’t.
Materials
- Clear mason jars (small or medium)
- Fairy LED lights (battery-operated)
- Jute twine or ribbon
- Parchment paper or tissue paper for diffusion
- Optional: dried flowers or eucalyptus for garnish
How to Make It
- Wrap the fairy lights inside the jar, leaving the battery pack outside for easy access.
- Line the inside with parchment or tissue paper to soften the glow, then add a few dried botanicals for texture.
- Decorate the outside with a wrap of jute twine or a ribbon bow.
Pro Tips / Styling Ideas
- Pair with a chunky candle and a woven coaster for a cozy vignette.
- Place in a cluster of jars at varying heights for visual interest.
End note: Perfect for nightstands, coffee tables, or a porch lantern moment. This one’s a crowd-pleaser for housewarmings and romantic dinners alike.
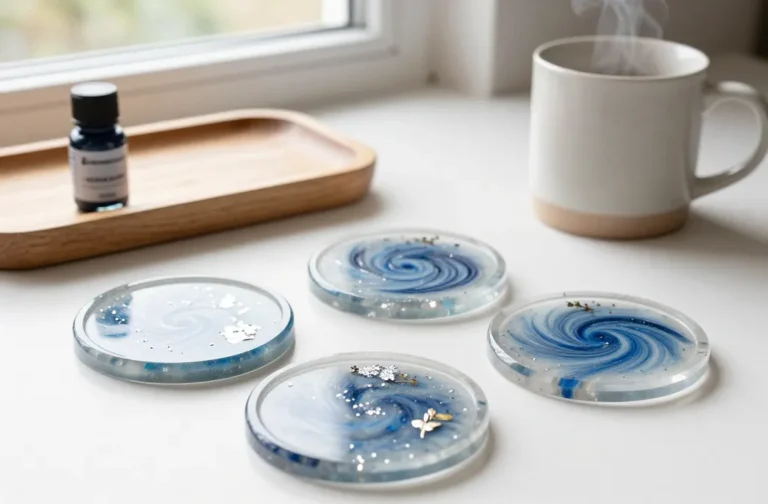
2. Marble DIY Coasters Using Self-Adhesive Foil
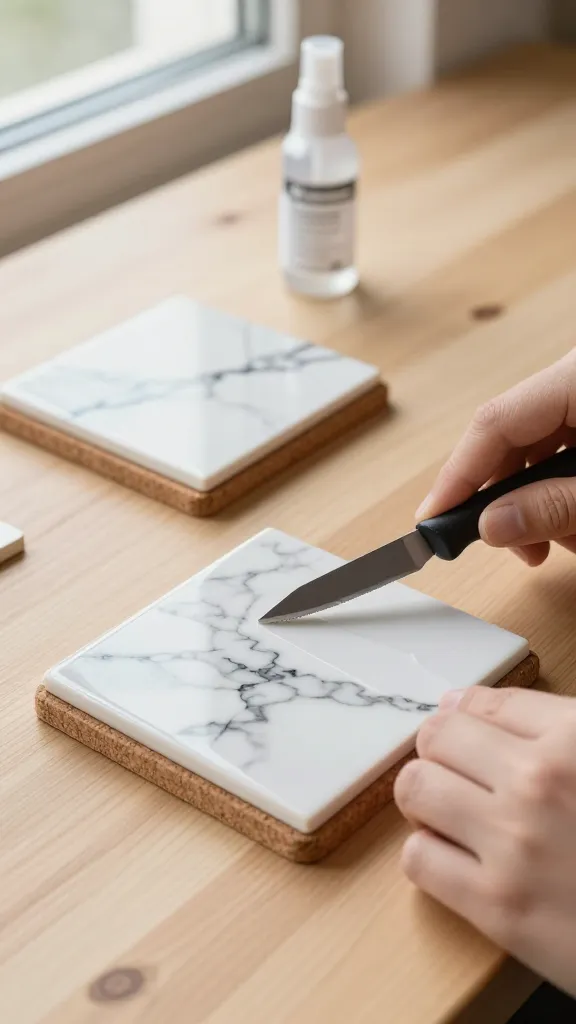
Marble vibes without the expensive material stress? Yes, please. These DIY coasters give you the chic look, minimal mess, and a dash of glam that elevates any coffee-or-tea setup. They’re practical, pretty, and quick enough to complete between episodes of your favorite show.
Materials
- Wooden cork-backed coasters or ~4 inch ceramic tiles
- Self-adhesive marble contact paper
- Scissors or a craft knife
- Clear sealant spray (optional)
How to Make It
- Cut marble contact paper slightly larger than each coaster’s surface.
- Peel and stick it onto the top, smoothing out air bubbles as you go.
- Seal with a light spray if you want extra durability.
Pro Tips / Styling Ideas
- Arrange on a teak tray with a small plant for a luxe minimal look.
- Mix with metallic accents for a modern gallery vibe.
End note: A simple upgrade that makes guests notice your tableware games—and you’ll love the instant bite-sized sophistication.
3. Fun Felt Garland With Colorful Pom Poms
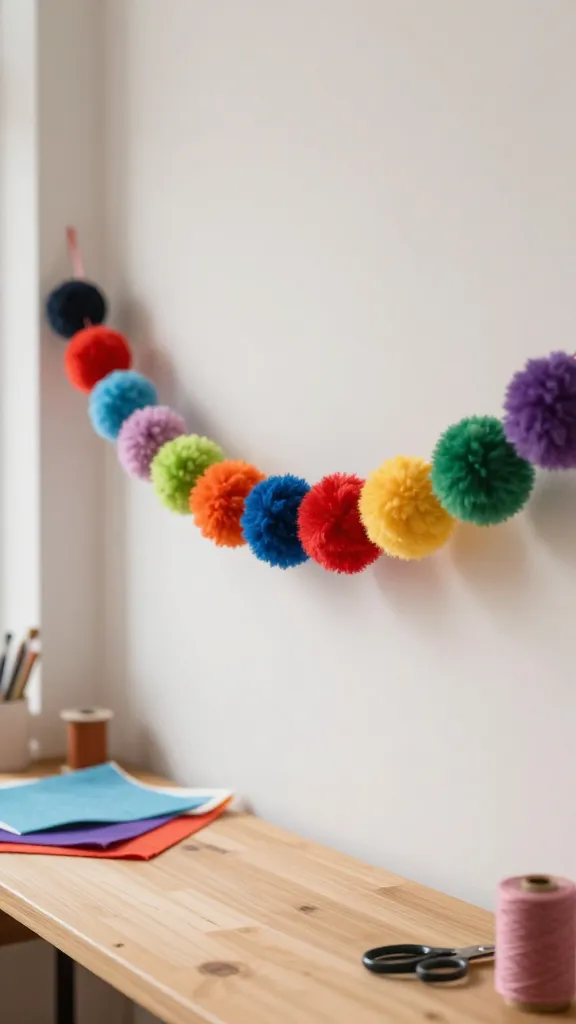
Color, texture, and a dash of whimsy—this felt garland brings instant personality to any room. It’s beginner-friendly, mess-free, and endlessly customizable for seasons, holidays, or just brightening a dull corner. Seriously, it’s a mood booster you can wear on your walls.
Materials
- Colored felt sheets
- Scissors
- Yarn or string for hanging
- Needle or hot glue (optional)
How to Make It
- Cut felt into circles or shapes of your choice. Make a stack of 5–8 pieces per pom pom for fullness.
- Stack, wrap with a small strip of felt, and secure with a stitch or dab of glue.
- Attach pom poms to a length of string, spacing as you like.
Pro Tips / Styling Ideas
- String above a doorway or across a window to catch the light.
- Try gradient colors for a bold, playful statement.
End note: It’s a bright, cheerful accent that’s perfect for kids’ rooms, craft corners, or a spring refresh.
4. Painted Terracotta Pot Centerpiece
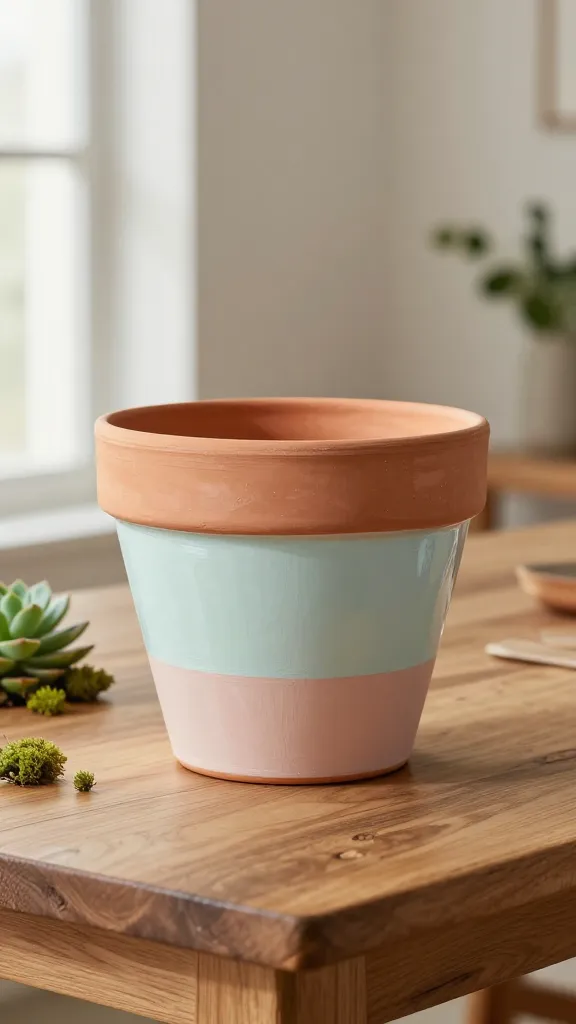
Terracotta gets a chic upgrade with a few color pops and a simple pattern. This centerpiece is a veritable mood-setter for dining tables, entryways, or a sunlit shelf. Easy to customize for seasons or favorite palettes, it’s proof that DIY can be both pretty and practical.
Materials
- Plain terracotta pot (or a few of varying sizes)
- Acrylic paints (your chosen colors)
- Painter’s tape for clean lines
- Clear sealant spray (optional)
- Small succulent, moss, or faux greenery
How to Make It
- Paint the pot in your base color. Add stripes or shapes using painter’s tape for crisp lines.
- Let dry, then apply a sealant to protect the finish.
- Top with greenery or a small plant for instant life.
Pro Tips / Styling Ideas
- Group a trio of pots on a shelf for a striking vertical statement.
- Swap the foliage seasonally to keep the look fresh.
End note: This is your all-purpose decor upgrade—stylish, simple, and endlessly adaptable.
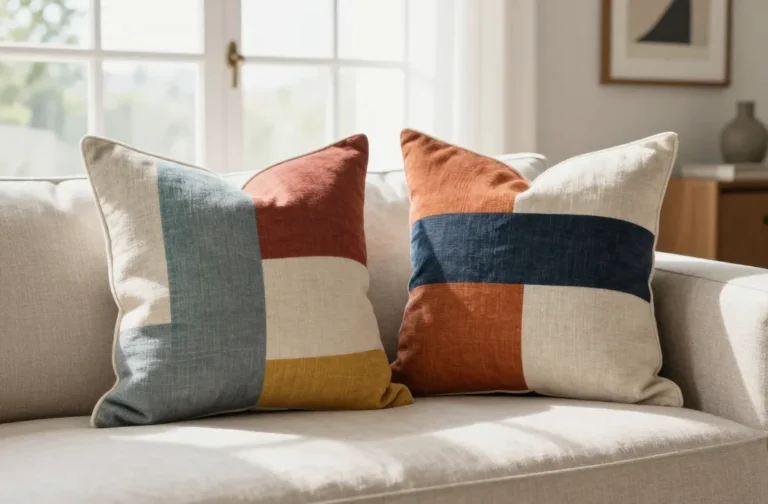
5. Customizable Fabric Wall Banner
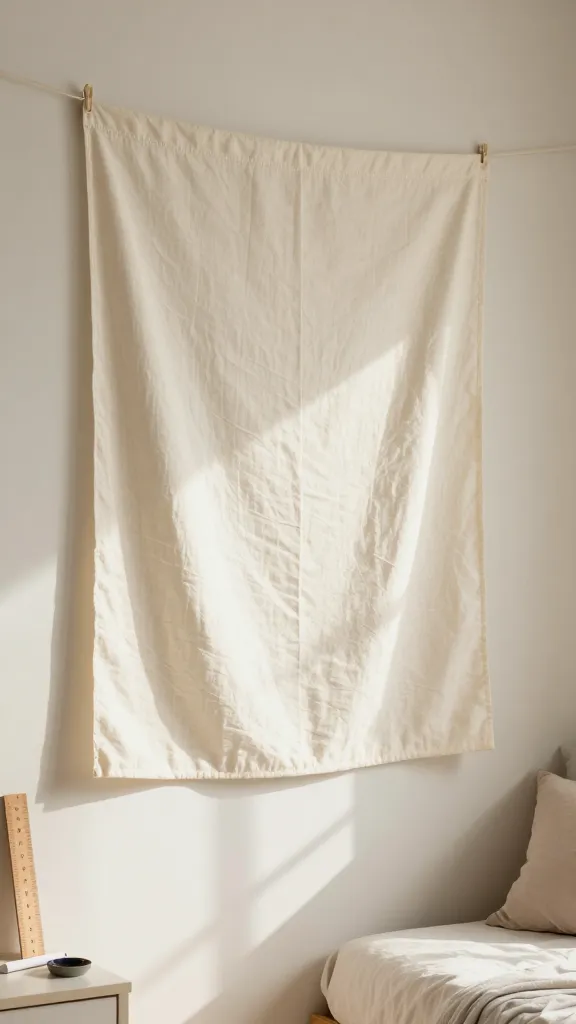
A personal touch on the wall that you can tailor to any room or season. This fabric banner feels handmade without the heavy sewing marathon. It’s perfect for dorms, apartments, or cozy living rooms that could use a pop of textile texture.
Materials
- Plain cotton or linen fabric strip
- Fabric paint or fabric markers
- Ruler and chalk pencil for neat lines
- String or ribbon for hanging
How to Make It
- Fold the fabric edge and secure with a simple stitch or glue to create a clean top edge.
- Paint a short word, initials, or a simple motif you love. Keep lines bold and legible for maximum impact.
- Hang with string along a wall or above a doorway.
Pro Tips / Styling Ideas
- Coordinate with cushion colors or a matching rug for cohesive vibes.
- Try a monochrome palette for a chic, modern look.
End note: Your home’s new friendly face—personal, scalable, and easy to swap out as mood or seasons shift.
6. Embroidered Hoop Art Minis
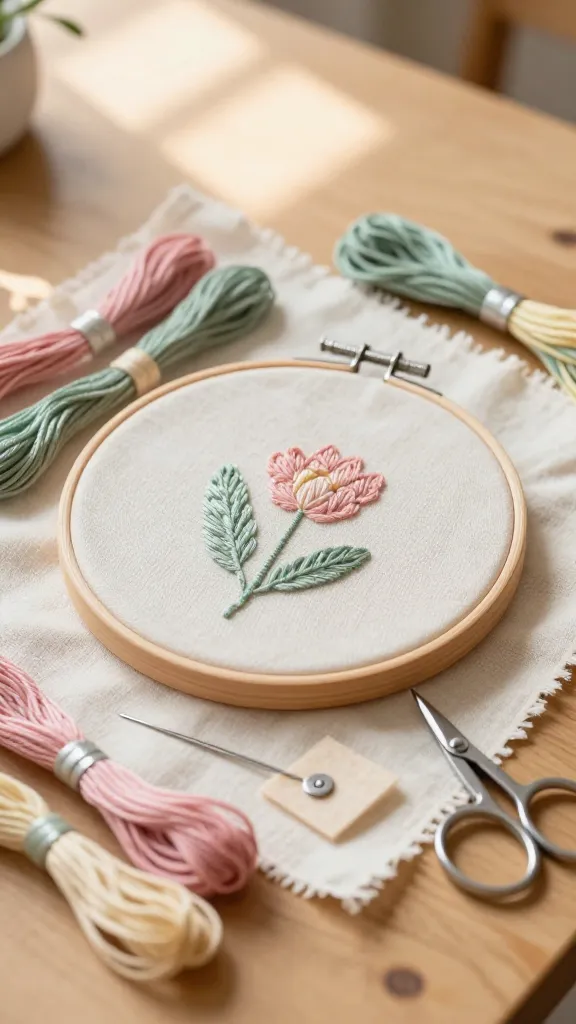
Tiny, chic, and irresistibly satisfying, these little embroidery hoop miniatures bring texture and storytelling to your walls. They’re ideal for nano-suites, office nooks, or a gallery wall full of whimsy. You’ll feel like a pro after your first stitch session—promise.
Materials
- Embroidery hoops (small sizes)
- Embroidery floss in a few colors
- Needle (sharper is easier for beginners)
- Felt or cardboard backing
How to Make It
- Transfer a simple shape or pattern onto the fabric and stitch with a basic satin or backstitch.
- Trim the fabric, glue to backing, and secure the hoop closure.
- Hang as a set of mini artworks on a wall or shelf.
Pro Tips / Styling Ideas
- Use a color story (three complementary colors) for a cohesive collection.
- Mix with other small wall pieces for a playful mini-gallery impression.
End note: A tiny, tactile project that feels incredibly rewarding and endlessly customizable.
7. Scented Soy Candle with a Simple Decor Twist
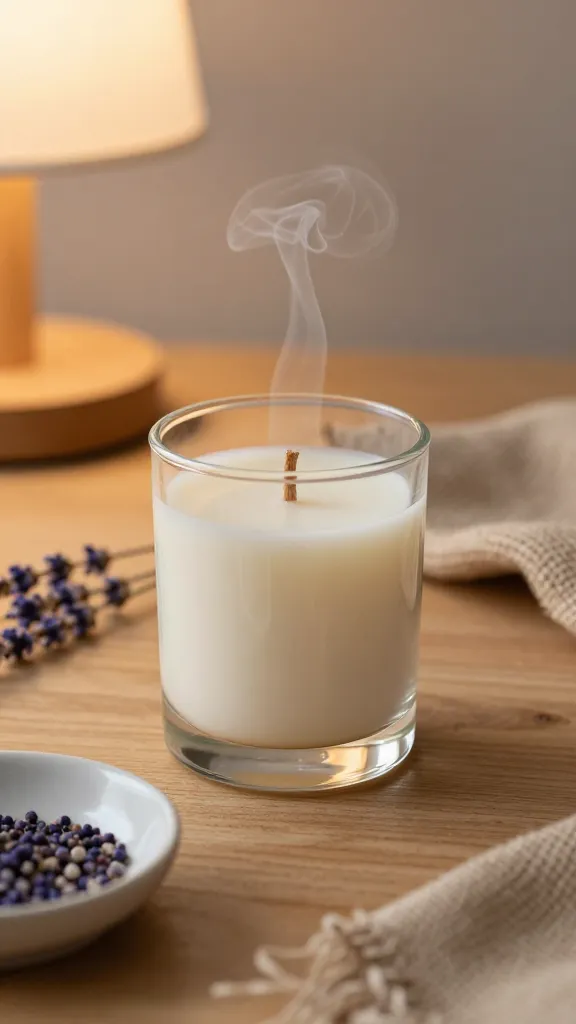
End the list with a soothing, practical project: a handmade candle that smells amazing and looks stylish on any surface. This isn’t a pro-only ritual—it’s simple, doable in under an hour, and smells like a cozy hug. FYI, it’s also a fantastic gift idea for friends who deserve some extra hygge.
Materials
- Soy wax flakes
- Candle wick
- Essential oils (your favorite scent)
- Glass jar or tin container
- Color dye chips (optional)
How to Make It
- Melt wax according to package instructions, add color if using.
- Pour into container with wick centered and a few drops of essential oil.
- Let cool completely and trim wick before lighting.
Pro Tips / Styling Ideas
- Decor with a small sprig of dried herbs on the lid for a decor-friendly look.
- Layer with a simple tray and a plant for a serene centerpiece.
End note: A sensory delight that doubles as a thoughtful, handmade gift—seriously, you’ll want to make extra batches.
Conclusion
These 7 quick crafts ideas for beginners are designed to be approachable, stylish, and genuinely fun. Each project is a complete, unique creation you can complete over a weekend, with lots of room for your personal twist. Pick one to start, or go ahead and try all seven—you’ll end up with a refreshed space and a bag of new skills. Happy crafting, and may your creativity continue to sparkle. You’ll love how satisfying these simple projects feel.