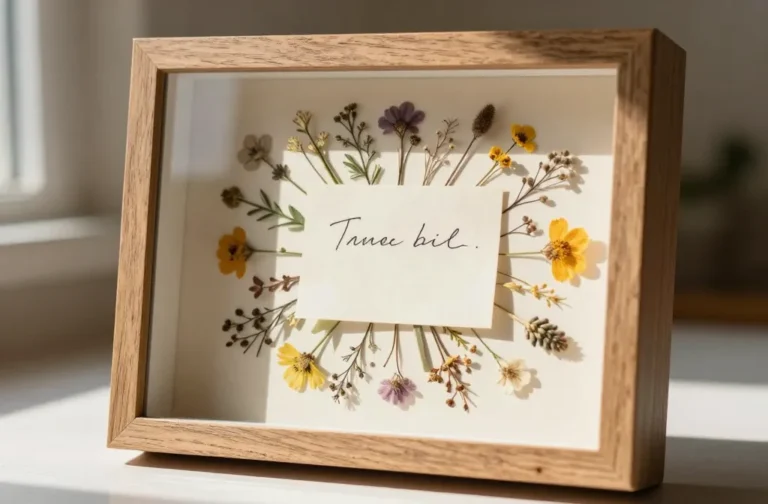
6 Useful Toilet Paper Roll Crafts
Ready to turn humble TP rolls into something magical? These six ideas are short on fuss and big on wow, perfect for lazy Sundays and quick gifting alike. Trust me, you’ll love how easy they come together and how Pinterest-worthy the results look.
Grab a stack of rolls, some glue, a splash of paint, and your favorite accents—we’re diving into seriously satisfying, budget-friendly craft ideas you’ll actually finish.
1. Cozy Mini Planters With Fabric Wrap
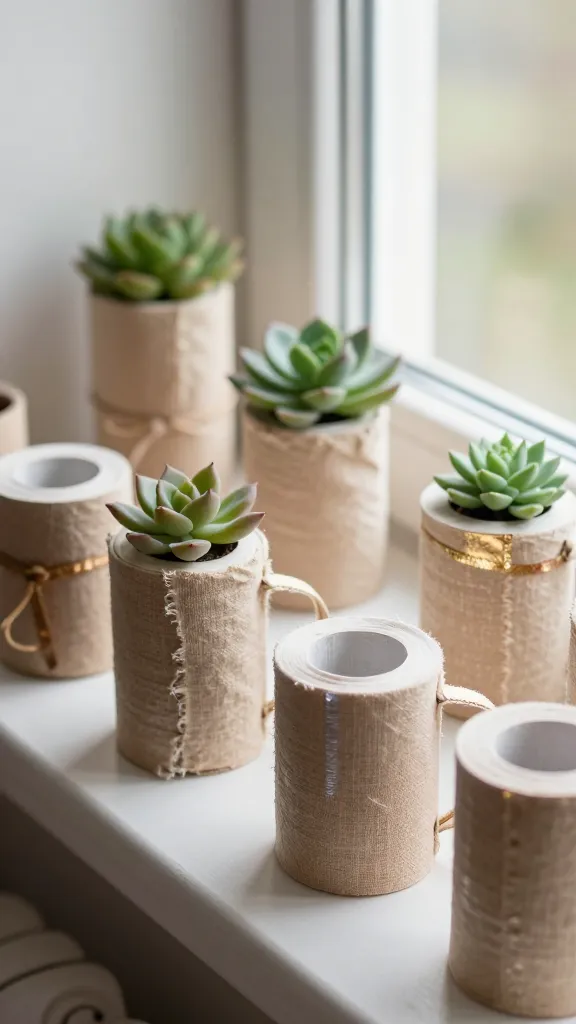
Imagine tiny, plant-filled mugs that fit on a windowsill without stealing real mugs’ spotlight. These cozy mini planters have a soft, tactile vibe thanks to fabric wraps and a dash of greenery. They’re adorable as desk decor, shelf buddies, or holiday table accents.
Materials Needed
- Toilet paper rolls (empty)
- Small fabric scraps or felt
- Mod Podge or white glue
- Scissors
- Carnation or small succulent plants (optional)
- Ribbon or twine for hanging (optional)
- Gold or copper paint marker for a chic edge (optional)
How to Make It
- Cut each roll into short sections about 2–3 inches tall for perfect mini pots.
- Wrap fabric around the outside and seal with Mod Podge. Trim edges for a clean seam.
- Optionally paint a tiny rim with metallic marker for a polished look.
- Fill with a bit of soil and a small plant or succulent, or leave hollow as decorative vessels.
- Hang with ribbon or place on a tray as a chic cluster.
Pro Tips / Styling Ideas
- Use complementary fabrics—think linen, velvet, or gingham for a cozy vibe.
- Group in threes on a sunny sill or terrarium-style display.
- Try seasonal patterns (scandi stripes for winter, florals for spring).
Who’ll love this? Plant lovers, cozy home decorators, and anyone who wants a touch of warmth without buying new pots.
2. Cardboard Carousel Wall Art
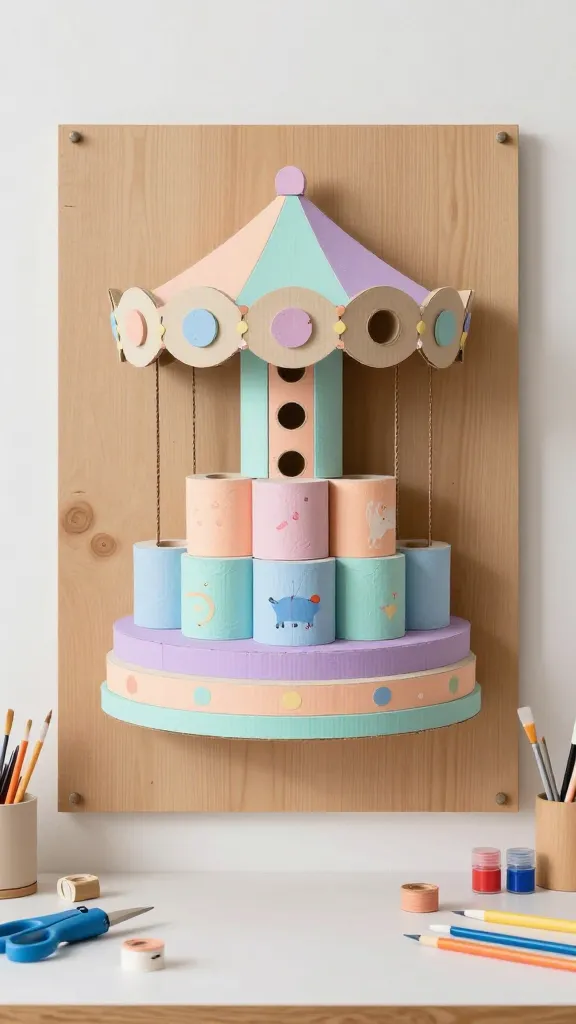
Turn plain wall space into a playful scene with a DIY cardboard carousel crafted from TP rolls. It’s light, whimsical, and surprisingly impressive when you add color and tiny painted animals or shapes. A kid-friendly project that doubles as decor—the best of both worlds.
Materials Needed
- 8–12 toilet paper rolls
- A thick backing board or recycled cardboard
- Acrylic paints and brushes
- Glue gun or strong craft glue
- Scissors
- String or twine for hanging
How to Make It
- Flatten some rolls slightly to form spokes; trim ends to create arches for a carousel look.
- Glue rolls to the backing board in a circular, layered pattern to resemble a merry-go-round.
- Paint each segment with bright colors and add simple painted silhouettes (horses, stars, hearts).
- Attach a twine loop for wall mounting.
Pro Tips / Styling Ideas
- Keep the palette cohesive—two or three complementary colors read more polished.
- Or go bold with a rainbow burst for a playful kids’ room.
- Seal with a light matte spray for durability.
Perfect for a kid’s playroom or a quirky hallway gallery. Fun, festive, and seriously eye-catching.
3. Rustic Lanterns From TP Rolls
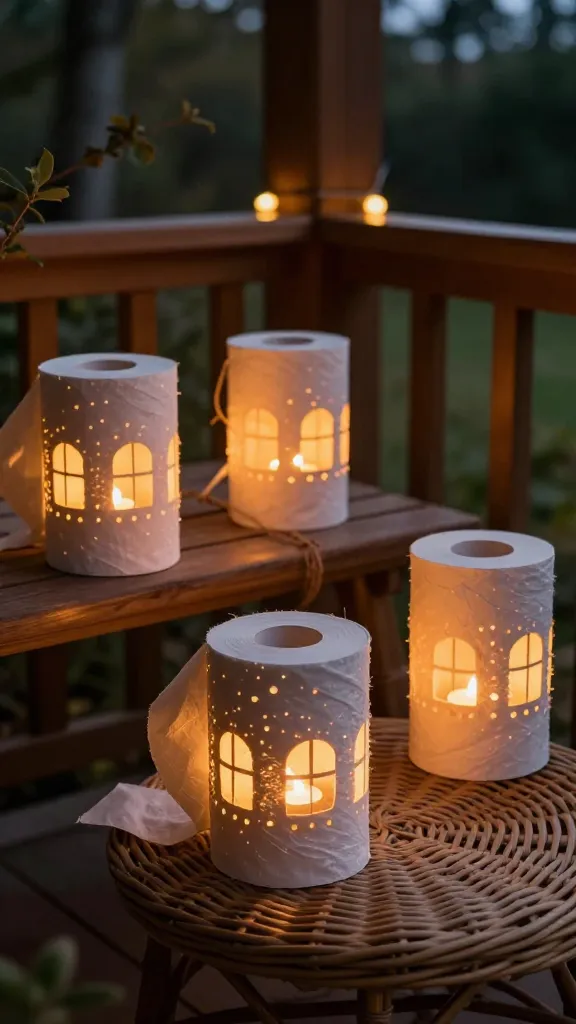
Here’s a warm, cozy way to recycle and glow. These rustic lanterns cast soft, ambient light—great for evenings on the porch or a cozy bath corner. They look like tiny lanterns from a vintage fair, only cheaper and easier.
Materials Needed
- Toilet paper rolls
- Jute twine or string
- Parchment paper or thin tea light-safe paper
- Mod Podge or glue
- Wire or metal hanger (optional for hanging)
- LED tealight candles
How to Make It
- Punch evenly spaced windows around each roll with a small craft knife (careful around edges).
- Wrap the outside with twine, securing with glue as you go for a rustic texture.
- Insert a parchment panel to diffuse light and protect the candle (use LED tealights for safety).
- Group a few together on a tray or hang them in a patio corner for ambiance.
Pro Tips / Styling Ideas
- Use warm amber LEDs for a true lantern glow.
- Add tiny pine sprigs or dried flowers between the roll and parchment for a seasonal twist.
- Paint the exterior in chalky neutrals for farmhouse vibes.
Who would love it? Interior lovers who crave cozy lighting without a big budget, and anyone chasing hygge energy.
4. Sparkly Gift Tags and Cards
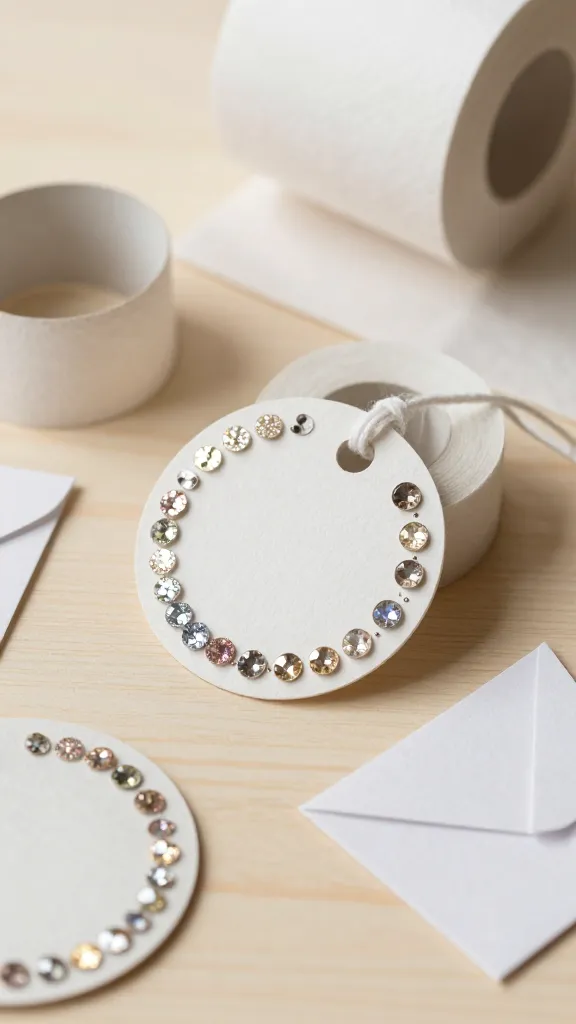
Take your gift game up a notch with personalized, sparkly tags and mini cards carved from TP rolls. They’re crisp, eco-friendly, and incredibly easy to customize for birthdays, weddings, or little thank-you notes.
Materials Needed
- Toilet paper rolls
- Colored papers or cardstock
- Glitter, sequins, or rhinestones
- Glue or glue sticks
- Scissors
- Fine-tip markers or pens
How to Make It
- Flatten a roll and cut into 1–2 inch wide rings. These become base tags or card tops.
- Fold cardstock into a card shape or cut shapes from colored paper to attach to the ring tops.
- Decorate with glitter, rhinestones, or tiny drawings. Write a note with a marker.
- Attach a string through a punched hole to tie onto gifts.
Pro Tips / Styling Ideas
- Coordinate colors with gift wrap—soft pastels for weddings, bold accents for birthdays.
- Layer textures by adding fabric scraps or foil accents.
- Store a stack of tags ready for last-minute gifting.
Who’ll love it? Hosts, brides-to-be, and anyone who loves a personal, handmade touch on presents.
5. Decorative Wreath Art With Recycled Embellishments

Turn a few TP rolls into a vibrant, textured wreath you can hang on a door or wall. It’s a bold splash of color and texture that screams “curated craft corner” without the museum-price tag. Seriously, it’s easier than it looks.
Materials Needed
- Toilet paper rolls
- Cardboard circle for base
- Acrylic paints or spray paints
- Hot glue or craft glue
- Optional embellishments: buttons, yarn, dried flowers, beads
- Ribbon for hanging
How to Make It
- Cut rolls into rings or small shapes (squares, diamonds, petals) and flatten slightly.
- Arrange on a circular base, gluing as you go to form a full wreath.
- Paint or spray in layered colors, then add embellishments in clusters for visual interest.
- Attach a ribbon loop for easy hanging.
Pro Tips / Styling Ideas
- Go seasonal: reds and greens for holidays, blues and silvers for winter, brights for spring.
- Vary sizes to create depth—smaller pieces toward the center, larger toward the edges.
- Seal with a matte spray to keep colors vibrant longer.
Who’d adore this? Home decorators looking for bold wall art that’s friendly to the planet and wallet.
6. Whimsical Flower Garland From Paper Rolls
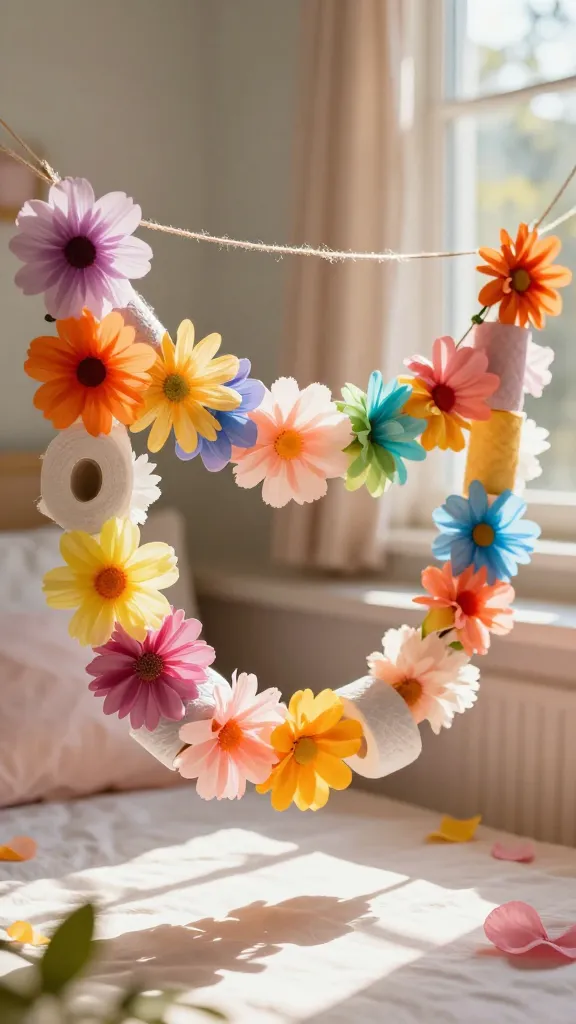
Brighten a bedroom nook or patio backdrop with a fluttering flower garland made from TP rolls. This project feels like sunshine and happiness—soft, whimsical, and totally doable in an afternoon. FYI, your future self will thank you for the vibe boost.
Materials Needed
- Toilet paper rolls
- Assorted tissue papers or colored papers
- Scissors
- Glue, straws or string for the garland line
- Markers or paint for details
How to Make It
- Cut rolls into petal shapes or circles and flatten slightly.
- Roll or fold the shapes to form bloom-like elements and glue together for small flowers.
- Thread flowers onto string, leaving space between each bloom for airiness.
- Hang as a gentle, uplifting backdrop in a nursery, balcony, or reading corner.
Pro Tips / Styling Ideas
- Mix pastel and bold colors for a playful garden feel.
- Attach to a dowel or ribbon for a lightweight, effortless display.
- Combine with leaf shapes cut from green paper for a botanical vibe.
Who will love it? Teens and adults alike who crave a cheerful, handmade touch that’s easy on the budget.
Conclusion
These 6 Usefully Creative Toilet Paper Roll Crafts prove that you don’t need fancy supplies to make something shareable, save-worthy, and totally charming. Pick one to start, or grab all six for a full crafting marathon that will leave your space feeling fresh and personal. Ready to dive in? Grab your rolls, and let the creative spark take over—you’ll love how simple, satisfying, and stylish these projects turn out to be.