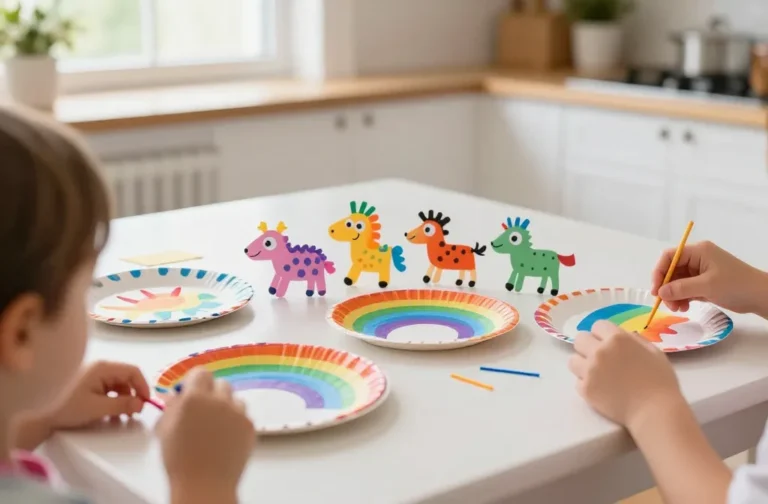
5 Genius Cardboard Box Craft Ideas for Kids
Hey, crafty friends! If you’ve got a stash of cardboard boxes and a curious kiddo, you’re about to unlock a treasure trove of imagination. These five ideas are big on wow factor, easy on the mess, and perfect for a weekend crafting session that sparks giggles and pride.
Trust me, these projects are fun, surprisingly quick, and totally Pinterest-worthy. Ready to dive in?
1. Cardboard Castle Playhouse With Hidden Doors
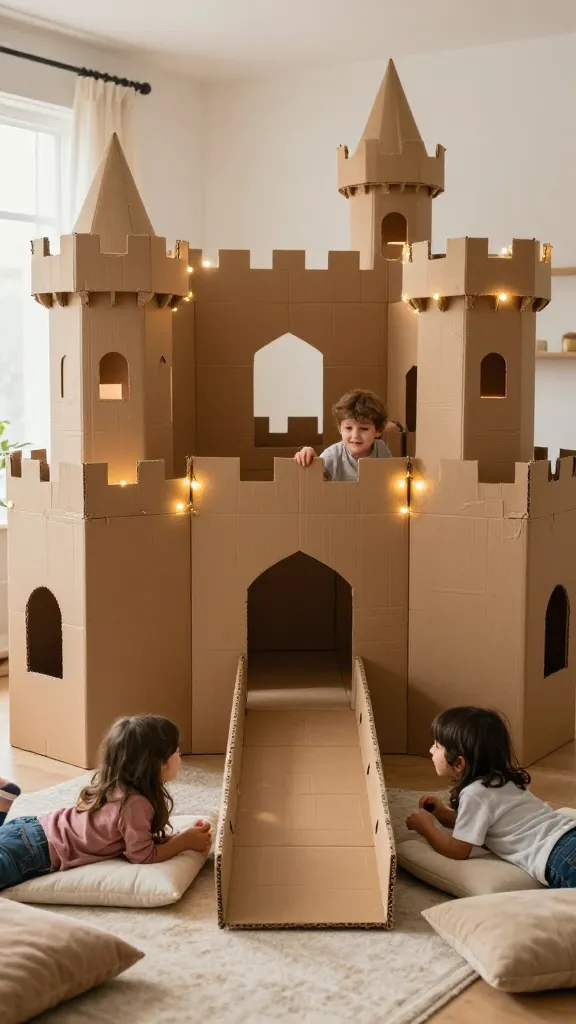
Picture this: a sturdy cardboard castle live in the living room, complete with drawbridge, towers, and secret doors that swing open for dramatic dragon-defeating entrances. The finish is charmingly imperfect, like a cozy storybook fortress that invites siege warfare with pillows and imagination. Kids will adore the grand scale and the glow of fairy lights tucked along the battlements.
Materials Needed
- Large cardboard boxes (tv/appliance boxes work great)
- Box cutter or safety scissors
- Masking tape or hot glue (adult supervision)
- Acrylic paint set or markers
- Printable drawbridge templates or craft paper for detailing
- Colored ribbon or fabric scraps for flags
- Battery-operated fairy lights
How to Make It
- Flatten the largest box to form the castle base, then cut out doorways, windows, and a drawbridge.
- Layer multiple walls for a sturdy fortress, securing with tape or glue. Build a couple of towers by stacking and shaping extra boxes.
- Decorate with paint, paper details, and fabric banners. Add a doorway secret by embedding a flap that opens to a small alcove.
- String fairy lights along the battlements and inside the towers for magical evenings.
- Let little rulers crown the castle with DIY flags on toothpicks.
Pro Tips / Styling Ideas
- Use removable wallpaper samples or wrapping paper for expressive walls without permanent paint on carpets.
- Create windows with clear plastic pockets for a stained-glass effect when lights are on.
- Place the castle on a folded blanket “castle courtyard” to keep it grounded and comfy.
End Note
This one’s for aspiring monarchs, knights, and everyone who loves a dramatic entrance. It’s a grand project that fosters collaboration and storytelling. Future builders and little designers will absolutely adore it.
2. Cardboard Rocket Ship That Actually Floats (Sort Of) in Imagination
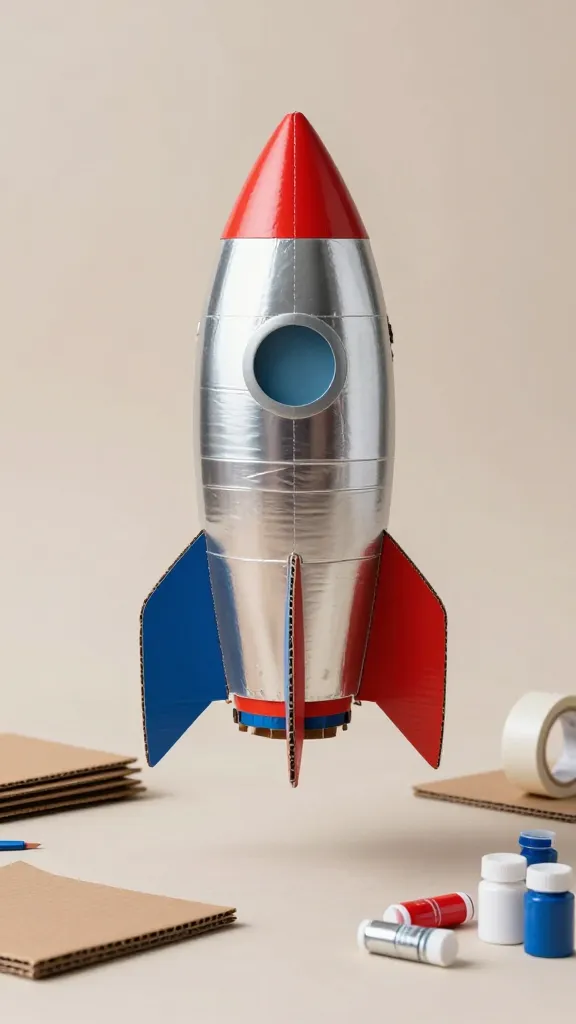
Blast off to a starscape of creativity with a cardboard rocket ship that looks stellar on a shelf and sparks pretend-feasts on the moon. The sleek curves and glossy paint give it a futuristic vibe that pairs perfectly with space-themed playdates or solo space adventures.
Materials Needed
- Long cardboard tubes or two large boxes
- Bright craft paint (silver, red, white, blue)
- Wide masking tape for frame seams
- Foam sheets or sturdy craft paper for fins
- Glue, scissors, ruler
- Optional: battery-powered LED puck lights
How to Make It
- Shape the rocket body by joining two boxes or a box with a sturdy tube; taper to a point at the nose with extra cardboard.
- Attach fins cut from foam sheets or heavy cardboard along the base for stability and a retro sci-fi look.
- Decorate with metallic paint and bold racing stripes. Add circular windows with contrasting colors for a pilot-friendly aesthetic.
- Glue a small stand or a flat base so it can perch proudly on a shelf or table.
- Optionally place a tiny LED inside to glow through a cutout window at night.
Pro Tips / Styling Ideas
- Keep the color palette energetic—think chrome silver with pops of red and blue.
- Pair with starry decals or a glow-in-the-dark constellation backdrop on a wall.
End Note
Perfect for budding astronauts and space lovers, this rocket is a fantastic centerpiece for a kid’s room or a classroom display. It’s bold, goofy, and totally share-worthy.
3. Cardboard Creature Habitat Diorama
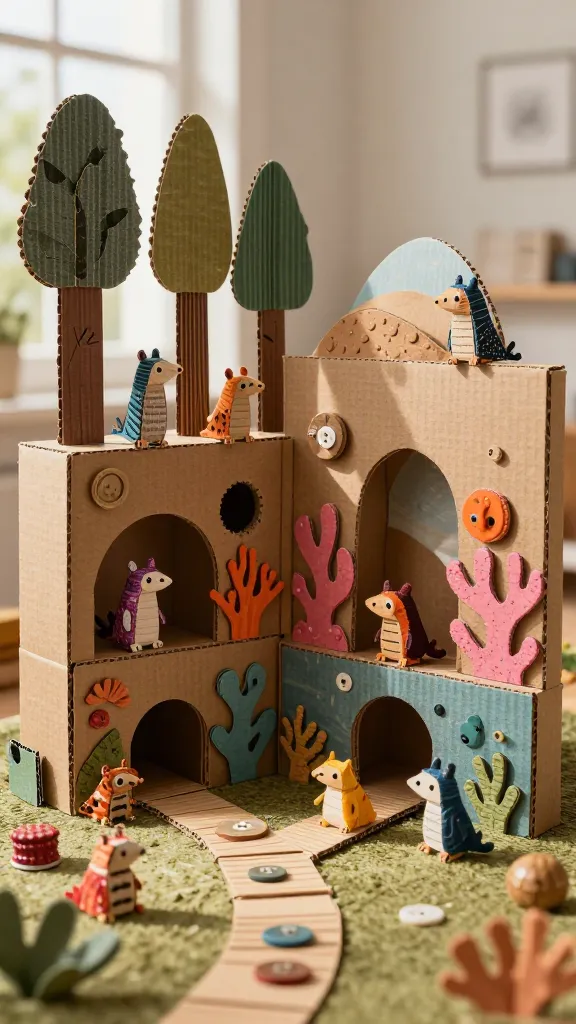
Imagine a mini ecosystem carved from cardboard—a whimsical forest, a coral reef, or a desert canopy—where cardboard trees, caves, and critter figures come to life. This project is all about texture, color, and storytelling. Your kid can curate habitats and then stage tiny adventures with their handmade creatures.
Materials Needed
- Several sturdy cardboard panels or a large shoebox
- Acrylic paints, sponge brushes, and markers
- Textured paper, fabric scraps, bottle caps, and buttons
- Glue gun or strong craft glue (adult supervision)
- Small figurines or printable cutouts for animals
How to Make It
- Assemble a shallow box or stacked panels to form the base and shelves for the habitat layers.
- Cover the base with painted “ground” and add forest floor textures with textured paper and fabric.
- Create trees, rocks, and bushes from cardboard tubes, cutouts, and paint. Layer different heights for a dynamic landscape.
- Place little habitats inside—nests, caves, or coral nooks—using paint and extras like bottle cap “ponds.”
- Add critters made from paper or clay, or print tiny digital designs for a modern twist.
Pro Tips / Styling Ideas
- Dump a handful of natural textures on the diorama (twigs, sand, pebbles) to boost realism.
- Use a little diorama lighting with a battery-powered puck to spotlight a favorite scene.
End Note
This one’s for little naturalists and story-makers. It’s a flexible, evergreen project that grows with imagination—change the habitat with the seasons or the kid’s current interests.
4. Cardboard Play Kitchen Set With Faux Food
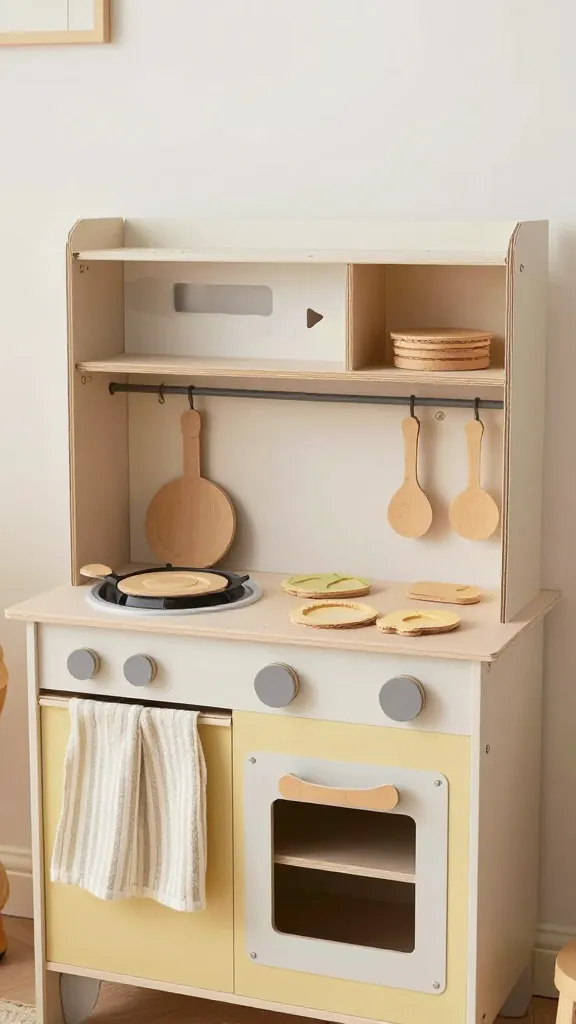
Who says play food has to be store-bought? Build a charming cardboard play kitchen that doubles as décor and a pretend culinary stage. Think pastel onions, a wooden-skillet vibe, and a countertop crafted from corrugated cardboard. Your kid will love plating imaginary meals for guests, and you’ll love the mess-free, easy-clean setup.
Materials Needed
- Box card panels for shelves and stove
- Non-toxic paint in warm tones
- Foam or cardboard cutouts for “food” shapes
- Cotton fabric strips for towels and oven mitts
- Decorative knobs or bottle caps for dials
- Glue, scissors, tape
How to Make It
- Cut a box into a compact kitchen shape: backboard, two sides, a pretend stove, and a sink area.
- Paint the surface with friendly shades. Add stovetop burners using black circles and metallic dab highlights.
- Fabric towels hang from a faux rack; bottle-cap dials click into place as knobs.
- Craft simple “food” pieces from foam or cardboard—carrots, eggs, bread—then fasten with a little Velcro so kids can “cook.”
- Place on a low shelf or table so kids can dive in easily during playtime.
Pro Tips / Styling Ideas
- Pair with a mini apron and a pretend faucet using a plastic cup and tubing for a thirsty tap.
- Finish with chalkboard paint panels for weekly menus or shop lists.
End Note
This is a cozy, social project that invites family meals and imaginative feasts. A durable cardboard kitchen grows with your child’s skills and storytelling flair.
5. Cardboard Musical Instrument Gallery
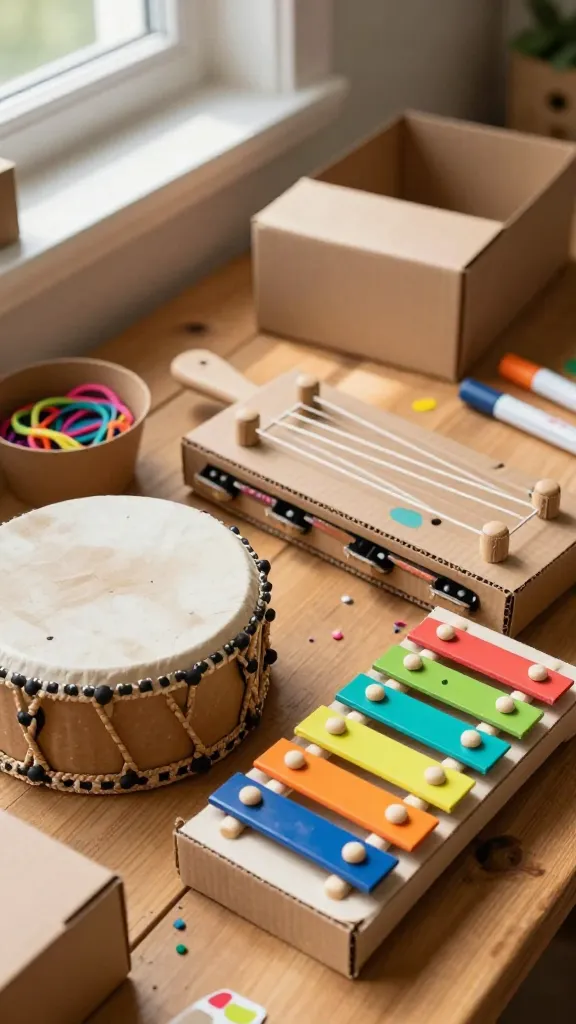
Turn dull boxes into a sound-studio playground. A cardboard drum, tambourine, and xylophone-inspired set invites kids to experiment with rhythm, color, and sensory play. The finished instruments look delightfully rough-and-tumble, with woodgrain textures and bright accents that invite finger-tapping. You’ll love how quickly this one comes together and how music sparks joy.
Materials Needed
- Cardboard boxes of various sizes
- Rubber bands (various tensions) for strings
- Decorative paint, markers, and stickers
- Plastic lid for a snare or drum surface
- Elastic bands or craft wire for tuning
- Glue, scissors, scissors
How to Make It
- Create a drum by stretching a large rubber band over a round lid anchored to a box top. Decorate the box with bright paint and patterns.
- Craft a tambourine by attaching metal bottle caps around a ring or small lid, using a sturdy box as the body.
- Assemble a xylophone-inspired instrument using wooden sticks or painted cardboard bars laid across a cardboard frame and attached with rubber bands.
- Tune by adjusting the tension on each band; test sounds with a quick stomp or clap experiment.
Pro Tips / Styling Ideas
- Paint sounds-inspired labels on each instrument—“Boom,” “Tap,” “Clack.”
- Pair with a tiny fold-out music sheet or a mirror for a performer vibe.
End Note
Musical exploration meets crafty cardboard in a playful, sensory-friendly way. It’s a guaranteed crowd-pleaser for kids who love to perform and improvise on the spot.
Conclusion
Cardboard is the superhero material of kids’ crafts: inexpensive, endlessly adaptable, and begging to be repurposed into magic. These five completely unique ideas—from a grand castle to a musical instrument ensemble—are designed to spark imagination, encourage hands-on play, and give you a stack of proudly displayed projects to show off. So grab some boxes, enlist a helper, and dive into a weekend of crafting bliss. You’ll love the creativity, your space will feel cozier, and your kid’s smile will be the best reward.