9 Hydro Dip Craft Ideas Painting Spray Paint: Wow-Worthy Diys
Ready to splash color, texture, and a little magic onto everyday objects? Hydro-dipping with spray paint is a playful, affordable way to transform almost anything. These nine unique ideas are crafted to be easy, visually striking, and totally Pinterest-worthy. Let’s dive in and get that DIY glow-up started!
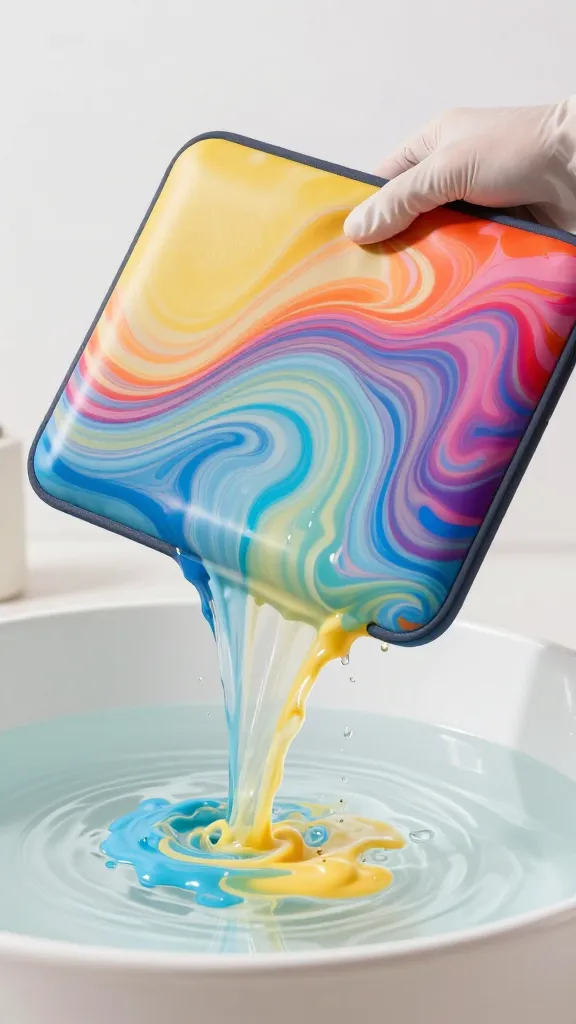
1. Hydro Dip Planter Trio: Marble Meets Ocean Swirl
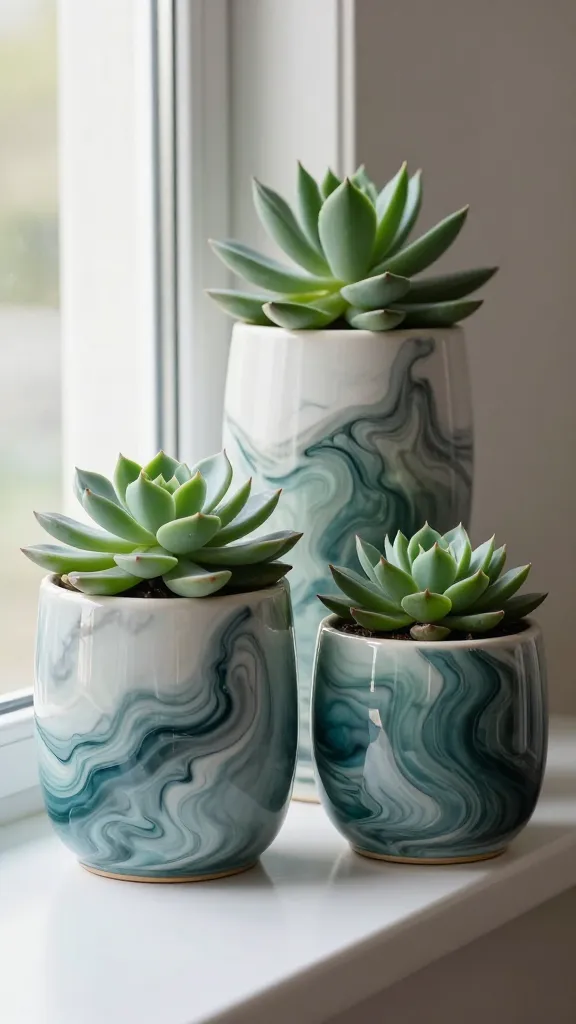
Imagine a trio of ceramic planters that look like a chic marble or ocean-inspired swirl—the kind that turns a windowsill into a mini gallery. This project balances bold patterns with clean shapes, making greens pop in a dramatic, gallery-worthy way. Trust me, your succulents will get all the compliments.
Materials Needed
- White ceramic planters (various shapes)
- Hydro dipping kit (or spray paint + clear coat)
- Water tray large enough for the biggest planter
- Gloves, masking tape, and paper towels
- Protective mat or drop cloth
How to Make It
- Fill a tub with water and prep your workspace with a mat and towels.
- Spray the paint in a quick, sweeping motion over the surface of the water to create a pattern.
- Submerge the planters for a few seconds, then lift straight up to reveal the pattern.
- Dry, seal with a clear coat, and place your plants inside.
Pro Tips / Styling Ideas
- Use metallic accents (silver or copper) to add luxe vibes.
- Pair with a matching coaster or tray to anchor the display.
- Mix matte planters with glossy leaves for contrast.
Who’ll love it: plant lovers, home decor enthusiasts, and anyone who wants a whisper of premium style with minimal effort.
2. Faux-Glazed Ceramic Bottle Art
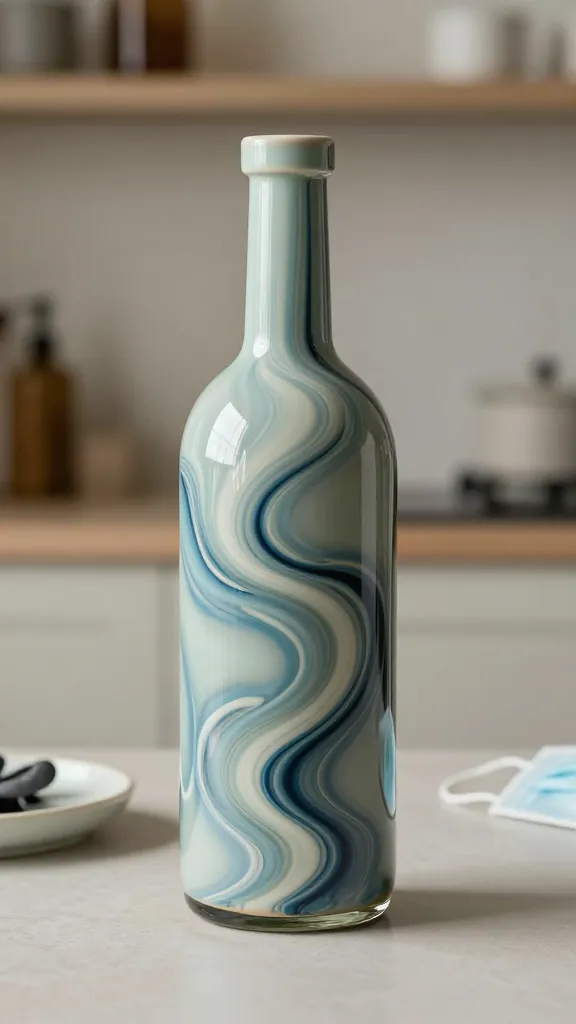
One repurposed bottle becomes a statement piece that looks like a hand-blown glaze job—without the studio price tag. This idea is perfect for a kitchen shelf, a bathroom display, or as a chic hostess gift. It’s all about those liquid, swirling hues that feel luxe and experimental.
Materials Needed
- Empty glass bottle with a slender neck
- Spray paints in two contrasting colors
- Water tray, gloves, masks
- Clear sealant
How to Make It
- Fill your tray with water and drop the base color into the surface via spray, letting it spread.
- Introduce the second color with quick taps to create a marbled effect.
- Dip the bottle neck-first so the widest body catches the pattern, then pull gently.
- Air-dry and seal for a glass-like finish.
Pro Tips / Styling Ideas
- Wrap twine around the neck for a rustic edge.
- Place on a shelf with dried botanicals for a warm, modern vignette.
Who’ll love it: gift-givers, bottle collectors, and anyone who loves single-item showpieces with a glossy twist.
3. Abstract Desk Organizer Set
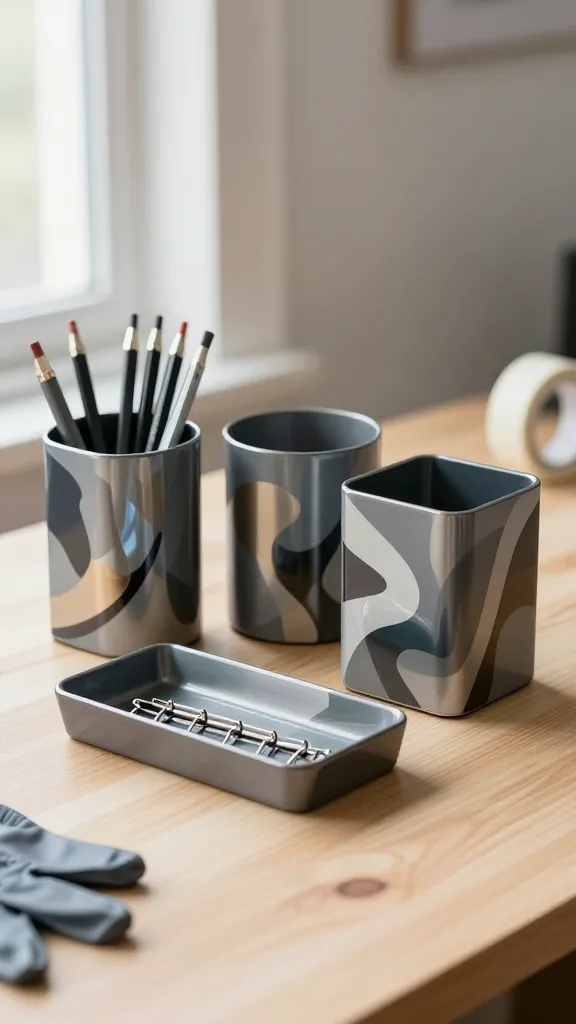
Transform dull office gear into an artful trio that sparks joy while keeping pencils and clips in check. Each piece gets a different pattern, but together they sing a cohesive, abstract story. It’s the kind of desk you’ll want to show off in a photo before you even start working.
Materials Needed
- Three metallic or matte desk organizers (pencils, brushes, clips)
- Hydro-dip spray paints in coordinating colors
- Water tray, gloves, painter’s tape
- Clear finish spray
How to Make It
- Dip each piece separately to create distinct patterns that feel connected by color family.
- Seal with a clear coat to prevent chipping and preserve color depth.
- Let dry completely before use.
Pro Tips / Styling Ideas
- Place a small succulent or air plant on each for a lively desk presence.
- Use complementary colors like teal, coral, and gold for a playful vibe.
Who’ll love it: students, remote workers, and anyone who loves a vibrant, cohesive workspace.
4. Hydro Dip Glass Coasters With Pop Art Flair
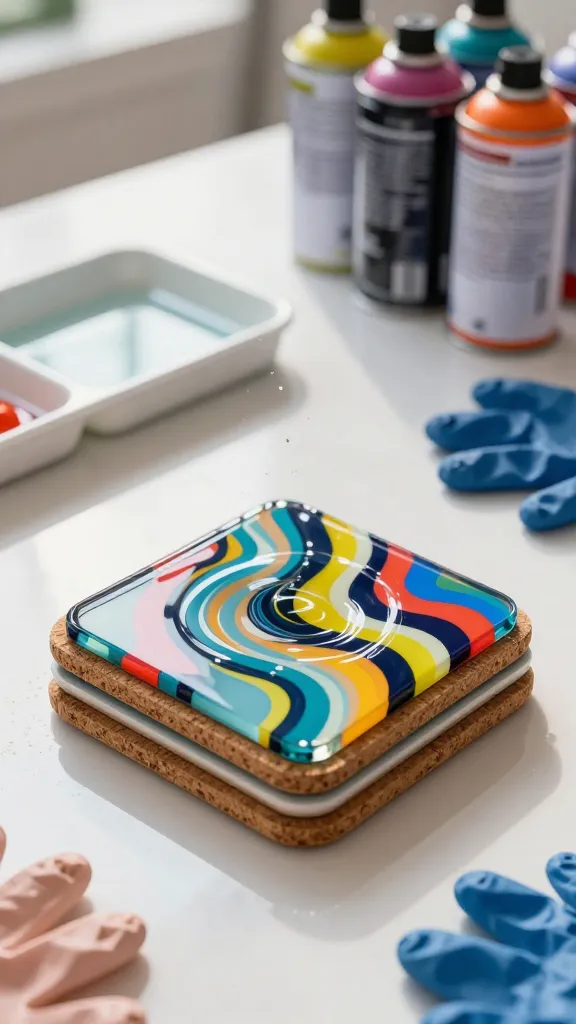
Coasters are tiny canvases, and these will dress up every coffee break. Think bold, geometric shapes or bubbly swirls—these coasters are practical art. They make a fantastic housewarming or hostess gift, or a fun weekend project with friends.
Materials Needed
- Plain cork or ceramic coasters
- Spray paints in bright colors
- Clear topcoat or resin (optional for extra shine)
- Gloves and tray for dipping
How to Make It
- Drop colors onto the water surface to form a pattern, then dip each coaster face down.
- Seal with a clear topcoat or resin for a glassy finish.
- Let cure fully before use.
Pro Tips / Styling Ideas
- Coordinate with a matching drinkware set for a curated look.
- Use metallic accents like rose gold or cobalt for drama.
Who’ll love it: hosting mavens, artists at heart, and anyone who hosts frequent gatherings.
5. Hydro Dip Laptop Sleeve: Tech That Smiles Back
Your laptop deserves a personality upgrade. A hydro-dipped sleeve protects and personalizes your tech while turning heads in meetings or classrooms. It’s practical, chic, and surprisingly quick to finish.
Materials Needed
- Plain neoprene or fabric laptop sleeve
- Spray paints in two or three complementary colors
- Water bath, gloves, and masking tape
- Protective clear coating
How to Make It
- Fill the tray with water and drizzle colors to create layers of pattern.
- Dip the sleeve sideways to capture a broad swath of design; rotate slowly for even coverage.
- Rinse, dry, and apply a clear protective layer.
Pro Tips / Styling Ideas
- Pair with a neon charger or matching notebook for a full tech set.
- Avoid wrapping the edge to keep the zipper area clean and functional.
Who’ll love it: students, freelancers, and anyone who spends hours at the computer and wants a morale boost.
6. Ocean-Blue Hydro Dip Serving Tray
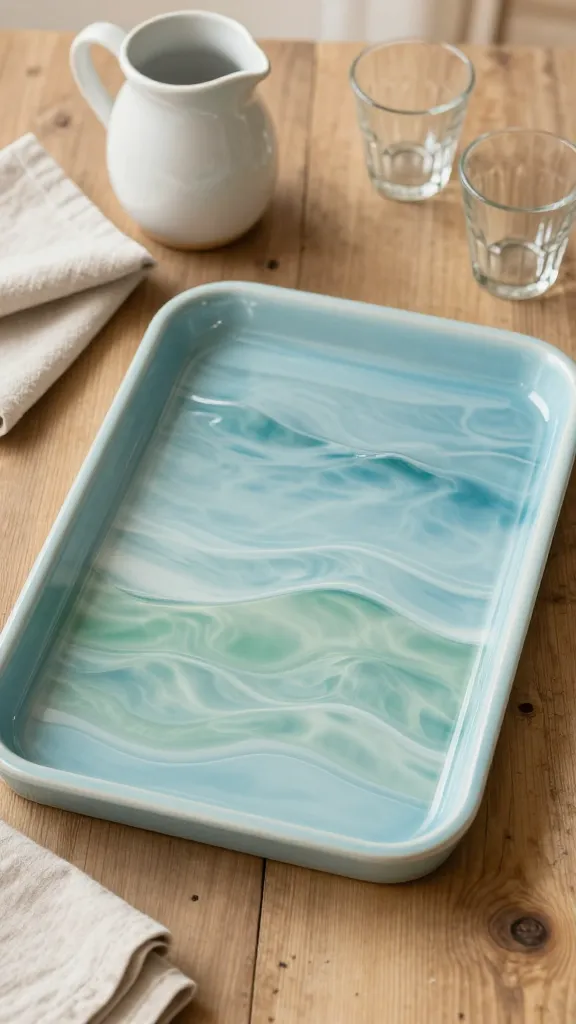
Serve up style with a shallow tray that looks like a seaswept surface. The gentle blues and greens evoke the coast, while the ripple-like patterns echo gentle waves. It’s ideal for picnics, coffee tables, or a weekend brunch centerpiece.
Materials Needed
- Wood or resin serving tray
- Hydro-dip paints in ocean hues
- Water tray, gloves, tape
- Non-slip padding or felt feet
How to Make It
- Dip the tray, ensuring even coverage on the flat surface.
- Seal with a durable clear coat to withstand use and washing.
- Attach felt feet if needed for grip and protection.
Pro Tips / Styling Ideas
- Top with a glass oil diffuser, seashells, or candles for a coastal vignette.
- Pair with blue-and-white linens for a crisp, beachy aesthetic.
Who’ll love it: entertainers, coastal lovers, and anyone who enjoys a little spa-like calm in their home.
7. Glossy Flower Vase Makeover
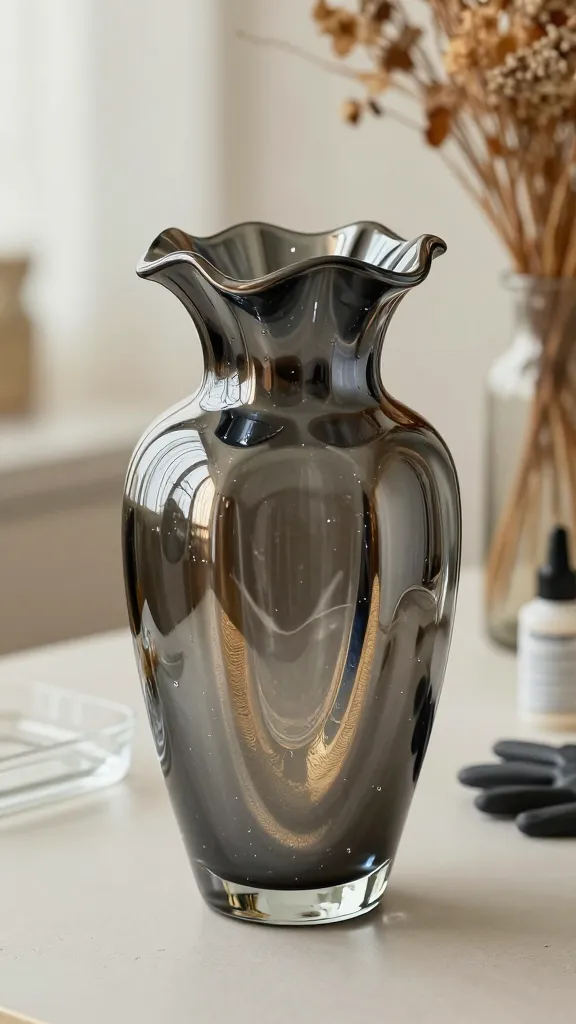
A plain vase becomes a showpiece when dipped in a glossy wave of color. Perfect for fresh or dried florals, this vase looks futuristic but feels approachable. It’s a simple swap that instantly upgrades any centerpiece.
Materials Needed
- Clear glass or ceramic vase
- Spray paints in a deep base color and metallic accents
- Water tray, gloves, and clear sealant
How to Make It
- Dip the vase in the water for a soft, blended finish or keep the top edge clean for a defined line.
- Dry, then spray with a protective gloss sealant.
Pro Tips / Styling Ideas
- Fill with bright greenery or seasonal blooms to maximize impact.
- Place on a mirrored tray to amplify shine and color.
Who’ll love it: interior enthusiasts, gift givers, and anyone who loves floral arrangements with a twist.
8. Customizable Wall Art Panels
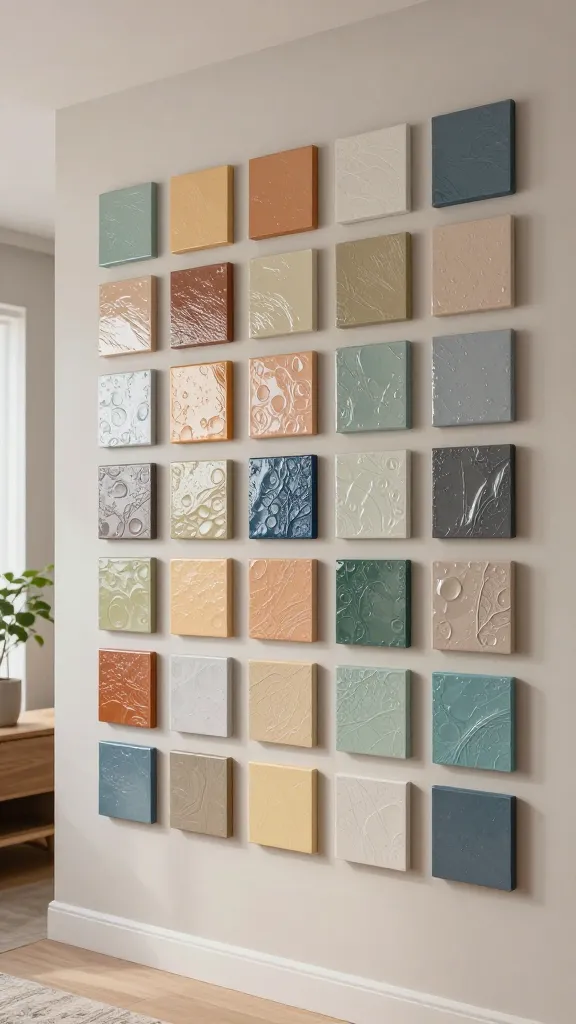
Give walls a personality boost with a set of small, hydro-dipped panels. Mix sizes and patterns to create a living gallery that’s easy to swap out as trends and moods change. It’s art that you can rearrange like a puzzle, seriously.
Materials Needed
- Pre-cut wooden panels or canvas boards
- Spray paints in complementary palettes
- Water tray, masking tape, and clear sealant
How to Make It
- Dip each panel in a different pattern while keeping color harmony across the set.
- Seal and mount in a grid or salon-style arrangement on your wall.
Pro Tips / Styling Ideas
- Leave one panel white for visual breathing room.
- Swap out panels seasonally for a refreshed look.
Who’ll love it: art lovers, renters who want removable decor, and anyone who loves a bold, cohesive wall statement.
9. Kids’ Mini Mount: Colorful Toy Storage Bins
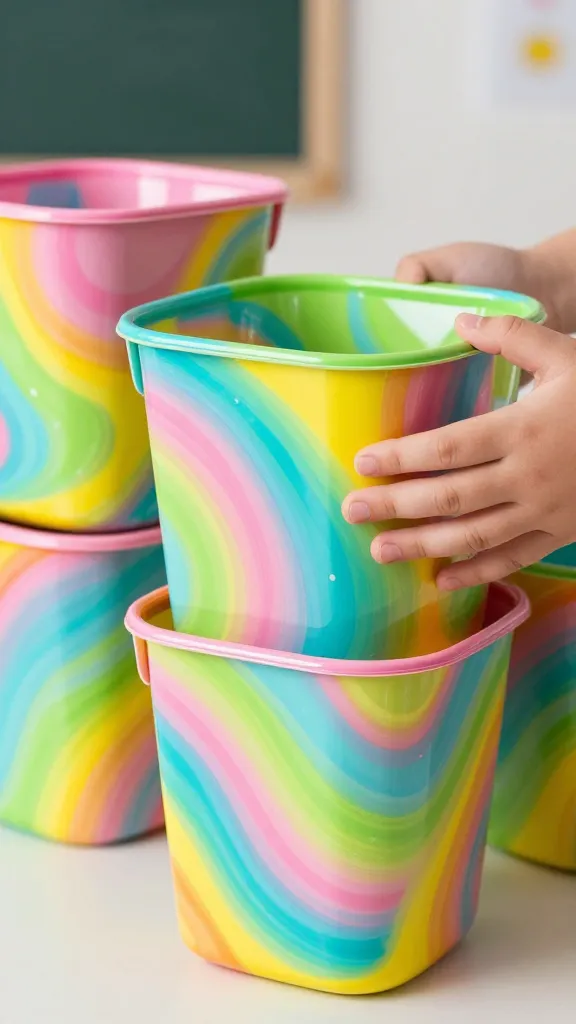
Turn bland storage into kid-approved art with bright, swirled bins that hold tiny toys, crayons, or bath toys. This project is quick, playful, and a reminder that organization can be delightful rather than drab.
Materials Needed
- Small fabric or plastic storage bins
- Spray paints in several cheerful colors
- Water tray, gloves, masking tape
- Clear sealant for durability
How to Make It
- Dip each bin in an overlapping pattern to create a layered look.
- Seal with a durable coat to withstand daily use and washing.
Pro Tips / Styling Ideas
- Label each bin with hand-painted letters for a whimsical touch.
- Pair with matching shelves or a rainbow-colored rug to anchor the space.
Who’ll love it: families, teachers, and anyone who wants a cheerful, practical memory-maker for kids’ rooms.
Conclusion
Hydro dip, paint, and play—these nine ideas prove that you don’t need a full art studio to create standout pieces. Each project offers a fresh way to add color, texture, and personality to everyday items. Pick a favorite, or try them all—your home (and your Instagram feed) will thank you.
So, which idea are you itching to try first? Grab a tray, a few spray colors, and dive into a weekend full of creative, colorful messy-fun. You’ll love this playful DIY journey, and so will everyone who sees your gorgeous, one-of-a-kind creations.