10 3d Craft Ideas Using Polymer Clay: Tiny Treasures You’Ll Love
Ready to dive into a world of tiny, tactile magic? These 10 3d craft ideas using polymer clay are fun, approachable, and seriously addictive. Trust me, once you start, you’ll want to make all of them—and your home, friends, and future self will thank you.
Let’s roll up our sleeves and get crafty. Each idea is a complete, unique project with personality, texture, and that Pinterest-ready glow you crave. FYI, you’ll love how quick some of these come together—and how stunning they look in photos.
1. Miniature Herb Garden Planters With Polymer Clay Tiles

Imagine a tiny herb garden for your shelf—complete with glossy clay tiles that mimic real mortar and greenery that pops. These planters are tiny, charming, and perfect for starter plants or faux herbs.
Materials Needed
- Polymer clay in terracotta, olive green, and white
- Small terracotta pots or air-dry clay pots as base
- Bake-curing oven or heat source per clay instructions
- Fine sandpaper or textured rolling pin
- Clear glaze for a glassy finish
How to Make It
- Shape tiny tiles by rolling flat sheets and cutting squares; emboss with dimples for a tile-like look.
- Stamp leaf impressions into some tiles; color with subtle green washes after baking.
- Adhere tiles onto the outer surface of small planters, leaving tiny gaps like real tiles would have.
- Gloss the finished tiles for that polished, shop-bought vibe.
Pro Tips / Styling Ideas
- Mix tile finishes—glossy, matte, and lightly textured—for depth.
- Use a tiny potting of faux herbs for a photo-ready display.
Who would love it: Plant lovers and people who want a charming windowsill scene. Perfect for gifting a mini herb garden to a friend or just brightening your own kitchen shelf.
2. 3D Food Jewelry Charms Set
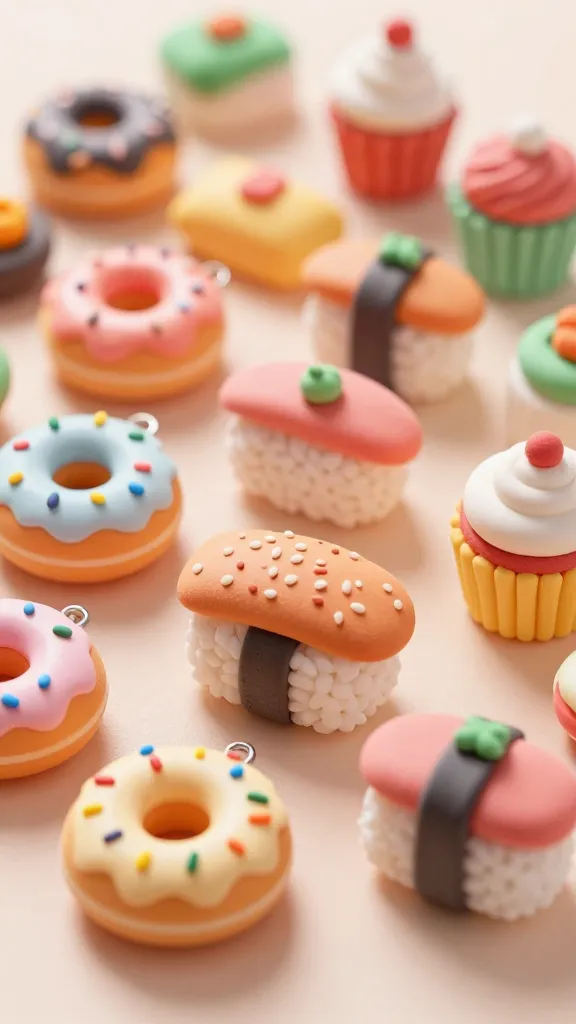
Delicious, whimsical, and totally wearable, this set of polymer clay food charms turns meals into merry accessories. Think donuts with sprinkles, sushi rolls, and cute cupcakes you can link into bracelets or necklaces.
Materials Needed
- Assorted polymer clay colors (pink, brown, white, yellow, etc.)
- Jump rings, eye pins, or bead cores
- Needle-nose pliers
- Gloss glaze or resin for finishing
How to Make It
- Craft tiny 3D versions of your favorite foods, using layered colors to create realistic cores (e.g., a donut with a hole and sprinkles).
- Bake according to clay instructions, then let cool fully.
- Attach charms to necklaces or bracelets with eye pins and jump rings.
Pro Tips / Styling Ideas
- Use metallic accents for a trendy look—gold rims on donuts or silver sesame seeds on sushi.
- Pair a couple of charms with simple beads for a playful everyday piece.
Who would love it: Fashion-forward friends, foodies, and anyone who wants a deliciously cute accessory set.
3. Polymer Clay Marbleized Vases
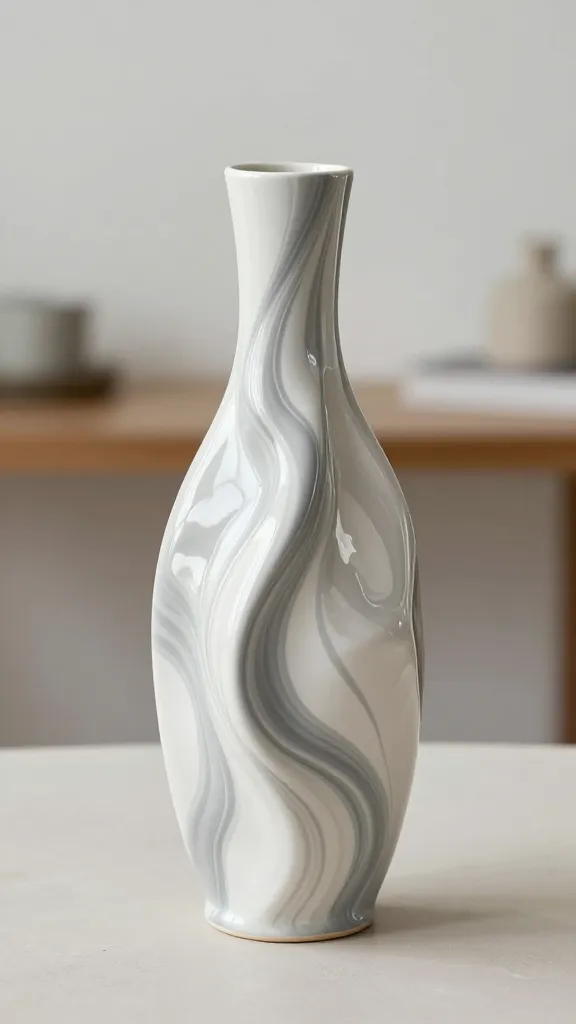
These statement vases feel sculptural and modern, yet are totally doable in an afternoon. The marbled swirls give each piece its own personality, making them perfect as desk decor or a centerpiece.
Materials Needed
- White and gray or colored polymer clays
- Vase form or hollowed cardstock core for support
- Rolling pin and tissue blade
- Gloss glaze for sealing
How to Make It
- Roll snakes of clay in different colors; twist and fold to create a marbled effect. Roll into a smooth cylinder.
- Wrap around your vase form, smoothing seams as you go.
- Finish with a light glaze to enhance the marble shine.
Pro Tips / Styling Ideas
- Vary the scale of the marbling for a dynamic look across several vases.
- Pair with simple greenery or dried stems for a chic tablescape.
Who would love it: Minimalists who crave texture and adults who want a bold, gallery-inspired home accent.
4. Tiny 3D Creature Planets Mobiles
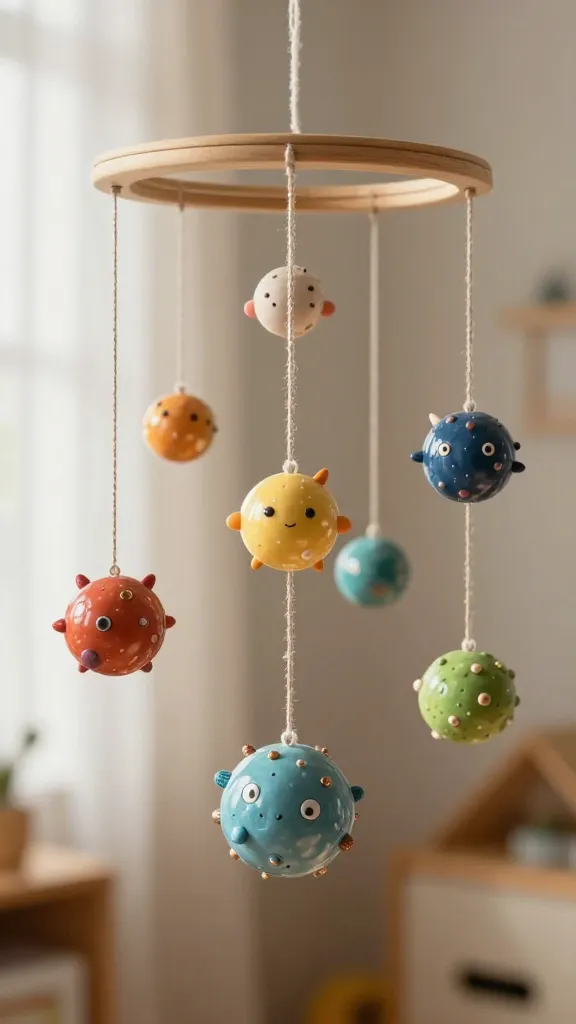
Whimsical planetary orbs float above a string, each planet a mini creature or textured landscape. It’s playful decor that doubles as a conversation starter and a perfect kids’ room charm.
Materials Needed
- Polymer clay in assorted colors
- Wire or sturdy thread for hanging
- Small metal hoops or embroidery hoops
- Sealant or glaze
How to Make It
- Shape tiny orbs; sculpt faces, spikes, or magical textures onto them.
- Attach to thread and string across a hoop, spacing evenly.
- Seal with glaze to preserve the colors and details.
Pro Tips / Styling Ideas
- Mix matte and glossy finishes for depth and interest.
- Hang in a nursery or playroom for a galactic, friendly vibe.
Who would love it: Kids, dreamers, and anyone who adores quirky, celestial decor.
5. 3D Textured Wall Tiles
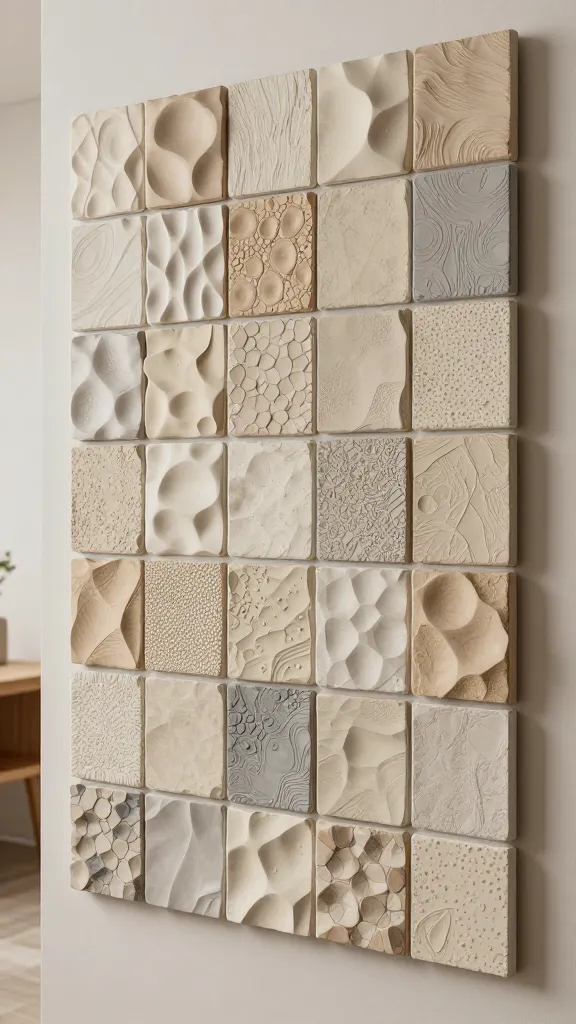
Turn a boring wall into a tactile artwork with 3D polymer clay tiles. Layer textures, from ripples to hex grooves, for a gallery-worthy feature wall that’s all you.
Materials Needed
- Polymer clay in your chosen palette
- Tile or cutting tools for texture
- Adhesive suitable for your wall surface
- Sealant or varnish
How to Make It
- Roll and shape small tile pieces, then carve textures with tools or stamps.
- Arrange on a backing board; bake if needed or adhere raw if using air-dry clay and seal later.
- Seal for protection and a crisp finish.
Pro Tips / Styling Ideas
- Create a color-block grid or an abstract flow across the wall.
- Frame a section with a slim profile for a modern display.
Who would love it: Design lovers, renters who want a removable, stylish focal point, and anyone craving tactile art.
6. Polymer Clay Stone Tiles With Integrated Coasters
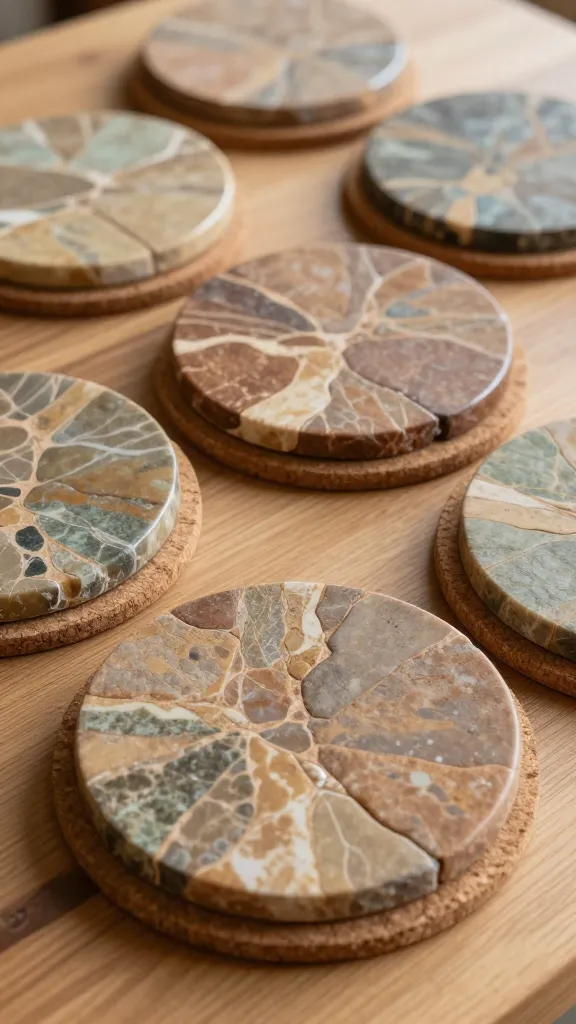
Rugged, earthy, and delightfully practical, these stone-like tiles double as coasters. Pair the natural textures with glossy edges to mimic real stone and keep surfaces pristine.
Materials Needed
- Earth-toned polymer clay shades
- Coaster backing or cork circles
li>Gloss sealant
How to Make It
- Roll and blend clay colors to create marbled, stone-like patterns.
- Shape into flat tile discs, slightly thick for durability.
- Attach to cork or backing; seal edges and tops for moisture resistance.
Pro Tips / Styling Ideas
- Group a few coasters on a tray for a rustic coffee-table display.
- Mix sizes for a dynamic set that still feels cohesive.
Who would love it: Hosts, coffee lovers, and anyone who enjoys functional decor with a natural vibe.
7. 3D Floral Hair Accessories
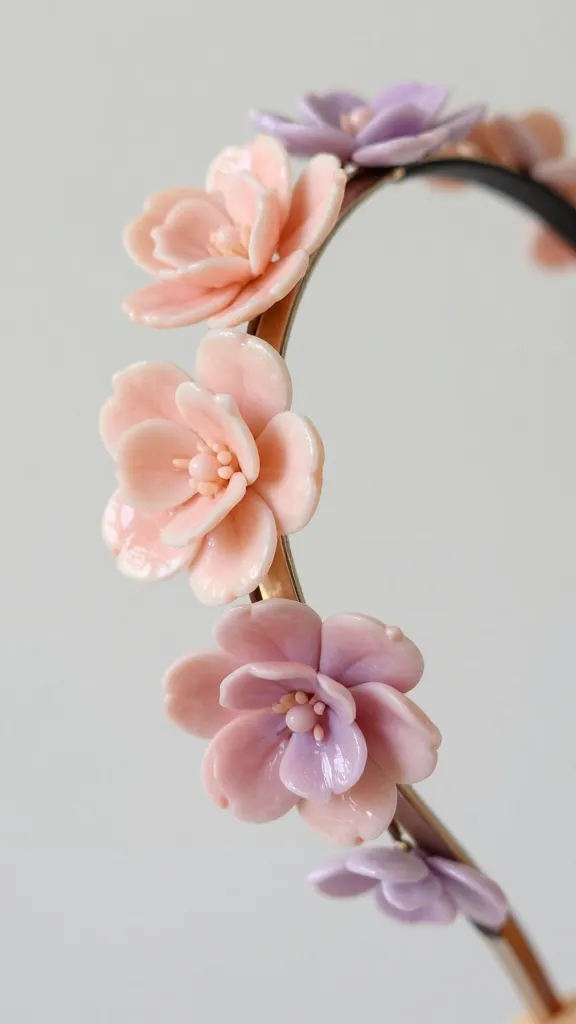
Bloom-powered hair clips, headbands, and pins crafted in polymer clay offer a fresh, whimsical touch to any hairstyle. The petals stay crisp, and the color range is limitless.
Materials Needed
- Polymer clay in your favorite flower colors
- Hairpin backs, clips, or headbands
- Glue suitable for clay and metal
- Glaze for a petal-like shine
How to Make It
- Sculpt tiny flowers with layered petals; bake and glaze.
- Attach to hair accessories with strong glue, ensuring a secure hold.
Pro Tips / Styling Ideas
- Create a mismatched bouquet of flowers for a playful look.
- Match clip colors to outfits for a thoughtful gift set.
Who would love it: Fashion-forward friends, brides-to-be, and anyone who loves a floral pop in their hair.
8. 3D Patterned Coasters With Embellished Edges
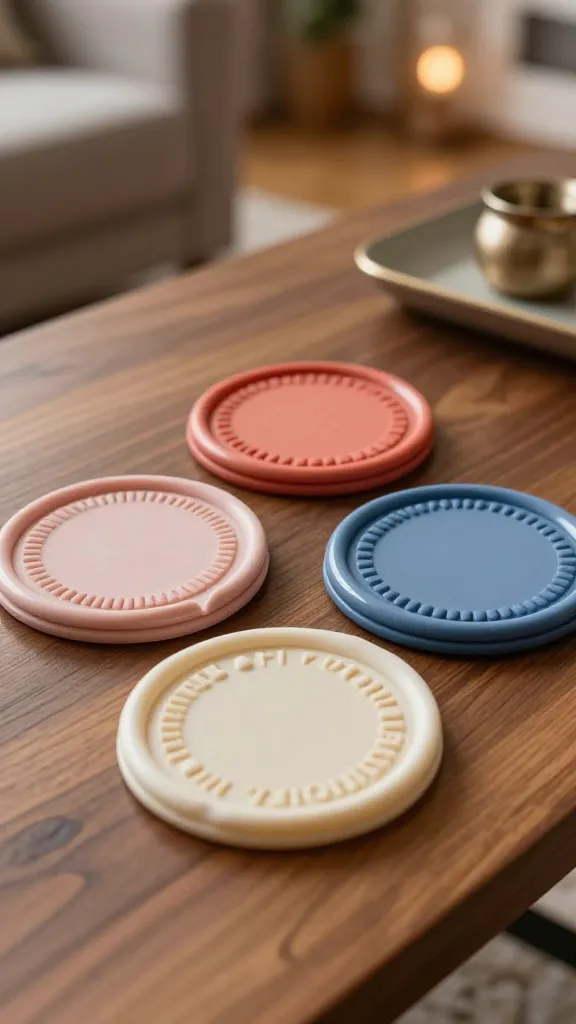
Coasters become tiny canvases with embossed patterns and sculpted accents. This set adds personality to any coffee table and protects surfaces in style.
Materials Needed
- Polymer clay in a palette of two to three colors
- Coaster bases or ceramic tiles
- Embossing tools or stamps
- Gloss glaze for protection
How to Make It
- Roll thin slabs and layer color bands; add embossed patterns along the edges.
- Layer onto a base, bake, and seal with glaze.
Pro Tips / Styling Ideas
- Coordinate sets with metallic accents for a chic desk display.
- Group different shapes together for a curated table setting.
Who would love it: Entertaining hosts, design lovers, and anyone who appreciates tactile, functional art.
9. 3D Fantasy Bookmarks With Tiny Bookmarks Within
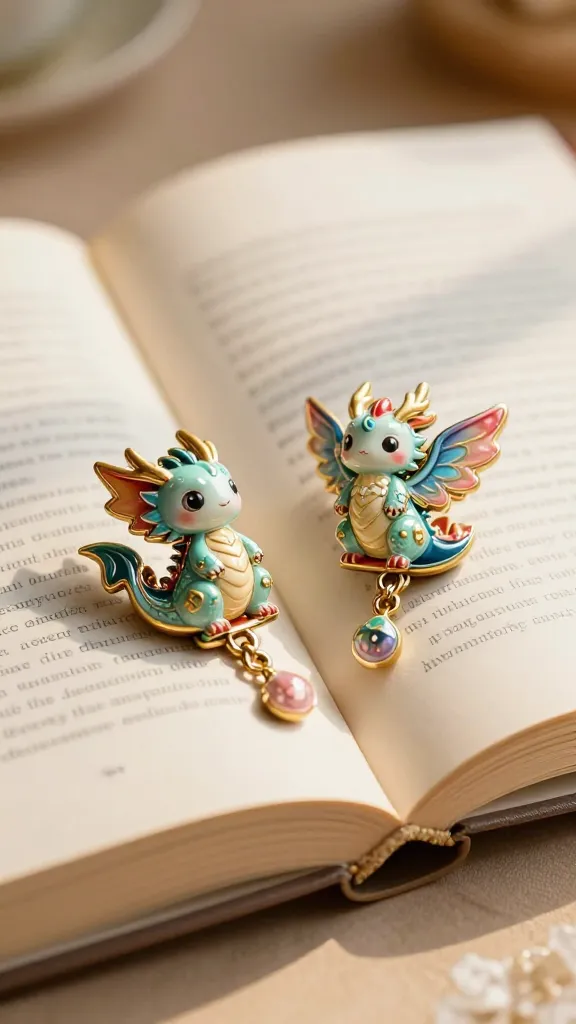
A pair of polymer clay bookmarks shaped like fantasy creatures or bookish icons sits inside a real book, making reading feel magical. They’re lightweight, durable, and incredibly cute.
Materials Needed
- Polymer clay in assorted colors
- Bookmark bases (card or thin metal pieces)
- Thin wire or eye pins
- Sealant
How to Make It
- Sculpt small creatures or magical shapes to anchor the bookmark.
- Attach to a slim base, then thread through the book page with a cute dangling charm.
Pro Tips / Styling Ideas
- Use contrasting colors to make the bookmark pop on the page.
- Include a tiny back panel with a quote embossed into clay for a personalized touch.
Who would love it: Book lovers, students, and anyone who wants a whimsical reading companion.
10. 3D Jewelry Dishes With Gel-Like Surface
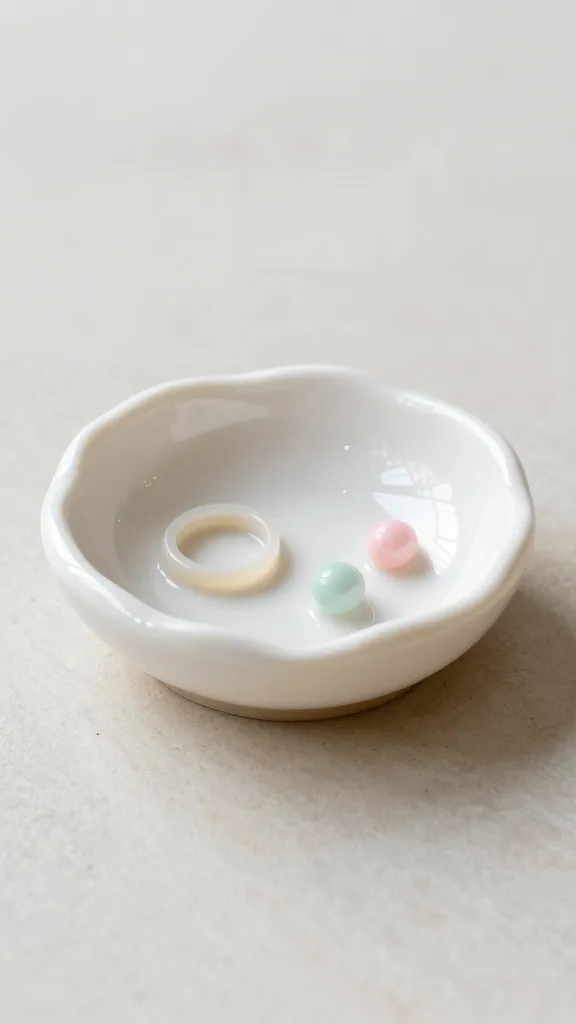
These small, sculpted dishes hold rings and earrings while looking like a piece of modern sculpture. The gel-like surface catches light and elevates everyday jewelry storage.
Materials Needed
- Polymer clay in milky white and soft pastels
- Small disc molds or free-form shaping tools
- Gloss glaze or resin for a glossy finish
How to Make It
- Shape shallow bowls with a gentle bowl curve; smooth the edges.
- Bake, then seal with a glossy glaze for a glassy, water-like surface.
Pro Tips / Styling Ideas
- Dust with a touch of fine glitter for a moonlit sheen.
- Place on a dresser alongside a few favorite rings for a curated display.
Who would love it: Jewelry enthusiasts, organizers, and anyone who wants a stylish catch-all piece that doubles as decor.
Conclusion
There you have it—10 completely unique and distinct craft ideas using polymer clay that blend fun, creativity, and practical charm. Pick one to start or dive into all ten for a month-long crafting spree. The best part? Each project scales from simple to intricate, so you can tailor the challenge to your mood. Get crafting, and watch your space brighten with handmade personality.