10 Trash to Treasure Craft Ideas Painting Thrift Flips: Quick Wins
Ready to turn everyday junk into show-stopping decor? These 10 trash to treasure craft ideas prove you don’t need to spend big to get big style. Each project is fun, doable, and totally Pinterest-worthy.
Trust me, you’ll be surprised how easy it is to give something destined for the curb a new lease on life. FYI, the best part is the thrill of the flip—and the compliments that follow.
1. Upcycled Tire Planter with Painted Patterns
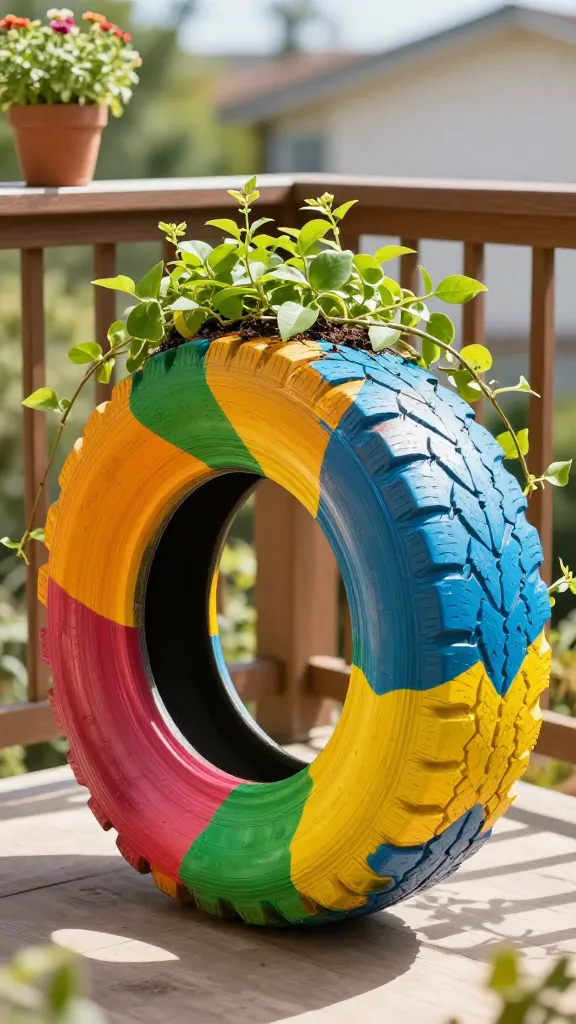
Imagine a bright, geometric tire planter gracing your balcony or porch, bursting with trailing vines. This flip is bold, budget-friendly, and endlessly customizable.
Materials Needed
- Used tire (spotless or cleaned)
- Exterior acrylic paints in your favorite colors
- Painter’s tape
- Polyurethane sealer (outdoor)
- Soil and a small herb or flowering plant
How to Make It
- Wash the tire well and let dry. Sand rough spots if needed.
- Apply a base coat and let dry completely.
- Use painter’s tape to create geometric patterns, then paint sections in contrasting colors.
- Peel off tape, touch up edges, and seal with two coats of outdoor polyurethane.
- Fill with soil and plant.
Pro Tips / Styling Ideas
- Pair with succulents for a drought-friendly display or mix herbs for a kitchen garden vibe.
- Place in sunlit corners or near entry doors for a pop of color.
Who’s going to love this? Garden lovers and urban balcony dwellers who crave cheerful, low-cost decor.
2. Vintage Window Frame Photo Wall Collage
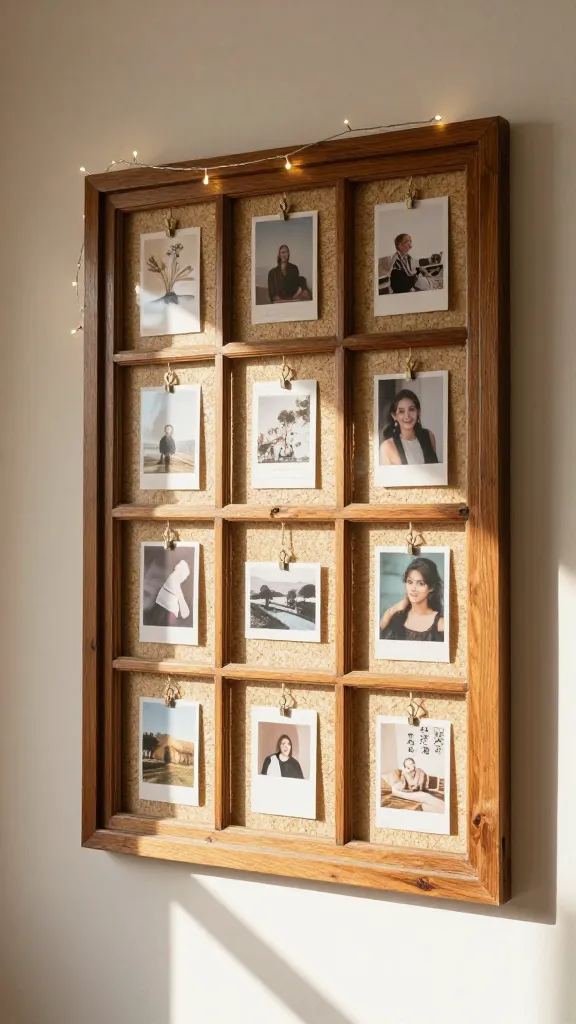
Picture this: a sunlit wall adorned with a rescued window frame, each pane a tiny photo nook. It’s nostalgic, airy, and totally personalized.
Materials Needed
- Old window frame with multiple panes
- Rattan, fabric, or cork backing for panes
- Assorted photos or printed mini art
- Twine or small clips
How to Make It
- Clean the frame, remove any glass if safe, and sand rough edges.
- Line each pane with backing material and attach photos or art.
- Hang with a sturdy wall hook and add a few fairy lights for glow.
Pro Tips / Styling Ideas
- Mix black-and-white with color photos for visual contrast.
- Swap in seasonal prints to keep the look fresh year-round.
Who’s it for? Nostalgia buffs, gallery-wall fans, and anyone who loves a cozy, storytelling space.
3. Tin Can Lanterns with Emerald Accents

Shiny, metallic, and unexpectedly chic—these tin can lanterns are perfect for twilight dinners or patio ambiance. The green sheen gives them a jewelry-like glow.
Materials Needed
- Empty tin cans (labels removed)
- Hammer and nail for dot pattern or a decorative punch
- Exterior spray paint or acrylics in emerald
- Tea lights or LED candles
- Twine or metal handles
How to Make It
- Punch holes in decorative patterns around the can.
- Paint with emerald tones and seal if used outdoors.
- Attach a handle or hang with twine; place a candle inside.
Pro Tips / Styling Ideas
- Cluster a few at different heights for a dramatic tablescape.
- Line a walkway with them for a magical effect.
Who will love this? DIY enthusiasts who adore glow-y, glass-free lanterns and sustainable spotlight moments.
4. Old Suitcase Storage Converter
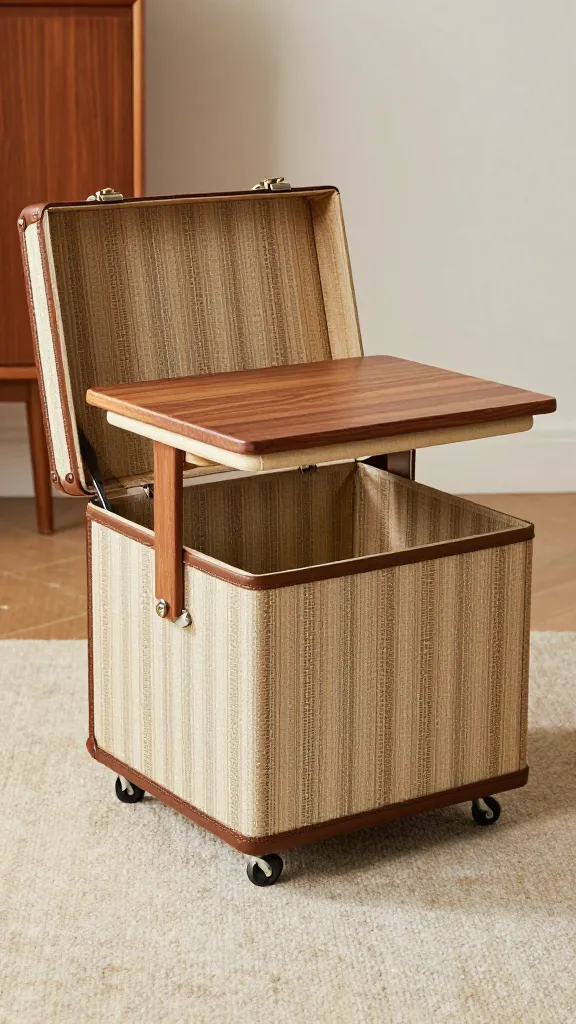
Turn a worn suitcase into a chic storage box with a lid that doubles as a side table. It’s vintage vibes with modern practicality.
Materials Needed
- Mid-century or vintage suitcase
- Plywood or sturdy cardboard for top and base
- Foam padding and fabric or wallpaper cover
- Rubber feet or small casters
How to Make It
- Cut top panel to fit inside or atop the suitcase lid.
- Line with padding and cover with fabric or wallpaper to suit your space.
- Attach legs or casters for stability and height.
Pro Tips / Styling Ideas
- Use as a coffee table in living rooms or as a vanity in bedrooms.
- Inside, stash throws, magazines, or remote controls for a tidy look.
Who’s it for? Fans of vintage furniture makeovers and clever storage solutions with a story.
5. Ceramic Tile Coaster Swap: Painted Tile Mosaics
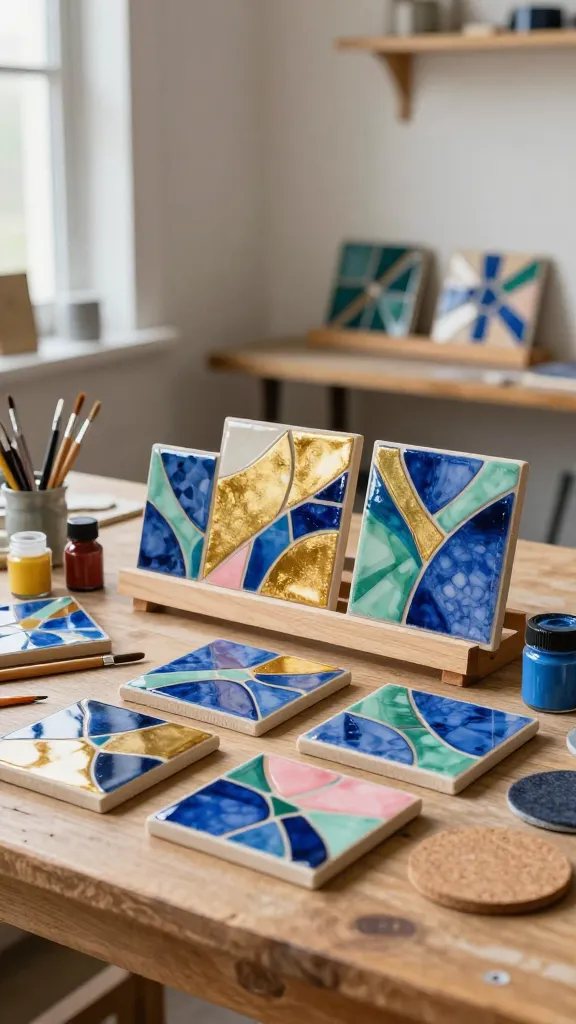
Grab thrifted ceramic tiles and craft a mosaic set that doubles as coasters or wall tiles. It’s artsy, tactile, and surprisingly easy to customize.
Materials Needed
- Unused ceramic tiles (assorted shapes)
- Acrylic paints or glaze paints
- Sealant or clear epoxy for coaster surfaces
- Felt pads or cork backing
How to Make It
- Sketch a simple mosaic design on each tile and paint with bold colors.
- Seal with a protective topcoat; add backing to prevent scratching tables.
- Optionally arrange as wall art or a mini coaster set.
Pro Tips / Styling Ideas
- Coordinate palettes with your dining area or kitchen backsplash.
- Arrange in a grid for a cohesive gallery look.
Who will love this? Color lovers and DIY hosts who want a practical, decorative touch for tabletops and countertops.
6. Upcycled Lamp Base from a Vintage Glass Bottle
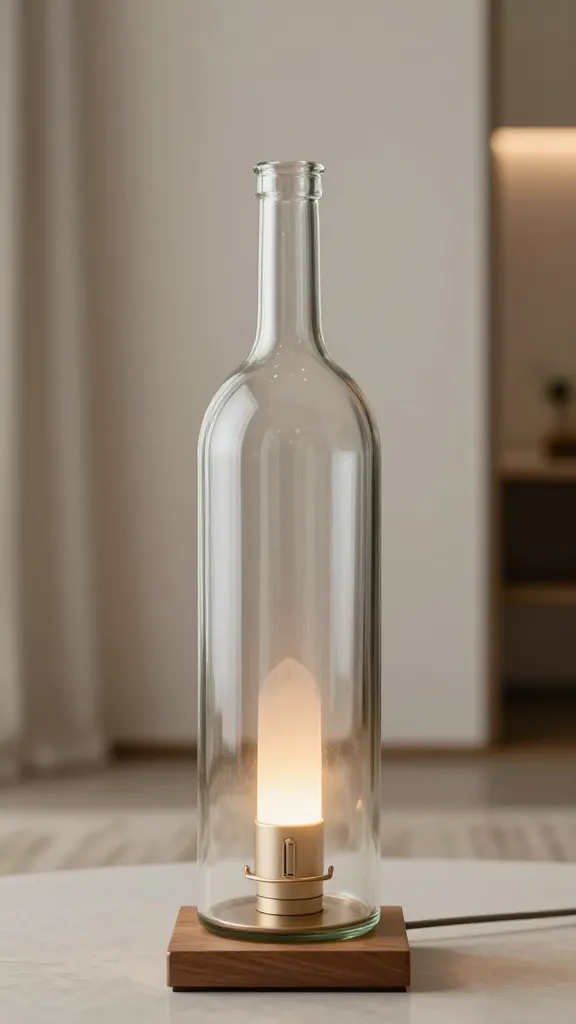
A tall, slender lamp base from a rescued bottle brings a touch of boutique hotel glam to any room. Soft lighting + reused object = instant mood setter.
Materials Needed
- Tall glass bottle or decanter
- Lamp kit (socket, cord, switch)
- Wooden or metal stand if needed
- Spray paint or decorative wrap (optional)
How to Make It
- Clean and dry the bottle; install the lamp kit following safety guidelines.
- Paint or wrap the bottle for a finished look, then slip it into a stand or base.
- Plug in and cozy up with warm-toned bulbs.
Pro Tips / Styling Ideas
- Pair with a linen lampshade for a soft, elegant glow.
- Place on a side table or bedside table for understated drama.
Who’s this for? Night-in lovers, romantic bedrooms, and anyone who appreciates repurposed elegance.
7. Denim Tote Turned Wall Organizer
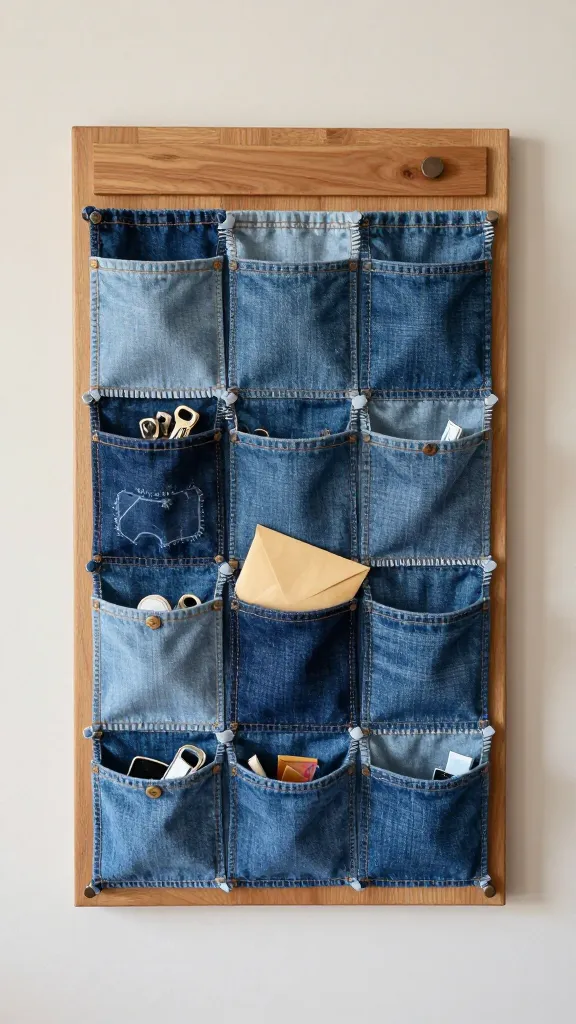
Old denim becomes a stylish wall organizer with pockets that store mail, keys, or tiny treasures. It’s casual, tactile, and irresistibly DIY-friendly.
Materials Needed
- Old denim jeans or jacket
- Fusible web or fabric stiffener
- Ribbon, buttons, patches for embellishment
- Backboard or wooden plaque for mounting
How to Make It
- Cut out pocket sections and stiffen to hold items.
- Arrange on a plaque and sew or glue in place. Add decorative touches.
- Mount on wall with hardware suitable for weight.
Pro Tips / Styling Ideas
- Use as a mail sorter in entryways or a small accessory wall in bedrooms.
- Mix denim shades with burlap for a rustic chic vibe.
Who will love this? Organizers, upcycle enthusiasts, and anyone who loves casual, cozy textures.
8. Painted Birdhouse Bouquet Holder

Turn a thrifted wooden birdhouse into a whimsical centerpiece that doubles as a bouquet holder or desk decor. It’s charming, playful, and totally photogenic.
Materials Needed
- Plain wooden birdhouse
- Acrylic paints in pastel hues
- Floral foam or foam plug
- Fresh or faux flowers
How to Make It
- Paint the birdhouse in a palette you love. Let dry.
- Fill with floral foam and arrange stems through the openings or from the roof.
- Place on a table or hang as a sweet wall piece.
Pro Tips / Styling Ideas
- Change the flowers seasonally for an ever-evolving centerpiece.
- Pair with soft textiles for a cottage-core vibe.
Who’s it for? Garden lovers, lovers of whimsy, and anyone wanting a delicate statement piece.
9. Audio-Visible Journal Box: Wooden Desk Organizer
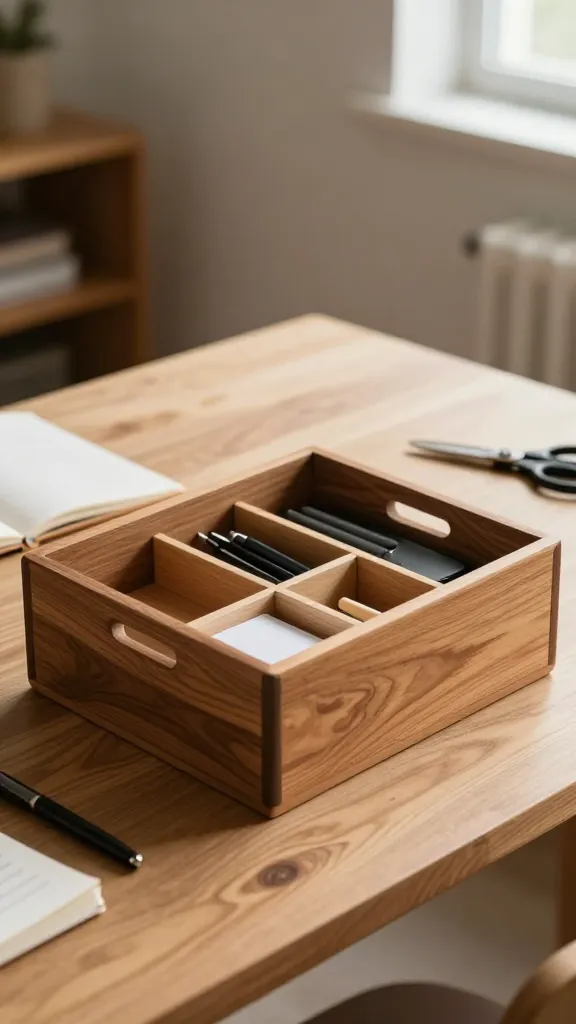
A thrifted wooden box becomes a multitasking desk organizer that hides clutter and adds warm, natural vibes to your workspace.
Materials Needed
- Wooden box or crate
- Chalk paint or stain
- Small labeled compartments (dividers, cardboard, or thin wood)
- Mini screws or strong adhesive
How to Make It
- Paint or stain the box; let dry.
- Create dividers to separate pens, papers, and gadgets.
- Label each section for quick access.
Pro Tips / Styling Ideas
- Keep it on a desk or sideboard for a tidy, creative workspace.
- Include a small tray for charging cables and accessories.
Who will love this? Remote workers and students who crave organization with a warm, woodsy touch.
10. Ceramic Pot Pendant Lights from Thrifted Planters
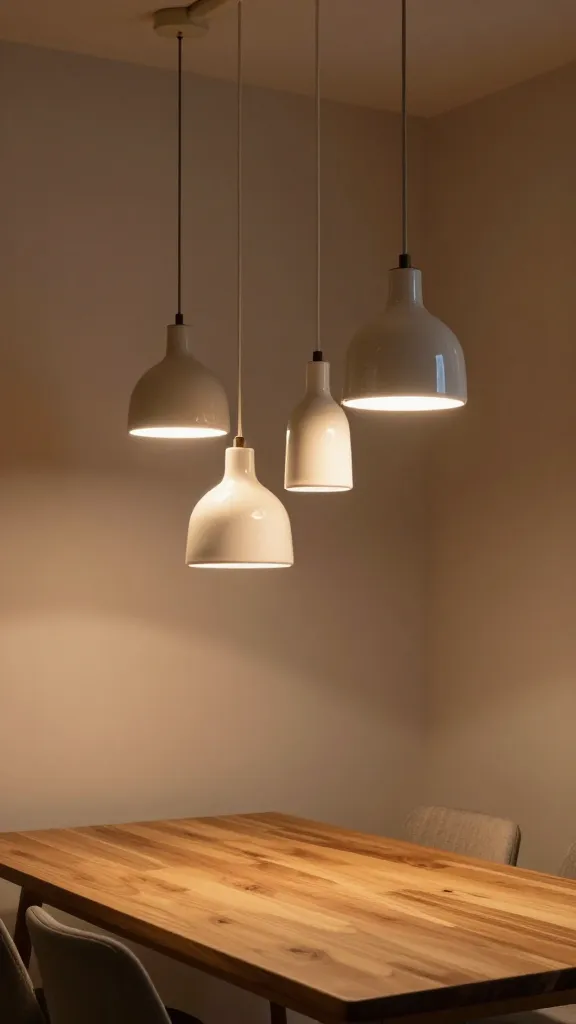
Repurpose ceramic pots into pendant lights that drop a soft glow over a dining nook or kitchen island. Retro shapes, modern glow—the best combo.
Materials Needed
- Small ceramic planters or bowls
- Pendant light hardware and fixture cord
- Dremel or drill for wiring hole
- Light bulbs (soft white)
How to Make It
- Drill a hole for the cord and thread through the ceiling canopy.
- Attach the ceramic piece to the fixture and install a bulb.
- Hang at varying heights for a playful cluster, or solo above a table.
Pro Tips / Styling Ideas
- Choose pale pastels for a breezy look or bold hues for a statement.
- Group with natural textures—woven shades, wood, and linen.
Who’s this for? Lighting lovers, home stylists, and anyone who loves a warm, artisanal glow.
Conclusion
There you go—a full lineup of 10 trash to treasure craft ideas that prove thrift flips can be stunning, practical, and totally share-worthy. Start with one that speaks to your space, or mix and match for a cohesive, eclectic vibe. The fun is in the flip—and the compliments are a delicious bonus. Ready to dive in and craft your own rescue-ready treasures?