11 Aesthetic Paper Crafts for Teens to Decorate Their Bedroom: Chic Diy Finds
Ready to level up your room without breaking the bank? These 11 aesthetic paper crafts are fun, breezy, and totally share-worthy. Trust me, your walls will thank you—and so will your future Instagram feed.
Let’s dive into a dozen-decorating-good-vibes sprint of DIYs you can tackle this weekend. Each idea is distinct, totally unique, and designed to be as stylish as it is doable. Seriously, you’ll love this.
1. Crystal-Glow Paper Prism Wall Hangings
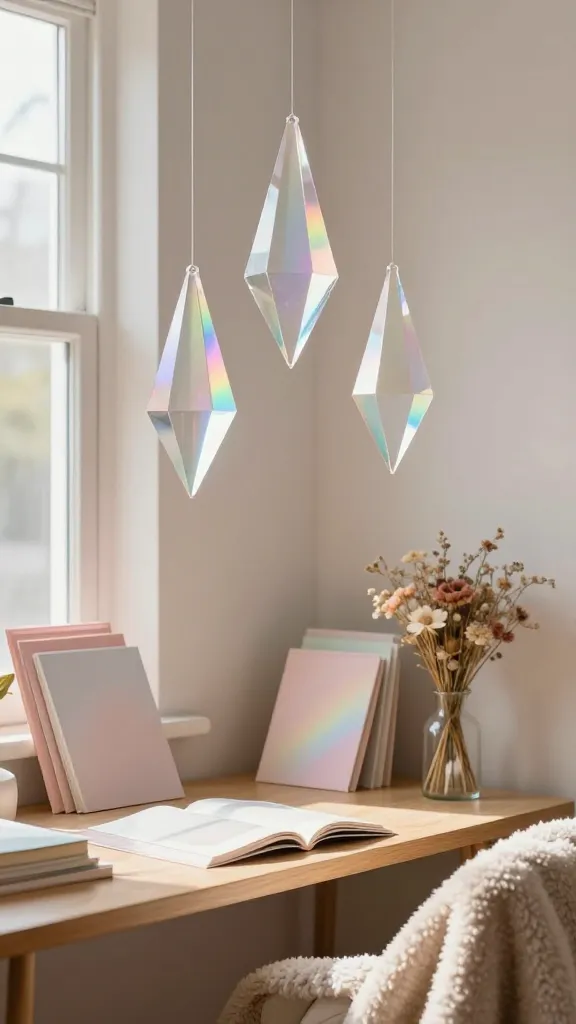
Picture a trio of translucent prisms catching the light, casting soft rainbows across your favorite reading nook. This craft feels magical but is surprisingly simple. The finished piece looks chic in a corner or above a desk, instantly elevating the vibe.
Materials Needed
- Colored translucent paper or vellum in pastel tones
- Clear fishing line or transparent thread
- Cardboard for backing
- Hole punch
- Scissors
- Ruler
How to Make It
- Cut long, narrow triangles from the translucent paper. Each prism should taper to a point for that crystal look.
- Punch a hole at the wide end of each triangle. Thread them onto fishing line, spacing evenly.
- Attach the line to a lightweight backing board or a wooden dowel so you can hang it like a mobile.
Pro Tips / Styling Ideas
- Layer three prisms at different heights for depth.
- Hang near a window; watch the prisms catch the sunlight and scatter little rainbows.
Who would love it? Anyone craving a dreamy, ethereal touch in their room—great for a desk corner or above a bed frame. FYI, it’s super flexible for color tweaks.
2. Bold Monochrome Wall Mash-Up Gallery Cards
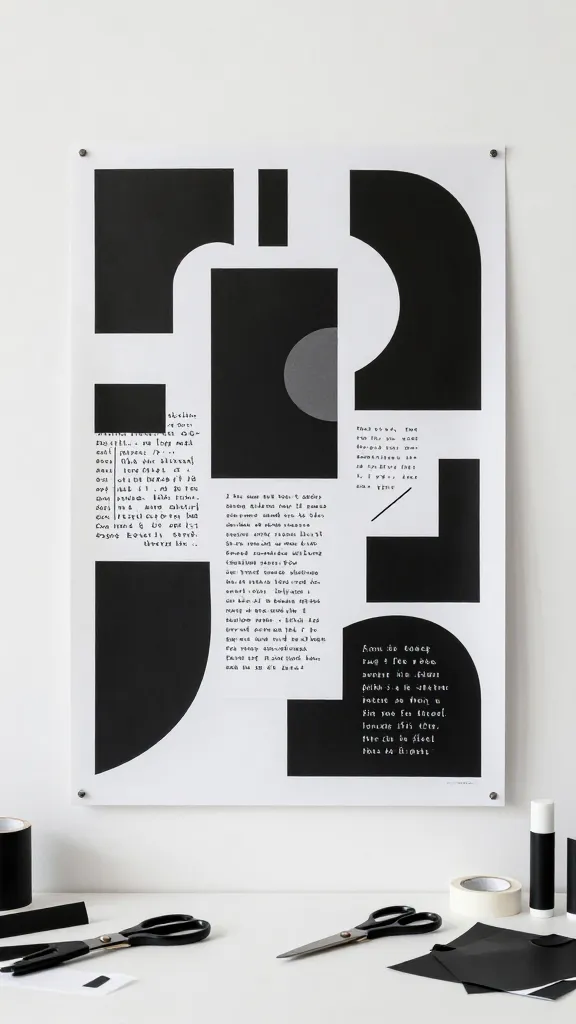
Think: a gallery wall that feels like a clean, editorial print spread. This project uses bold black-and-white cutouts layered on a poster board to create a cohesive, art-gallery vibe.
Materials Needed
- Black and white cardstock
- Scissors or craft knife
- Glue sticks or double-sided tape
- Washed poster board or a large cut canvas
How to Make It
- Cut geometric shapes, quotes, and doodles in black and white. Aim for variety in shape but unity in color palette.
- Arrange on the backing board first, then glue in place to keep alignment clean.
- Add a couple of small gold or silver accents if you’re feeling fancy.
Pro Tips / Styling Ideas
- Leave a clean, white margin around each piece for a modern, editorial look.
- Frame everything with a single-color frame to amplify cohesion.
Who would love it? Minimalists and trendsetters who want a smart, high-contrast focal wall. It’s a perfect DIY upgrade for dorm rooms or small spaces.
3. Folded Paper Rose Garland

Soft, sculptural, and impossibly delicate—this garland feels like a breath of romantic whimsy. The finished piece drapes beautifully over a headboard, door frame, or window sill.
Materials Needed
- Colored origami or craft paper in blush, blush-pink, or cream
- Scissors
- Floral wire or thin craft wire
- Glue or double-sided tape
- Twine or thin ribbon for stringing
How to Make It
- Fold each sheet into a rose shape using a simple spiral fold technique. Glue the base to secure.
- Attach several folded roses to a length of wire, spacing evenly.
- String the wired roses along twine for hanging versatility.
Pro Tips / Styling Ideas
- Mix sizes for a natural clump look or graduate color intensity along the garland.
- Hang above a bed or across a mirror for a soft, romantic glow.
Who would love it?Romantic dreamers and anyone who wants a touch of nature without real petals. Perfect for spring refreshes or a cozy corner in a teen bedroom.
4. Origami Flora Wall Panels
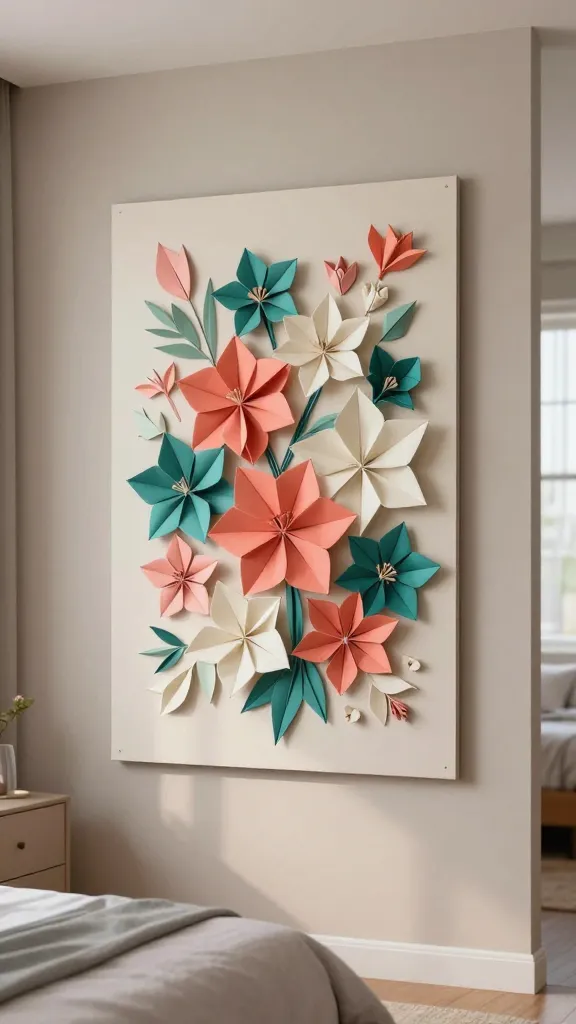
Three-dimensional origami blooms create a lush, botanical vibe on a plain wall. This project feels like adult decor but is delightfully doable, even for beginners.
Materials Needed
- Colorful origami paper in two complementary colorways
- Adhesive putty or double-sided tape
- Cardboard for panel backing
How to Make It
- Fold several duplicate origami flower shapes (you can use a simple crane or blossom pattern).
- Arrange into a loose floral cluster on the panel backing, then secure with putty or tape.
- Mount the panel on the wall with even spacing around each bloom.
Pro Tips / Styling Ideas
- Use a single color family with accents to keep it cohesive.
- Vary the size of blooms for a more natural garden effect.
Who would love it? Aesthetic planners and plant lovers who crave a tactile, 3D statement without real plants. Great for walls that feel empty.
5. 3D Paper Heart Terrariums
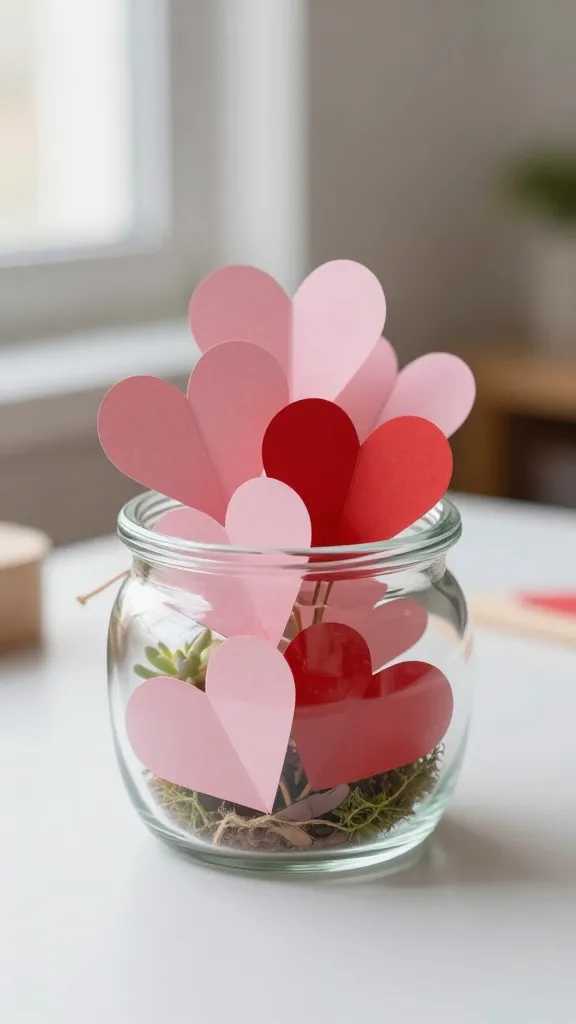
Three-dimensional paper hearts housed in a glassy terrarium vibe bring a playful, romantic mood to any desk shelf or nightstand. It feels whimsical yet polished, like a tiny sculpture you can carry into any mood.
Materials Needed
- Colored paper in pinks and reds
- Clear plastic or glass jars or small transparent bowls
- Thin cord or twine
- Glue or double-sided tape
- Optional: tiny faux succulents or moss for interior accents
How to Make It
- Roll and glue paper to create compact, hollow heart shapes with a cutout center.
- Place the hearts inside the small jars, stuffing a bit of moss or a faux plant for realism.
- Seal or leave open for airflow and a cute, floating display vibe.
Pro Tips / Styling Ideas
- Group three jars at varying heights for a playful still-life.
- Hang as a vertical trio or place on a shelf beside a stack of books.
Who would love it? If you’re into cute, collectible displays and tiny sculptures. A sweet gift or a personal love-note-in-a-jar vibe.
6. Textured Paper Dandelion Clocks
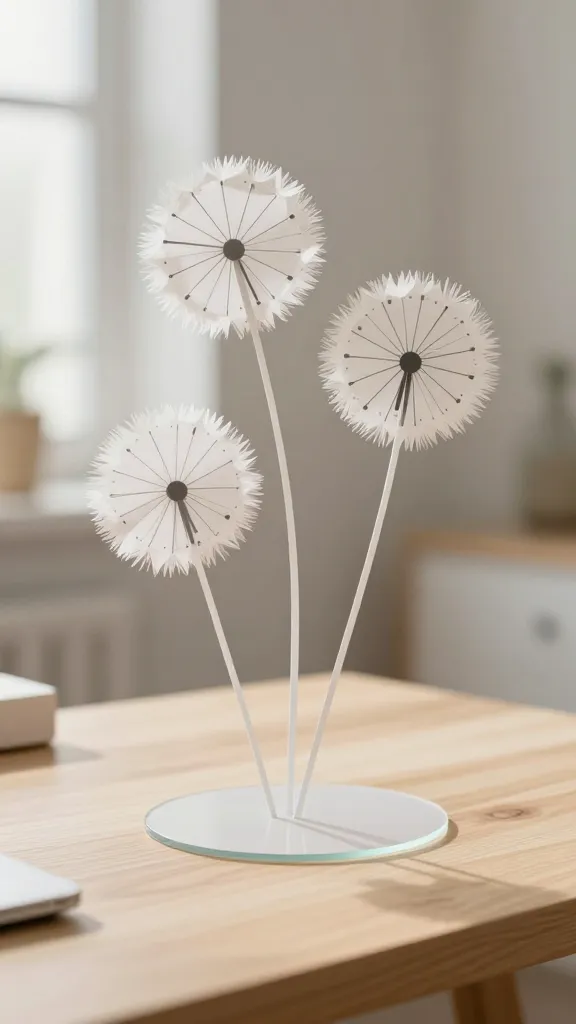
Blast from the past meets modern desk aesthetics with paper dandelion clocks. They look airy, add texture, and float above your workspace like a gentle breeze—without shedding any fluff.
Materials Needed
- White or light-colored cardstock
- Black ink or marker for clock face details
- Clear glass or plastic clock-base shapes (or make your own circular frames)
- Thin thread for “clock stems”
How to Make It
- Cut circle clock faces from cardstock and draw minimal, modern numbers or tick marks.
- Attach a short thread to the back as a stem, then glue a tiny paper silhouette of puffball dandelions.
- Mount in a shallow frame or on a light-weight hanger for a floating look.
Pro Tips / Styling Ideas
- Use subtle grayscale tones for a chic, minimalist mood.
- Pair with a slim white frame for a gallery-feel display.
Who would love it? Clock-lovers and fans of clean lines who want a whimsical focal point without clutter. Great above a desk or reading chair.
7. Coral Reef Oceanic Mobile
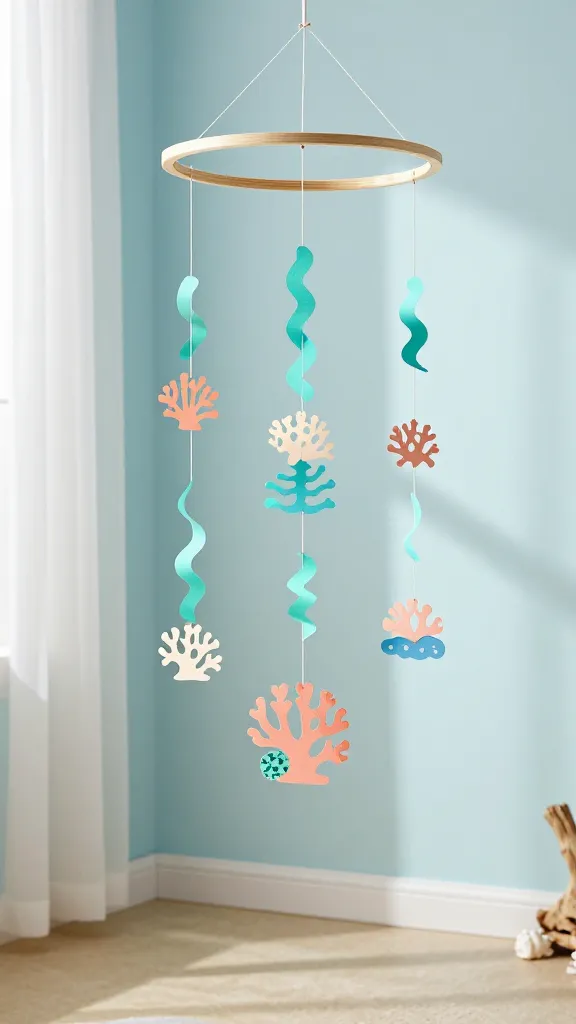
Bring a splash of sea-side color to your room with an underwater-inspired paper mobile. Coral shapes, shells, and waves of aqua and peach feel breezy and fresh, perfect for a coastal-tinged bedroom.
Materials Needed
- Colored craft paper in blues, teals, peach
- Metal or wooden hoop for the mobile frame
- Thread or fishing line
- Glue
How to Make It
- Cut wavy strips and coral shapes from paper; secure them at varying heights on strings.
- Attach strings to the hoop, balancing the pieces around it to form a mobile.
- Hang from the ceiling where light can filter through the papers for a shimmering effect.
Pro Tips / Styling Ideas
- Keep the color palette cool and cohesive to maximize serenity.
- Move from a single center point to a more balanced spread for visual interest.
Who would love it? Ocean lovers, dreamers who crave a soft, drift-away vibe. It’s a great conversation piece for dorms or small bedrooms.
8. DIY Paper Palettes: Mood Board Wall Art
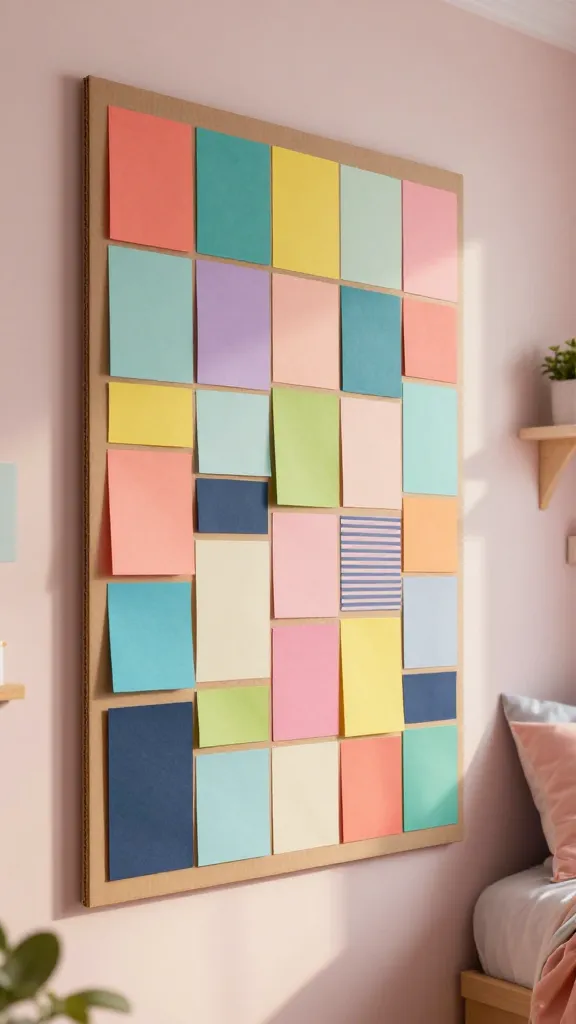
A cheerfully artsy mood-board vibe—crafted entirely from paper—lets you curate your current inspo into a permanent wall feature. It’s like posting your vibe, but on a wall you can touch.
Materials Needed
- Colored scrapbook paper or construction paper
- Cardboard backing
- Adhesive spray or glue sticks
- Scissors and a craft knife
How to Make It
- Cut out rectangular “tiles” in varying sizes and colors to mimic a mood board grid.
- Arrange on the cardboard backing in an intentional, collaged pattern, then glue in place.
- Optional: add magnetic strips to hang on a metal surface or frame it with a thin border for a polished look.
Pro Tips / Styling Ideas
- Pick a color story (neon accents or soft pastels) and align tiles to it.
- Update it seasonally by swapping a few tiles with new colors or quotes.
Who would love it? Creatives who like to curate inspiration and favorite quotes. It’s a living wall—updateable, adaptable, and totally you.
9. Paper Clip Wall Ornaments
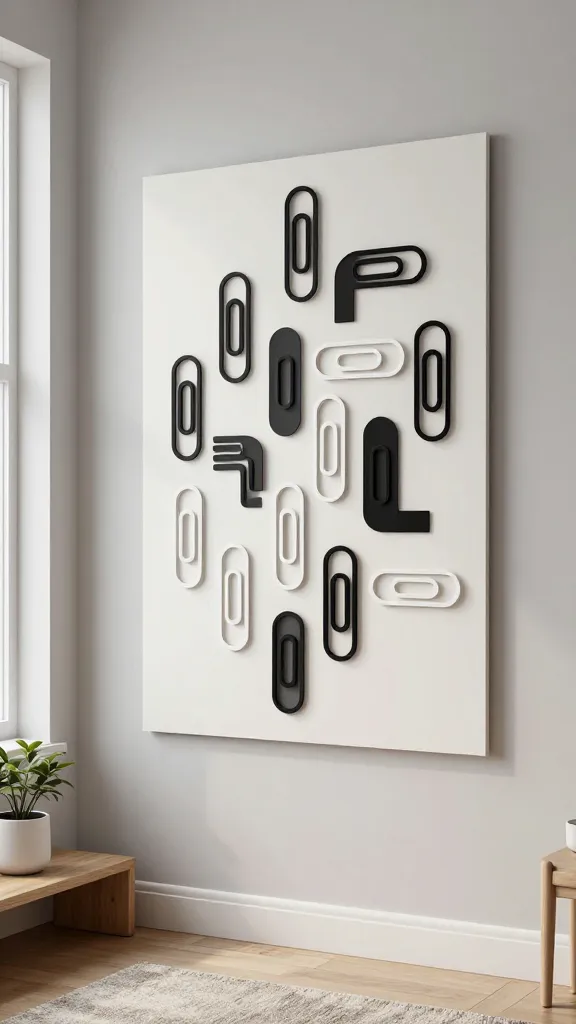
Sleek, minimal, and oddly satisfying to assemble, these paper clip-inspired shapes are a great way to add architectural lines to your space. They look crisp in a monochrome palette or a bold two-tone combo.
Materials Needed
- Colored cardstock or thin poster board
- Scissors or craft knife
- Adhesive or double-sided tape
- Fine point marker for detailing
How to Make It
- Cut out curved or angular shapes reminiscent of paperclips, varying sizes for interest.
- Assemble in a loose cluster on a backing board, attaching with small dabs of glue.
- Hang as a single large motif or several smaller clusters along a wall.
Pro Tips / Styling Ideas
- Stick with a high-contrast palette for a crisp, modern effect.
- Pair with a matte black frame or leave unframed for a contemporary edge.
Who would love it? Fans of geometric design and clean lines who want a statement without weighty installation. Great for hallways or behind a desk.
10. Rainbow Pop-Up Card Accent Panels
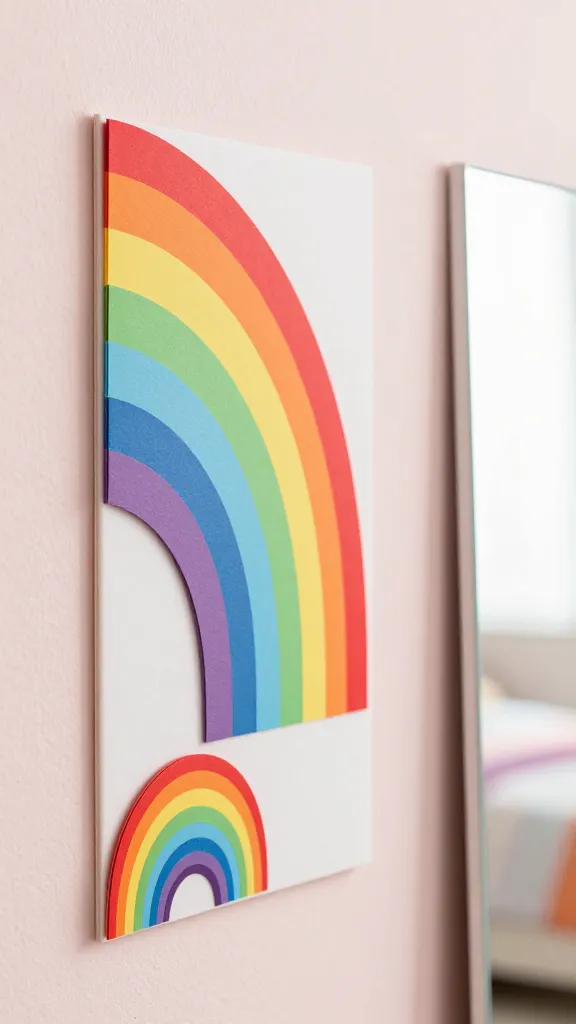
Turn everyday cards into elevated wall art with mini pop-up panels. This playful idea adds dimension and a pop of color without much fuss or space.
Materials Needed
- Bright cardstock in a spectrum of colors
- Double-sided tape or glue
- Thin mounting boards or foam core
How to Make It
- Cut cards into small panel shapes and fold into a gentle “pop” to stand away from the frame.
- Glue onto the mounting board in a rainbow gradient or a specific color sequence.
- Hang as a mini gallery or near a mirror to reflect light and color.
Pro Tips / Styling Ideas
- Keep the panel edges clean and crisp for a polished look.
- Rotate colors seasonally to refresh the mood.
Who would love it? Color lovers who enjoy a playful, optimistic vibe. It’s a booster shot of cheer for any teen space.
11. Paper Lantern Collage Lampshade
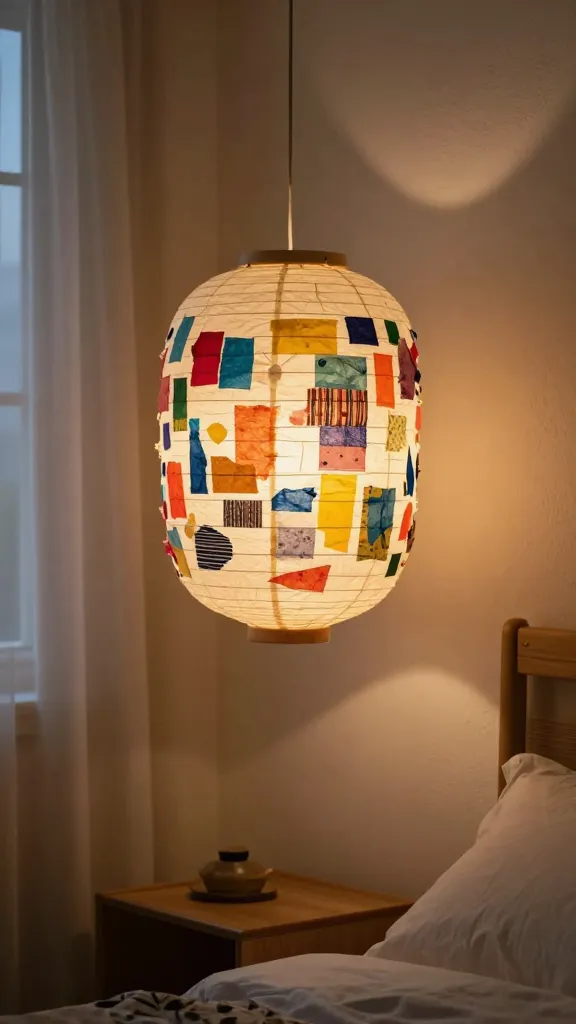
Light up your nights with a handmade paper lantern collage that casts soft, cozy shadows. It’s a practical decor piece that adds texture and warmth to late-night study or hangout sessions.
Materials Needed
- Plain paper lantern or a DIY paper lantern kit
- Colored tissue paper or lightweight patterned paper
- Glue and scissors
- String or cord for hanging the lantern
How to Make It
- Tear or cut colorful paper into small shapes and glue onto the lantern’s surface in a collage pattern.
- Let dry completely before turning on the light to avoid overheating.
- Hang in a corner where the lantern can glow softly across the walls.
Pro Tips / Styling Ideas
- Coordinate with the room’s color palette for a cohesive look.
- Pair with a simple, clean shade to keep the glow balanced and not overwhelmed.
Who would love it? Night-lit dreamers who want a warm ambiance and a unique, handmade touch. A lovely feature above a reading chair or beside a bed.
Conclusion
There you have it—11 completely unique, totally doable paper crafts that transform a teen’s bedroom into a creative, cohesive space. Each project is designed to be fun, easy to customize, and seriously Pinterest-worthy. Pick one to start, or tackle them all to craft a personal gallery that screams you.