11 Necklace Craft For Kids
11 Necklace Craft For Kids
If you are looking for a fun and creative craft project for kids, then this list is for you.
We have compiled a list of 11 necklaces that are perfect for little hands to make!
These necklaces will keep your kids’ busy while also learning about how to create something with their own two hands.
Ribbon Necklace Craft
Materials needed
- 1 piece of ribbon, about the width of your child’s wrist.
- Glue or tacky glue (or something similar).
You can find these in craft stores and at office supply stores.
It is important to use glue that will stay in place for a long time, especially when kids are playing with it! We recommend using glue that dries clear so you can see the necklace later on.
How to make it:
Cut one end of your ribbon into two equal pieces (so you have two equal lengths).
Fold each piece into halves and then fold them again so they’re folded in fourths (like folding sheets). This will give you four small pieces of ribbon with creases running along the length of each piece.
Pinch one end together slightly further down than midway down each strand so there’s enough room for three fingers inside; this makes sure that when you pull on both ends equally, all four strands come out straight instead of twisted around each other like spaghetti strands would do if left untouched!
Bubble Necklace For Kids
Materials needed
- 2 paper plates
- A piece of yarn or string (for hanging)
- Scissors
- Acrylic paint in various colors
Instructions.
First, cut out a variety of shapes from the paper plates. You can make circles, squares, triangles, and more! Next, paint each shape with a different color. When the paint is dry remove the plate from inside your bubble necklace by pulling it out gently.
Thread your bead onto your string or yarn so that it hangs at whatever length you prefer! Decorate it further with glitter and sequins if you like – bubbles are great for party decorations too!
Pom Pom Necklace Craft
You will need
- Pom poms (the size depends on how big you want your necklace to be)
- Ribbon
- Needle and thread
- Scissors or Exacto knife for cutting ribbon if needed
To make your pom-pom necklace, start by taking a few large strands of the ribbon and tying them together tightly with one end. Then use the thread to tie it around another piece of ribbon. Using this method, you can create as many layers as needed until you’ve reached the desired
Width!
After all of your layers are complete, twist them together at the top so that they’re secure.
Cut off any excess ribbon from close to where it connects to each layer.
Next up is adding embellishments like glitters/beads/buttons etc! If using glitter glue with children be sure that they don’t get much on their hands because glitter may end up everywhere (like in their eyes).
Seashell Necklace For Kids
You can use any kind of seashell to make this necklace.
Any type of string is fine, but if you’re using macramé or a thicker string, it may be helpful to tie a knot at the end so that the shell doesn’t slip through.
Make sure your child knows how to thread beads onto a string before beginning this craft! You can use any type of bead for this project—make sure they’re big enough for your child to hold in their hand easily, but not so heavy that they’ll pull on her neck when worn.
The glue should be applied sparingly because too much glue will cause the shells and string together into one big clump on her neck (which isn’t very attractive).
If necessary, use some super glue instead—it’s stronger and holds things better than regular white glue does, although it takes longer for it to dry completely.
It’s also possible for adults only who are familiar with how these things work; children should never handle super glue without adult supervision!
Perler Beads Necklace For Kids
Perler beads are plastic beads that can be melted together using iron to form shapes.
They are great for young children because they’re easy to use, safe, and don’t involve any cutting or gluing.
A Perler bead necklace is a great craft for kids to make because it’s simple and fun, but also has the bonus of being wearable!
To make a Perler bead necklace, start by finding some colored squares (or shapes) of Perler beads in your favorite colors (or shapes). You’ll need quite a few, so get started early! Lay out all of your colored squares on a flat surface so you have plenty of space available.
Then, use an ironing board or other firm surface large enough for all the squares you’ll be working with at once—we recommend using one that has an ironing mat attached as it will help keep things from sliding around while you work on them!
Next comes the best part: arranging your pieces into whatever pattern or design you want! Make sure each square’s peg goes through another peg in order to hold everything together securely while they’re being heated up by the iron later—this will ensure nothing falls apart during creation but also afterward when wearing them out into public where people might ask questions about how cool/funny/crazy they look.”
Button Necklace For Kids
You’re going to need
- A button of your choice
- One 12-inch piece of string per necklace (or one 24-inch piece)
Steps
Take the button and thread it onto the string. You may want to use a needle for this step. Make sure that you leave enough room on the other end so that you can tie a knot without having the string getting in your way or too close to the button so that it doesn’t look right when finished!
Tie a knot at each desired length, leaving some extra space between each knot so you can adjust them later if needed.
Cut off any excess string from your last knot and VOILA! You now have a cute new necklace for yourself or someone else 🙂
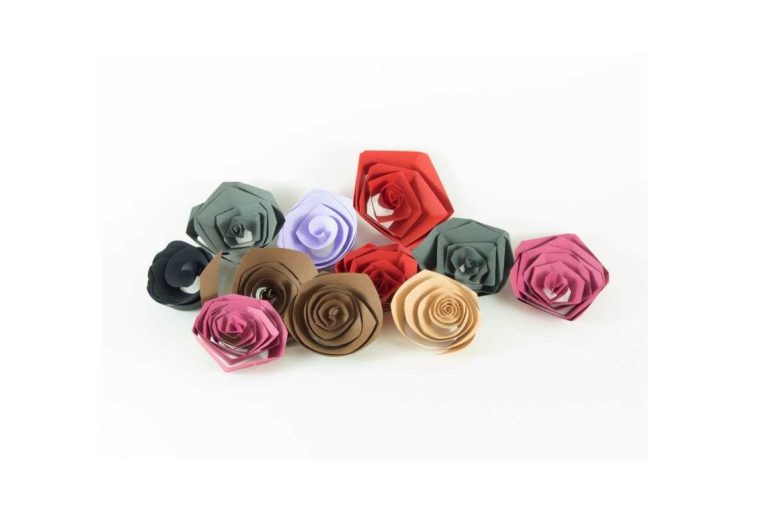
Coffee Filter Flower Necklace Craft
What You Need
- coffee filters
- pencils or chopsticks (to hold the coffee filter in place)
- scissors, hole punch, or craft knife.
What You Do
1. First, you need to make sure you have enough coffee filters cut into 5 petal shapes and also enough for the middle section, which will be folded over so it looks like a flower.
2. Fold each side in half and then into thirds, making sure that your holes are pointing up so they don’t fall out when you’re wearing them!
3. Take one of the ends from another coffee filter flower and poke it through one of the holes on your necklace holder (pencil/chopstick).
4. Repeat this step until all of your flowers are attached together!
5. Twist both ends together again for extra security
Egg Carton Flower Necklace Craft
Materials needed
- 10 egg cartons (the yellow ones)
- Construction paper of various colors
- Glue stick
- A piece of string or yarn to use as your necklace, approximately 30 inches long. If you want a longer necklace, cut more string or yarn.
Instructions
Cut out the petals for each flower out of construction paper and glue them onto the egg carton with a glue stick.
Make sure that they are all facing one direction so that when you make your necklace, it will look like a flower! You can also add a leaf if you like; just cut out an oval shape for the leaf and glue it on using the same technique as above!
Paper Plate Flower Necklace For Kids
Materials
- a paper plate (or other round objects)
- tissue paper in various colors (you can also use newspaper if you don’t have tissue paper)
glue or tape to hold the flower together. You can also use Elmer’s Glue, but it’s messy!
string for hanging your necklace. You need about two feet of string per necklace. The type of string you choose will depend on your style and how old your child is;
paracord is great if you’re making a hipster necklace for an older kid, but cotton twine would be perfect for a little girl who wants something fluffy and girly. Make sure that whatever kind of string you use is thin enough so that it doesn’t get in the way when she wears her necklace!
Step 1
Cut out all the petals from different colored sheets of tissue paper using a scissor o a craft knife.
Step 2
Glue each petal together along one side so they look like little flowers when finished! (We recommend using hot glue instead of tape because it dries faster.)
Note
Make sure not to put too much glue on at once or else it will drip off into another part of our project—which isn’t fun at all!
Simple Heart Felt Necklace Craft
For this project, you will need
- A piece of felt (one color or two)
- scissors or a cutting machine
- glue or tacky glue
To make your necklace, follow these steps
Cut out 2 pieces of felt in the shape of hearts.
Glue them together with the wrong sides facing out so that they are attached at both ends but do not overlap each other. This will create a flat surface with the edges curving upwards to form an upside-down heart shape when seen from above.
Place something heavy on top for about 15 minutes until it has dried completely — this is called “blocking,” and it helps ensure that all parts have dried fully before you start wearing your new accessory!
Wooden Beads Summertime Necklace Craft
Don’t get overwhelmed by all of the beads in this necklace craft. It’s actually fairly simple to make, and it can be done in under an hour. Here’s what you’ll need
- Wooden beads (we used a pack of 20)
- String or yarn (we used embroidery thread)
- A large paper clip (or two smaller ones if your child is younger than 3 years old)
To begin, fold the top 2 inches of string over itself to create a loop for the paper clip. Then, lay out all of the wooden beads on a piece of paper and glue them down so they don’t move around.
Lay out one row at a time until you’ve used them all, then go back with another row and repeat until they’re all attached. Once they’re done being glued down, have your child choose which color he or she would like stomach bead to be based on what happens during summertime—sunset colors such as orange and pink are great choices!
Finally, put the string through each side of their paper clip and attach it to their new necklace!
These are some really nifty kids’ necklaces
that you can make with your children and they are bound to enjoy it!
- These are some really nifty kids’ necklaces that you can make with your children and they are bound to enjoy them!
- They are easy to make, inexpensive, and fun to wear. Your kids will love these!
- It’s a great way for them to express their creativity and imagination.
Conclusion
I hope you enjoyed this article and found it helpful in finding the right necklace craft for your kids. These are some very cute and easy-to-make ideas that will surely bring smiles on their faces. Give them a try!