15 Aesthetic Room Decor Craft Ideas for Teens You’Ll Love
You’re chasing that cozy, Instagram-worthy vibe without breaking the bank. I’ve got you with 15 totally unique, super doable crafts that scream “you.” Each idea is fresh, shareable, and totally doable in a weekend. Let’s customize your space and have fun while we’re at it, trust me.
1. Dreamy Monochrome Wall Melt: Matte Grid Art Panels
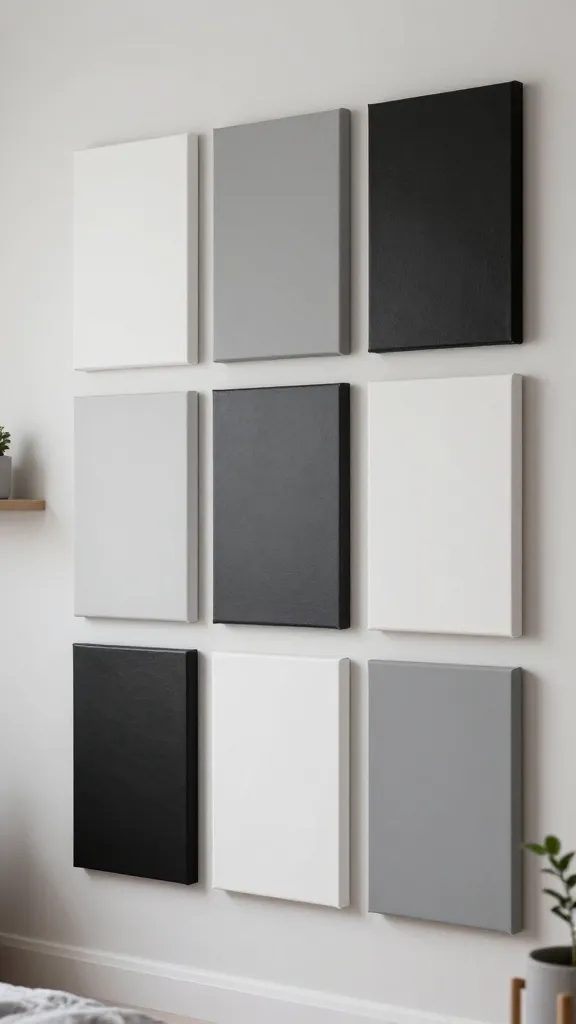
Imagine a clean, chic wall made of soft grayscale panels that look like a gallery, but scream teen vibes. This project creates a calm, modern backdrop with endless styling options. Seriously, it’s the perfect statement without overwhelming color.
Materials Needed
- Canvas boards or cardboard panels (5–9 depending on space)
- Matte acrylic paints in white, gray, and black
- Painter’s tape
- Grid ruler or tape measure
- Adhesive or double-sided mounting strips
How to Make It
- Lay out a grid layout with painter’s tape on each panel.
- Paint each panel a unique shade of gray, letting some edges show for texture.
- Remove tape to reveal crisp lines. Repeat for all panels, then arrange on the wall in a cohesive grid.
Pro Tips / Styling Ideas
- Pair with a black-and-white photo wall or a single statement print above.
- Switch up the grays seasonally with warm whites in winter, cooler tones in summer.
Who’ll love it? Minimalists and mood-board lovers who want clean lines and calm vibes.
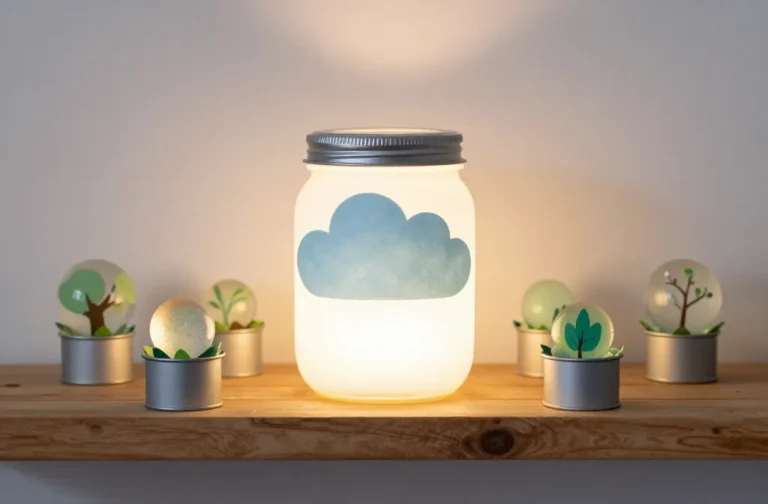
2. Cloudy Neon Nightstand Tray Lights
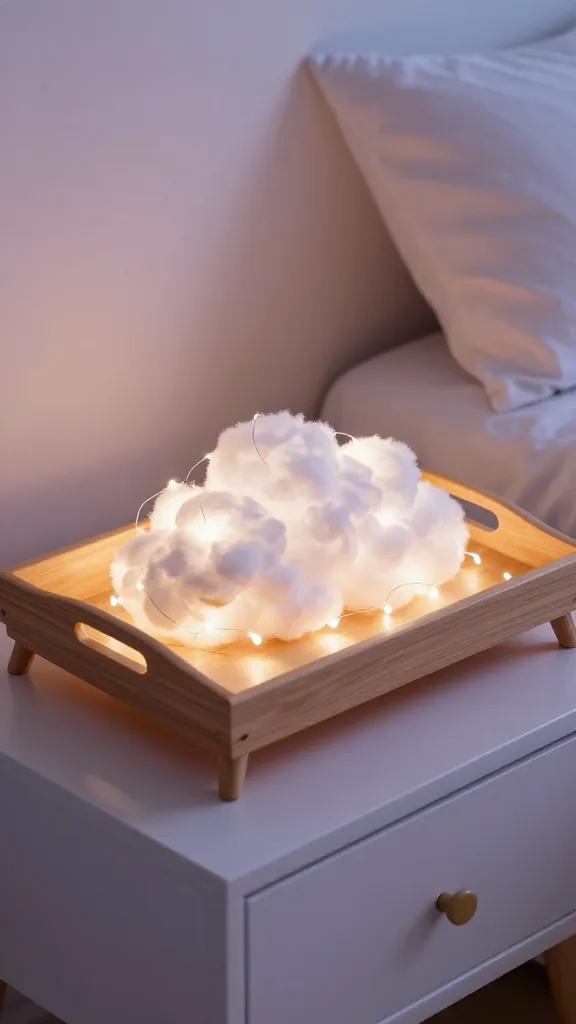
Turn a boring tray into a glowing cloud of color. This mini light-up tray doubles as a bedside mood setter and a cute catch-all for the nightstand. You’ll want it on every mellower evening.
Materials Needed
- A shallow wooden or acrylic tray
- Fairy lights with micro LED strands
- Faux clouds or fluffy cotton batting
- Clear hot glue or craft glue
- Optional: translucent paint for tint
How to Make It
- Line the inside of the tray with fairy lights for a soft glow.
- Pile cotton batting to create cloud shapes, gluing them down so they feel fluffy.
- Place the tray on your nightstand with the lights facing outward for a dreamy halo.
Pro Tips / Styling Ideas
- Try tinted lights (pink or blue) for a playful vibe.
- Use it as a mini plant display or a jewelry tray by day.
Who’ll love it? Night-owls and playlist-curators who crave calm, cozy glow.
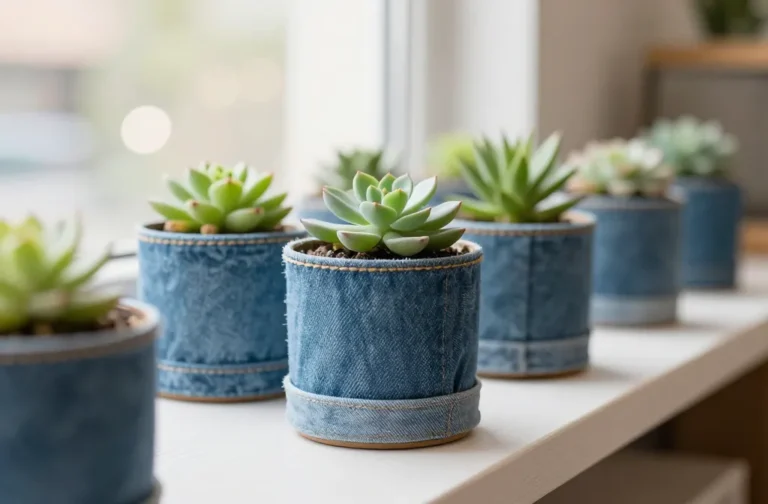
3. Tie-Dye Plant Pot Cushions
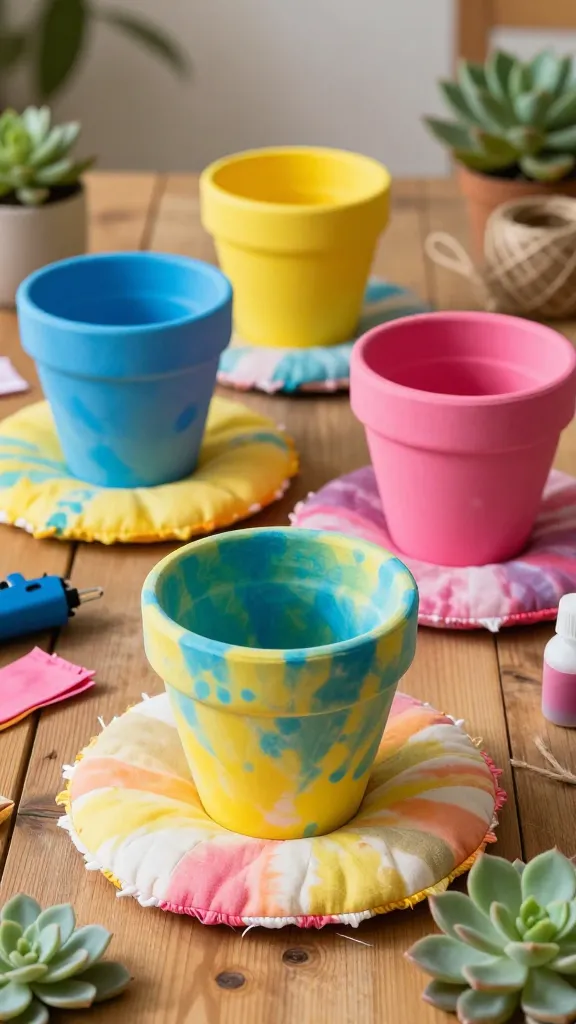
Transform plain terracotta pots into soft, cushiony statements that plant lovers will adore. It’s surprising how a splash of fabric paint can reinvent a plant’s entire vibe.
Materials Needed
- Cementable terracotta pots (2–4)
- Indoor fabric paints or dye in bold colors
- Soft fabric scraps or felt for cushion covers
- Polyfill stuffing
- Hot glue or fabric glue
How to Make It
- Paint the pots with a fun tie-dye pattern, letting colors blend naturally.
- Cut fabric into circles or squares and stitch scraps into small cushions that fit over the pot edges.
Pro Tips / Styling Ideas
- Stack different pot sizes on a windowsill for a playful display.
- Coordinate color palettes with your room’s theme.
Who’ll love it? Plant parents who want a touch of whimsy and texture in their greenery corner.
4. Warm Wool Wall Weave Panels
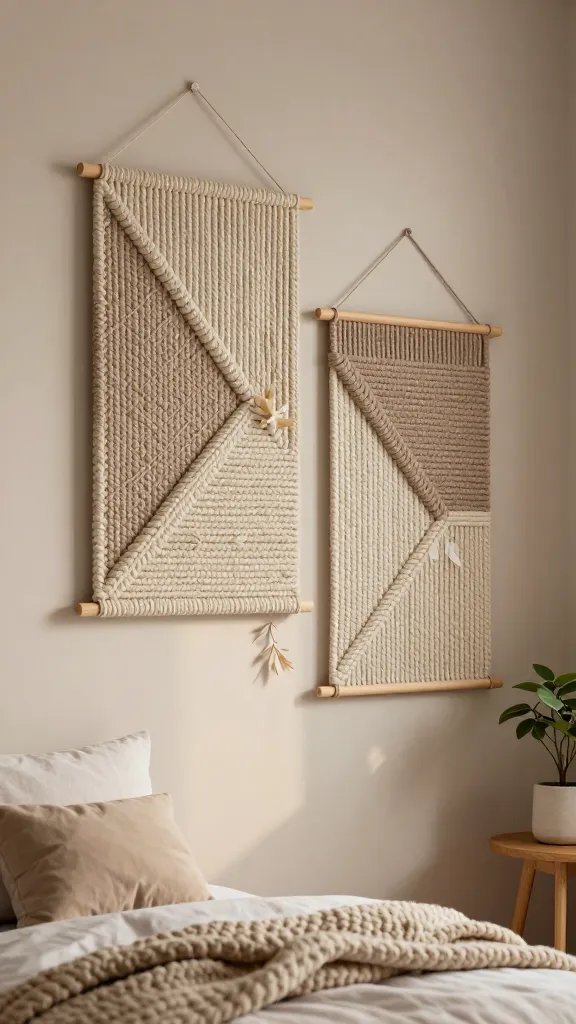
Texture is everything, and these soft-walled weaves bring depth without loud color. It’s like a cozy hug for your room—but on the wall.
Materials Needed
- Macramé cord or thick yarn
- Wooden dowels or a lightweight frame
- Scissors
- Optional: small dried accents (pale leaves, feathers)
How to Make It
- Wrap and knot the yarn around the dowels to create a geometric weave. You can vary knot patterns for texture.
- Attach finished panels to the wall with nails or adhesive strips.
Pro Tips / Styling Ideas
- Hang two different sizes grouped together for a mini wall installation.
- Add dried botanicals for a natural accent.
Who’ll love it? Texture enthusiasts and boho dreamers who want warmth without color overload.
5. Glitter-Soled Wall Clock Mosaic
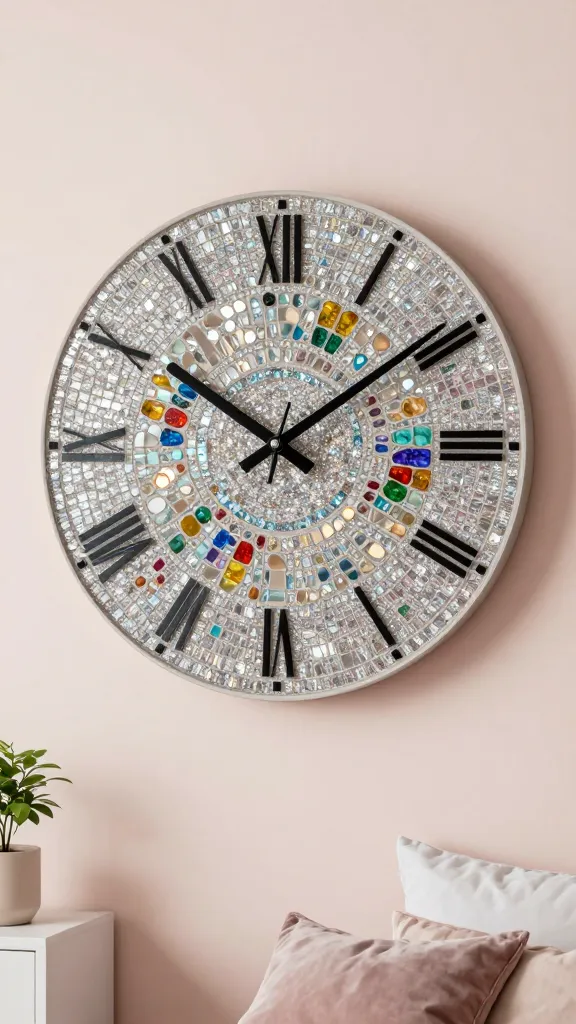
A clock that’s art and function in one. Create a mosaic dial using glittery tiles or shiny glass pieces for a sparkly, clock-face statement piece.
Materials Needed
- Plain round wall clock or clock kit
- Assorted glitter tiles, mirrors, or colorful glass shards
- Strong adhesive for glass
- Grout or decorative filler
How to Make It
- Arrange the tiles on the clock face in a favorite pattern and glue down.
- Fill gaps with grout to create a smooth surface; wipe excess carefully.
Pro Tips / Styling Ideas
- Keep the rest of the room matte to let the clock shine.
- Use neutral tones for the frame to balance the sparkle.
Who’ll love it? Glam enthusiasts who want a bold, functional piece they can show off.
6. Floating Shelves With Hidden LED Strips
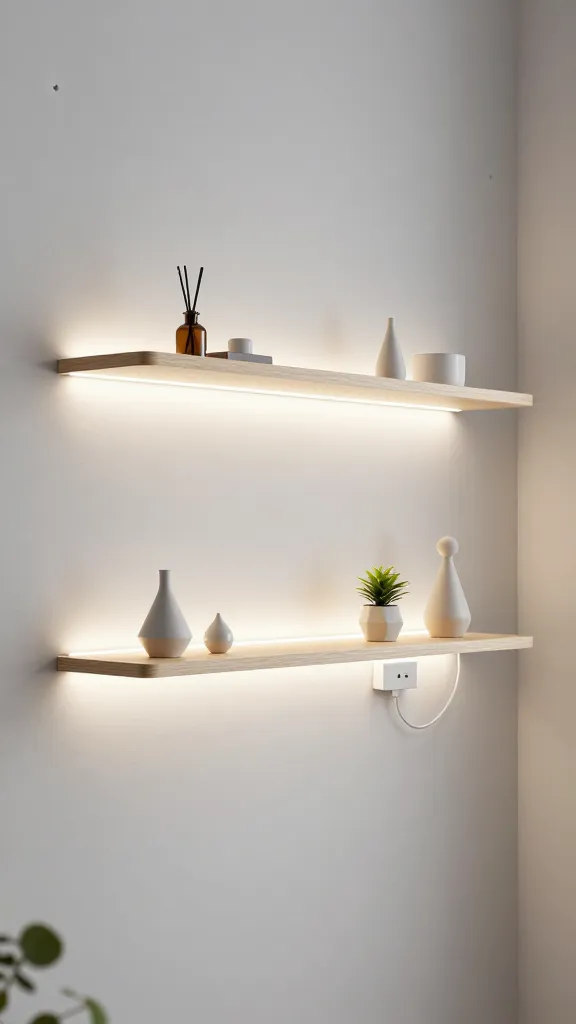
Upgrade plain shelves with hidden lights for a floating effect that makes every trinket pop. It’s practical, stylish, and perfectly teen-approved.
Materials Needed
- Two to three lightweight floating shelves
- LED strip lights (adhesive-back)
- Power supply with USB or plug-in
- Risers or small standoffs
How to Make It
- Mount shelves securely with studs, then attach LED strips along the underside.
- Keep cords discreet using cable clips and short cable runs.
Pro Tips / Styling Ideas
- Decorate with a few monochrome books and small planters for a chic peek of color.
- Switch the LED color temperature with season—warmer in fall, cooler in spring.
Who’ll love it? Shelf enthusiasts and lighting nerds who crave glow without clutter.
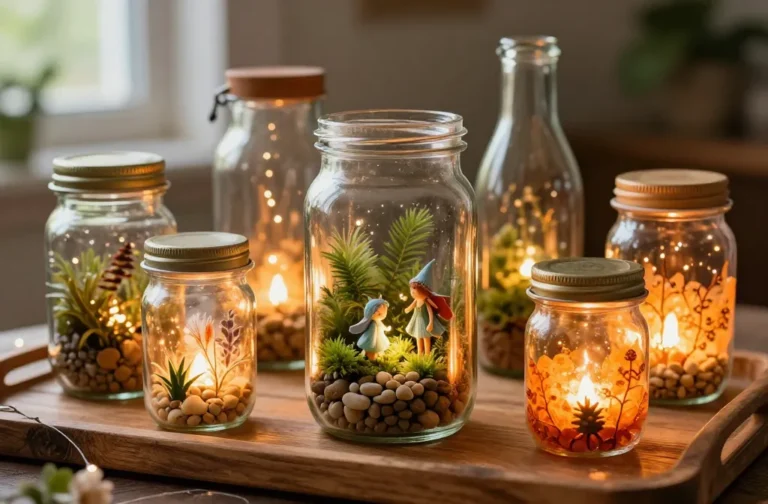
7. Vintage Tin Can Lanterns
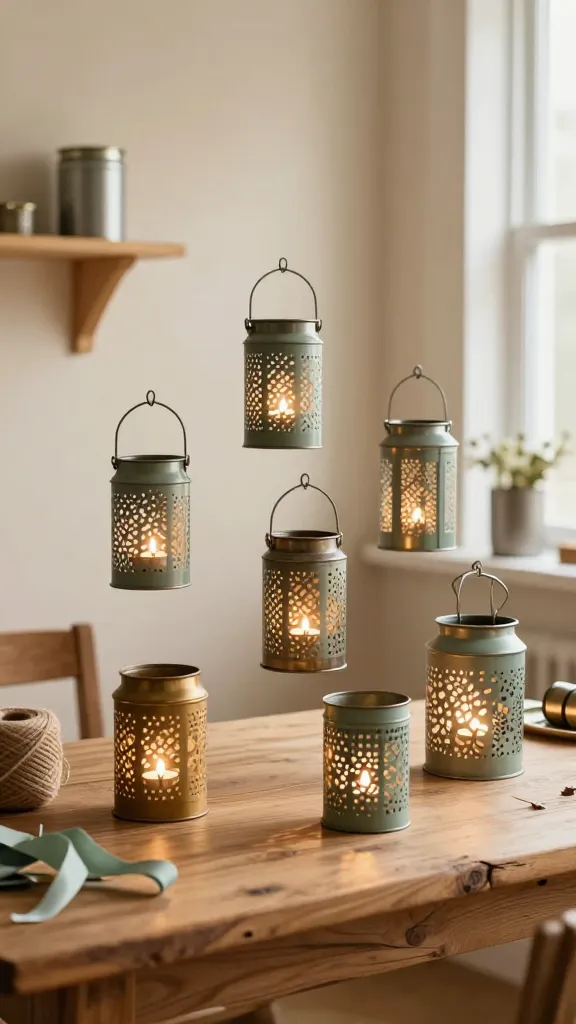
Repurpose old tins into delicate lanterns that cast pretty shadows on walls. They’re budget-friendly, eco-conscious, and endlessly charming.
Materials Needed
- Empty metal tins (save labels if you like)
- Hammer and nail or a pin vise
- Tea light candles or LED tealights
- Ribbon or twine for hanging
How to Make It
- Punch small holes in decorative patterns around the tin.
- Place a tealight inside and hang or set on a windowsill.
Pro Tips / Styling Ideas
- Group together of varying heights for a luminous vignette.
- Paint the outside with matte chalk paint for a soft, vintage feel.
Who’ll love it? DIY lovers who adore rustic charm and dramatic lighting effects.
8. Acrylic Painted Plant Walls
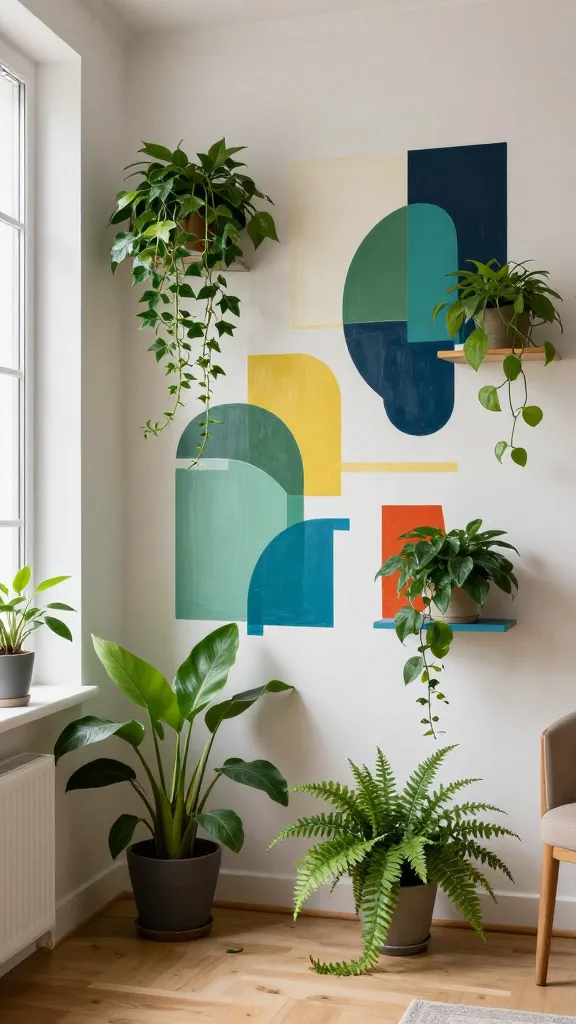
Turn a boring plant corner into a mini gallery with bold acrylic shapes painted on the wall behind your greenery. It instantly elevates the whole look.
Materials Needed
- Canvas or plywood backing board
- Acrylic paints in contrasting colors
- Painter’s tape
- Brushes and sponges
How to Make It
- Sketch a simple abstract pattern with tape to guide crisp lines.
- Paint bold shapes, letting colors overlap for layered depth.
Pro Tips / Styling Ideas
- Pair with a few green plants for a lively, modern vibe.
- Change colors with seasons for a quick refresh.
Who’ll love it? Color lovers who want a graphic, upgrade-ready backdrop.
9. Library Card Tray Wall Organizer
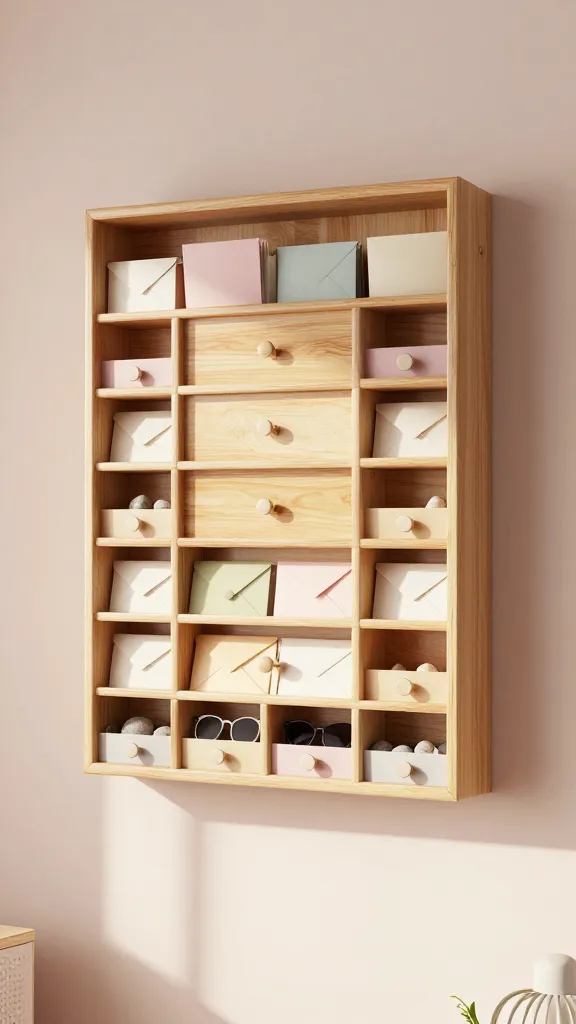
Turn an old library card catalog tray into a chic hanging organizer. It doubles as flexible storage and a quirky art piece.
Materials Needed
- Old wooden card catalog tray or repurpose a shallow drawer
- Chalk paint or wood stain
- Hanging hardware
- Decorative knobs for dividers (optional)
How to Make It
- Sand and paint or stain to your taste; mount to wall with sturdy hardware.
- Use dividers or small baskets to section items like mail, pens, or photos.
Pro Tips / Styling Ideas
- Label sections with mini pot labels for a tidy look.
- Pair with a framed quote above for a library-y feel.
Who’ll love it? Organization-obsessed teens who want a practical, stylish piece.
10. Celestial String Art Circles
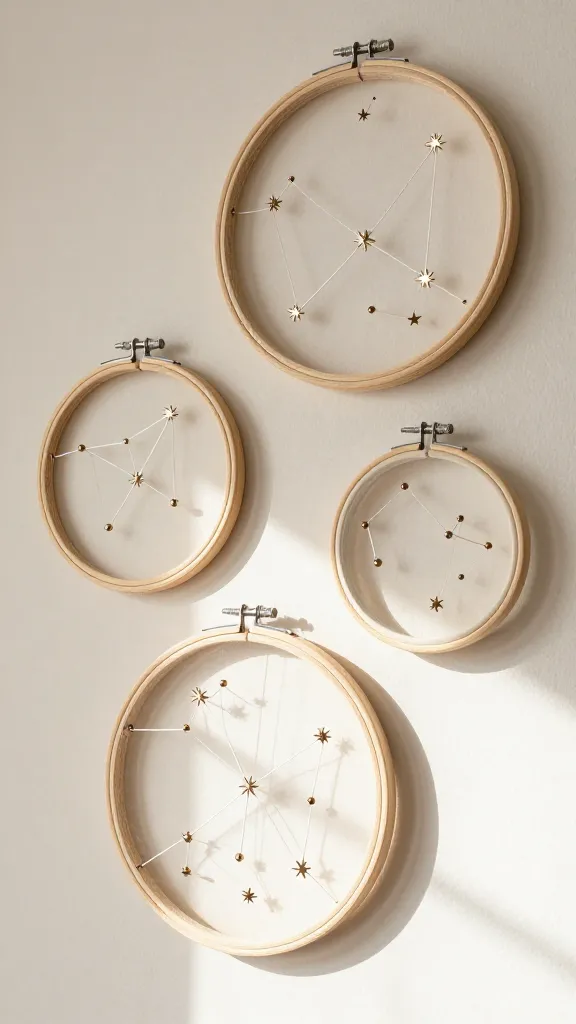
Turn simple hoops and string into a cosmic dream. This project feels gallery-worthy but is totally approachable for beginners.
Materials Needed
- Wooden embroidery hoops (3 sizes)
- White or metallic cotton string
- Push pins or small nails
- Acrylic paint (optional for hoops)
How to Make It
- Wrap strings between push pins to create star-like patterns inside the hoops.
- Outline tiny stars or planets for extra detail.
Pro Tips / Styling Ideas
- Group hoops in a constellation along the wall.
- Tint the string in subtle gold or silver for shimmer.
Who’ll love it? Astronomy lovers and dreamers who enjoy delicate, airy decor.
11. DIY Velvet Letter Cushions
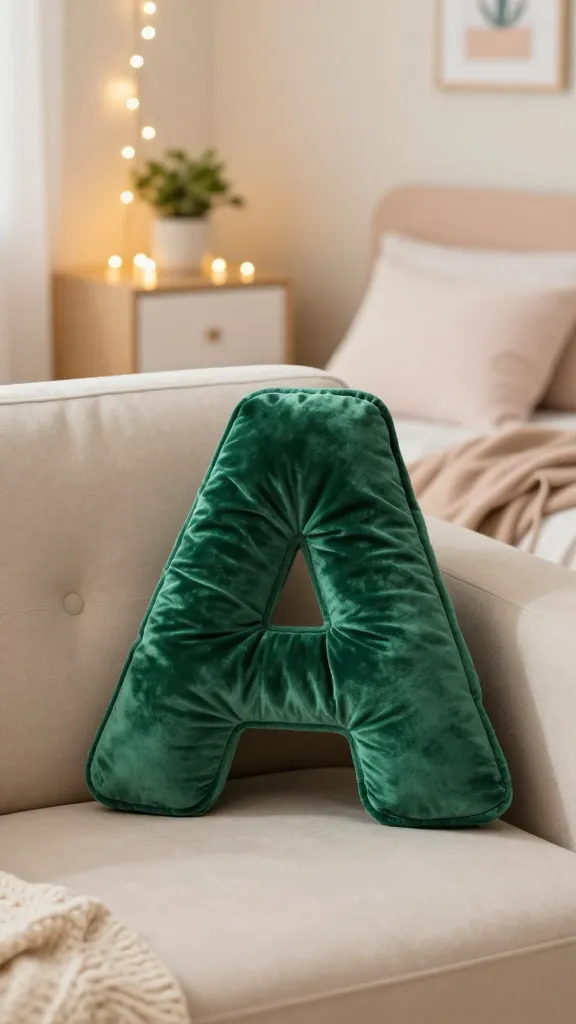
Cozy up your couch with plush velvet cushions bearing your initials or a favorite word. Luxury feel, teen-friendly price.
Materials Needed
- Vinyl or felt letter templates
- Velvet fabric (colors of your choice)
- Stuffing or a soft cushion insert
- Fabric glue or needle and thread
How to Make It
- Cut velvet into cushions shaped like letters; glue or sew edges, leaving one side open for stuffing.
- Fill and close the opening, then place on a sofa or bed.
Pro Tips / Styling Ideas
- Mix metallic gold or silver threads for extra glam.
- Combine with a neutral sofa to let the cushions pop.
Who’ll love it? Soft-texture lovers and typography fans seeking cozy personalization.
12. Micro-Planter Terrariums
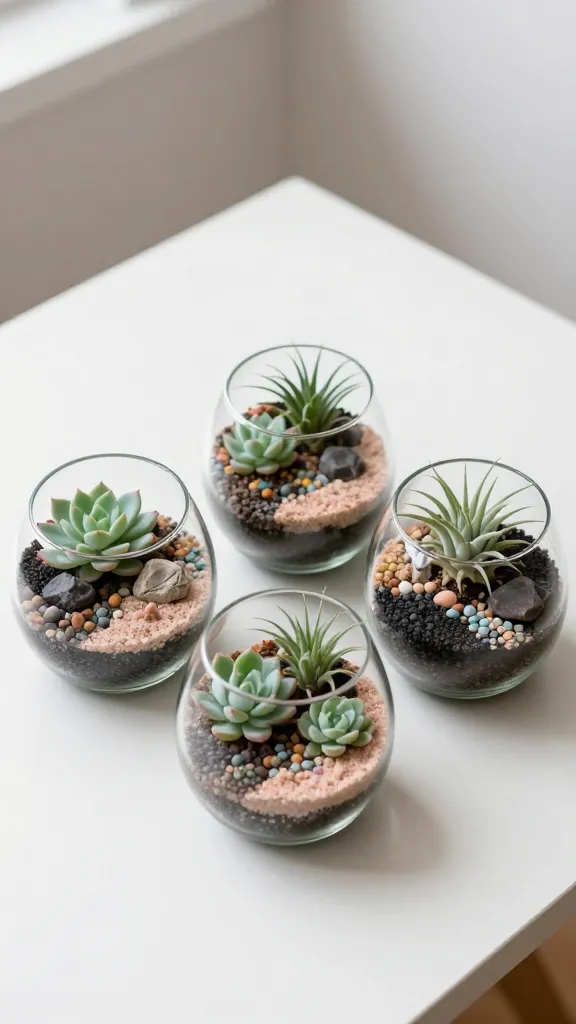
Tiny glass terrariums with micro succulents and sand textures create a zen microcosm on your desk. Cute, calm, and totally on-trend.
Materials Needed
- Small glass bowls or open terrariums
- Mini succulents or air plants
- Colored sand, tiny rocks, and activated charcoal
- Fine-grit pebbles and decorative figurines
How to Make It
- Layer charcoal, sand, and pebbles for drainage and color.
- Plant the succulents and add a few decorative pieces to finish.
Pro Tips / Styling Ideas
- Group a few together in a tray for a mini greenhouse effect.
- Keep water minimal to protect surfaces and avoid mosquitos.
Who’ll love it? Desk-dwelling plant lovers who want a tiny, magical green corner.
13. Painted Mason Jar Lid Wall Clock
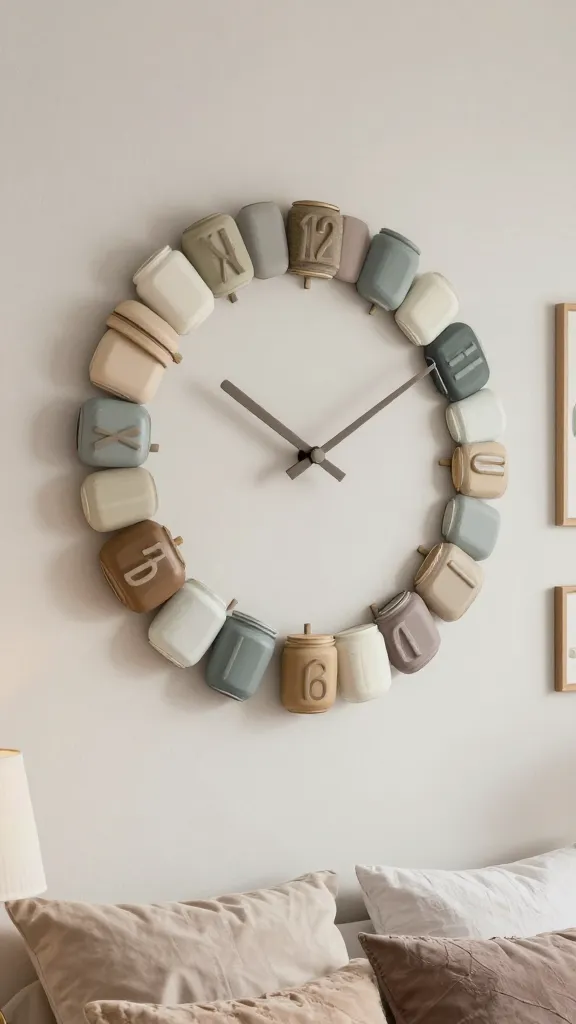
A familiar favorite reimagined as a bold wall clock with a painted lid design. Simple, nostalgic, and unexpectedly stylish.
Materials Needed
- Wooden clock mechanism kit
- Assorted mason jar lids
- Acrylic paints in a limited palette
- Ruler and numbers or stickers for clock face
How to Make It
- Paint the lids to form a cohesive clock face pattern, then assemble the clock mechanism.
- Affix numbers or markers and hang on the wall.
Pro Tips / Styling Ideas
- Choose a color story that matches your bedding or rug.
- Pair with a wooden frame and a plant for a rustic-modern vibe.
Who’ll love it? Nostalgia fans who want a playful, functional piece with retro flair.
14. Magnetic Chalkboard Jewelry Wall
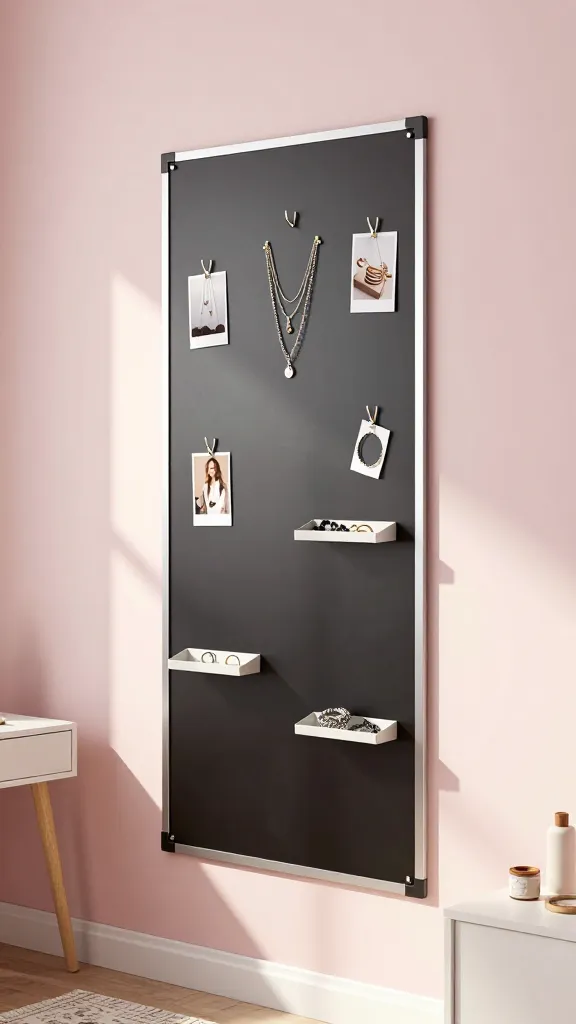
Convert a slim metal panel into a magnet-supported chalkboard for notes, photos, and a jewelry display all in one. It’s clever and endlessly useful.
Materials Needed
- Thin metal sheet or pre-made magnetic board
- Chalkboard paint or a chalkboard contact paper
- Mini magnets, hooks, and small decorative trays
How to Make It
- Paint the board with chalkboard paint or cover with chalkboard contact paper.
- Mount on the wall and add magnets and hooks to arrange photos, notes, and jewelry.
Pro Tips / Styling Ideas
- Label sections with chic icons for a visually organized space.
- Switch magnets with seasons for a fresh look.
Who’ll love it? Messy-bun creators who crave a practical place to corral small items and memories.
15. Velvet-Coated Dried Flower Wreath
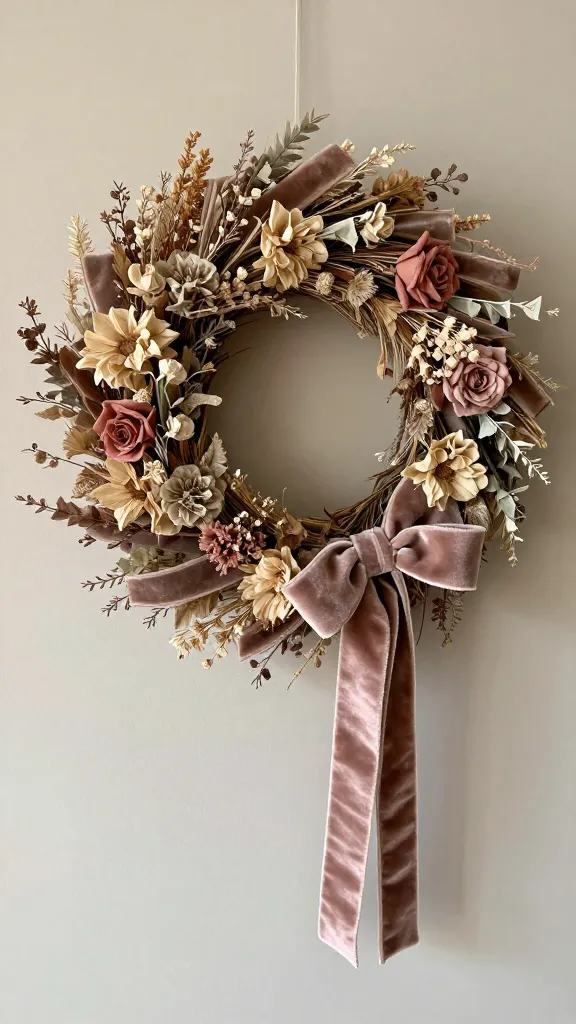
A wreath that merges soft textures and delicate botanicals for a ready-at-hand seasonal decor piece. Elegant, warm, and effortlessly stylish.
Materials Needed
- Wire wreath base
- Dried flowers in muted tones
- Velvet ribbon or fabric strips
- Hot glue and scissors
How to Make It
- Attach dried flowers to the wreath base with hot glue, layering for fullness.
- Finish with a velvet ribbon bow for a polished touch.
Pro Tips / Styling Ideas
- Hang above a bed or on an inviting entry wall for a warm welcome.
- Keep it seasonal by swapping flowers or ribbon colors.
Who’ll love it? Romance-inclined decorators who want a luxe, nature-inspired piece.
Conclusion: You’ve got a full arsenal of 15 completely unique, ready-to-create ideas to transform any teen space into a stylish, personal haven. Pick one tonight, or ambitious you can tackle all of them this month. Either way, you’ll savor the process, and your room will thank you with every new photo snap you take. Happy crafting!