9 3d Craft Ideas for Baby Shower Decorations: Dreamy Diy Decor
Ready to turn a baby shower into a breathtaking, DIY wonderland? If you adore hands-on projects that look store-bought but feel totally personal, you’re in the right place. These 9 3d craft ideas for baby shower decorations are fun, surprisingly easy, and absolutely Pinterest-worthy.
Yes, you can DIY gorgeous decor that guests rave about—and you’ll finish with that warm, “I did this!” glow. Let’s dive into nine completely unique, totally doable crafts that will elevate any baby shower vibe.
1. Paper-Ceiling Cloud Mobile With Tiny Stars

Imagine a canopy of soft white clouds floating above the dessert table, sprinkled with tiny star accents. This 3d paper cloud mobile feels ethereal yet playful, perfect for a dreamy baby shower theme. It’s light, airy, and surprisingly simple to assemble.
Materials Needed
- White card stock or thick parchment
- Wire or fishing line
- Small 3D cloud cutouts (or cut your own from light cardboard)
- Gold or pastel star confetti
- Hot glue gun
How to Make It
- Cut cloud shapes with a 3D fold—think two panels glued along the edges for a gentle puff.
- Stack 2–3 clouds per strand and connect with delicate fishing line at varying heights.
- Attach a few tiny stars between the layers to catch the light.
- Hang the strands from a central point or a lightweight hoop above the table.
Pro Tips / Styling Ideas
- Use varying cloud sizes for depth and movement.
- Coat a few edges with shimmer paint for a subtle glow under party lights.
- Coordinate colors with your palette—soft pinks, blues, or gold accents work beautifully.
Who would love this? Beautiful for the ceremony backdrop or dessert area—especially if your guests adore whimsical, airy decor.
2. 3D Paper Butterfly Garlands

Whimsical, vibrant, and elegantly dimensional, these 3D butterflies flutter across a wall or mantel like a breeze made visible. They’re surprisingly simple and look luxe in clusters.
Materials Needed
- Colorful cardstock in 2–3 coordinating colors
- Scissors and craft knife
- Double-sided tape or glue dots
- String or ribbon for garland
How to Make It
- Cut butterfly shapes in pairs, then score along the body to create a gentle 3D bend.
- Glue pairs with a small gap so wings pop outward.
- Color-match wings and assemble into a garland by threading through the center.
Pro Tips / Styling Ideas
- Mix matte and metallic card stock for extra glam.
- Alternate up-down butterfly orientations for a lively look.
- Place near an entrance to greet guests with a flutter of color.
Who would love this? Ideal for a playful, nature-inspired theme—great for photo backdrops and fluttery details.
3. Giant Floral Monogram 3D Letters
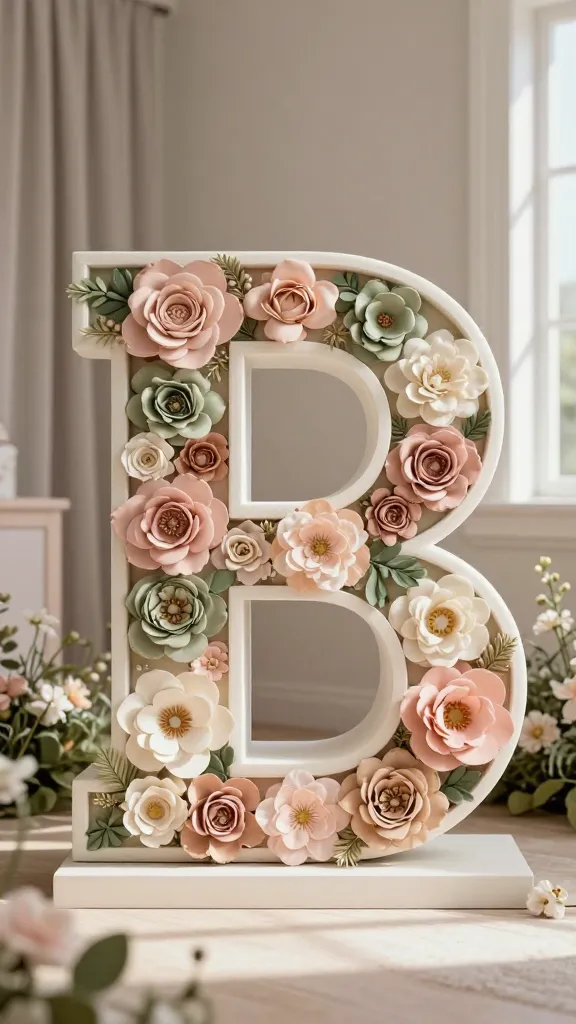
Make a bold, personalized statement with a 3D floral monogram. It doubles as a stunning focal piece and a keepsake after the shower (move it to a nursery corner or entryway).
Materials Needed
- Foam or cardboard letters (e.g., “B” or the baby’s initials)
- Artificial flowers in a cohesive color palette
- Floral hot glue gun
- Spray adhesive or glue for securing stems
How to Make It
- Plan color blocks first—cluster lighter hues near the top, bolder tones toward the base.
- Trim stems and glue each bloom to the letter, layering for depth.
- Fill in gaps with greenery for a lush, garden-fresh look.
Pro Tips / Styling Ideas
- Dust with a touch of clear spray sealant to keep petals from wilting indoors.
- Use a stand or easel to display prominently at the venue entrance.
- Choose flowers that echo the baby’s gender-neutral palette for universal charm.
Who would love this? A show-stopping centerpiece that doubles as a décor keepsake—a must for elegant, mom-to-be celebrations.
4. 3D Origami Ball Centerpieces
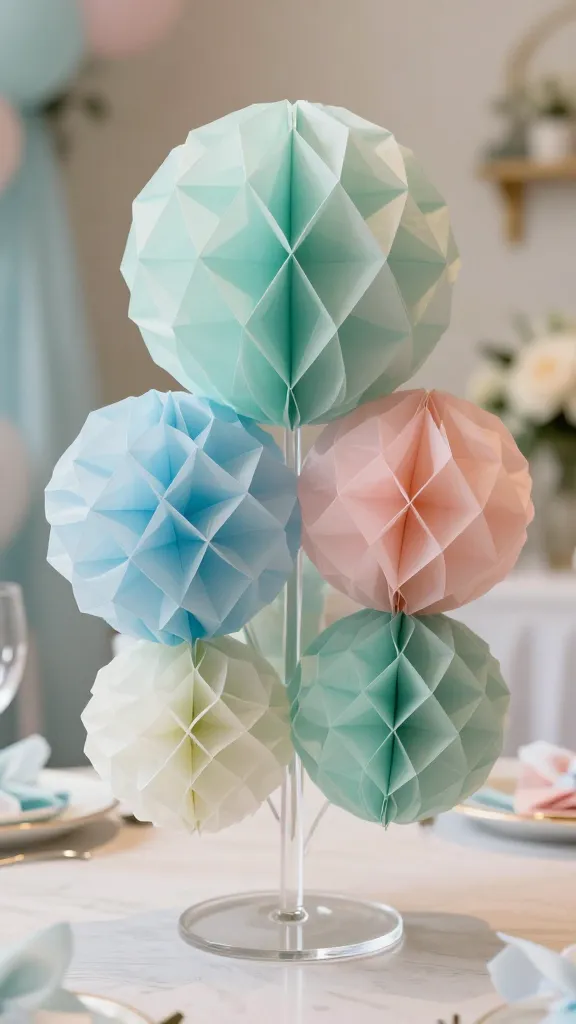
Origami gets a modern upgrade when you blow it up into 3D spheres. Layered tissue and paper create architectural, eye-catching centerpieces that still feel delicate and celebratory.
Materials Needed
- Colored tissue paper or lightweight origami paper
- Thin paper strips or ribbons
- Clear acrylic stands or small glass bowls
- High-strength glue or double-sided tape
How to Make It
- Fold individual 3D petals or modules, then connect them into a sphere shape.
- Attach several spheres to a central base or nest them in decorative bowls.
- Place a few in varying heights for layered drama.
Pro Tips / Styling Ideas
- Incorporate soft gradient colors for a dreamy effect.
- Intertwine a few LED fairy lights through the center for a twinkle.
- Pair with simple eucalyptus sprigs for a modern botanical vibe.
Who would love this? Perfect for a chic, contemporary shower with a touch of whimsy.
5. Folded Paper Ribbon Centerpiece Trees
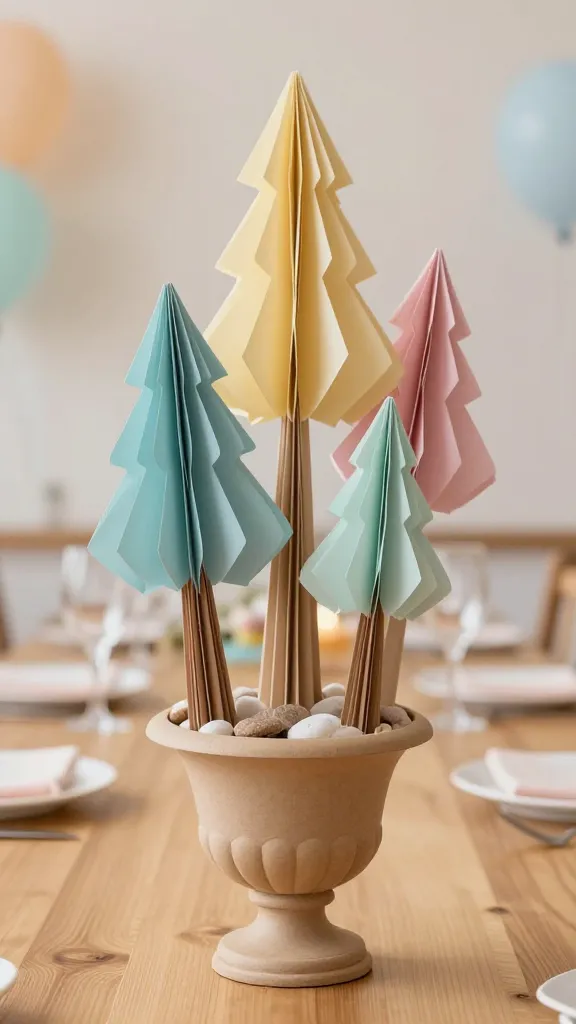
These little “trees” are basically folded paper sculptures arranged in urns or vases. They add vertical interest to tables without crowding the surface.
Materials Needed
- Colored kraft paper or cardstock
- Wire or wooden dowels
- Small pots or decorative containers
- Ribbon or twine to tie the “tree” shapes
How to Make It
- Cut long strips and accordion-fold them into tree shapes; secure to the dowel.
- Arrange several trees in a pot with foam or pebbles to anchor them.
- Vary heights for a forest-like centerpiece.
Pro Tips / Styling Ideas
- Choose a monochrome palette with metallic accents for a luxe look.
- Turn some trees into mini birthday candle holders (battery-operated, of course).
Who would love this? A charming, modern take on floral decor that lasts beyond the party.
6. 3D Paper Watercolor Blossoms Garden Wall
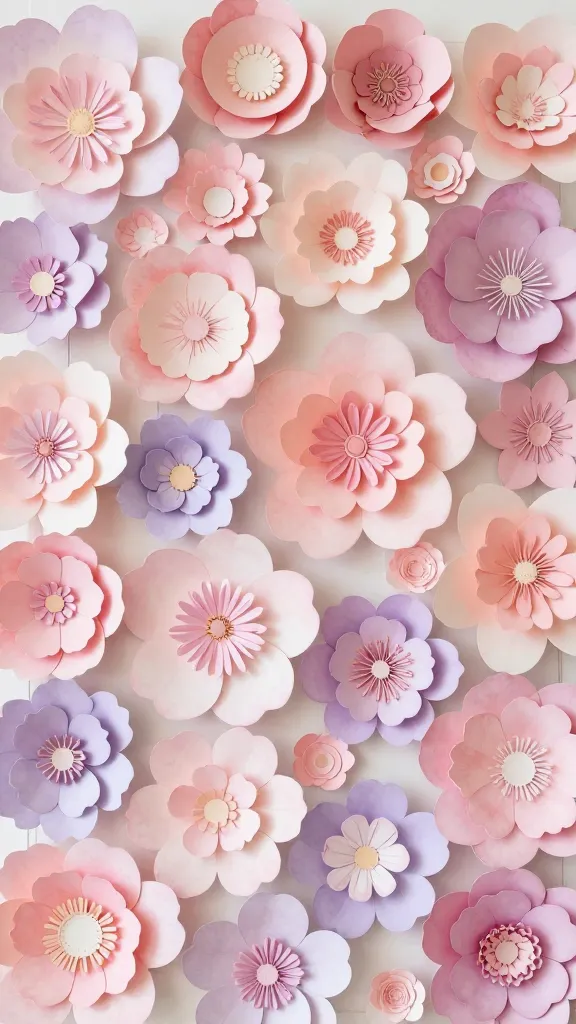
Soft, layered blossoms created from watercolor-inspired paper give a gentle, garden-first vibe. A 3D bloom wall is a showstopper backdrop that photographs beautifully.
Materials Needed
- Watercolor wash paper stock in pastel hues
- Scissors or craft knife
- Clear mounting tape or adhesive
- Thin string to hang individual petals
How to Make It
- Cut circular petals in multiple sizes and curl edges slightly for dimension.
- Layer petals from largest to smallest and glue in place.
- Mount to a wall grid or secure to a decorative frame for structure.
Pro Tips / Styling Ideas
- Incorporate a few metallic gold edges for luxe sparkle.
- Space clusters with white space to keep the look airy and fresh.
Who would love this? Ideal for a lush, feminine theme—soft, elegant, and unforgettable in photos.
7. 3D Balloons With Hidden Messages
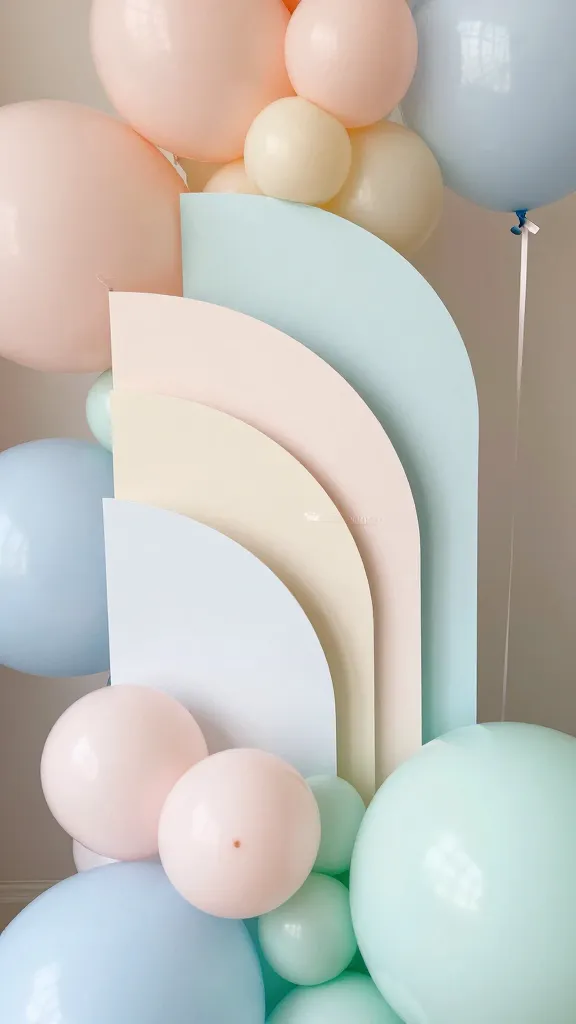
Balloons are a party staple, but add a 3D twist with layered panels and hidden baby-themed messages visible as you approach. It’s playful, interactive, and surprisingly chic.
Materials Needed
- Plain round balloons (various sizes)
- Colored cardstock panels attached with tape or glue
- Ribbon for tying
- Marker or small stamps for messages
How to Make It
- Cut curved panels that wrap around the balloon to give it depth.
- Attach panels with a small overlap so they feel dimensional, not flat.
- Stash tiny messages under some panels for guests to discover as they gather.
Pro Tips / Styling Ideas
- Use pastel color families for a soft, sophisticated look.
- Group varying sizes into an arch or cluster for visual impact.
Who would love this? A playful, interactive element that doubles as a photo prop and a source of sweet surprises.
8. 3D Ribbon-Wrapped Letterbackdrop
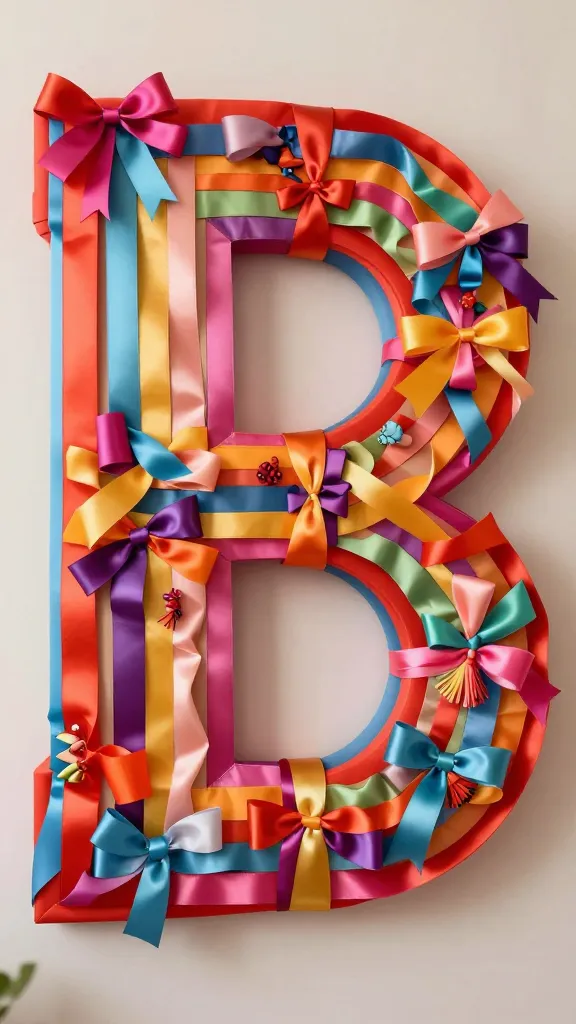
Turn a plain wall into a lush, dimensional backdrop by wrapping large letters with ribbons and adding tiny knots or bows. It’s bold, colorful, and totally customizable to your theme.
Materials Needed
- Large cardboard or foam letters
- Satin or grosgrain ribbons in your color palette
- Glue gun or double-sided tape
- Optional: tiny decorative elements (mini pins, tassels)
How to Make It
- Wrap each letter in ribbon, securing ends with glue.
- Layer ribbons in alternating directions for a textured look.
- Add small bows or tassels for extra flair at the intersections.
Pro Tips / Styling Ideas
- Coordinate with the overall color story to tie everything together.
- Hang as a photo backdrop or prop for the gift table.
Who would love this? A bold, high-impact backdrop that serves as décor and a photo-worthy moment.
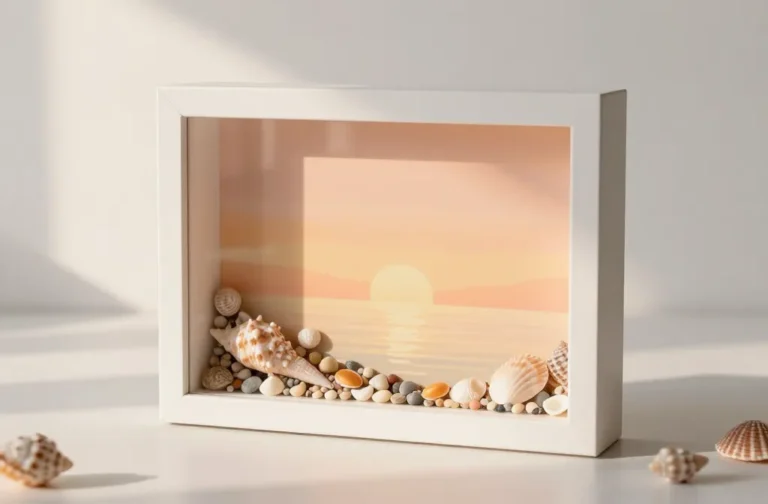
9. 3D Paper Shell Corner Decor
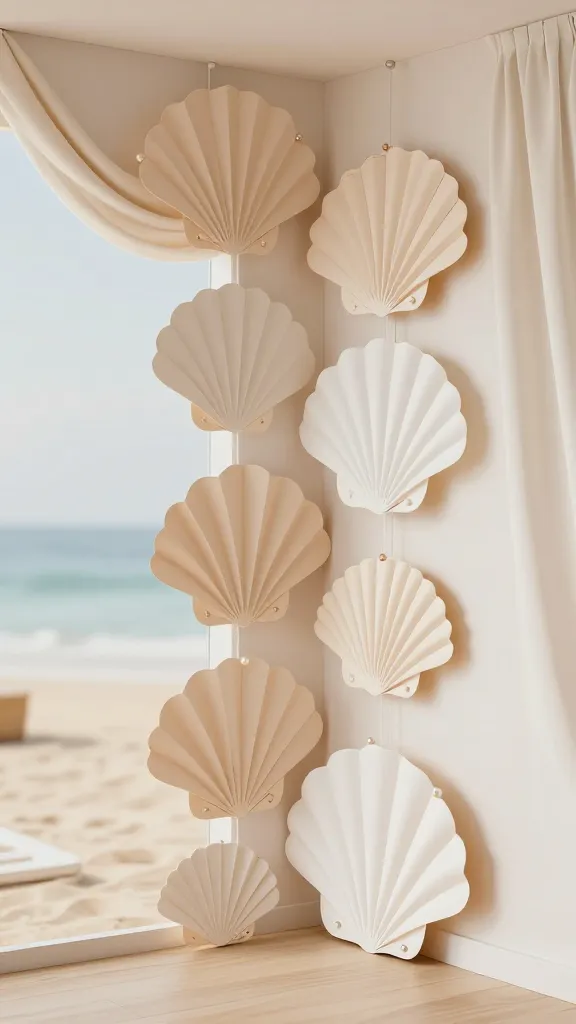
Seashell-inspired 3D shells crafted from layered paper bring a delicate, coastal vibe—great for a baby shower with a beachy, serene mood.
Materials Needed
- Stiff paper or cardstock in soft sandy tones
- Scissors or craft knife
- Clear fishing line and small hooks or adhesive dots
- Beads or pearl accents for texture
How to Make It
- Cut curved shells in several sizes, then layer and curl edges for dimension.
- Attach shells to fishing line at varying depths for a hanging cascade.
- Anchor the strands to a light fixture or a decorative stand in the corner.
Pro Tips / Styling Ideas
- Pair with white florals and soft blues for a seaside feel.
- Use subtle pearlescent ink on shell edges for a luxe touch.
Who would love this? Great for a nautical or coastal theme, adding texture without overpowering other decor.
Conclusion
So there you have it—nine completely unique, totally doable 3d craft ideas for baby shower decorations that will elevate any party vibe. Pick a favorite or mix and match a few to craft a cohesive, visually stunning celebration. Trust me, these projects are fun, easy, and incredibly rewarding—and your guests will be pinning, saving, and complimenting your creativity for weeks to come.