8 Halloween Toilet Paper Roll Crafts
Ready to turn everyday toilet paper rolls into spooktacular decor? These eight DIY ideas are creative, budget-friendly, and surprisingly adorable (yes, even the scary stuff can be cute). Trust me, you’ll love how easy and fun each project is to pull off.
1. Whimsical Witch Hat Ornaments
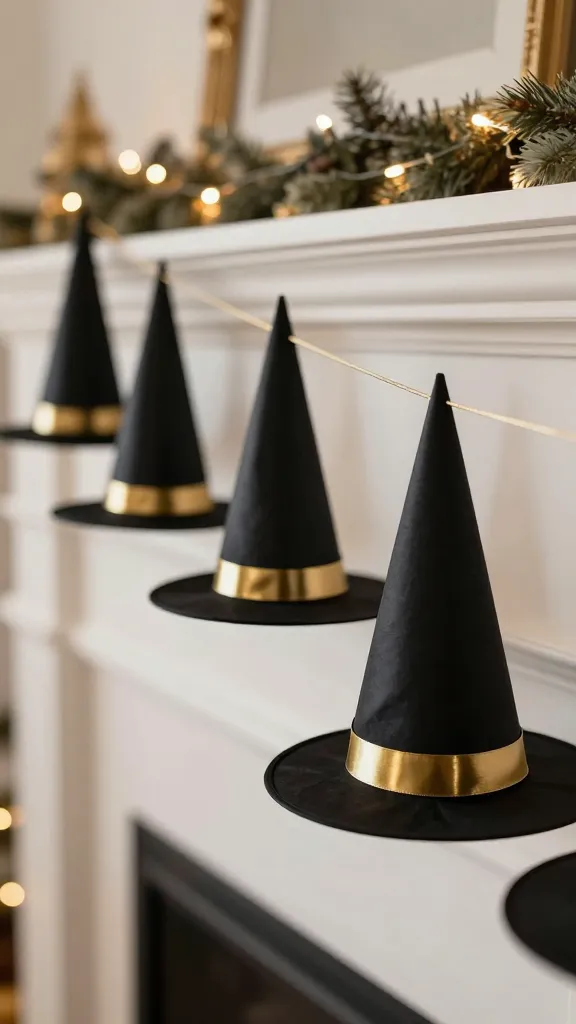
Picture a string of glossy black witch hats perched on your mantel, twinkling with a hint of Halloween magic. This project turns simple rolls into chic, minimalist holiday accents that work on a tree, garlands, or as wall art.
Materials Needed
- Toilet paper rolls
- Black construction paper or foam sheets
- Gold or silver ribbon
- Glue gun or strong craft glue
- Scissors
- Optional: tiny fabric bows or faux gems
How to Make It
- Cut a circle from black paper to cover one end of the roll for the hat brim.
- Form a cone from black paper and glue to the roll, tucking the tip into the brim.
- Attach a small ribbon for the hatband and pop a tiny embellishment on the front.
- Hang with twine or lay them along a garland for dramatic effect.
Pro Tips / Styling Ideas
- Use metallic ribbons to add a festive sparkle.
- Paint the tips with glow-in-the-dark paint for a nocturnal glow.
Who would love it / When to use
Perfect for a minimalist spooky vignette or a candy-laden tree! A chic, scalable centerpiece for any Halloween party décor. You’ll love this if you adore clean lines with a touch of whimsy.
2. Cuddle-Worthy Monster Door Hangers
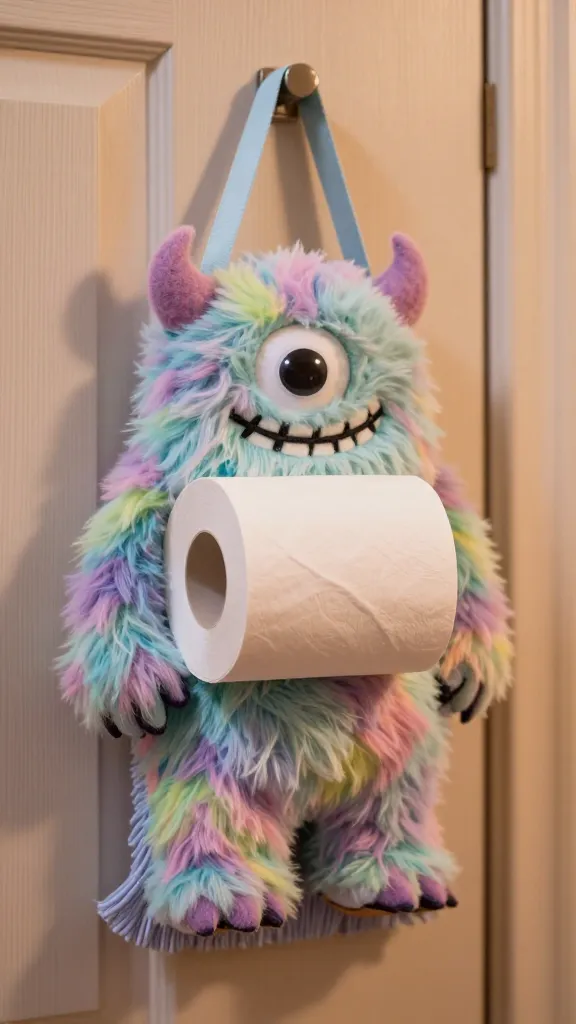
Doorways deserve a friendly, fuzzy welcome, especially on Halloween. Turn rolls into soft, plush-looking monsters that greet guests with a wink.
Materials Needed
- Toilet paper rolls
- Felt in bright colors
- Googly eyes
- Fabric scraps or felt for mouths
- Hot glue or fabric glue
- Ribbon for hanging
How to Make It
- Cut a roll in half lengthwise to create a rounded body. Seal edges with felt pieces.
- Decorate with felt circles for eyes, a goofy mouth, and assorted teeth shapes.
- Glue on a fluffy fringe or yarn for hair, giving each monster its personality.
- Attach a loop of ribbon to hang on the door.
Pro Tips / Styling Ideas
- Mix bold textures—fuzzy felt, glitter felt, and plaid for personality.
- Group a trio of monsters at different heights for visual interest.
Who would love it / When to use
Great for a playful entryway or kids’ rooms. If you’re aiming for cute, not creepy, these will win hearts.
3. Haunted Mason Jar Sleeve Statues
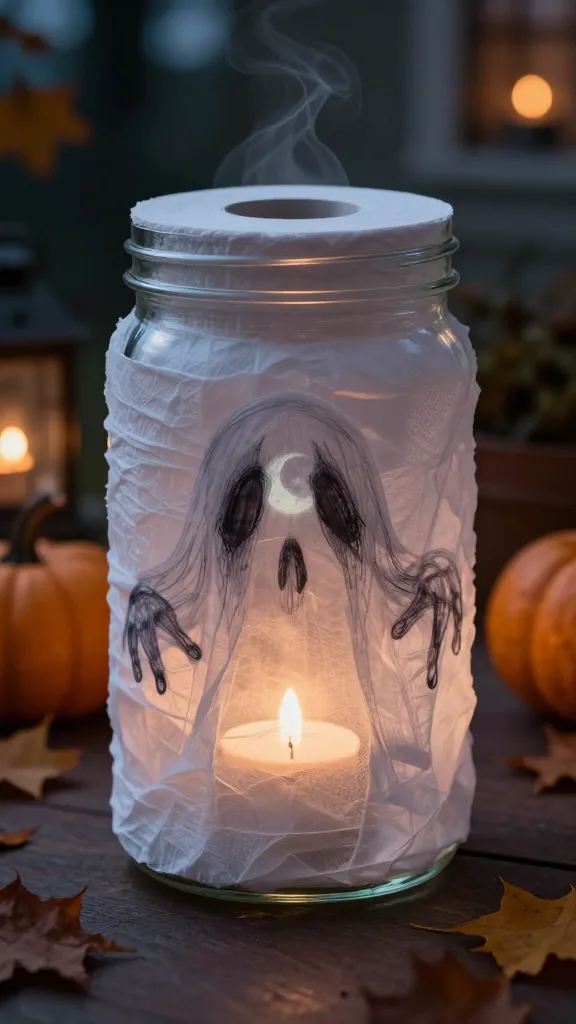
Jars are a classic, but this twist uses a hollowed toilet paper roll as a spooky, sculptural base. Think lanterns with a ghostly vibe that glow softly at dusk.
Materials Needed
- Toilet paper rolls
- White tissue paper or gauze
- Black marker or paint
- Tea light or LED candle
- Clear glue or decoupage glue
- Optional: translucent chipboard for moon silhouettes
How to Make It
- Wrap the roll with tissue or gauze to create a ghostly silhouette; secure with glue.
- Draw a spooky face or stencil a moon behind the ghostly wrap to peek through.
- Place a tea light inside the roll to illuminate from within.
Pro Tips / Styling Ideas
- Group several in varying heights for a graveyard of glow.
- Speckle with silver paint for an eerie starlit effect.
Who would love it / When to use
Ideal for a coffee table centerpiece or a porch display. It’s a gentle nod to Halloween that still feels cozy.
4. Spooky Silhouette Spectacle Wall Decals
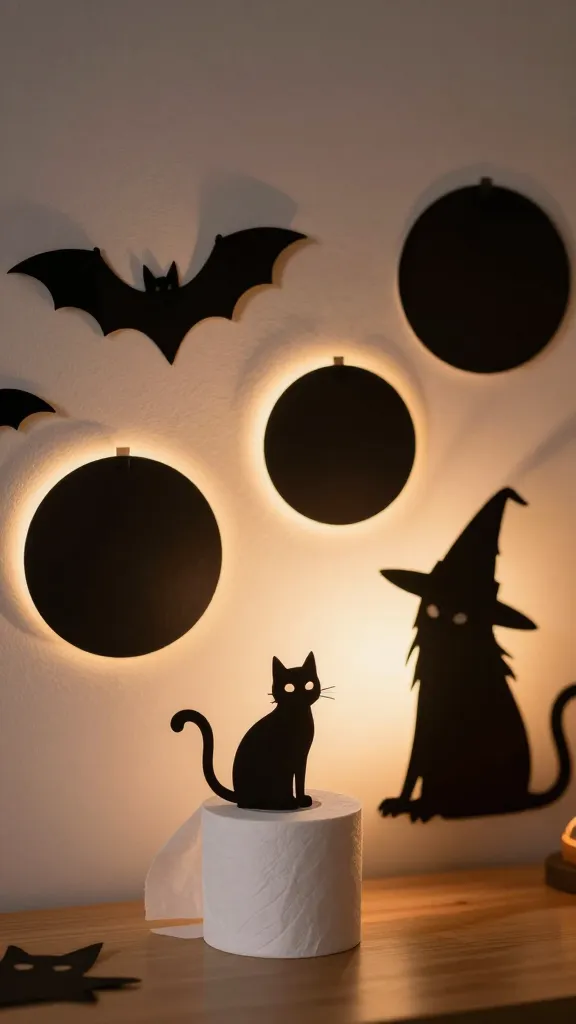
Turn plain walls into a storybook of silhouettes without the fuss. Use rolled-up monsters to cast playful shadows that transform with the lighting.
Materials Needed
- Toilet paper rolls
- Black cardstock or vinyl
- Double-sided tape or removable mounting tape
- Scissors or craft knife
- LED strip lights (optional)
How to Make It
- Flatten the rolls to create circular wall plaques. Cut bat, cat, and witch shapes from black cardstock.
- Arrange silhouettes on the wall using tape. For extra drama, place a backlight with LED strips along the edge of the ceiling to cast long shadows.
- Attach cutouts to the flattened rolls with glue or tape.
Pro Tips / Styling Ideas
- Vary heights by stacking rolls to create a staccato skyline effect.
- Paint the backs with chalkboard paint to write spooky messages that disappear by morning.
Who would love it / When to use
Best for renters who want reversible decor or those who crave a dramatic wall feature without committing to permanent paint.
5. Batty Garland With DIY Flying Bats
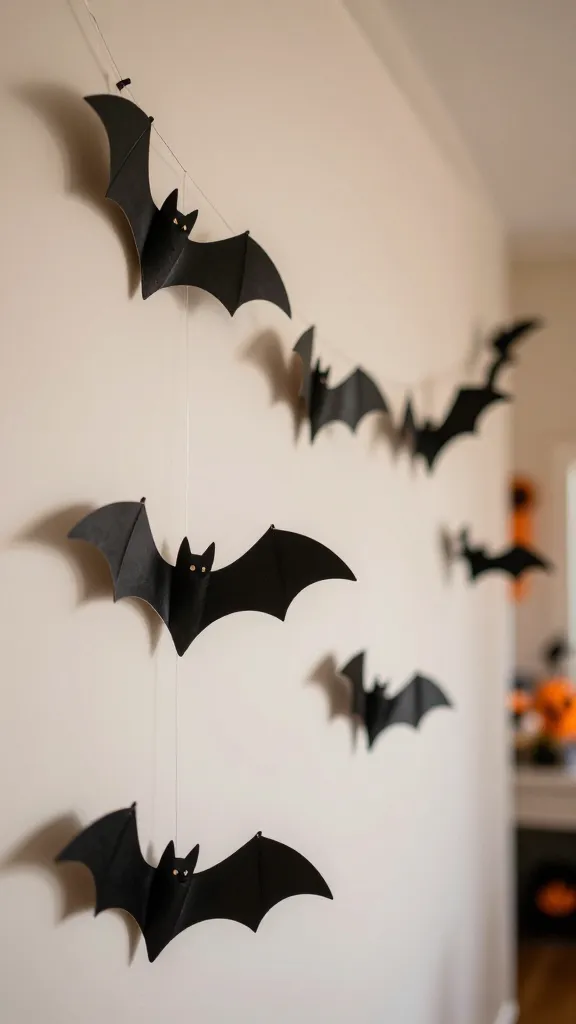
A flutter of bats in flight instantly elevates any hallway or mantle. This garland uses rolls as the batter-turned-bats’ bodies for a lightweight, airy look.
Materials Needed
- Toilet paper rolls
- Black cardstock
- White or gray craft paint
- Fishing line or twine
- Scissors
- Glue
How to Make It
- Cut the rolls into small hollow bat shapes by slicing the roll lengthwise and trimming to wings with curved edges.
- Paint the sides in black with a touch of gray on the wings to imply depth.
- Glue the wings to the body and punch a small hole to thread the twine for hanging.
- Arrange along a staircase, doorway, or mantel for the illusion of a flock in flight.
Pro Tips / Styling Ideas
- Space them at different intervals for a natural flying pattern.
- Add a light dusting of glitter to catch the light in the evening.
Who would love it / When to use
Perfect for the entryway or living room—an easy way to invite a playful Halloween energy into the home.
6. Mini Pumpkin Lanterns
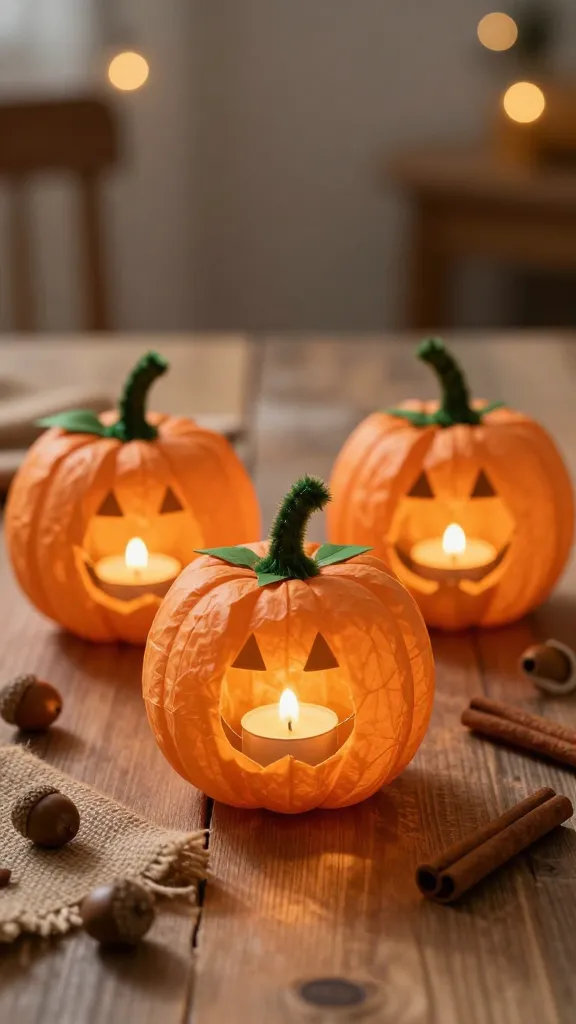
Who said pumpkins must be real to be adorable? Tiny pumpkin lanterns made from rolls bring a warm, harvest-y glow to your tablescape.
Materials Needed
- Toilet paper rolls
- Orange tissue paper or paint
- Green pipe cleaners or ribbon
- Votive candles or LED tea lights
- Glue or decoupage medium
How to Make It
- Wrap the roll with orange tissue or paint the outside orange; seal with glue.
- Carve or cut tiny leaf shapes from green paper and attach to the top with a small ring or stem.
- Place a light inside to glow through the translucent orange skin.
Pro Tips / Styling Ideas
- Line a row along a dining table for a whimsical harvest vibe.
- Pair with warm white candles and a few faux gourds for a complete scene.
Who would love it / When to use
Delightful for kids’ parties or cozy dinners. They’re small enough to tuck into a centerpiece while still delivering major cuteness.
7. Ghostly Floating Orbs
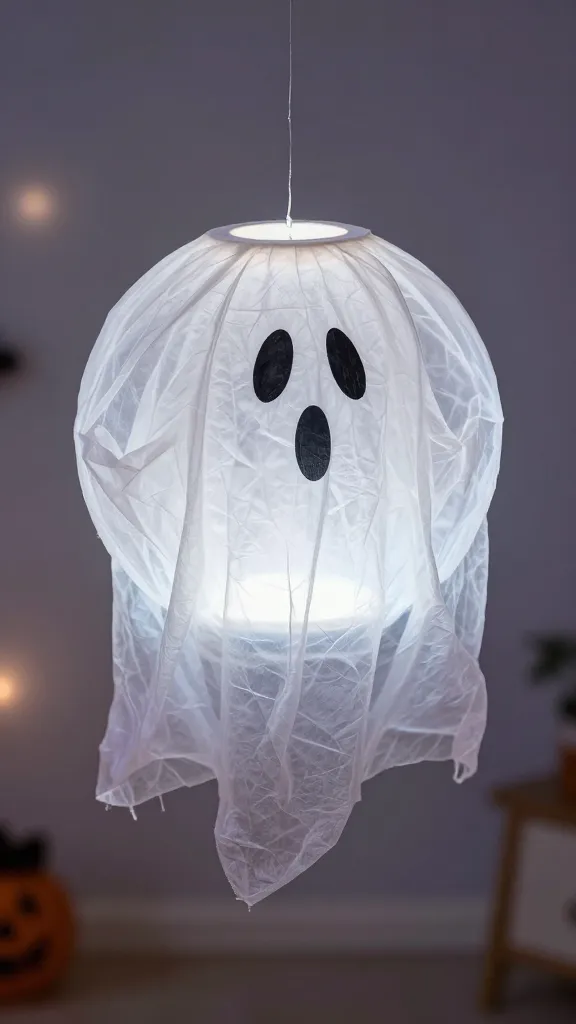
Lightweight, ethereal, and hauntingly simple, these floating ghosts elevate any ceiling or dreamlike corner. They feel a bit magical and a lot fun.
Materials Needed
- Toilet paper rolls
- White tissue paper
- String or fishing line
- Black marker for eyes
- Glue
How to Make It
- Cut the roll to form a hollow silhouette, then cover with translucent white tissue paper, leaving a hollow center for light to peek through.
- Draw two black eyes on the tissue for a friendly ghost face.
- Thread a length of string through the top and hang from the ceiling at varying heights.
Pro Tips / Styling Ideas
- Pair with fairy lights to mimic moonlit night or a gentle halo of illumination.
- Group in threes for a floating, spooky chorus.
Who would love it / When to use
Excellent for a dreamy Halloween vibe in a bedroom or living room. It feels whimsical rather than spooky, which is perfect for mixed-age gatherings.
8. Creepy Crawly Centerpiece Mobile
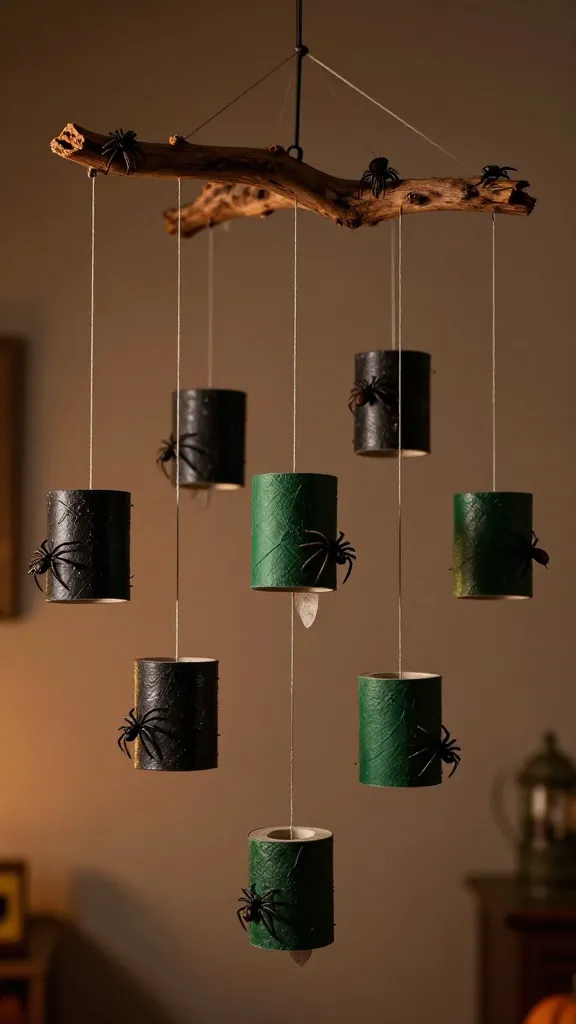
Turn a simple roll into a dramatic centerpiece that crawls with tiny plastic spiders or paper-cut insects. It’s an eye-catching focal point that’s surprisingly easy to assemble.
Materials Needed
- Toilet paper rolls
- Black or dark green acrylic paint
- String or thin wires
- Miniature fake spiders or cut-out bug shapes
- Glue or hot glue
- Branch-like driftwood or a circular wreath form
How to Make It
- Assemble a mobile by attaching several painted rolls to strings of varying lengths from a central driftwood or wreath ring.
- Glue spiders or bugs to the ends of the strings so they dangle beneath the rolls.
- Finish with a light spray of matte sealer to keep paint from chipping.
Pro Tips / Styling Ideas
- Use dark greens and purples for a moody vibe.
- Hang above a dining table for a dramatic, conversation-starting centerpiece.
Who would love it / When to use
For a statement piece that doubles as a conversation starter. It’s bold, atmospheric, and distinctly Halloween.
Conclusion
Eight unique, no-overlap Halloween ideas, all born from humble toilet paper rolls. Each project brings a touch of whimsy, a dash of spook, and a lot of easy crafting fun. Pick one (or go all in) and let your space glow with handmade charm this season. You’ve got this—happy crafting, and may your spooky season be as bright as your creativity.