25 Craft Ideas for School on a Budget: Chic Diy Sprouts
Stuck on budget but craving cute, shareable school crafts? You’re in the right place. These ideas are quick, affordable, and totally Pinterest-worthy, with zero fluff and all the fun. Trust me, your backpack—and your desk—will thank you.
From cheery desk decor to clever organizational hacks, these projects prove you don’t need a big budget to get big style. FYI, you’ll love how each piece doubles as a personal win: a gift, a classroom upgrade, or a cozy reminder of home during long school days.
1. Rustic Mason Jar Desk Organizer With Painted Accents
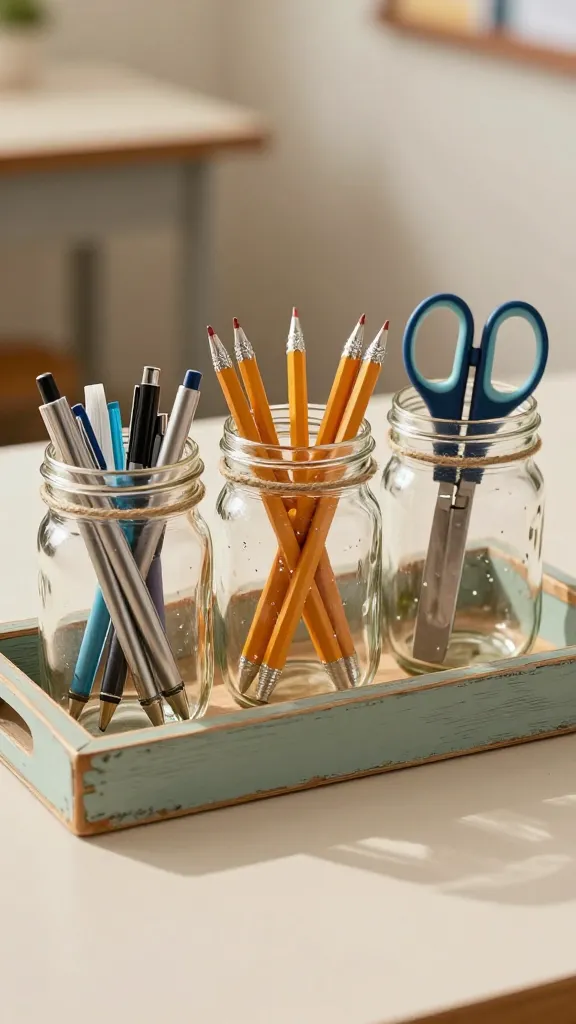
Picture this: a trio of mason jars on a painted wooden tray, each jar holding pens, pencils, and scissors. Fresh, rustic, and unexpectedly chic for a student desk. Easy to customize with your color palette, and seriously budget-friendly.
- Materials: Mason jars, wooden tray or cardboard cut into tray shape, acrylic paints, brushes, hot glue, decorative twine.
- Key steps: Paint jars and tray, dry, glue jars to tray, wrap twine around rims for a finishing touch.
- Pro tips: Use a waterproof sealant on the paint if you’ll be carrying it around; swap in glitter or washi tape for extra flair.
Who’ll love it: anyone who wants a charming, functional desk upgrade without breaking the bank.
2. Washi Tape Pencil Case Makeover
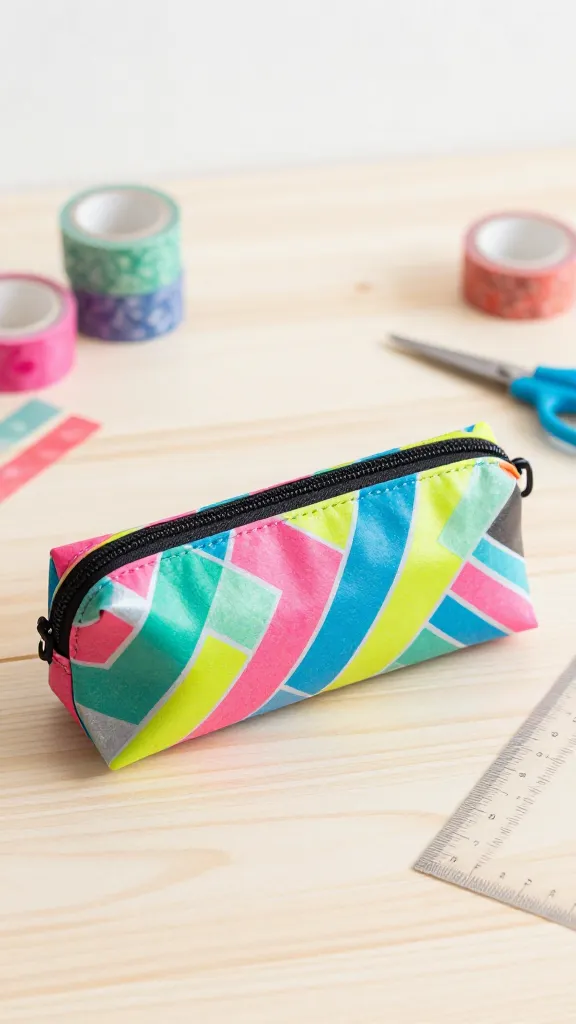
Transform a plain pencil case into a personalized masterpiece with just washi tape and a dash of bold color. It’s a sneaky way to express personality while keeping your pockets tidy.
- Materials: Plain pencil case, assorted washi tapes, scissors, ruler.
- Key steps: Clean surface, plan design, apply tape in layers, trim edges.
- Pro tips: Create geometric patterns or stripes; seal with a light spray of clear acrylic if you want durability.
Who’ll love it: the color-coding aficionado and anyone who loves a quick aesthetic upgrade.
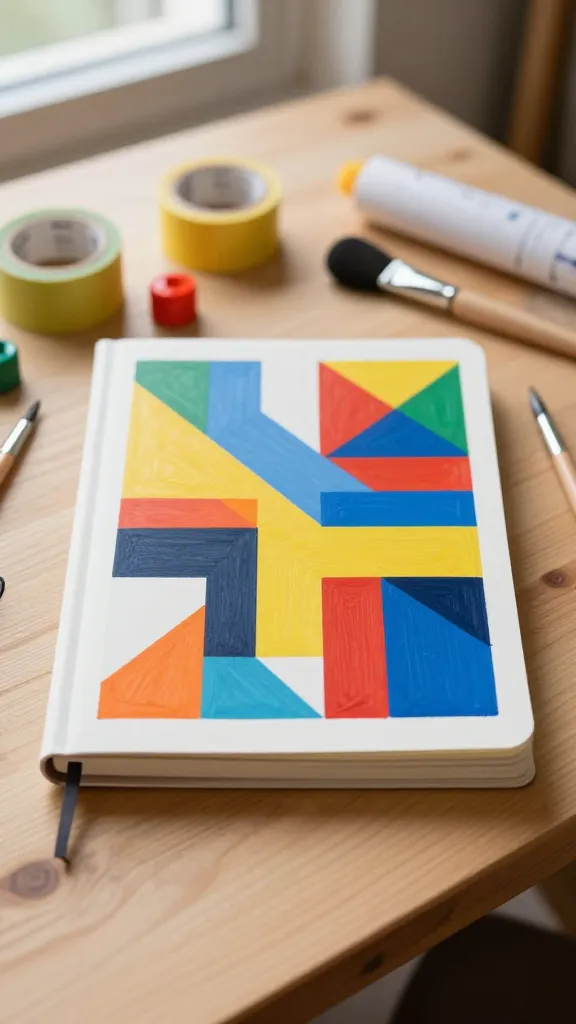
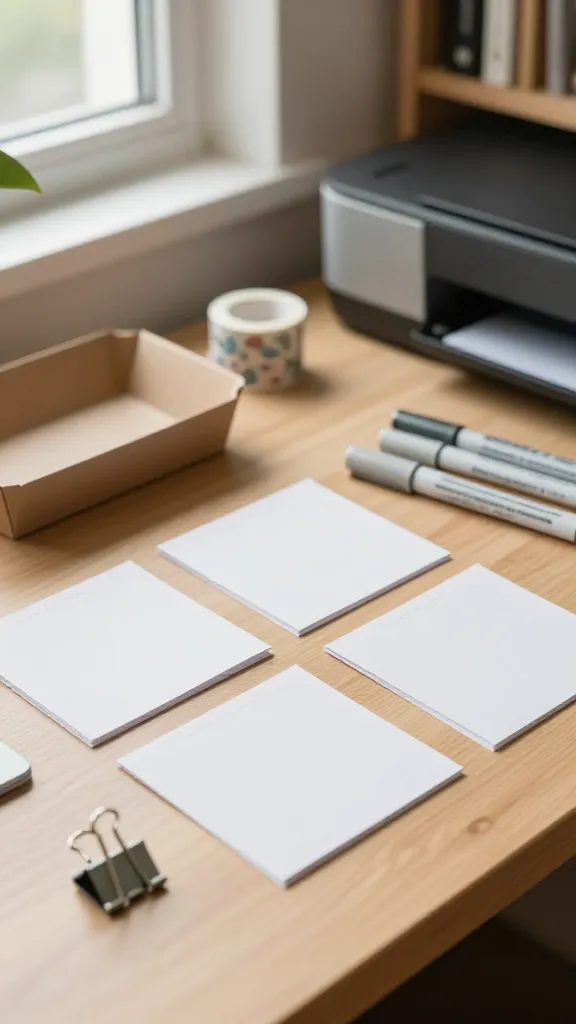
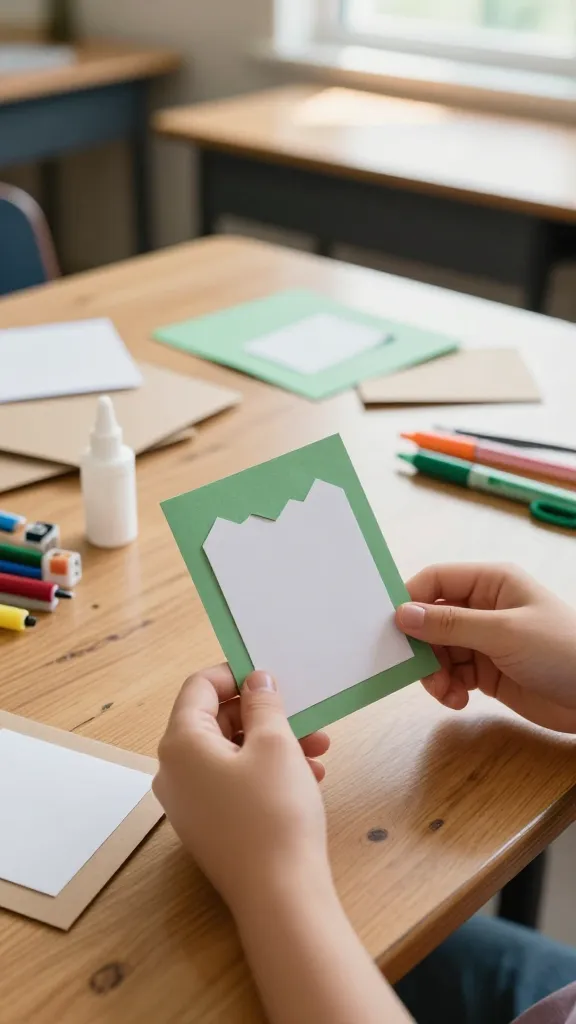
3. Customizable Graph Paper Notebook Covers
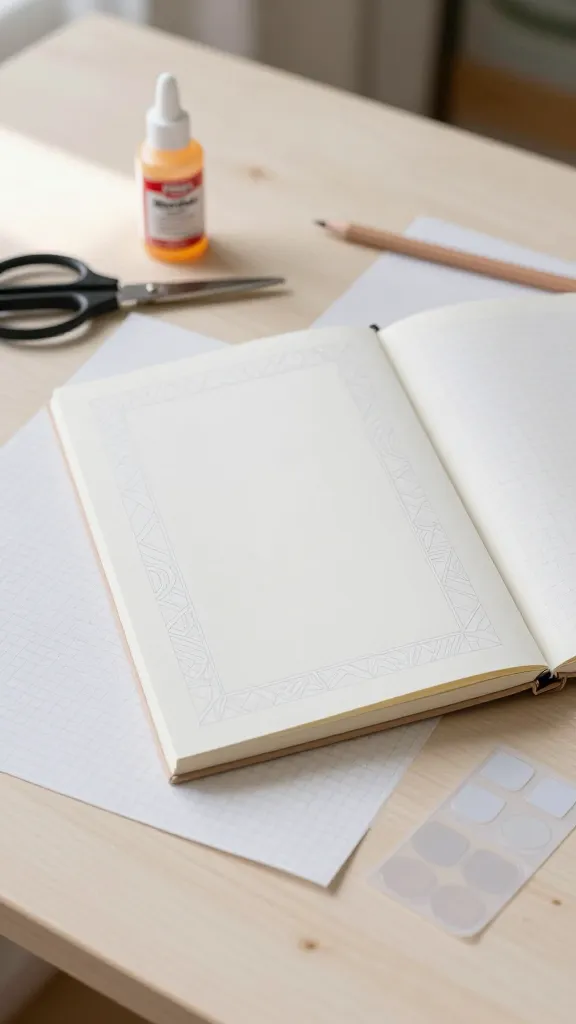
Snazz up a plain notebook cover with a reusable stencil or freehand shapes. The result feels custom and chic, perfect for staying organized without shouting school-supply-by-the- dozen vibes.
- Materials: Plain notebook cover, decorative paper, Mod Podge, scissors, pencil, optional stickers.
- Key steps: Cut decorative paper to fit cover, glue on, add final layer of top sealant.
- Pro tips: Create a small pocket on the inside cover for quick notes or receipts.
Who’ll love it: notebook nerds who crave standout covers and a tiny brag on their desk.
4. Recycled Magazine Clip Wall Art
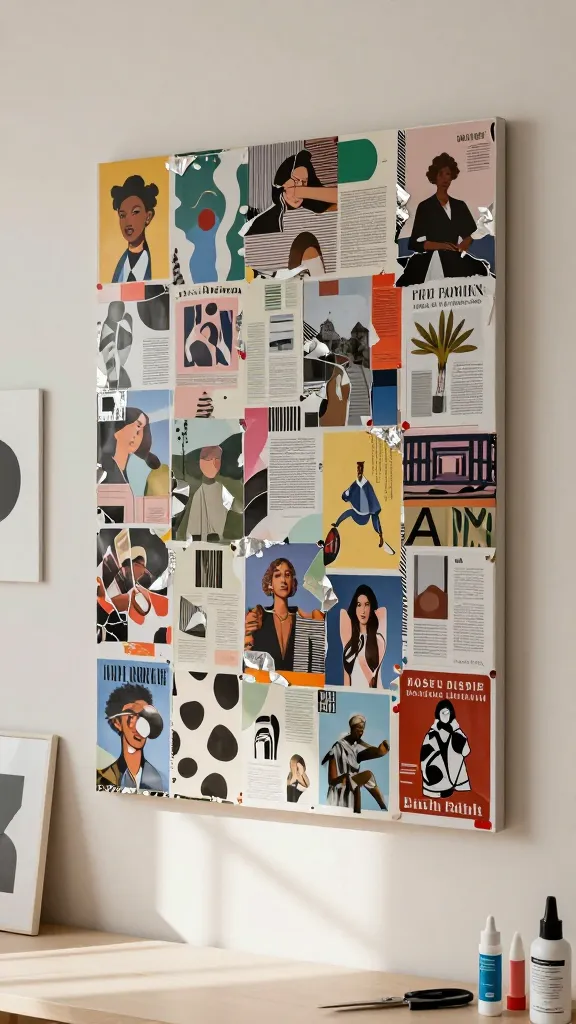
Turn discarded magazines into a vibrant, collage-style wall piece for your dorm or room. It’s artsy, eco-friendly, and totally you.
- Materials: Old magazines, poster board or canvas, acrylic medium or Mod Podge, scissors, glue sticks, a frame (optional).
- Key steps: Cut images in varied shapes, arrange on board, glue down, seal with medium or mod podge.
- Pro tips: Stick to a color story for a cohesive look; add metallic accents with foil scraps.
Who’ll love it: collage lovers and those who want quick, high-impact wall decor.
5. Alphabet Clay Magnets
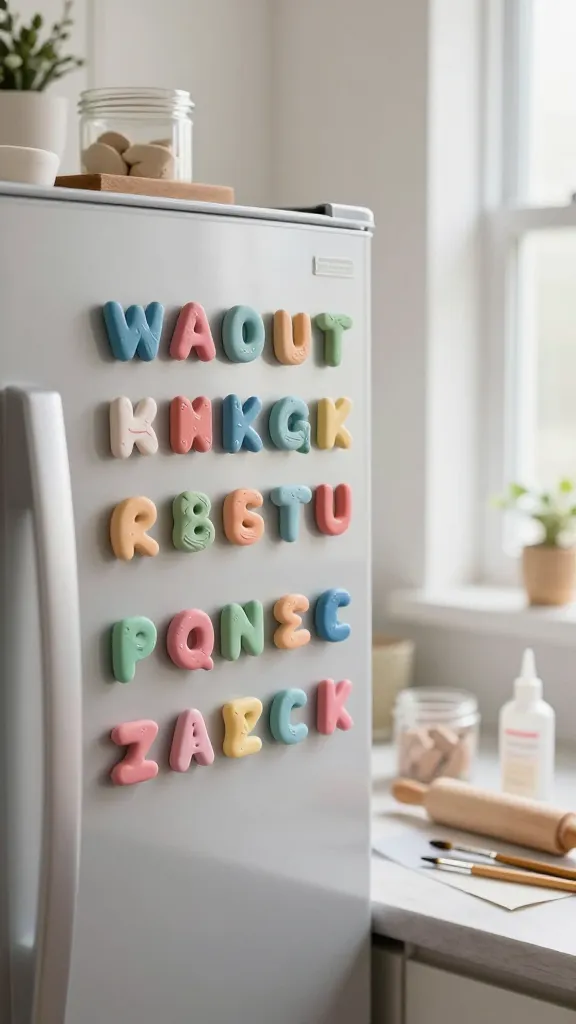
Spell out your name or a favorite word with tiny clay letters that double as magnets. Cute, tactile, and perfect for a fridge or steel locker shelf.
- Materials: Air-dry clay, magnet strips, acrylic paints, brushes, glue.
- Key steps: Roll tiny letter shapes, bake or air-dry, paint, attach magnets with sturdy glue.
- Pro tips: Seal with a clear glaze for durability; mix in a tiny charm for extra personality.
Who’ll love it: anyone who loves little touches that make a space feel personalized.
6. Pom-Pom Pencil Cup Cooler
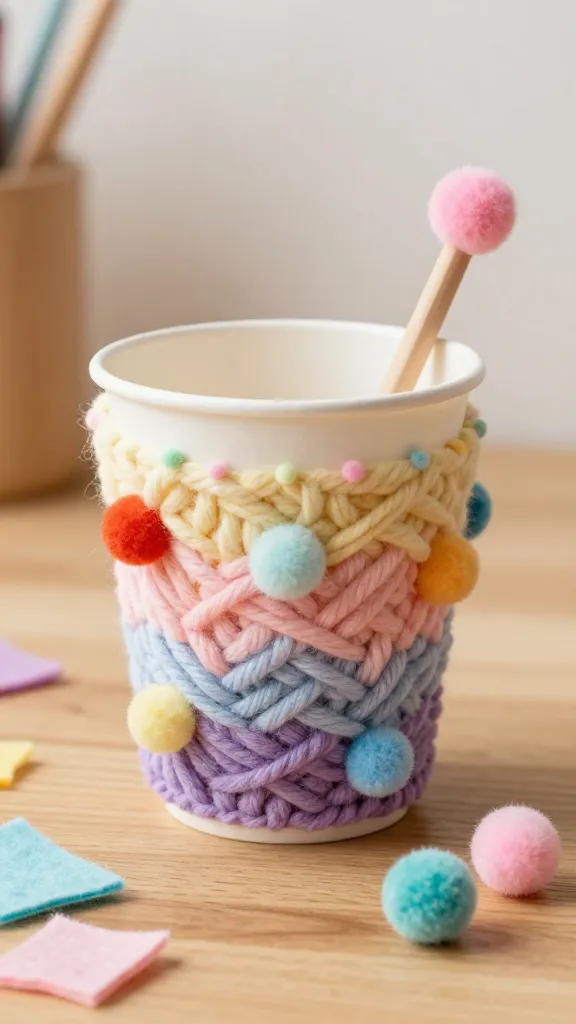
Bring whimsy to your desk with a felt and yarn pom-pom cup holder. It’s soft, colorful, and surprisingly sturdy for a little DIY charm kit.
- Materials: disposable cup or small container, yarn, felt scraps, hot glue, scissors.
- Key steps: Cover cup with yarn, add felt decorations, glue pom-poms as accents.
- Pro tips: Use school colors or gradient yarn for a polished look.
Who’ll love it: the cozy desk stylist and anyone who wants a tactile splash of color.
7. Upcycled Cardboard Desk Divider
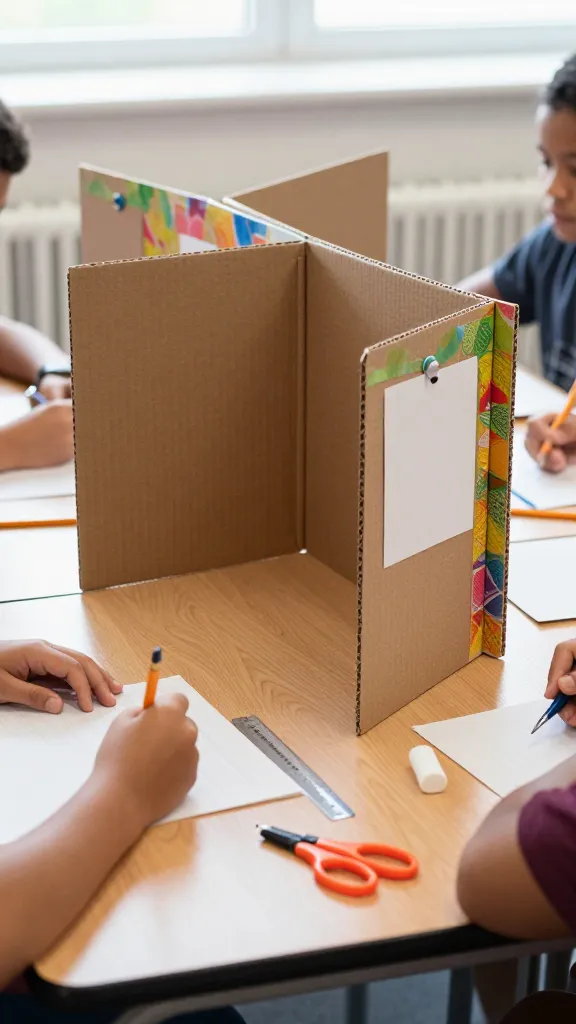
Create a low-profile divider from stacked cardboard to carve out little privacy nooks on a crowded desk. Frugal, functional, and surprisingly sturdy.
- Materials: Cardboard, decorative paper or fabric, glue, scissors, measuring tape.
- Key steps: Cut cardboard into panels, glue layers for thickness, cover with design material.
- Pro tips: Add a magnet strip on the back to attach notes or photos.
Who’ll love it: group project students who want a personal space at a shared table.
8. DIY Chalkboard Wall Panel
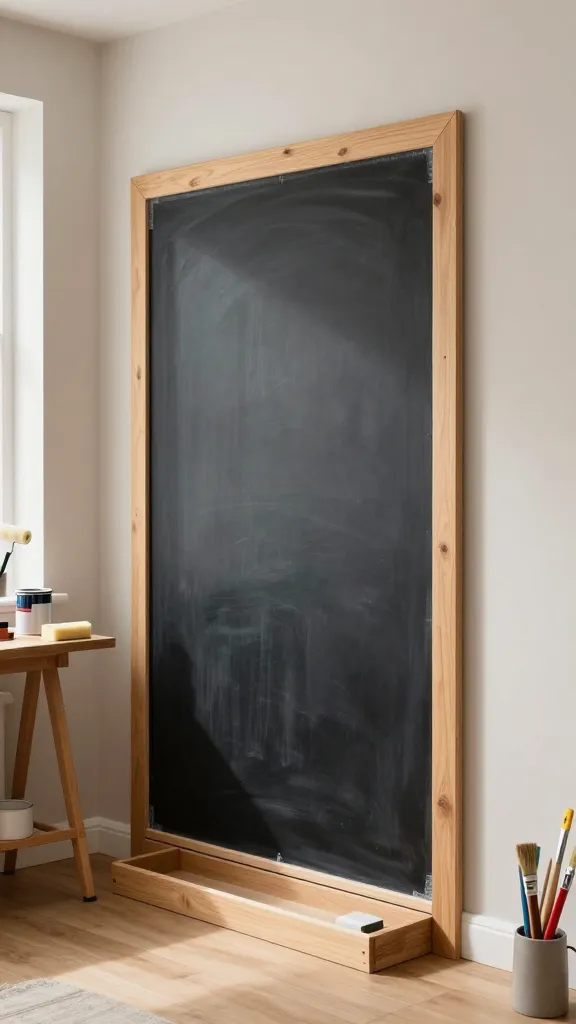
Turn a small wall section or door into a reusable chalkboard with budget-friendly paint. It’s where to doodle, plan, and brainstorm with friends.
- Materials: Chalkboard paint, painter’s tape, sponge roller, 1x wood panel or sturdy board.
- Key steps: Prep surface, tape edges, apply two coats of chalkboard paint, cure as directed.
- Pro tips: Frame with scrap wood for a polished look; add a small tray for chalk and erasers.
Who’ll love it: creative minds who want a living, evolving study space.
9. Faux Tie-Dye Scrunchie Bookmarks

Low-cost, high-impact bookmarks folded from cardstock and tied with a DIY faux tie-dye pattern. They look tailor-made and add a splash to any syllabus.
- Materials: Cardstock, rubber bands, markers or watercolors, scissors, hole punch.
- Key steps: Create folded booklet bookmark, add faux tie-dye strip, punch a hole for tassel.
- Pro tips: Use color families to keep your notes visually organized.
Who’ll love it: paper-crafters who crave color-assigned study aids.
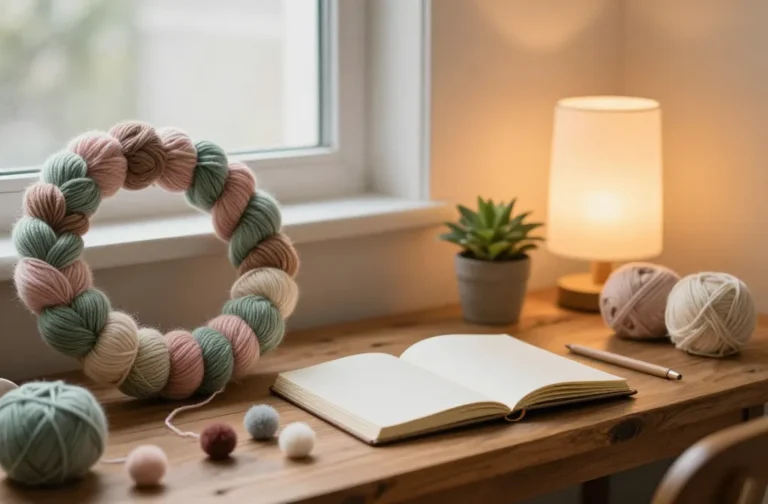
10. Desk Plant S überrasive: Mini Succulent Terrarium
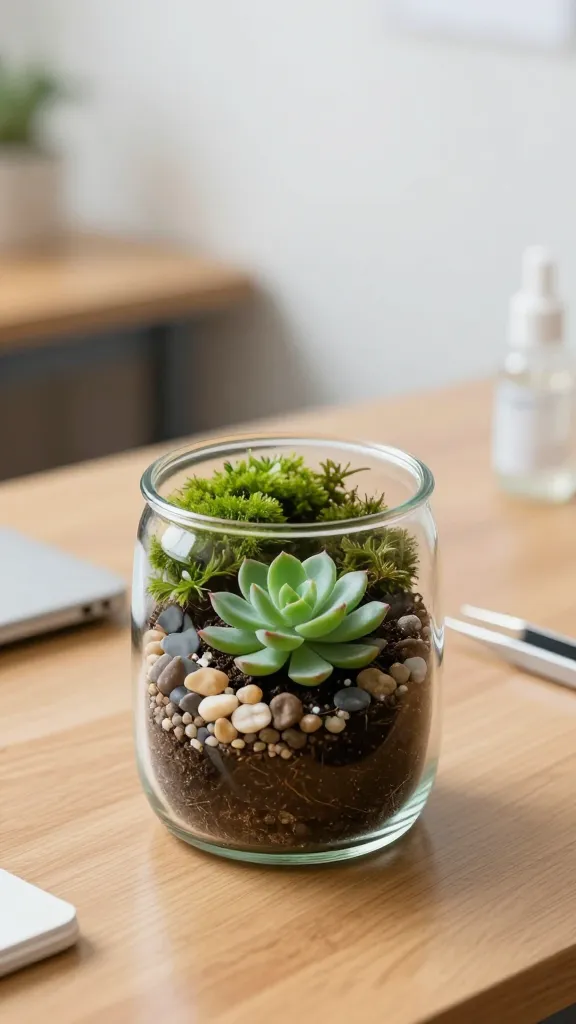
A tiny glass terrarium with a plastic succulent transforms a boring corner into a breathable, botanical nook.
- Materials: Clear glass jar or bottle, small faux or live succulent, potting soil, decorative pebbles, tweezers.
- Key steps: Layer pebbles, soil, plant, and top with moss or decorative stones.
- Pro tips: If live plants, pick hardy varieties and use a small spray bottle to water sparingly.
Who’ll love it: plant lovers and anyone who wants a touch of nature in class or dorm rooms.
11. Candy Wrapper Banner
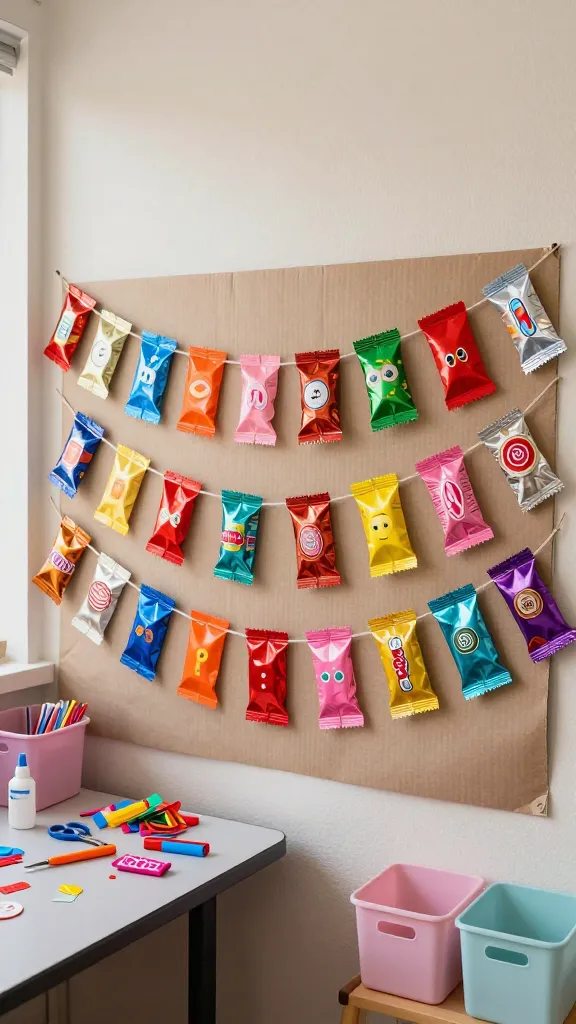
A playful banner made from clean candy wrappers creates a sweet, upcycled wall piece that’s sure to spark smiles.
- Materials: Clean candy wrappers, glue, string, scissors, cardboard or fabric for backing.
- Key steps: Cut wrappers into shapes, glue to string in your chosen pattern, mount on backing.
- Pro tips: Mix bold colors with metallic wrappers for extra pop.
Who’ll love it: sweet-toothed crafters and those decorating dorms with a playful vibe.
12. DIY Button Spot Coasters
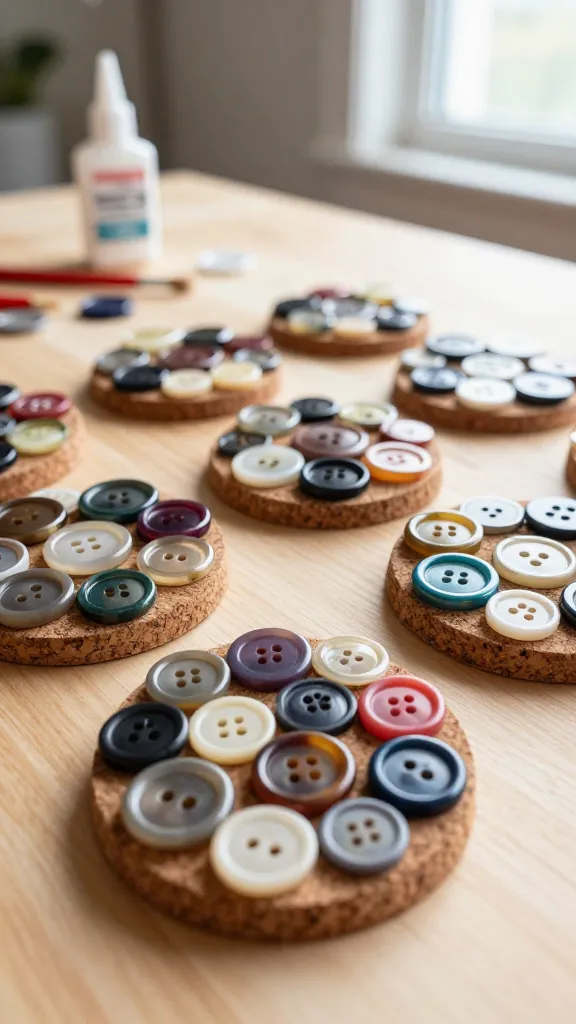
Turn old buttons into glossy, one-of-a-kind coasters. Practical, retro-chic, and a breeze to assemble in an afternoon.
- Materials: Assorted buttons, cork disks, strong glue, clear sealant.
- Key steps: Arrange buttons on cork, glue down, seal edges to prevent snagging.
- Pro tips: Create a color story; add a felt base to protect tables.
Who’ll love it: anyone who collects buttons or wants a nostalgic nod to craft history.
13. Tape-Stamped Paper Notebook Covers
Use paint-friendly tape as a stamp to create geometric patterns on notebook covers. Bold, fast, and gallery-worthy with zero mess.
- Materials: Plain notebook, painter’s tape, acrylic paint, sponge or brush.
- Key steps: Place tape in desired pattern, dab paint, remove tape for clean lines.
- Pro tips: Experiment with negative space by leaving sections untaped.
Who’ll love it: design-forward students who value crisp lines and color blocks.
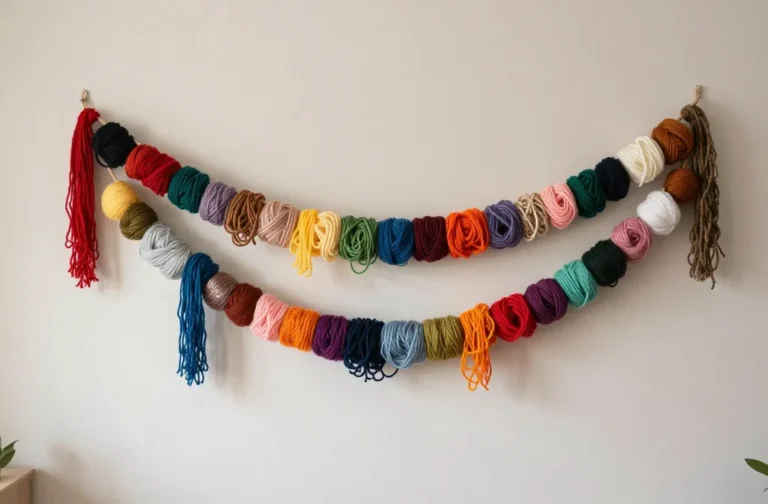
14. Felt Letter Garland
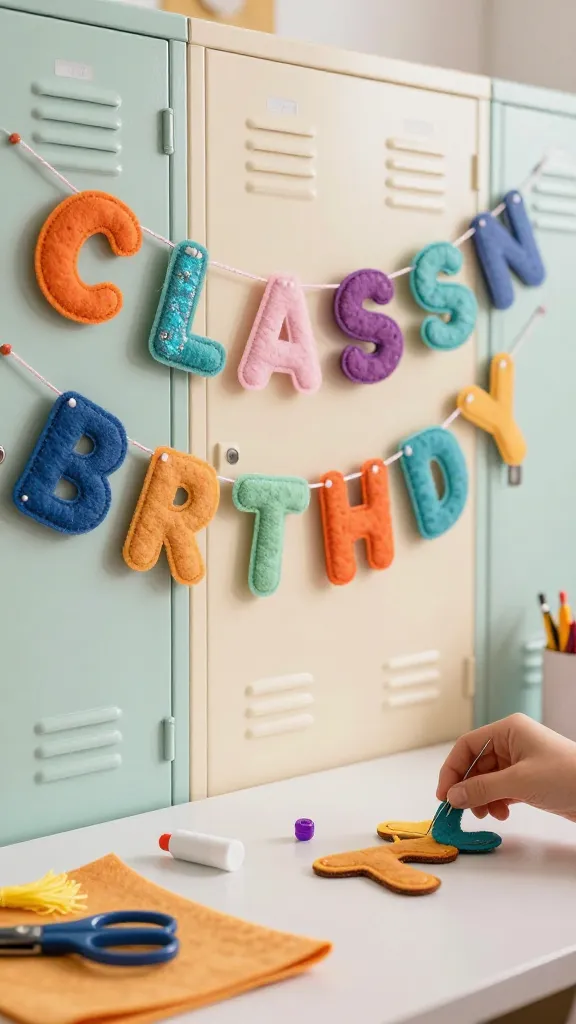
A soft, playful garland spelling out your class name or motto. Great for lockers or dorm walls and easy to reuse.
- Materials: Felt sheets, embroidery floss, needle, scissors, glue.
- Key steps: Cut letters, sew or glue onto a string in order, hang up.
- Pro tips: Mix textures—felt with iridescent fabric scraps for depth.
Who’ll love it: typography fans and anyone who wants a cute, movable decor piece.
15. DIY Fabric Bookmark Ribbons
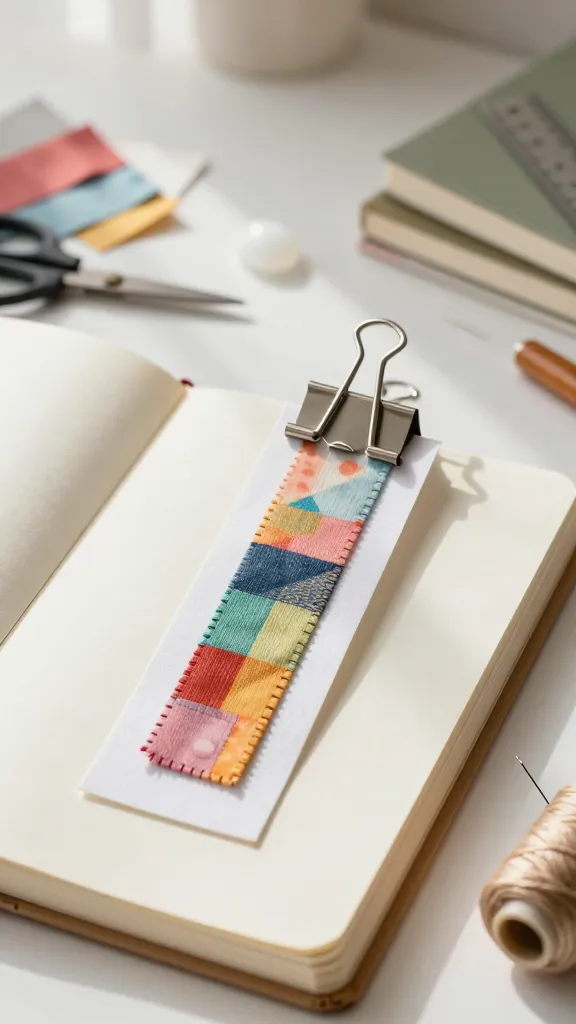
Ribbon bookmarks from scrap fabric and a sturdy clip give you a stylish way to mark pages without tearing your paper.
- Materials: Scrap fabric, cardstock, binder clips, scissors, fabric glue or hot glue.
- Key steps: Cut fabric into strips, glue to cardstock, attach to clip.
- Pro tips: Personalize with initials or tiny charms sewed into the edge.
Who’ll love it: fabric lovers and students who want a durable, decorative page saver.
16. Painted Pencil Rainbow Sticks
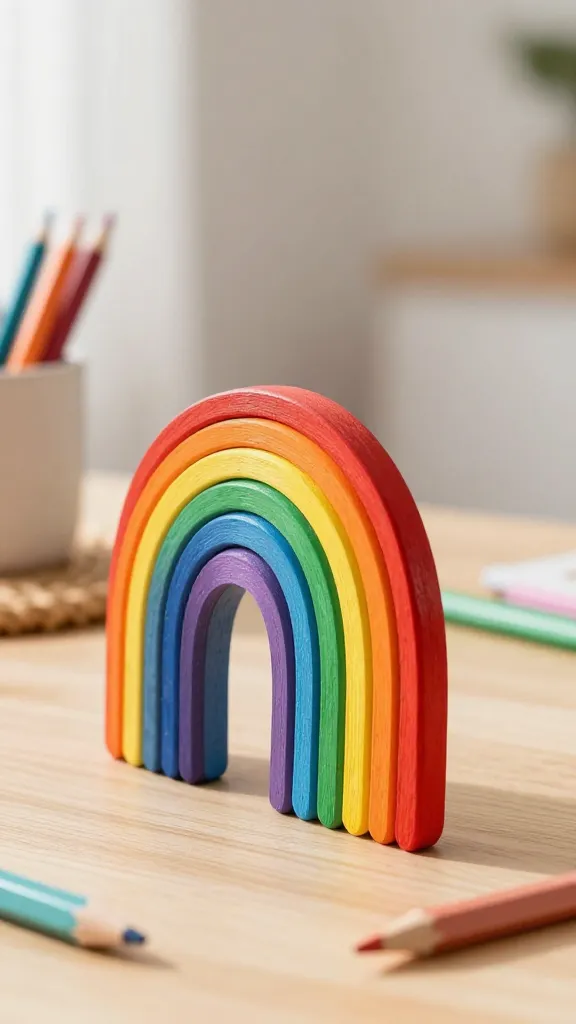
Turn wooden craft sticks into a tiny rainbow display that doubles as a cheerful desk ornament or pen rest.
- Materials: Wooden craft sticks, acrylic paints, brush, hot glue (optional for arranging).
- Key steps: Paint sticks in rainbow order, let dry, arrange and glue into a fan or wave shape.
- Pro tips: Seal with a matte finish for longevity and smooth handling.
Who’ll love it: color lovers who want a tiny, joyful desk sculpture.
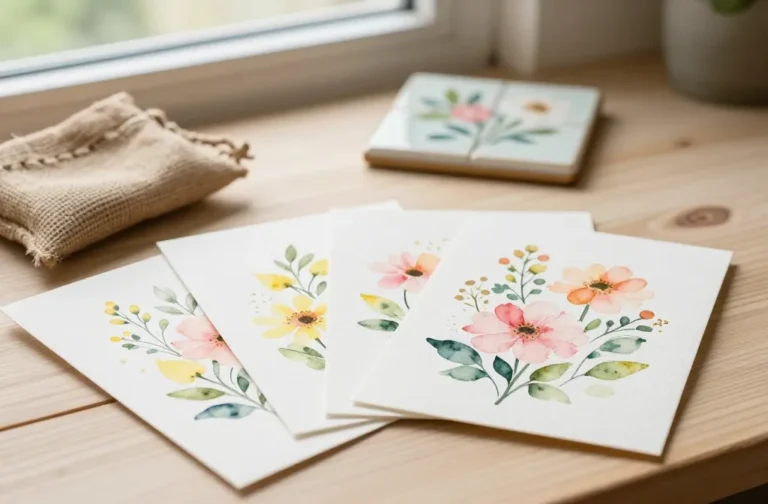
17. DIY Quote Card Set
A small set of printable or hand-lettered quote cards to inspire during study breaks. Simple, meaningful, and endlessly adaptable.
- Materials: Cardstock, printer or brushes, markers, optional decorative stickers.
- Key steps: Cut cards, add quotes, decorate lightly to keep legible.
- Pro tips: Punch holes and bind into a mini ring binder for portability.
Who’ll love it: anyone who appreciates a little daily motivation on a desk or dorm shelf.
18. Mini Photo Clip String

Hang a slim string with tiny clips to display photos, memos, or mini art. A personal gallery in a few minutes.
- Materials: Lightweight string, mini clothespins, photos or art prints, tape or nails for mounting.
- Key steps: Measure space, string, clip items in place, secure ends.
- Pro tips: Alternate with decorative badges or small posters for texture.
Who’ll love it: sentimental souls and those who want a rotating display for memories.
19. DIY Light-Up Paper Lanterns
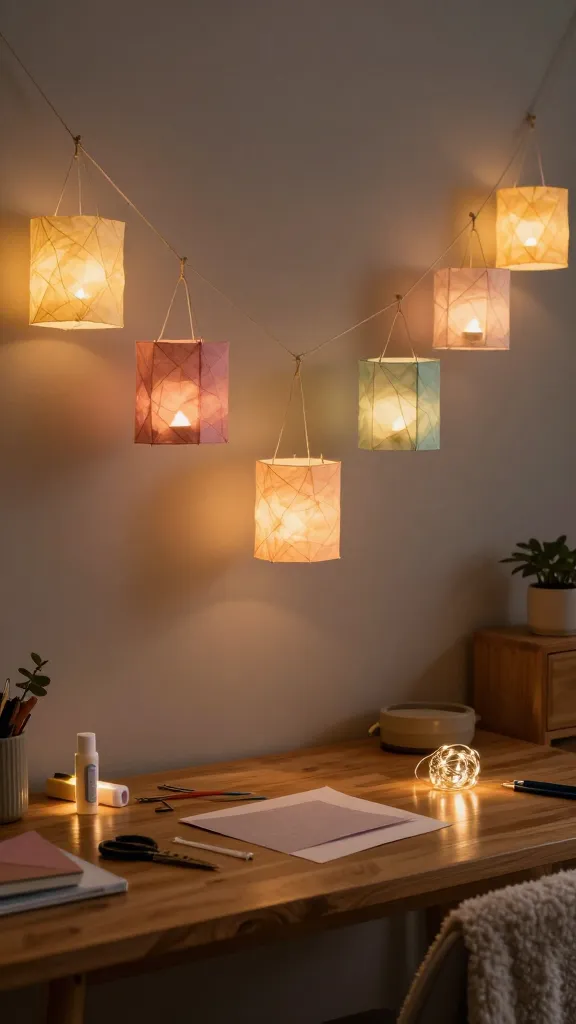
Folded paper lanterns with a tiny LED tucked inside create a cozy glow for desk corners or nightstands.
- Materials: Colored paper, scissors, glue, tiny LED tea light or fairy lights, tape.
- Key steps: Cut and fold into lantern shape, secure with glue, insert light, hang or place.
- Pro tips: Use batteries-safe LEDs; pick colors that match your room palette.
Who’ll love it: night owls who crave ambient lighting without the risk of candles.
20. Upcycled Snack Cup Organizer
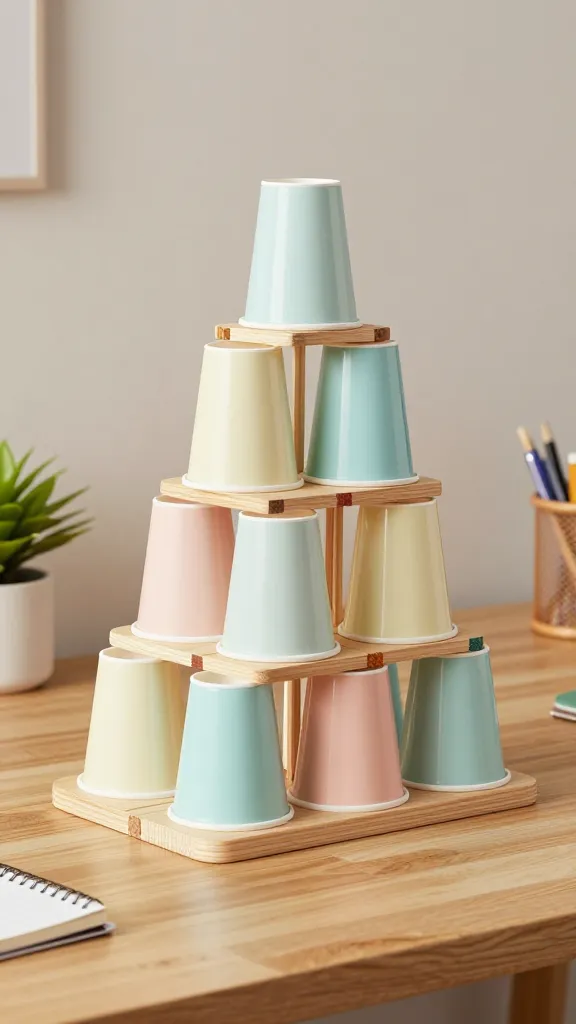
Repurpose clean snack cups into a modular desktop organizer with a few popsicle sticks. Practical and fridge-to-desk friendly.
- Materials: Snack cups, hot glue, popsicle sticks, paint or markers, decorative tape.
- Key steps: Glue cups onto a base or into a pyramid, decorate with paint or tape.
- Pro tips: Create different heights for visual interest and easier access.
Who’ll love it: space-saving organizers and anyone who loves clever recycling projects.
21. Chalky Finish Memory Box
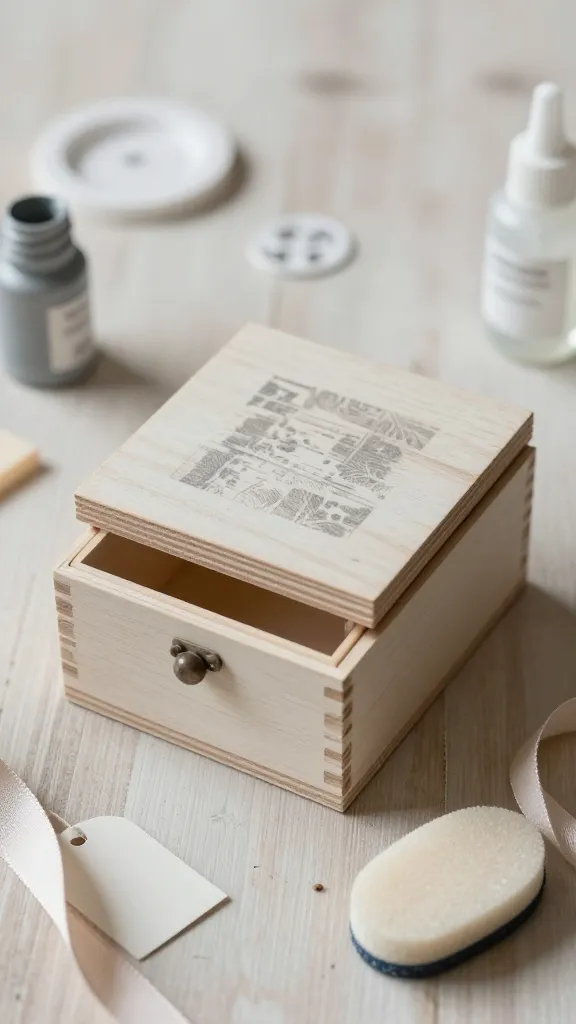
Decorate a small box with chalky paint and stencil a message on top. It’s perfect for keepsakes, notes, or gift treasure chests.
- Materials: Small wooden box, chalky paint, stencil, sponge, clear sealant.
- Key steps: Paint, apply stencil, seal; add a ribbon or label for personalization.
- Pro tips: Layer different colors for a soft ombré effect.
Who’ll love it: nostalgic souls who want a tactile storage piece with character.
22. Seed Packet Handmade Cards
Use seed packets as mini cards to gift notes or encouragement to classmates. Eco-friendly, unexpected, and friendly to wallets.
- Materials: Seed packets, cardstock, markers, glue, optional stamps.
- Key steps: Decorate packets, write message, tape or glue a small card inside.
- Pro tips: Include a small packet of seeds as a future bloom reminder.
Who’ll love it: nature lovers and anyone who enjoys a little gardening vibe in school life.
23. DIY Ribbon Book Spine Decorations
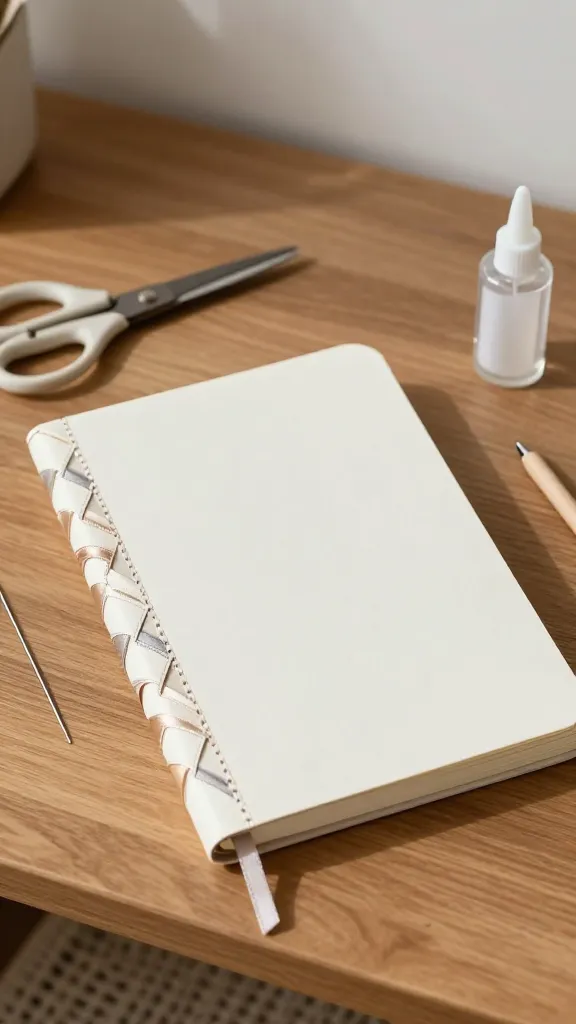
Jazz up the spine of a plain notebook with a stitched ribbon overlay. It looks luxe but stays affordable.
- Materials: Notebook spine, decorative ribbon, fabric glue or needle and thread, scissors.
- Key steps: Cut ribbon to length, glue or sew across spine in a decorative pattern.
- Pro tips: Combine metallic and matte ribbons for a chic effect.
Who’ll love it: fashion-forward students who want to upgrade their study staples.
24. Linen-Covered Pencil Cup
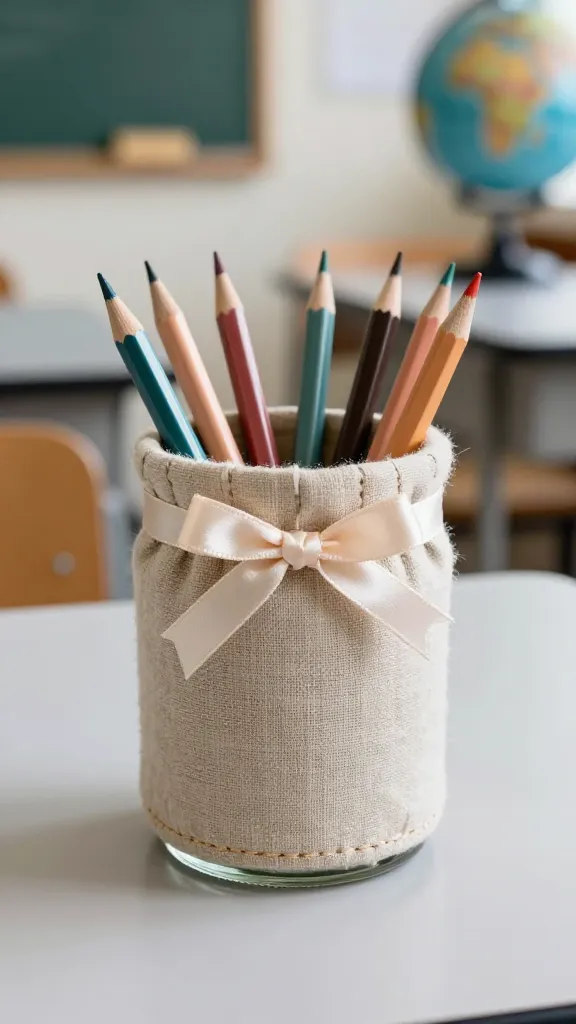
A simple fabric wrap around a jar yields a soft, tactile pencil cup that stands out in any classroom corner.
- Materials: Glass jar, linen or scrap fabric, fabric glue, scissors, ribbon (optional).
- Key steps: Cut fabric to wrap around jar, glue edges, let dry, add ribbon for a finished edge.
- Pro tips: Use a contrasting fabric on the inside for a hidden pop of color.
Who’ll love it: fabric lovers and anyone who wants a touch of texture at their desk.
25. DIY Glittery Binder Clip Magnets

Turn ordinary binder clips into magnets with a splash of glitter and a sturdy magnet strip. Functional, sparkly, and easy to replicate for a class project party.
- Materials: Binder clips, small magnets, school-appropriate glitter, clear sealant, glue gun.
- Key steps: Glue magnets to back of binder clips, sprinkle glitter, seal with clear coat.
- Pro tips: Use color-coded glitter by class or subject to organize your space visually.
Who’ll love it: sparkly organizers and those who adore tiny, portable decor with big personality.
Conclusion
These 25 craft ideas for school on a budget prove that you don’t need to splurge to create something share-worthy. Each project is quick, customizable, and designed to spark a little joy in your daily routine. Give one a try, or go wild and make all of them—your desk, locker, and brain will thank you.