5 Awesome Crafts for an 8-Year-Old Boy
Ready to spark a kid-approved creative rush? These five crafts are fast, fun, and insanely engaging for an 8-year-old’s hands and curiosity. You’ll love watching their imagination come alive with each project—trust me, they’re the kind you’ll want to post about on Pinterest.
1. Whimsical Cardboard Castle Model Kit
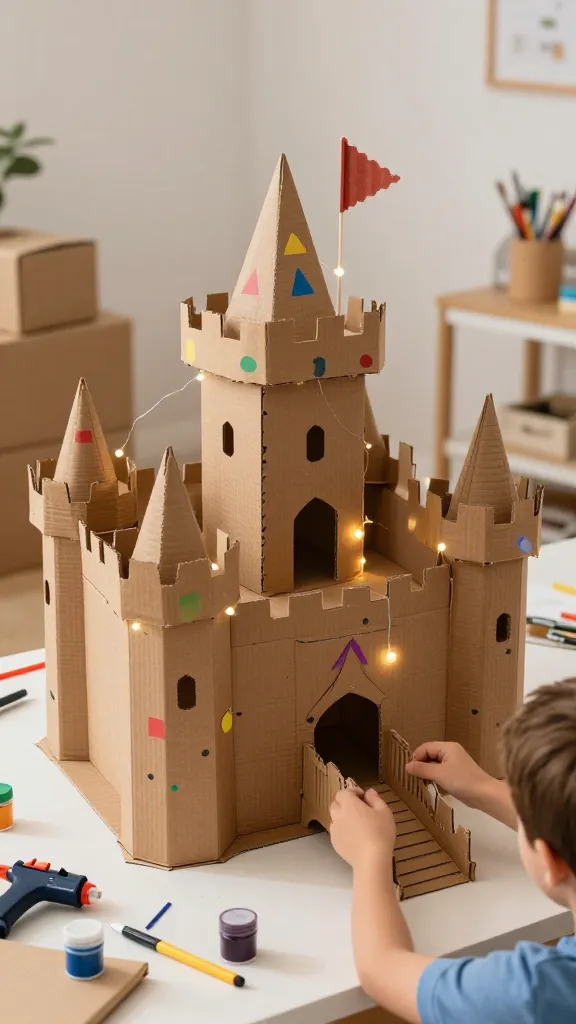
Picture a sturdy cardboard fortress bursting with towers, drawbridges, and secret doors. This isn’t just a craft; it’s a mini world your kid can design and play inside. The bright colors and texture-rich surfaces look instantly epic on a shelf or desk.
Materials Needed
- Large cardboard boxes (washable on the outside if possible)
- Acrylic paint and brushes
- Masking tape and cardboard scissors
- Glue or hot glue gun (adult supervision)
- Markers, stickers, string lights (optional)
How to Make It
- Sketch a simple castle layout on a flat box and cut out the walls and towers.
- Assemble with tape and glue, creating multiple levels and secret rooms.
- Decorate with bold colors, flags on towers, faux stone textures, and fun details.
- Add string lights or LED tea lights for a dramatic glow in the evenings.
Pro Tips / Styling Ideas
- Keep the color palette bright and high-contrast for epic photo moments.
- Let your kid design creaky doors and hidden passages—these are the heart of the castle.
- Place inside a cozy “king’s chamber” with blankets for dramatic play.
End note: This is perfect for a rainy afternoon or a themed birthday activity. Any kid who loves adventures and pretend play will go wild for this. It’s sturdy, reusable, and seriously impressive.
2. Turbo-Trek Marble Run With Recycled Tubes
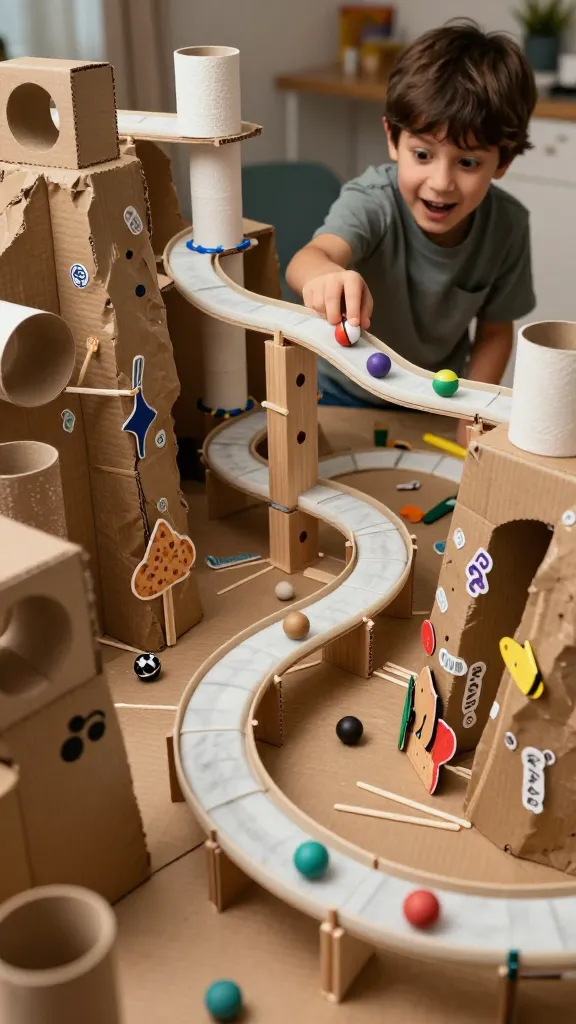
Imagine a roaring marble course winding through a canyon of cereal-box arches and coffee-stirrer bridges. This is a science-meets-art project that will have your 8-year-old cheering at every twist and turn. Plus, it reuses everyday scraps—super satisfying, FYI.
Materials Needed
- Empty toilet paper rolls and paper towel tubes
- Masking tape, hot glue (adult supervision)
- Popsicle sticks, cardboard cutouts
- Marbles or small plastic balls
- Paint, markers, stickers for decorating
How to Make It
- Stand tubes upright on a sturdy base (old cardboard or a thick sheet).
- Connect tubes with bridges and ramps using tape and glue.
- Create twists, loops, and a few jump sections to keep the marble guessing.
- Decorate the frame with bold patterns and a quick color-block theme.
Pro Tips / Styling Ideas
- Color-code ramps so the marble’s journey feels like a mini adventure story.
- Add small flags or doodles along the track for personality.
- Test run with a few practice marbles to check speed and flow.
End note: It’s portable, endlessly adjustable, and a fabulous conversation starter. Kids love perfecting a track and watching their marble conquer every obstacle.
3. Pocket-Sized DIY Solar Oven Snacking Station
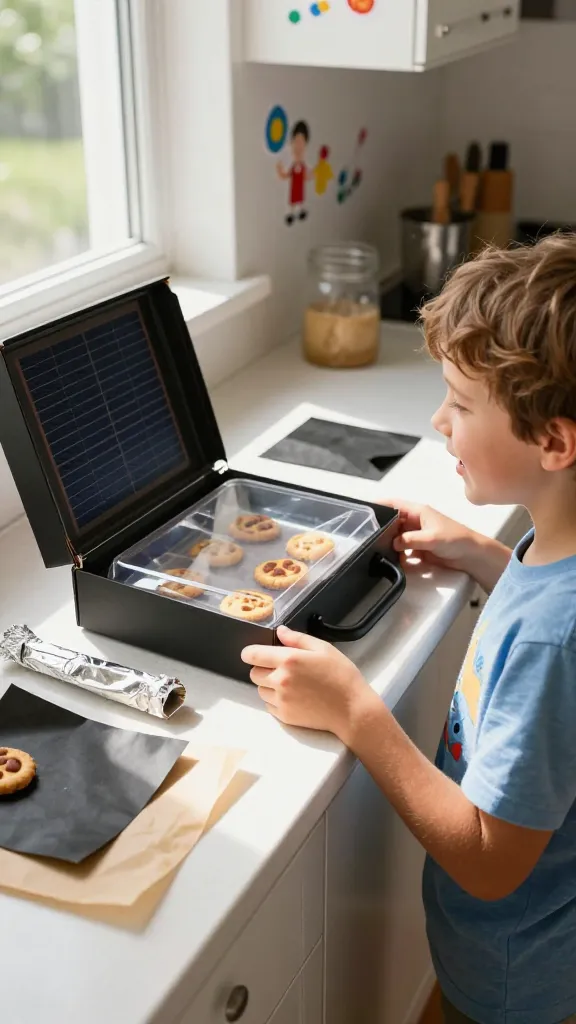
Science in a compact, kid-friendly setup that bakes tasty treats using sun power. This pocket-sized solar oven turns a sunny afternoon into a delicious experiment, plus it teaches energy basics without a single dull moment.
Materials Needed
- Cardboard shoebox or small cardboard cooler
- Aluminum foil, clear plastic wrap
- Black construction paper
- Wax paper or parchment (optional)
- Small snacks that can bake (mini pizzas, s’mores, or cookies)
How to Make It
- Line the inside with black paper to absorb heat, then cover the lid with aluminum foil to reflect sunlight.
- Seal a small viewing window with plastic wrap to trap heat inside.
- Place snacks on a small tray inside and prop the oven at an angle to chase the sun.
Pro Tips / Styling Ideas
- Let your kid decorate the outside with a bold sun motif and quirky stickers.
- Track the sun’s position and talk about how angles affect heating—learn while you bake!
- Keep a quick timer in reach so you don’t overcook or burn anything.
End note: It’s delicious science with a tasty payoff. Perfect for a sunny weekend, a science fair prep project, or a backyard snack session.
4. Create-Your-Own Comic Strip Mini-Zine
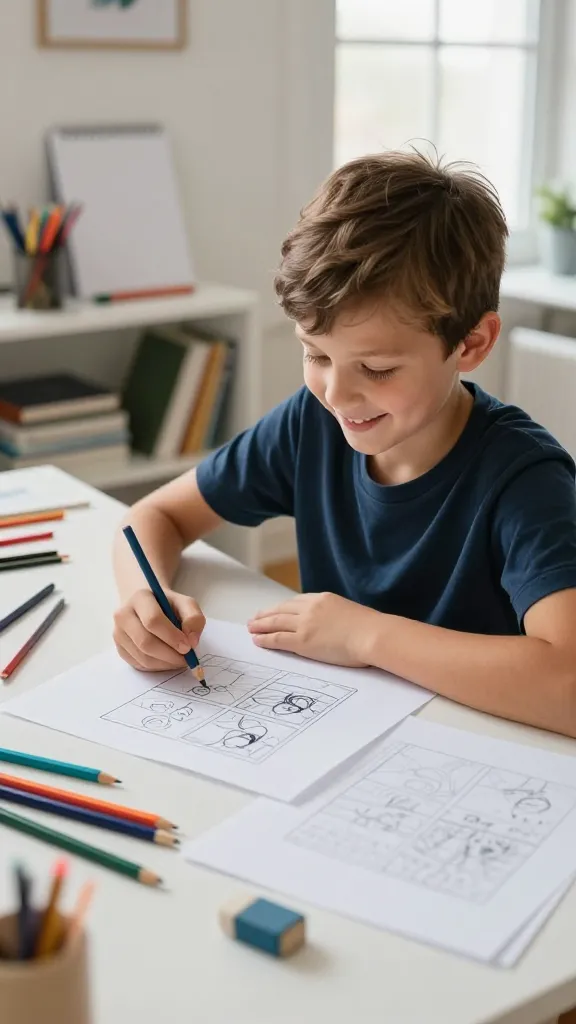
Let imagination sprint across pages with a self-made comic zine starring your kid as the hero. This is the kind of project that blends storytelling, drawing, and design into a compact, keepsake booklet that screams personality.
Materials Needed
- Several sheets of blank printer paper or notebook paper
- Pencil, eraser, marker set
- Ruler for clean panels (optional)
- Colored pencils or markers for bold coloring
How to Make It
- Fold papers into a 8-page mini booklet or staple several sheets for a thicker zine.
- Sketch a simple hero, sidekick, and a short, fun adventure across each panel.
- Ink, color, and add dialogue bubbles for humor and action.
- Decorate the cover with a title and a bold illustration.
Pro Tips / Styling Ideas
- Use a consistent panel layout to keep it neat and readable.
- Encourage your kid to invent a quirky catchphrase or signature line for their hero.
- Turn one zine into a mini-series by continuing the adventures on future pages.
End note: This project builds storytelling confidence, boosts drawing skills, and results in a tangible book your kid will be excited to show off. It’s creative, personal, and seriously fun.
5. Nature-Inspired Painted Rock Gallery Studio
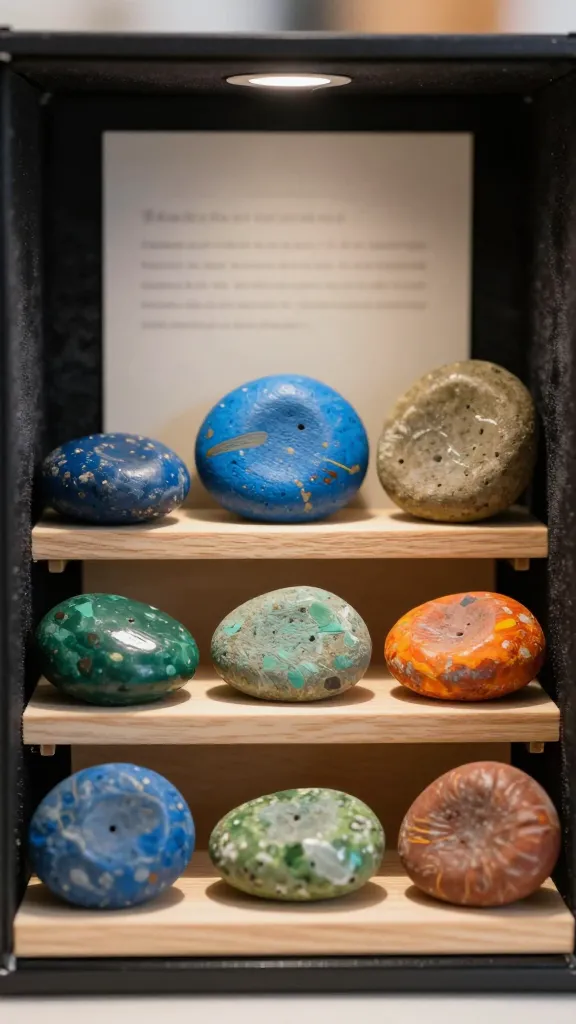
Turn ordinary rocks into tiny works of art and curate a pretend gallery in a shoebox or on a bookshelf. This project taps into color theory, texture, and a sense of calm creativity that kids naturally love. It’s a delightful way to bring a touch of whimsy indoors.
Materials Needed
- Smooth rocks of various sizes
- Acrylic paints and small brushes
- Sealer spray or mod podge (optional)
- Newspaper or tray to protect surfaces
How to Make It
- Wash rocks and let dry; choose a color palette—bold blues, earthy greens, or sunset oranges work great.
- Paint each rock with patterns: stripes, dots, or tiny landscapes.
- Seal for longevity and place in a curated display or around a mini “gallery” on a shelf or window sill.
Pro Tips / Styling Ideas
- Mix metallics with matte colors for added depth and shine.
- Create a theme across all rocks, like ocean, forest, or space.
- Add tiny labels on the bottom with the rock’s “title” and the artist’s name.
End note: A surprisingly soothing yet wildly creative project. It’s the perfect finish for a nature-day adventure or a quick, quiet afternoon activity that blooms into a charming display.
Conclusion
Five completely unique crafts, each designed to ignite curiosity and hands-on fun for an 8-year-old. These projects are meant to be easy, visually striking, and endlessly shareable—so you’ll want to pin, print, and dive in. Pick one or go all in and turn a weekend into a tiny, colorful world of creativity. Have fun crafting together!