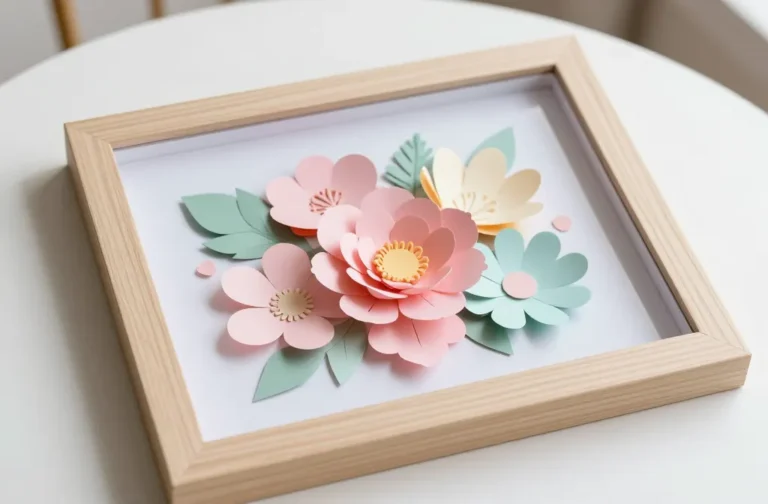
5 Easy Craft Projects for 5-Year-Olds (Perfect for Preschoolers)
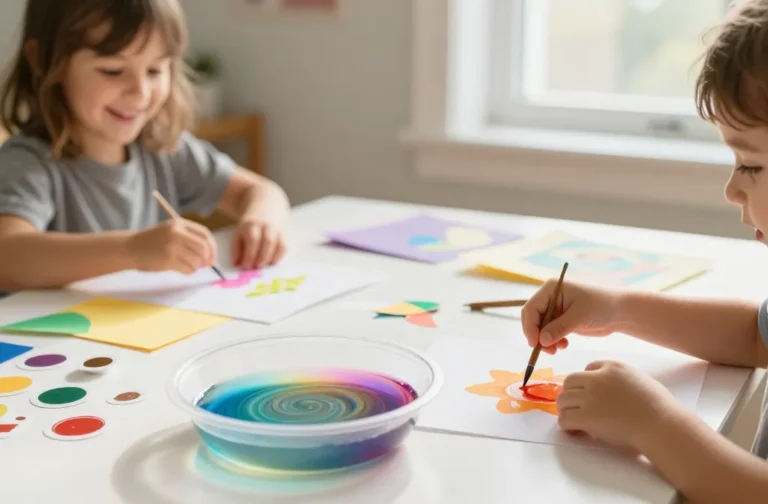
You’re scrolling for quick, joyful projects that tiny hands can conquer with big pride. These five crafts are playful, approachable, and totally kid-approved—no grown-up supervision needed beyond a cheer or two. Trust me, your preschooler will want to make every single one this week.
1. Paper Plate Zoo Animals: A Tiny-Talent Craft Party
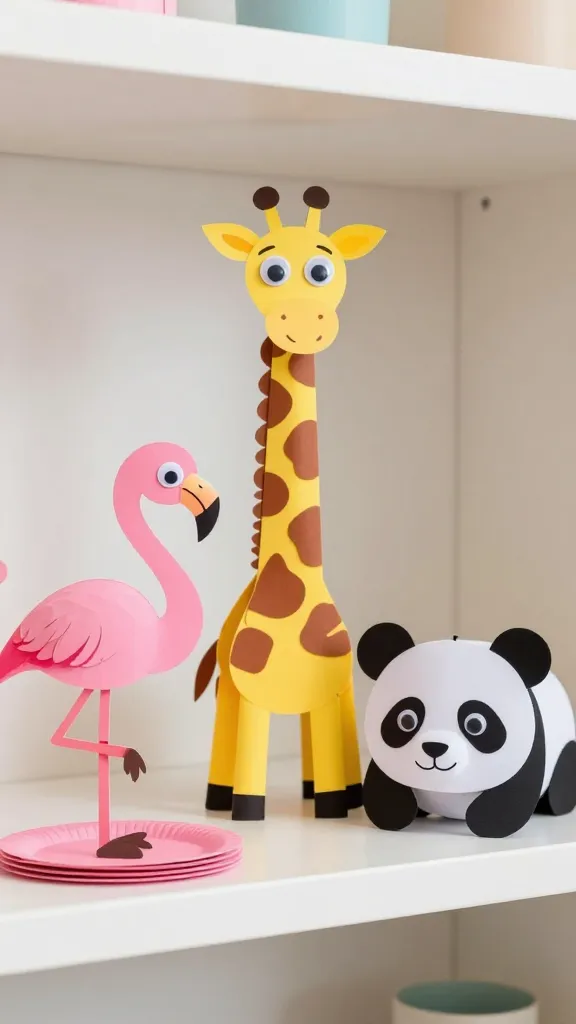
Imagine a bright flamingo, a goofy giraffe, and a sleepy panda perched on your shelf, all made from a stack of paper plates. This project turns simple shapes into personality, and the best part is the creative mess is practically non-existent. The finished creatures are delightfully display-worthy and perfect for a playful mini zoo display.
Materials Needed
- Plain paper plates
- Non-toxic paints or kid-safe markers
- Construction paper scraps
- Googly eyes (optional but fun)
- Glue sticks or craft glue
- Safety scissors (child-friendly)
How to Make It
- Paint or color the plates to resemble your chosen animal. Let the colors dry a minute or two.
- Cut ears, noses, and facial features from construction paper. Attach with glue, adding any small details with markers.
- Affix googly eyes if you have them, or draw eyes directly on the plate for a super-speed version.
- Create a tiny “scene” by adding foliage or a little footprint background with scraps of paper.
Pro Tips / Styling Ideas
- Keep plates in a coordinated color palette—soft pastels for a calm display or bold neons for a playful setup.
- Turn the zoo into a mobile by punching holes and stringing with a ribbon for a ceiling decoration.
Who would love it or when to use it
Ages 3–5 and parents who love bright wall art or a quick, cheerful afternoon activity. It’s a perfect rainy-day project or a cute bedroom seasonal display.
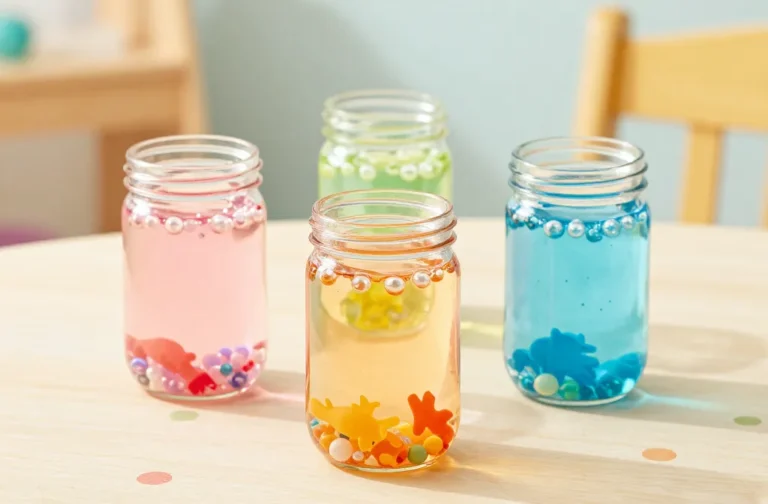
2. Sensory Rainbow Jar Collage: Shimmer and Shine DIY Mini Gallery
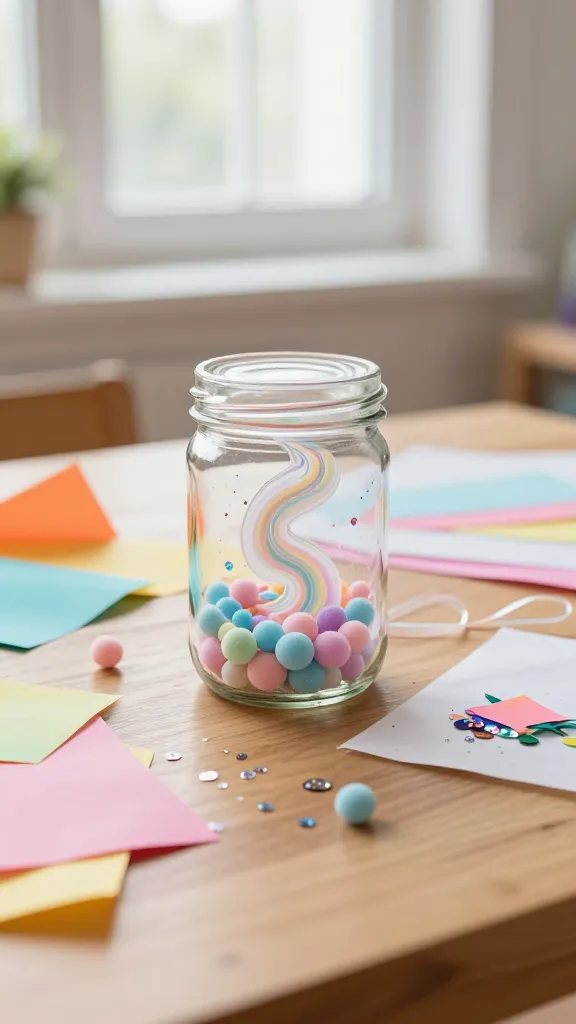
This project is all about textures, colors, and the satisfying swirl of pouring. Your little one will love watching the light catch all the glitter and beads, while you’ll love the calm, almost hypnotic effect. A perfect keepsake for a desk or dresser, and totally adaptable to whatever supplies you’ve got on hand.
Materials Needed
- Clear plastic or glass jar with lid
- Glitter, foam beads, and sequins
- Liquid glue or craft glue
- Colored tissue paper or small pieces of scrapbook paper
- Optional: ribbon for a finishing touch
How to Make It
- Pack the bottom with a splash of color using tissue paper scraps.
- Layer glitter and beads in cheerful rainbow order. You can arrange by color or swirl randomly.
- Seal the lid with a dab of glue if you want to prevent spills, then add a ribbon for a pretty finial.
- Let your child give the jar a gentle shake to see the shimmering rainbows dance.
Pro Tips / Styling Ideas
- Use tiny pom-poms for a fluffy texture—especially fun to shake and watch settle.
- Label the colors with small sticky notes on the lid for a quick color-name game.
Who would love it or when to use it
Ideal for sensory bins, quiet corners, or a gift for a teacher or grandparent. It’s calming, mesmerizing, and honestly, pretty to look at.
3. DIY Felt Emoji Bookmarks: Mood-Boosting Reading Buddies
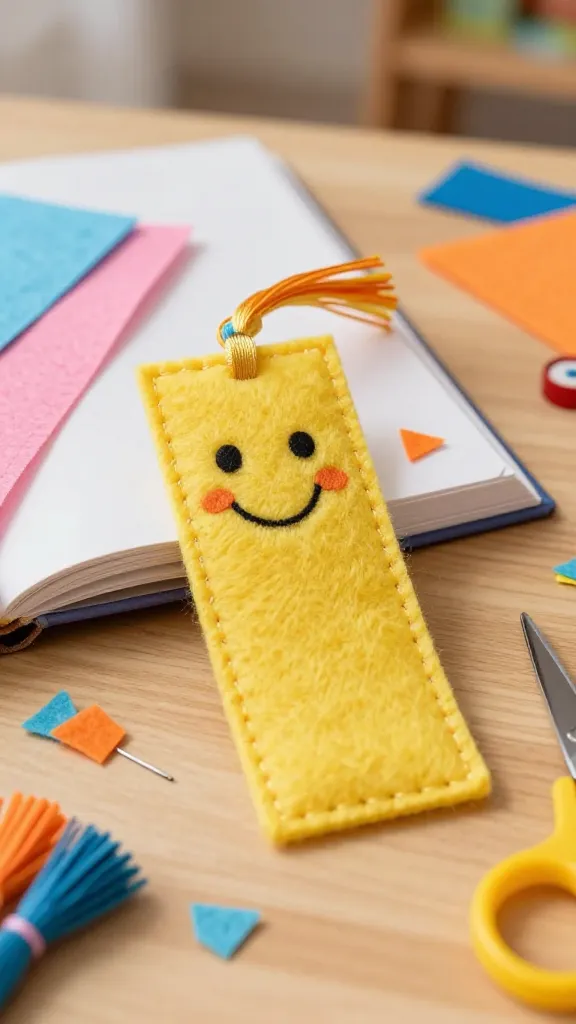
Turn reading time into a giggle-fest with these soft, squishy bookmarks that express every mood under the sun. Your child will love picking a face to match the book’s vibe, and you’ll love the teeny-tiny sewing skills they practice (or help with) along the way.
Materials Needed
- Felt sheets in bright colors
- Thin felt scraps for facial features
- Needle and embroidery thread or fabric glue (kid-safe)
- Scissors
- Ribbon scraps (optional) for a tassel
How to Make It
- Cut a small bookmark shape from a bright felt sheet, about the size of a standard index card.
- Cut additional small shapes for facial features—eyes, mouth, cheeks—from contrasting felt.
- Attach features with a few simple stitches or a dab of glue. Add a tiny tuft of hair if you like.
- Optional: Attach a ribbon tassel to the top for extra flair.
Pro Tips / Styling Ideas
- Mix and match moods—happy, surprised, sleepy—so your child has a bookmark for every reading moment.
- Laminate the felt pieces inside the book if you want long-lasting durability (with adult help).
Who would love it or when to use it
Perfect for budding readers and a sweet gift for birthdays or end-of-year classroom goodies. Fun, comforting, and totally bookmark-worthy.
4. Cardboard Castle Tower Art: Build, Paint, Display
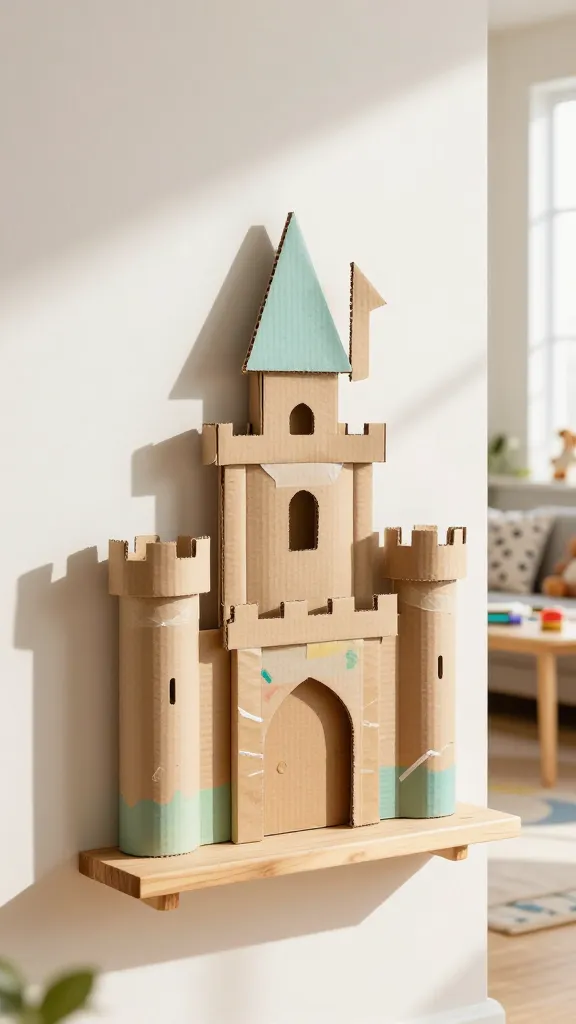
Let your kiddo dream big with a cardboard castle that doubles as wall art. This project combines construction play with creative painting, resulting in a sturdy, ready-to-have masterpiece. It’s low-cost, high-imagination, and surprisingly chic once displayed in a sunny corner.
Materials Needed
- Corrugated cardboard (large pieces or a cereal-box bounty)
- Acrylic paints or poster paints
- Paintbrushes in various sizes
- Masking tape for clean lines
- Glue or tape for assembly
How to Make It
- Cut and assemble cardboard into a simple castle silhouette: towers, walls, and a drawbridge shape.
- Paint the base color first, then add accents like stone patterns, flags, and doors.
- Use masking tape to keep lines crisp for windows or battlements.
- Let dry completely, then prop the castle on a shelf or hang as wall art with string or tape.
Pro Tips / Styling Ideas
- Use metallic paint for highlights to give your castle a magical glow.
- Add tiny paper banners or felt pennants to boost the fantasy vibe.
Who would love it or when to use it
For little builders and dreamers—great for a pretend-play corner, a bedroom display, or a playful party activity that doubles as decor.
5. Salt Dough Trinket Dobs: Tiny Keepsakes You Can Kiss Goodbye (Carefully)
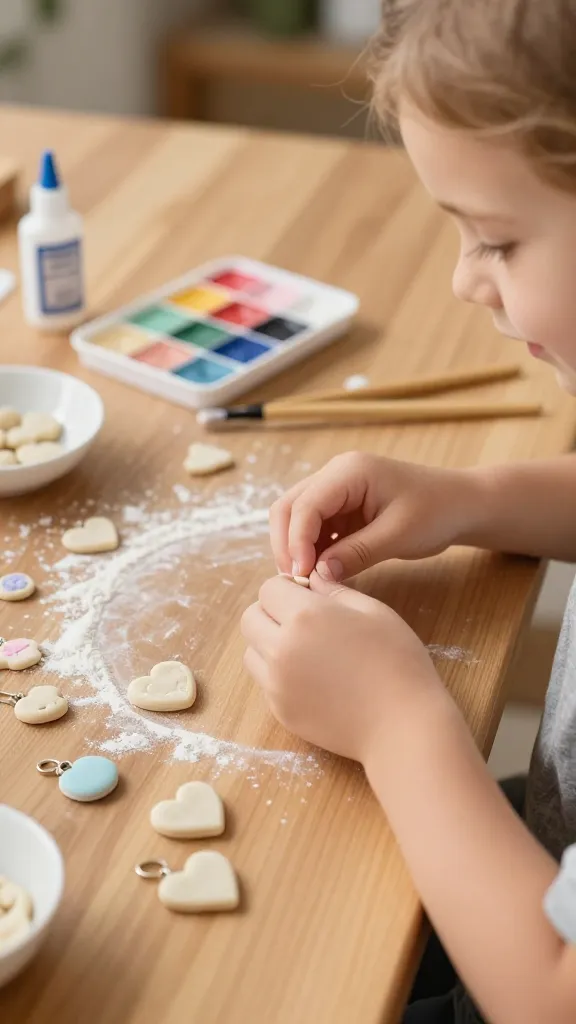
Salt dough is the classic “I can bake this with everyday kitchen staples” project. These mini keepsake bowls or charms are simple, sturdy, and endlessly customizable. Your child will adore pounding the dough, shaping little treasures, and painting their final glossy coats.
Materials Needed
- 1 cup all-purpose flour
- 1/2 cup salt
- 1/2 cup warm water
- Acrylic paints or colored markers
- Varnish or clear nail polish (for sealing, adult supervision advised)
- Small bowls or shapes to imprint (optional)
How to Make It
- Mix flour, salt, and water until a dough forms. Knead until smooth.
- Roll out and cut into small shapes like hearts, stars, or mini bowls.
- Kids press their thumbs or small tools to create a keepsake impression. Use a straw to poke a hole for hanging if desired.
- Bake at a low temperature until firm, then let cool and paint.
- Seal with a clear coat for durability.
Pro Tips / Styling Ideas
- Turn the shapes into jewelry holders, mini plant pots, or sun-catchers for a sunny window display.
- Encourage personalization with initials or little doodles that tell a memory.
Who would love it or when to use it
Ideal for birthday crafts, a family-fun afternoon, or as a handmade gift for grandparents. These tiny keepsakes are seriously darling and surprisingly robust.
Conclusion
Saving, pinning, and trying these five crafts is a breeze—and totally worth it. Each idea is crafted to be simple enough for preschoolers, with enough color, texture, and whimsy to spark a lasting memory. Pick one or go all-in and turn a cozy afternoon into a mini craft festival that your little one will beg for again and again.