5 easy whimsical crafts for kids
Kids love whimsy, and so do grown-ups who want a sprinkle of magic around the house. These five crafts are intentionally simple, totally adorable, and easy to personalize with the supplies you already have. Ready to stir up some giggles and glitter? Trust me, you’ll want to try them all.
1. Sparkle-Pop Paper Plate Unicorn Masks
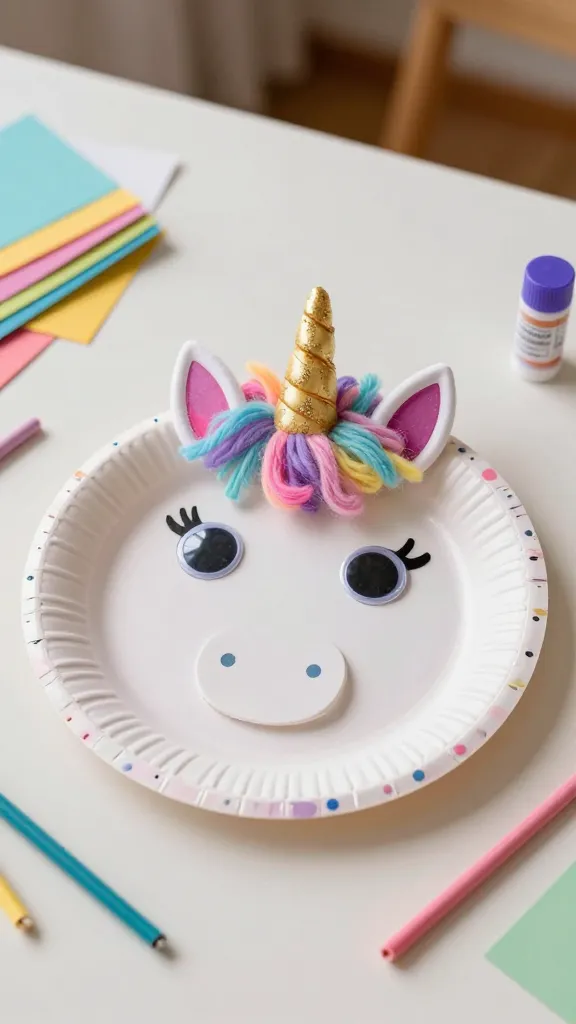
Picture it: a bright paper plate turned into a magical unicorn mask, complete with a fluffy mane and a twinkly horn. This is the sort of project that feels festival-ready but is perfect for a cozy afternoon at home. Your little artists will love the whimsy, and you’ll love how quick it comes together.
Materials Needed
- Paper plates (one per mask)
- Construction paper in assorted colors
- Googly eyes
- Pipe cleaners for the mane
- Foam or cardboard horn (rolled and taped)
- Glue stick and optional glue dots
- Scissors
- Elastic string to wear the mask
How to Make It
- Cut a half-mrown ear from construction paper and attach to the top of a paper plate.
- Glue googly eyes in place, then add a little shine with a marker or glitter tape if you like.
- Roll a cone-shaped horn from yellow or pastel foam and secure with tape; attach to the center of the mask.
- Thread fluffy strips of construction paper or pipe cleaners along the top edge for a rainbow mane.
- Attach elastic to the sides so the mask fits comfortably on a child’s face.
Pro Tips
- Use magnetic tape to make the mane removable for a quick swap when the mood changes.
- Dust with a little glitter for extra sparkle—kids love it, and it’s easy to brush off later.
Styling Ideas
- Pair with a “storybook” outfit or a unicorn-themed party backdrop.
- Shop a few color variations to create a small herd of magical friends.
Who will love it or when to use it
This mask is perfect for pretend-play sessions, a dress-up corner, or a party activity at a kid-friendly birthday bash. It’s cozy, whimsical, and seriously share-worthy.
2. Mini Felt Forest Shadow Puppets
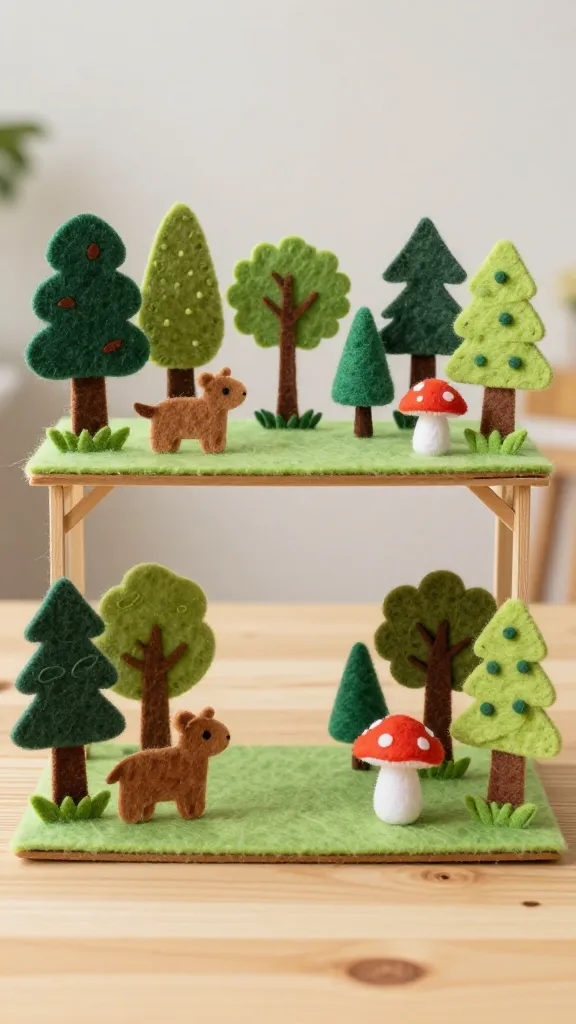
Imagine a tiny woodland scene sliding to life with each flap of a finger. These felt forest puppets are adorable, tactile, and surprisingly durable for little hands. They look wonderful when displayed as a seasonal garland or tucked into a homemade theater stage.
Materials Needed
- Sheets of felt in greens, browns, and accent colors
- Fabric scissors
- Needle and embroidery thread or fabric glue
- Black cardstock for silhouettes
- Wooden dowels or craft sticks
How to Make It
- Cut simple forest shapes from felt—trees, a fox, a bunny, a mushroom cap—and sew or glue edges for a clean finish.
- Trace small woodland animal silhouettes onto black cardstock and cut out.
- Attach the silhouettes to the felt shapes with a little glue or stitch them with thread for a tiny raised effect.
- Glue a bottom edge to a craft stick so you can hold or pin them into a DIY shadow theater setup.
Pro Tips
- Choose a color palette from the season—emerald greens with warm browns feel magical in fall; icy blues and whites for winter.
- Stitch a few tiny blanket stitches for durability on the edges.
Styling Ideas
- Display as a mini forest garland along a doorway or on a kid’s wall shelf.
- Incorporate a simple flashlight behind a white bedsheet to make a home shadow theater.
Who will love it or when to use it
Perfect for an imaginative playdate, a classroom craft corner, or a cozy bedtime storytelling prop.
3. Bubble-Glitter Glass Pebble Garden Markers
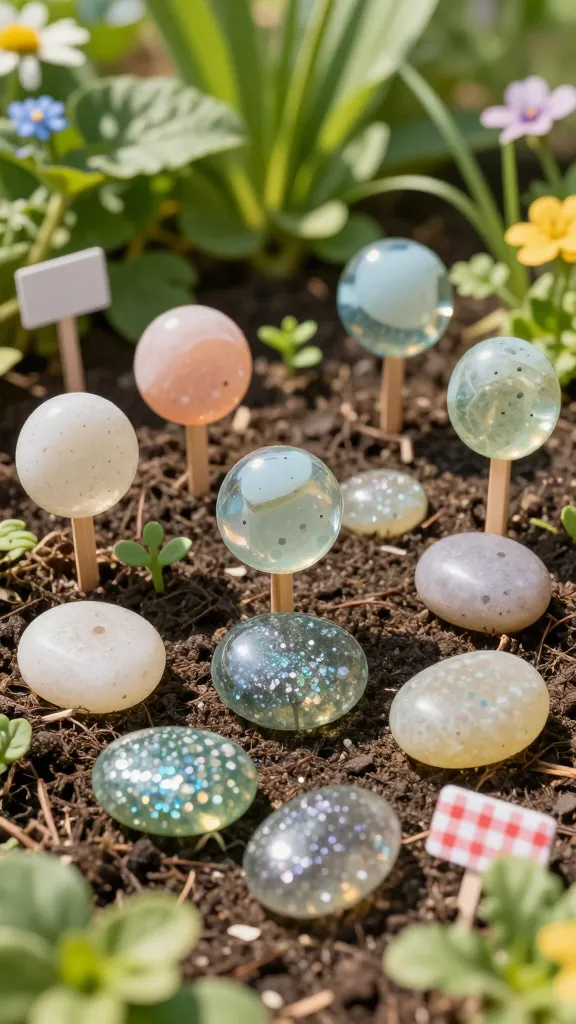
Turn ordinary glass pebbles into twinkling garden markers that double as tiny art pieces. They’re fantastic for naming pretend plants in a kid-friendly garden setup or as place-card-like markers for a family picnic table. The sparkle makes them irresistibly inviting.
Materials Needed
- Glass pebbles or smooth rocks (cleaned)
- Acrylic paints or paint markers
- Fine glitter (optional)
- Clear sealant spray (non-toxic for kids’ use)
- Small brushes or dotting tools
How to Make It
- Base color each pebble with a solid coat; allow to dry.
- Decorate with plant names, tiny doodles, or initials. Add a dusting of glitter if desired.
- Seal with a kid-friendly sealant to protect the art and add a subtle shine.
Pro Tips
- Keep a few color palettes consistent to create a cohesive garden vibe.
- Let kids choose the words or doodles to add personal flair.
Styling Ideas
- Place markers along a pretend herb corner in a play kitchen or a kid’s outdoor play space.
- Group several markers in a shallow tray as a “mini garden” display.
Who will love it or when to use it
Great for budding gardeners, classroom centers, or a surprise-added detail for a picnic or party dessert table.
4. Celestial Spinner Mobiles
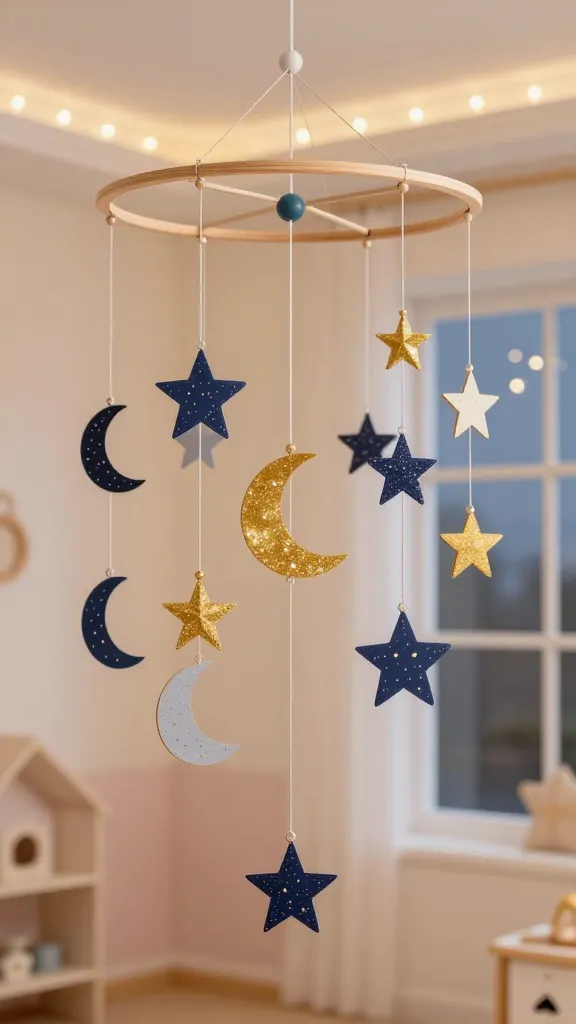
Twinkling stars and crescent moons dancing on string? Yes, please. These celestial spinners are a striking visual centerpiece for a kid’s room or a dreamy window display. They’re surprisingly easy to assemble and endlessly customizable with color palettes and glitter accents.
Materials Needed
- Cardstock or lightweight cardboard in navy, gold, and pastel shades
- Metallic string or embroidery floss
- Wooden hoops or circular cardboard frames
- Hole punch, scissors, glue
- Craft dowels or tree branches for hanging display
How to Make It
- Cut star and moon shapes from cardstock; punch holes at the top and bottom.
- Thread shapes onto string, creating a mobile with gentle movement.
- Attach strings to a central hoop or frame so it can hang freely in a window or on a wall.
Pro Tips
- Vary the lengths of the strings for an organic, spacey look.
- Use a mix of matte and metallic papers to catch the light differently.
Styling Ideas
- Hang above a reading nook or crib to add a dreamy, celestial vibe.
- Pair with a night-sky wall mural for a full-theme effect.
Who will love it or when to use it
Ideal for a nursery or playroom refresh, a birthday party backdrop, or a calm-down corner with a touch of magic.
5. Citrus Splash Painted Terracotta Bud Vases
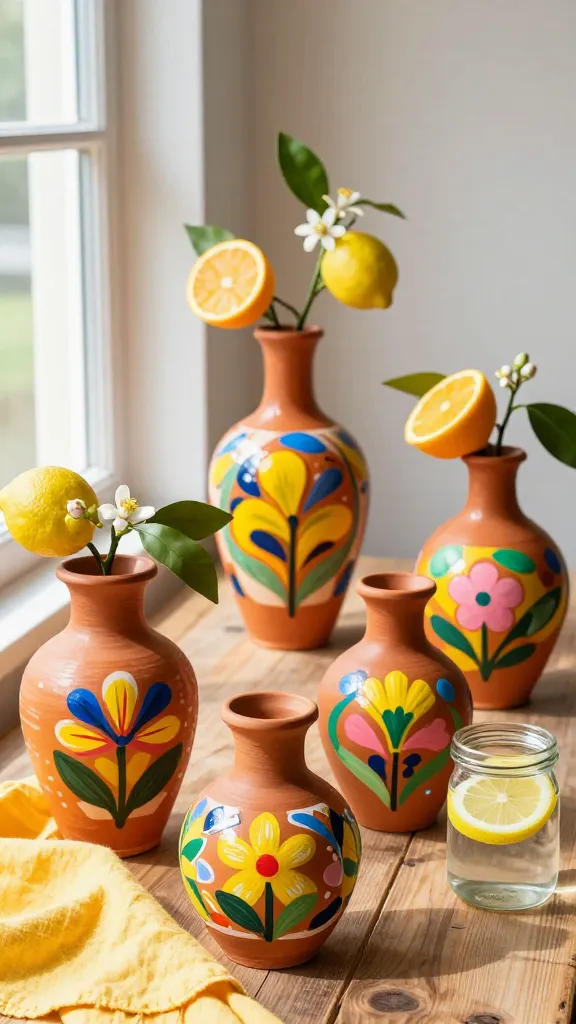
Bright, punchy, and delightfully practical, these hand-painted terracotta bud vases bring a splash of color to any shelf or table. They’re perfect as party favors, classroom gifts, or a cheerful centerpiece for a family meal. And yes, they’re as easy as a sunny afternoon snack.
Materials Needed
- Small terracotta pots or vases
- Acrylic paints in bold colors
- Paint brushes of various sizes
- Mod Podge or clear sealant (optional)
- Masking tape for clean lines
How to Make It
- Paint the pots in base colors, letting them dry between coats.
- For a citrus-inspired look, use masking tape to create clean stripe patterns or segments on each pot.
- Finish with a light sealant to protect the paint and keep it bright for longer.
Pro Tips
- Decide a color story before you start—think citrus yellows, lime greens, and coral oranges for high-energy vibes.
- Add tiny scripted labels with a fine-point pen to designate flower types or names.
Styling Ideas
- Group several vases at varying heights on a tray for a festive tablescape.
- Use as a decorative planter for tiny succulents or cut flowers.
Who will love it or when to use it
Perfect for a bright kitchen shelf, a cheerful entryway display, or as a little mother’s-day-mique gift for grandparents.
Conclusion
These five crafts deliver whimsy without the overwhelm—quick to finish, endlessly adaptable, and seriously fun for kids (and grown-ups who love a splash of color). Which one will you start with first? Grab a few supplies, set a playful timer, and let the room fill with bright, creative energy. You’ll love how easy it is to spark imagination with simple materials and a lot of heart.