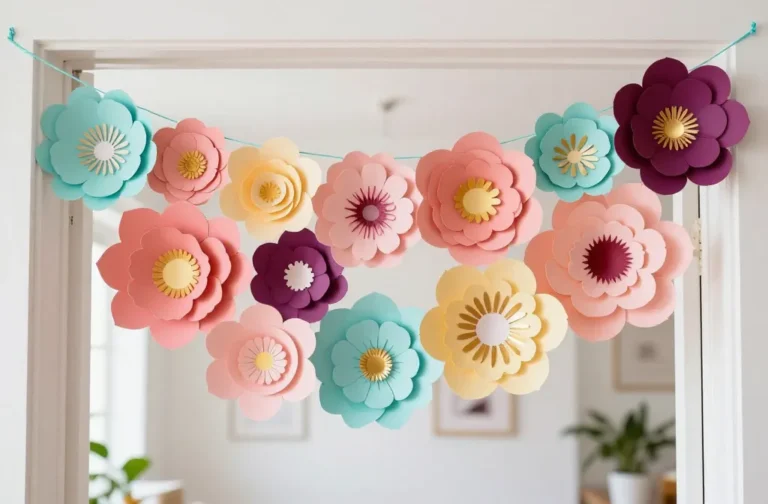
9 whimsical crafts for adults
If you’ve got a few spare hours and a big imagination, these nine whimsical crafts for adults are about to become your new obsession. Not only are they fun, they’re totally doable, budget-friendly, and seriously Pinterest-worthy. Trust me, you’ll want to make at least one—okay, maybe all of them.
1. Moonlight Paper Lanterns That Glow Like Little Night Skies
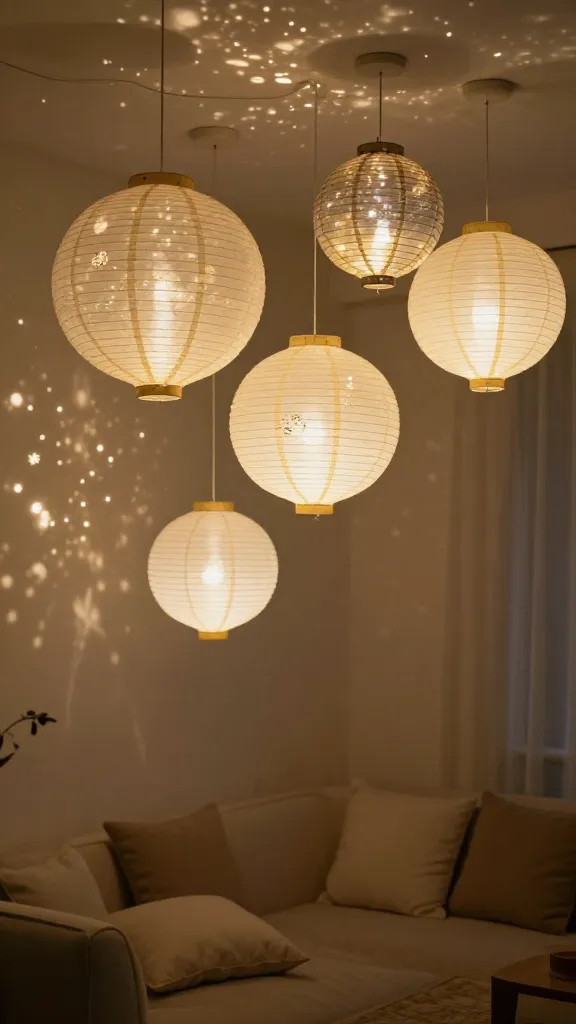
Imagine hanging a row of lanterns that cast tiny craters of light across your living room walls. These moonlit paper lanterns look airy, dreamy, and surprisingly easy to whip up. The shimmer from the string lights inside gives a soft, magical vibe that’s perfect for cozy evenings or a sprinkle of whimsy at a party.
Materials Needed
- Round paper lanterns in your favorite size
- Gold or silver acrylic paint
- Fine-tipped paintbrushes
- Toothpicks or a thin stencil brush
- String lights (battery-operated)
- Glue or double-sided tape
How to Make It
- Paint subtle crater textures onto the lanterns with a light hand—think delicate dabbing rather than full coverage.
- Let the stars and craters dry, then wrap the string lights inside. Seal the lanterns shut and hang in a cluster for best effect.
- Optional: Add a few metallic accents around the rim for extra moon-glisten.
Pro Tips / Styling Ideas
- Use cool whites and pale golds for a lunar feel, or go midnight blue with silver specks for a dramatic look.
- Group them above a dining table or along a porch rail for dreamy ambient lighting.
Who would love it or when to use it
Perfect for a romantic dinner, a lazy Sunday night, or a whimsical kids’ party backdrop. You’ll love how effortless the glow feels.
2. Herbarium Shadow Boxes: Sleepy Leaves, Bold Colors
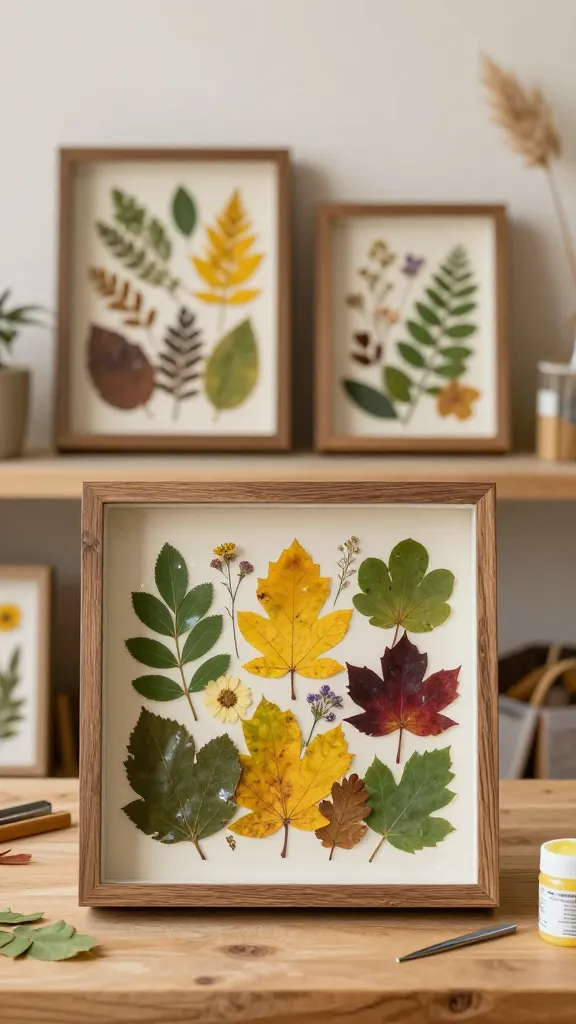
Shy about painting or drawing? This craft lets you curate a garden in glass without ever watering a plant. Pressed leaves, vibrant pigments, and a crisp shadow box create a tiny seasonal display you’ll adore looking at every day.
Materials Needed
- Shadow box frames (various sizes)
- Pressed leaves or safe botanicals
- Acrylic paints or watercolor pencils
- Clear glue or Mod Podge
- Craft tweezers
- Optional: tiny dried flowers, glitter, or pressed petals
How to Make It
- Arrange leaves and botanicals inside the frame to your liking, securing with a light dab of glue.
- Trim to ensure they lay flat; add color accents behind the glass for a pop of personality.
- Seal edges and close the frame, letting the colors truly sing when light hits the glass.
Pro Tips / Styling Ideas
- Pair with a soft pastel palette or go bold with electric greens and blues for a modern gallery vibe.
- Rotate seasonal sets—think autumn leaves in copper tones or spring florals with blush pinks.
Who would love it or when to use it
Great for office decor, living room nooks, or a seasonal wall display. You’ll love the botanical calm without the ongoing care.
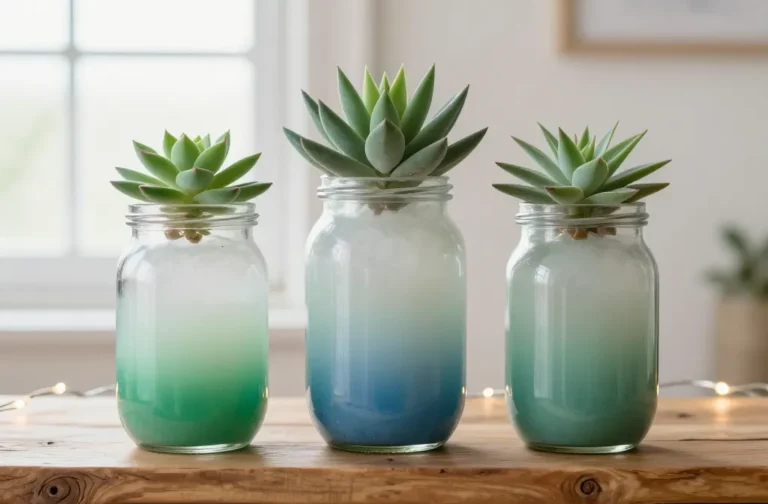
3. Ceramic Mug Pin-Top Planters: Cozy, Quirky, and Totally Cute
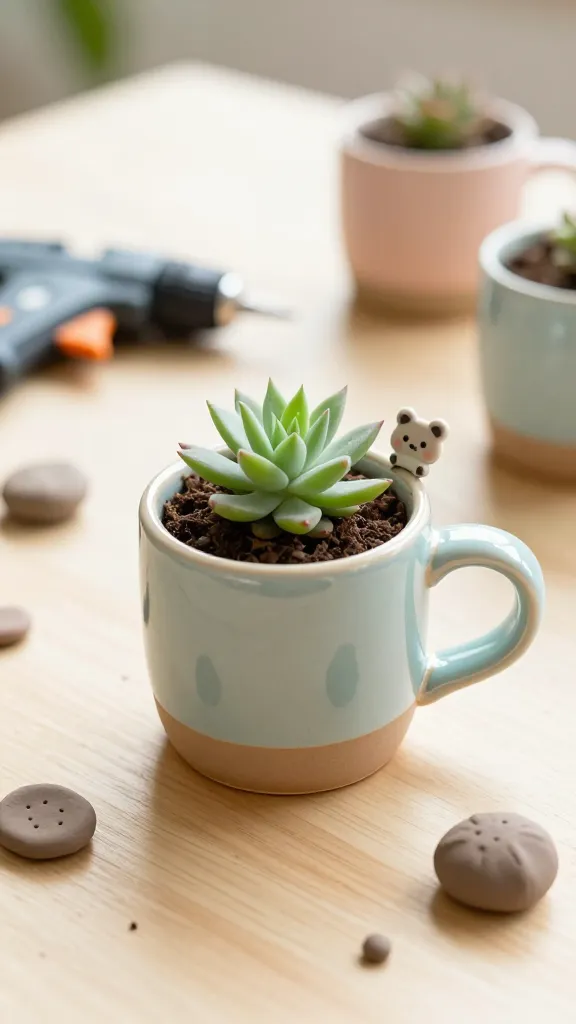
Turn a simple mug into a tiny planter with a cheeky twist. These ceramic mug pin-tops are a conversation starter and unbelievably versatile—use them to house succulents, herbs, or air plants, and you’ve got portable greenery that fits on a shelf or a desk.
Materials Needed
- Plain ceramic mugs
- Sculpting clay or heat-set oven-bake clay
- Mini pin toppers or small tacks (optional for whimsy)
- Potting soil and a tiny succulent or air plant
- Drill or hot glue (for drainage holes if needed)
How to Make It
- Shape a small air-pocket pot inside the mug using clay; bake or cure according to material instructions.
- Fill with soil and plant your greenery. Add a pin-top tail or a decorative knob if you like.
- Ensure drainage to prevent soggy roots; place in a sunny spot near a window.
Pro Tips / Styling Ideas
- Paint the mugs in matte pastels or glossy brights to suit your decor.
- Line shelves with a row of these quirky planters for a playful, garden-inspired aesthetic.
Who would love it or when to use it
Perfect for desks, kitchen windowsills, or as a birthday gift with a tiny plant included. Seriously cute and surprisingly practical.
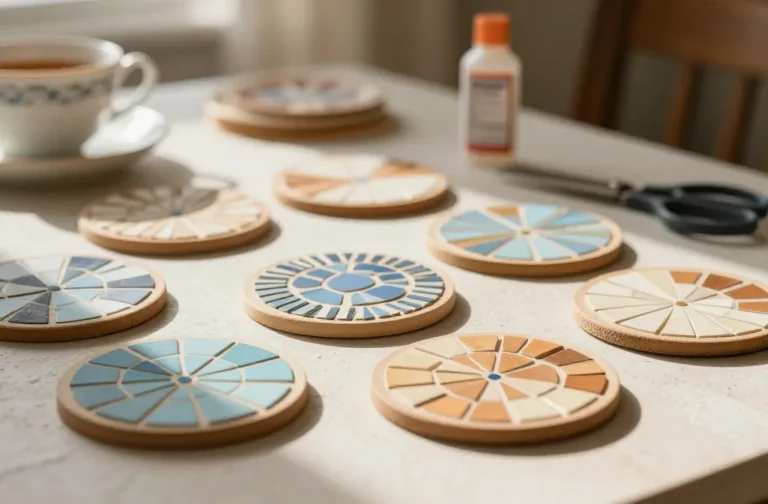
4. Resin Coaster Clouds: Clear, Featherlight Fun
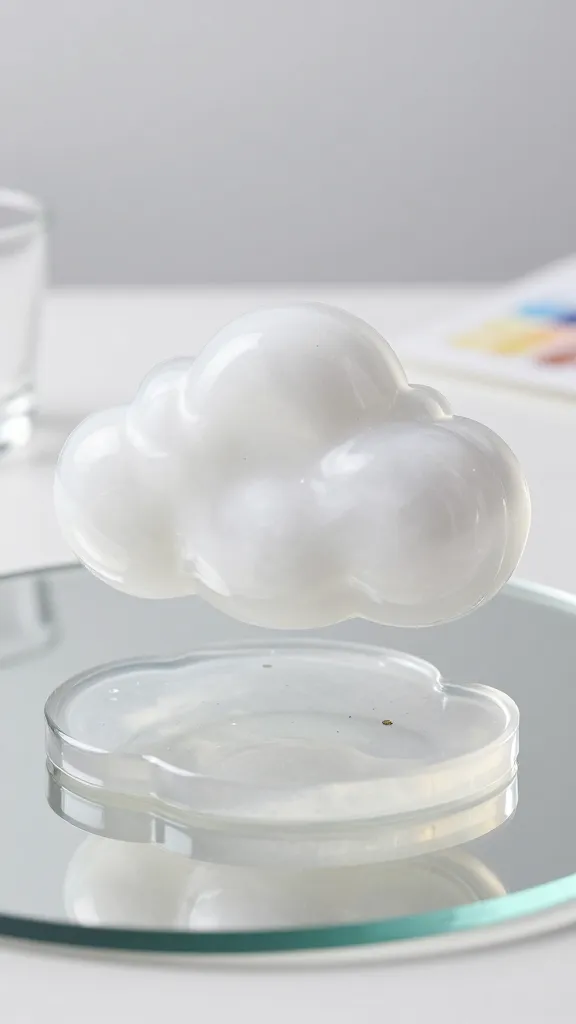
Imagine silky resin coasters that look like floats of cloud white trapped in crystal-clear acrylic. These resin coaster clouds are sturdy, glossy, and endlessly customizable with colors, tiny inclusions, or metallic flecks.
Materials Needed
- Epoxy resin kit (including hardener)
- Silicone coaster molds
- White pigment, pearlescent powder, or color confetti
- Mixing cups and sticks
- Safety gear: gloves, goggles
How to Make It
- Mix resin per instructions, adding a touch of white pigment for a cloud look.
- Pour into molds in layers, letting each layer cure to create depth. Add a few tiny metallic flecks for sparkle.
- Remove from molds and sand edges if needed; finish with a high-gloss topcoat.
Pro Tips / Styling Ideas
- Coordinate with a matching set of glassware or a white-and-metallic bar cart.
- Gift a set as a housewarming present or wedding favor with the couple’s initials etched in resin.
Who would love it or when to use it
A flawless blend of practicality and whimsy—great for entertaining spaces, coffee tables, or gifting to design-obsessed friends.
5. Velvet-Dipped Branch Ornaments: Plush, Holiday-Chic Vibes Year-Round
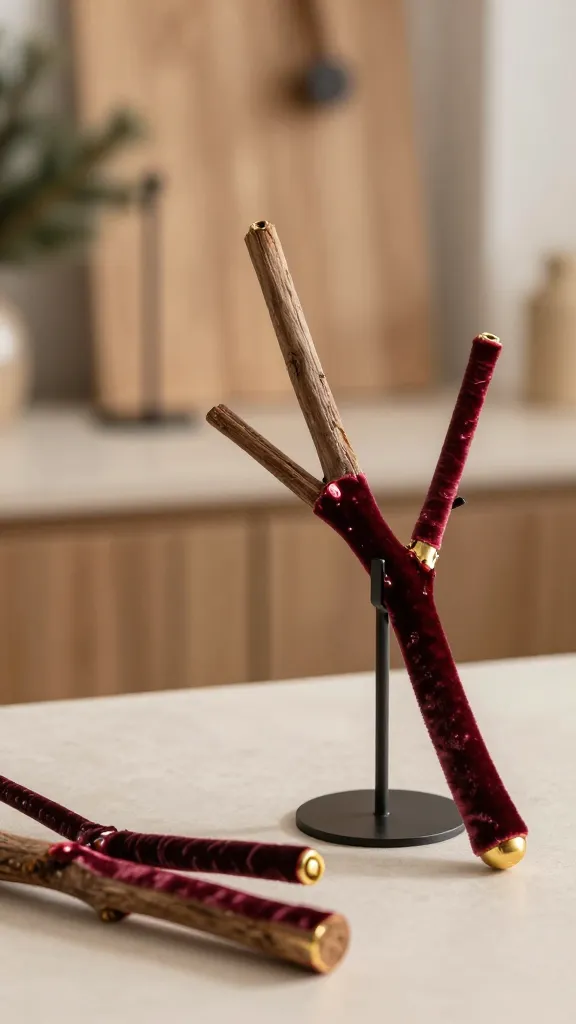
Who says ornaments are just for trees? Take a few natural branches, give them a plush velvet dip, and you’ve got statement pieces that feel luxe without the fuss. These can seasonally skew festive or stay on display as textural art all year.
Materials Needed
- Thin tree branches or driftwood sticks
- Velvet ribbon or fabric in two colors
- Hot glue gun
- Metal wall hooks or a tabletop stand
- Paint optional for natural enhancement
How to Make It
- Dip the ends of branches into hot glue and roll quickly in velvet fabric to coat—let dry.
- Attach a hanging loop or a small stand to display as a mini sculpture.
- Arrange in a bowl or hang in a cluster for a chic, tactile display.
Pro Tips / Styling Ideas
- Pair with brass accents or black-and-white decor to amp up the luxury feel.
- Change the velvet colors by season for an easy refresh.
Who would love it or when to use it
Ideal for mantels, coffee tables, or gifting to someone who adores tactile textures and subtle glam.
6. Faux Stained Glass Window Decals: Sun-Catching Color Without the Glasswork
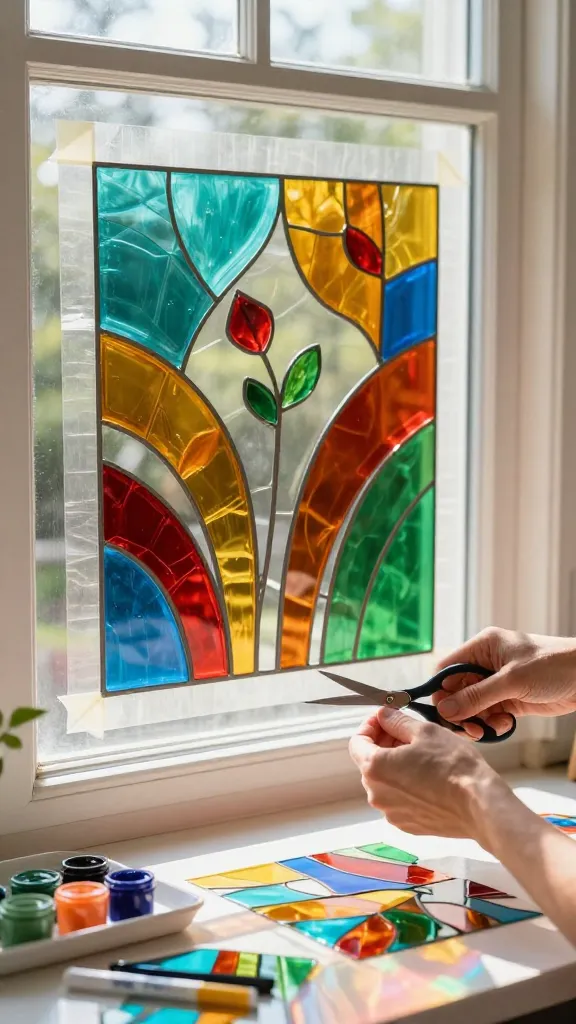
Stained glass vibes without expensive panes? Yes, please. These faux stained glass decals bring color-drenched light into any room using simple adhesives and glass paints. They’re bright, breezy, and delightfully easy to customize.
Materials Needed
- Clear window decals or acrylic sheets
- Glass paints or translucent markers
- Painter’s tape for clean lines
- Scissors or craft knife
How to Make It
- Sketch a simple geometric or nature-inspired pattern on the decal or sheet. Use tape to section colors for crisp lines.
- Fill in sections with glass paints and let dry fully before applying to a sunny window.
- Trim excess and enjoy the sun-drenched color bloom as the light passes through.
Pro Tips / Styling Ideas
- Opt for bold color combos for a bold statement or soft pastels for a calm glow.
- Place opposite a mirror to double the color effect in a small room.
Who would love it or when to use it
Excellent for apartment dwellers or anyone who wants a studio-quality effect without the glasswork commitment.
7. Faux Marble Desk Accessories: Quiet Luxury at Your Fingertips
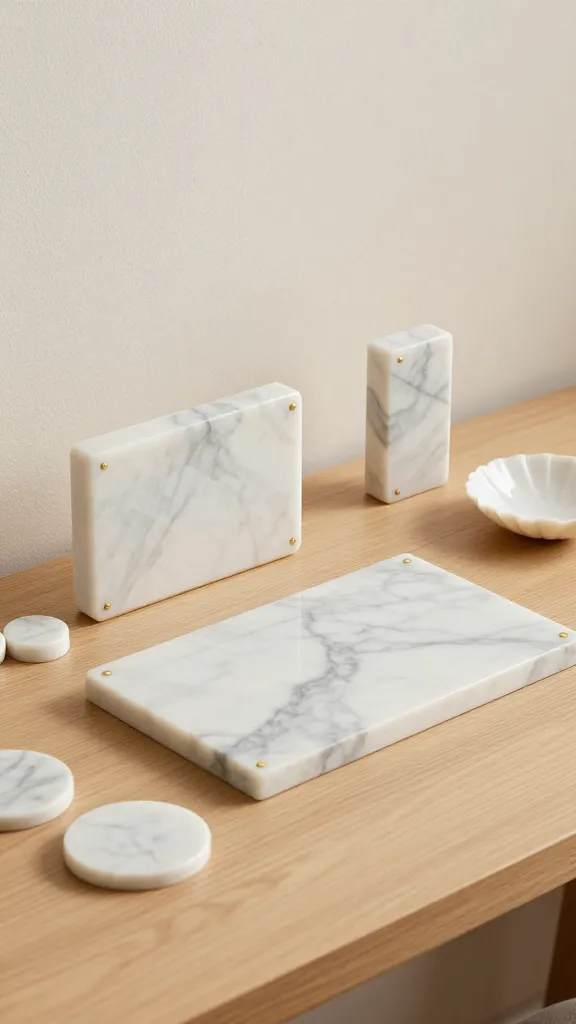
Marble is timeless, but real marble is pricey (and heavy). These faux marble desk accessories are lightweight, transportable, and look luxe enough to make your creative workspace feel special. A few simple pieces can anchor an entire desk aesthetic.
Materials Needed
- Flat wooden blocks, small trays, and a few shells or bowls
- Marble contact paper or epoxy marble mix
- Sealant spray
- Gold or brass accent stickers or paint
How to Make It
- Wrap wooden pieces with marble contact paper or apply an epoxy marble coating in swirls of gray and white.
- Seal for durability, then add corner details like gold trim for a luxe edge.
- Arrange into a coordinated desk set: a tray, a pencil holder, and a small dish for clips and pins.
Pro Tips / Styling Ideas
- Keep color palette cohesive with a monochrome or soft gray scheme.
- Layer with small potted succulents for a touch of life.
Who would love it or when to use it
Ideal for home offices, study corners, and as a gift for new grads or anyone launching a productivity-focused space.
8. Glow-In-The-Dark Map Art: Wanderlust That Lights Up Your Wall
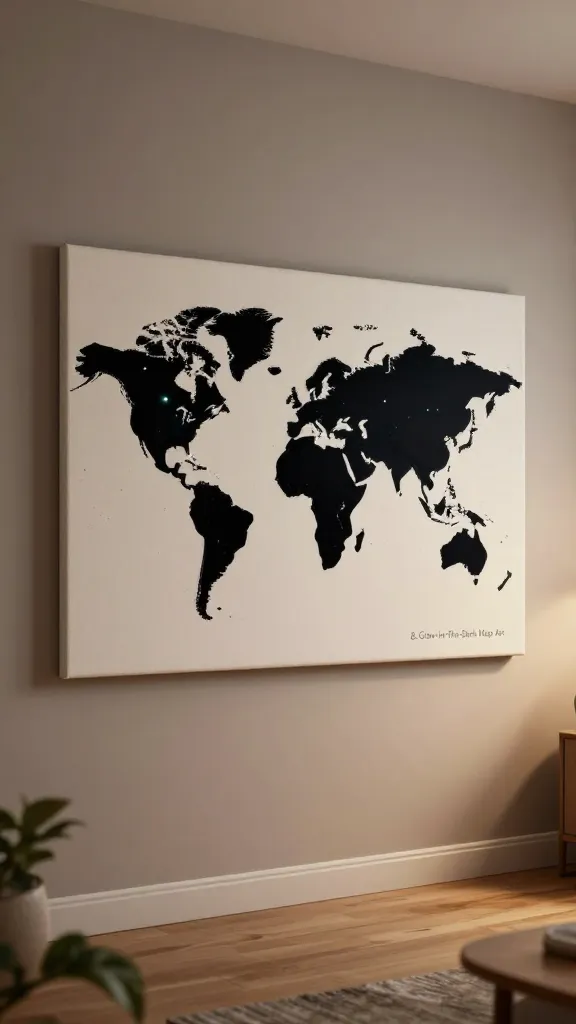
Turn your love of travel into a playful, glow-in-the-dark wall art piece. A simplified map outline with starry touches becomes a radiant reminder of adventures past and future rights there on your wall.
Materials Needed
- Stretched canvas or wooden panel
- Glow-in-the-dark paint or UV-reactive ink
- Fine-tipped brushes
- Graph paper or stencil for map outlines
How to Make It
- Sketch or stencil a map outline onto the canvas. Keep lines bold but simple for a graphic look.
- Fill in key countries or continents with glow paint. Add a few stars to mark special places.
- Apply a clear sealant to protect the glow layer and extend its life.
Pro Tips / Styling Ideas
- Place in a dim corner of a hallway or above a bed for a nightly glow moment.
- Add small pins with dates to highlight trips and memories.
Who would love it or when to use it
Travel lovers, geography nerds, or anyone who wants a moody, luminous focal point in a room.
9. Grungy-Glam Macramé Wind Chimes: Soft Textures Meet Shimmer
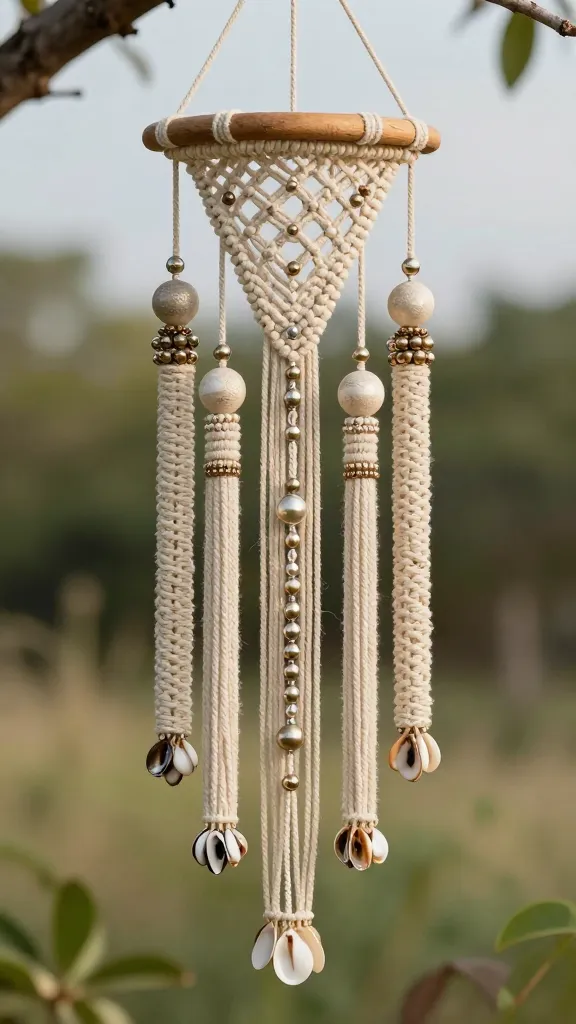
Macramé isn’t just for boho walls. Create a wind chime that blends soft yarn, metallic beads, and delicate shells for a piece that jingles with personality. It’s a tactile, decorative audio moment that elevates any outdoor or indoor space.
Materials Needed
- Macramé cord in two neutral tones
- Metallic beads, ring accents, and small shells
- Wooden dowel for hanging
- Scissors and hot glue (optional)
How to Make It
- Create a layered macramé weave on a hanging loop to form a central panel.
- Attach beads and shells along the fringe for texture and a hint of shimmer.
- Affix the woven panel to a wooden dowel and hang where a breeze can play with the strands.
Pro Tips / Styling Ideas
- Use neutral tones with metallic accents to achieve a chic, grown-up boho vibe.
- Hang near a porch or window for a gentle, musical welcome.
Who would love it or when to use it
Awesome for terraces, sunrooms, or a dreamy corner of your living room. Seriously cozy and uniquely stylish.
Conclusion
Ready to dive in? Each of these nine whimsical crafts for adults brings a distinct mood, a splash of color, and a dash of charm to everyday spaces. Pick one and start small, or challenge yourself to tackle all nine. You’ll end up with not just adorable finished pieces, but proof that creativity can be wonderfully addictive.
Give one a try this weekend—your future self will thank you for the fun, the glow, and the simple joy of making something delightful with your own two hands. Happy crafting, friend!