8 Engaging Craft Ideas for 8-Year-Olds
Ready to spark a little sunshine with glue, stickers, and a splash of imagination? These eight crafts are hand-picked to be fun, approachable, and totally kid-friendly for curious eight-year-olds. Trust me, they’re the kind of activities that spark pride, not frustration.
Grab a blanket of supplies, some playlist-worthy vibes, and let’s dive into eight completely unique, totally doable projects that will have your kitchen table buzzing with creativity.
1. DIY Stained Glass Window Kaleidoscope Suncatchers
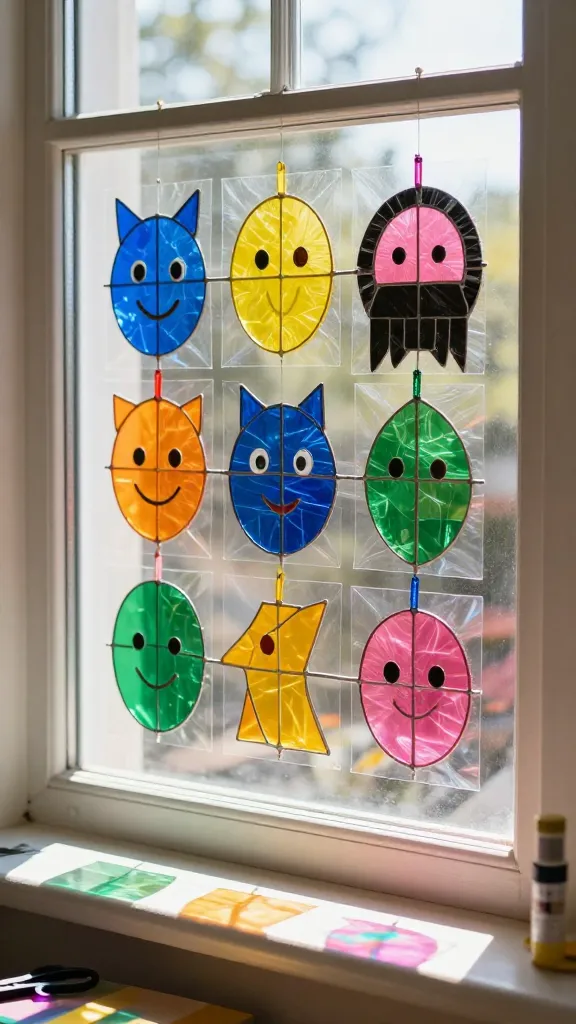
Picture this: sunlight streaming through cheeky, colorful suncatchers that glow like miniature rainbows. These stained glass window kaleidoscope suncatchers capture light in a playful way and look stunning on any window. They’re simple, bold, and absolutely captivating for a sunny afternoon.
Materials
- Contact paper or clear folders
- Colored tissue paper scraps
- Black construction paper or sturdy cardstock
- Scissors
- Glue stick or clear-drying glue
- String or ribbon for hanging
How to Make It
- Cut contact paper into small rectangles or abstract shapes.
- Fill each shape with a mix of tissue paper scraps, sealing with another piece of contact paper or a second layer of tissue on top.
- Trace and cut out black shapes or borders to give a stained glass vibe, then layer onto a window-friendly backing.
- Attach string for hanging and pop in a sunny window to catch the light.
Pro Tips
- Use a mix of warm and cool colors for more dynamic light.
- Laminate scraps between two sheets of contact paper for extra durability.
Why this rocks: It’s cheerful, reusable, and the rainbow glow is endlessly rewarding. This craft is perfect for a sunny Saturday and makes sweet, gallery-worthy decor for a kid’s room.
Who will love it: Curious crafters who adore color play and window decor. A sunny afternoon masterpiece for any bedroom wall.
2. Mini Terrarium in a Jar: Tiny World in Glass
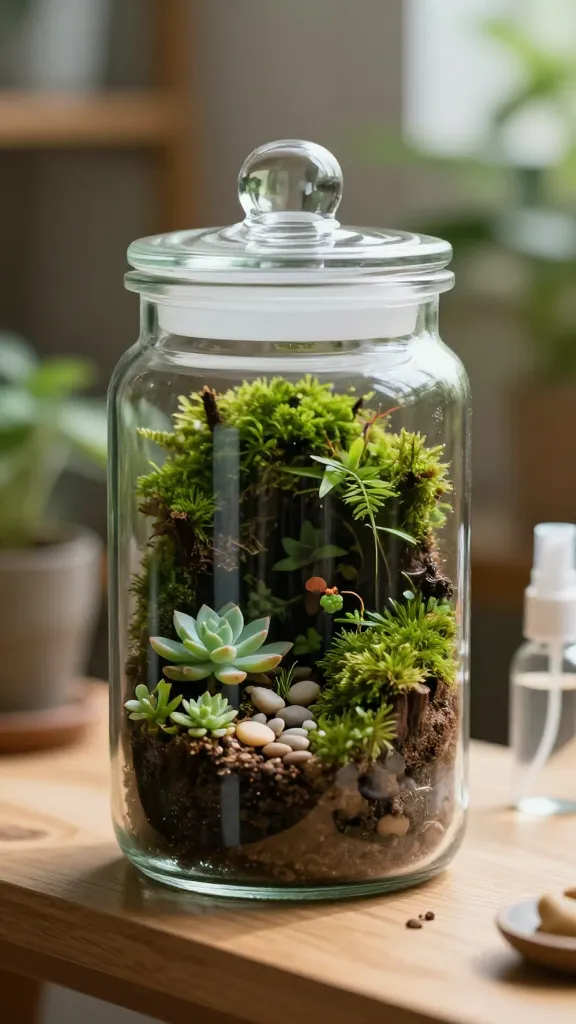
Step into a little glass forest that fits on a shelf. This mini terrarium turns a simple jar into a tiny escape—lush greenery, tiny figurines, and a sprinkle of mossy magic. It’s like having a little rainforest at home, minus the humidity.
Materials
- Small glass jar with lid
- Fine-potting soil
- Decorative pebbles
- Mini succulents or moss sheets
- Tiny figurines or mini accessories
- Spray bottle with water
How to Make It
- Layer pebbles at the bottom for drainage, then add a thin layer of soil.
- Plant tiny succulents or lay down moss, arranging until you love the look.
- Top with more soil as needed and tuck in a miniature figurine.
- Lightly spray with water to help moss settle in.
Pro Tips
- Keep it on a sunny window sill but out of direct heat to avoid scorched plants.
- Wash hands after handling moss to minimize skin irritation for sensitive kiddos.
Why this rocks: It’s a calming, satisfying project that teaches care for tiny ecosystems and doubles as adorable desk decor. Plus, it’s a miniature adventure in a jar.
Who will love it: Nature lovers, budding botanists, and anyone who enjoys tiny, cozy spaces.
3. Personalized Sock-Puppet Creatures
Bring bedtime stories to life with sock-puppet critters that look and feel like real characters. This is a spontaneous, silly project that boosts storytelling skills and yields a troupe of plush pals ready for imaginative play.
Materials
- Colorful socks (fun patterns are best)
- Googly eyes or fabric markers
- Fabric scraps for ears, noses, or hair
- Fabric glue or hot glue (adult supervision for hot glue)
- Needle and thread (optional for durability)
How to Make It
- Turn a sock into a character by adding eyes and a mouth with markers or glue.
- Affix features with glue and add fabric scraps for hats, ears, or hair.
- Stuff a little soft filling if you want the puppet to be plushier.
- Decorate with buttons or embroidered details for extra personality.
Pro Tips
- Sturdy fabric scraps help shapes hold up to play.
- Name your puppets and invent backstories for more fun during playtime.
Why this rocks: It’s cost-effective, endlessly entertaining, and perfect for a storytelling session or a mini puppet show. Kids love seeing their designs come to life on stage.
Who will love it: Future performers, story-time helpers, and anyone who enjoys goofily adorable characters.
4. Watercolor Galaxy Bottles
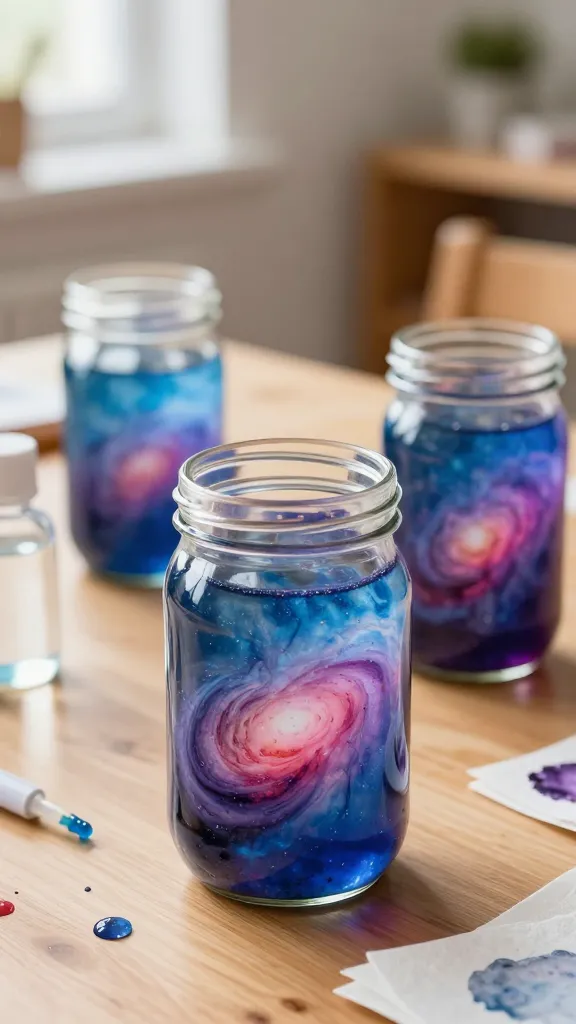
Turn ordinary jars into starry, swirl-washed galaxies that shimmer like distant nebulae. This project is visually stunning, easy to customize, and a soothing, meditative activity for kids who like to experiment with color blending.
Materials
- Clear bottles or jars
- Acrylic paints (blue, purple, pink, black)
- Water and paper towels
- Glitter (optional)
- Rubbing alcohol in a dropper (optional for texture)
How to Make It
- Pour a small amount of water into the bottle. Add drops of paint and swirl gently to create a cloudy, galaxy-like backdrop.
- Drip a few drops of rubbing alcohol to soften edges and create star-like textures.
- Sprinkle a pinch of glitter and seal the lid tightly.
- Shake gently to mix and create a swirling galaxy effect when settled.
Pro Tips
- Use dark colors at the base and lighter hues toward the top for depth.
- Seal tightly to prevent paint leakage during school-day transport.
Why this rocks: It’s a visually captivating project that yields a decorative piece kids are proud to display. Each bottle becomes a tiny universe to explore.
Who will love it: Space enthusiasts, artists who love color play, and anyone who enjoys a calm, creative activity.
5. Upcycled Cardboard City Build
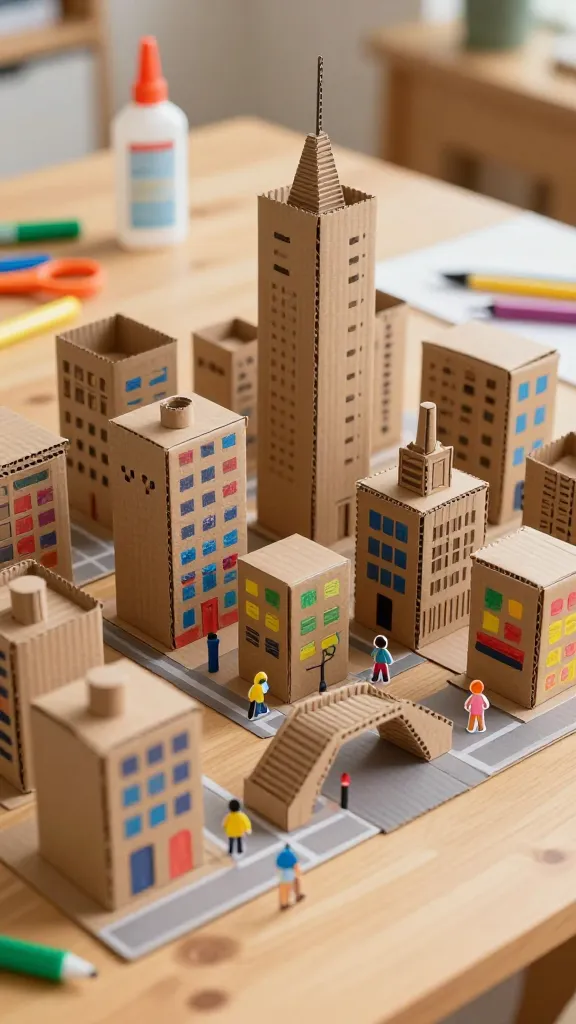
Turn scrap cardboard into a bustling mini metropolis. This is a fantastic engineering-friendly craft that fuels creativity while teaching perspective, scale, and a little architectural flair. The finished city looks delightfully cheery and ready for play.
Materials
- Corrugated cardboard pieces
- Colored markers or acrylic paints
- Glue or tape
- Scissors or a craft knife (adult supervision)
- Small figurines or printable paper people
How to Make It
- Sketch simple buildings on cardboard, then cut out shapes with child-friendly scissors.
- Glue buildings onto a large base and decorate with color to create a city grid.
- Add roads with marker lines and tiny parks with scraps of green paper.
- Place figurines to populate the city and imagine daily routines for your residents.
Pro Tips
- Poppy, bold color blocks read beautifully from a distance—lean into contrast.
- Consider adding bridges or elevated walkways for a dynamic skyline.
Why this rocks: It’s a big, satisfying build that uses common recyclables and invites sculptural thinking. The payoff is a bright, whimsical city that begs to be played with.
Who will love it: Aspiring architects, collage lovers, and kids who adore big, bouncy color palettes.
6. Edible Play-Ddough Palettes
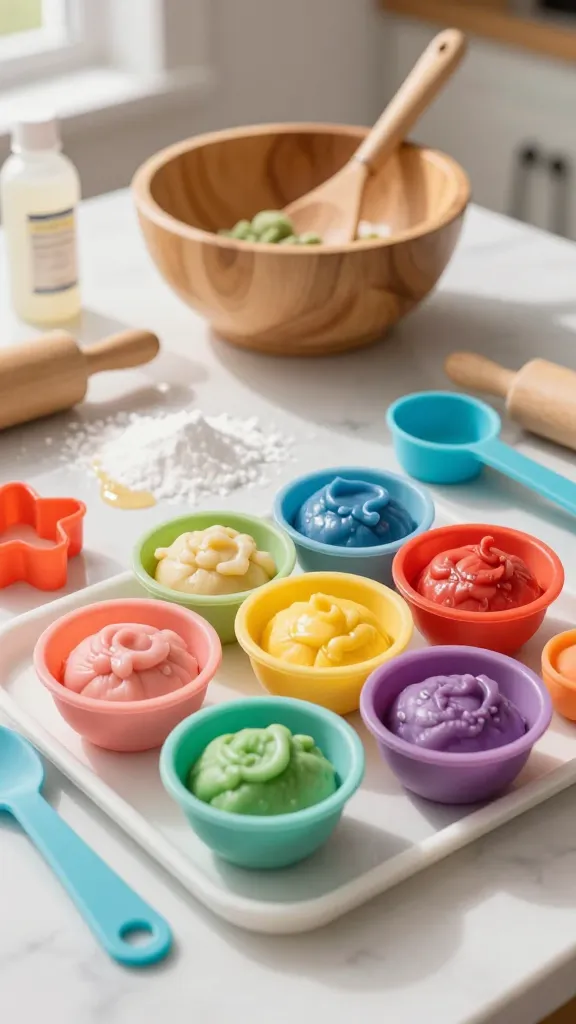
Tools for art meet snack time in a chewy, colorful twist. Edible play-dough is safe, squishy fun that doubles as a tasty treat after a little artistic session. The texture is perfect for little hands and encourages sensory exploration.
Materials
- 2 cups powdered sugar
- 1/2 cup light corn syrup or honey
- Colorful food coloring
- Optional: vanilla extract for scent
How to Make It
- Mix powdered sugar with corn syrup until a dough forms. Add a splash of vanilla if desired.
- Split into bowls and tint with food coloring to create a rainbow palette.
- Knead until smooth and pliable. Play then snack responsibly (supervised eating allowed).
Pro Tips
- Keep dough in airtight containers to prevent hardening.
- If it sticks, dust with a little extra powdered sugar.
Why this rocks: It’s a wonderfully tactile experience that teaches color mixing and texture in a tasty way. Plus, there’s a built-in snack at the end—double win.
Who will love it: Food-loving crafters, sensory-seekers, and kids who enjoy mixing colors and munching at the same time.
7. Fabric Tie-Dye Mini Tea Towels
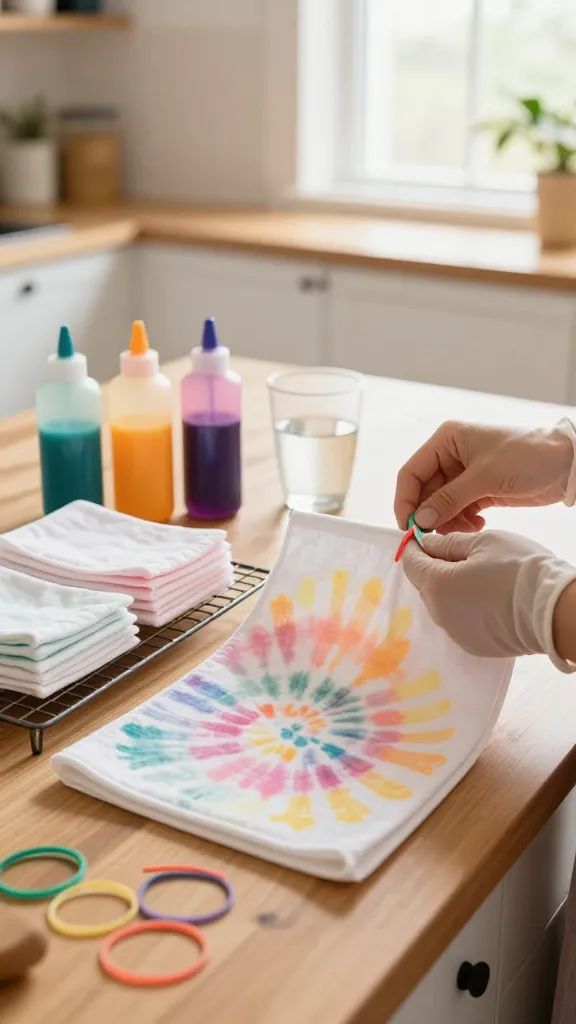
Retro vibes meet modern craft with tiny, cheerful tea towels that scream “handmade” in the best possible way. This project is easy to scale, wildly satisfying to watch as colors blend, and results in usable decor that upgrades any kitchen nook.
Materials
- Small cotton tea towels or squares of cotton fabric
- Fabric dye or food coloring
- Rubber bands
- Disposable gloves
- Buckets or Zip-top bags for dyeing
How to Make It
- Crimp towels with rubber bands to create patterns (stripes, spirals, or dots).
- Prepare dye according to package directions, then apply colors to different sections.
- Seal in bags or wrap in plastic to set the colors, then rinse and air-dry.
Pro Tips
- Layer colors lightly for pastel tones or go bold for high-contrast results.
- Pre-wash towels to reduce color bleeding and ensure brighter results.
Why this rocks: It’s a wearable, washable craft with a strong visual payoff. The towel becomes a colorful little piece of home decor, plus it’s a recyclable textile project that reduces waste.
Who will love it: Color enthusiasts, textile fans, and anyone who enjoys a retro-chic vibe in their kitchen.
8. Chalkboard Photo Frames Made From Recycled Cards
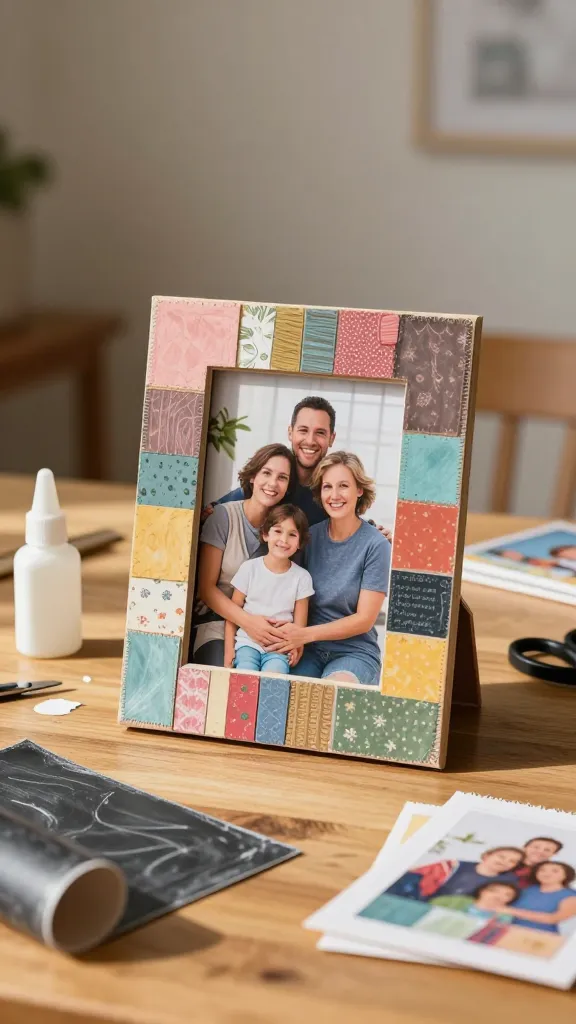
Turn everyday greeting cards into nostalgic chalkboard frames that hold favorite snapshots. This craft blends memory-keeping with practical display, giving new life to old cards and creating a reusable place for doodles and messages.
Materials
- Old greeting cards or cardboard pieces
- Small chalkboard paint or chalkboard vinyl
- Glue or double-sided tape
- Plastic or wood photo holder backing (optional)
How to Make It
- Cut a card into a frame shape, leaving a window for the photo.
- Adhere chalkboard paint or vinyl to the frame’s inner panel.
- Pop a photo behind the glass or card window and seal with tape.
- Lightly write a message on the chalkboard panel for a playful touch.
Pro Tips
- Use a non-toxic chalk that wipes away easily for quick updates.
- Customizing with a few decorative doodles can elevate the look.
Why this rocks: It’s a clever way to repurpose memories into a cute, interactive display. The kids feel like artists, and the end product is a practical keepsake.
Who will love it: Memory-keepers, scrapbook lovers, and kids who enjoy giving projects as thoughtful gifts.
Conclusion
Eight completely unique, kid-friendly crafts that spark imagination, teach new skills, and produce share-worthy results. Each project stands alone with its own look, texture, and mood, so there’s something for every mood and every space. Pick one to start, or go on a crafty spree and try all eight—your eight-year-old will be buzzing with pride and creativity. Have fun, get messy, and watch the magic unfold as creativity takes center stage.