6 Awesome Craft Ideas for 11-Year-Olds
Ready for a scavenger hunt of colorful, kid-friendly crafts? If you’re hunting for activities that spark imagination and brag-worthy results, you’ve hit gold. These six ideas are polished, playful, and perfect for hands-on weekend fun—trust me, your batch of 11-year-olds will glow with pride.
Grab your glue sticks and glitter, because we’re diving into easy, standout projects that feel like serious Pinterest vibes without the heavy lifting. Each idea is crafted to be approachable, with room to customize and make it totally theirs.
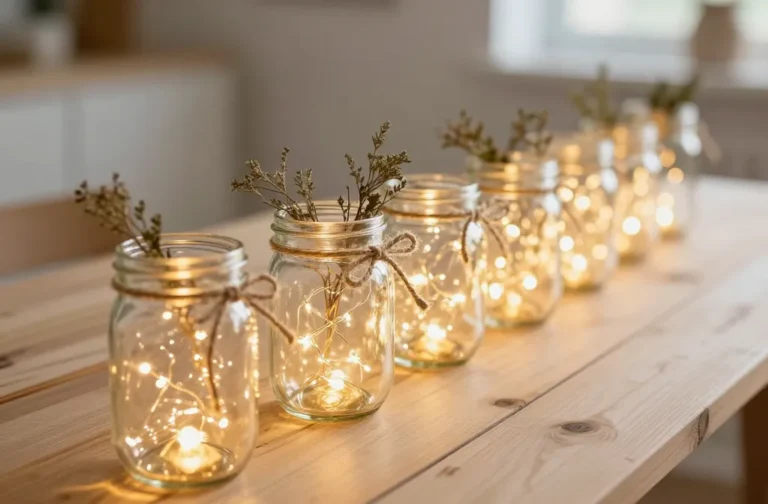
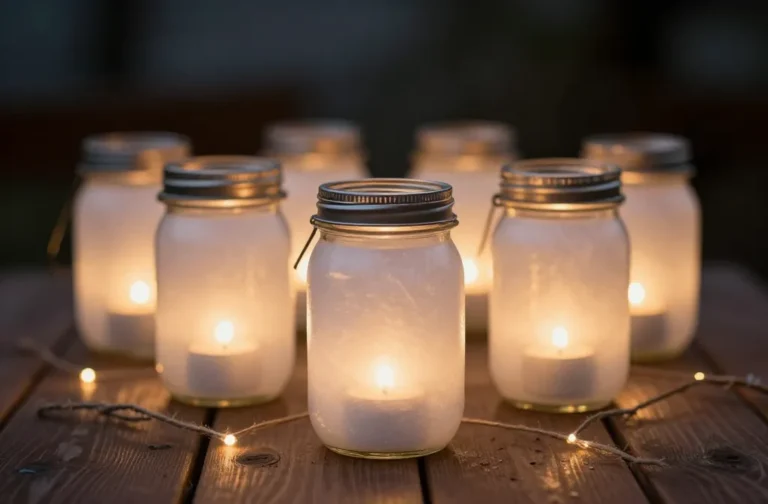
1. Rustic Mason Jar Lanterns With Fairy Lights
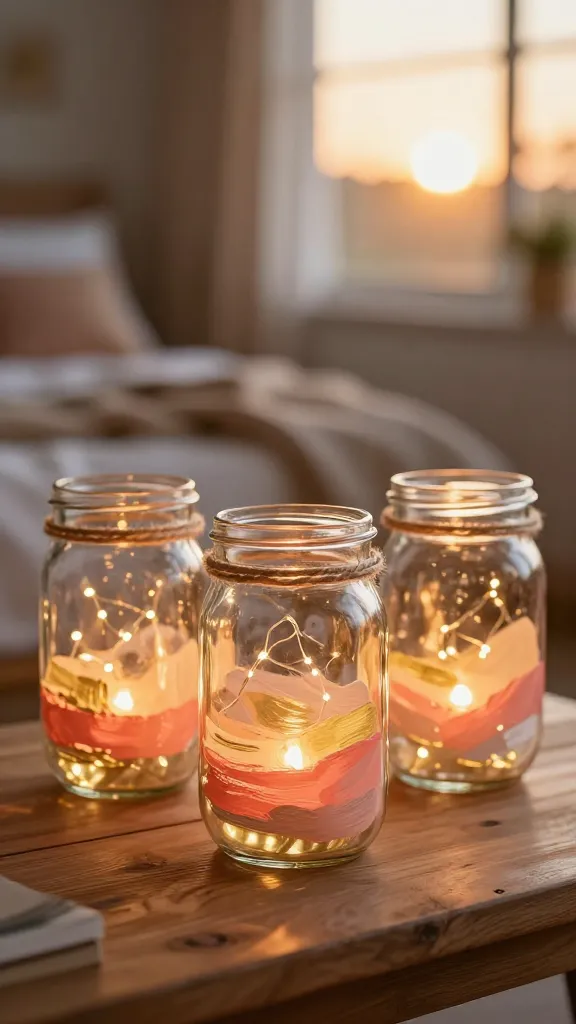
Picture this: a trio of softly glowing mason jars, wrapped in twine and painted in sunset hues. These lanterns set the mood for cozy bedrooms, outdoor movie nights, or a charming tablescape for a family gathering. The glow is gentle, and the texture is totally Instagram-worthy.
Materials Needed
- Glass mason jars (cleaned)
- Acrylic paints (warm tones like peach, coral, and soft gold)
- Twine or jute for wrapping
- Battery-operated mini fairy lights
- Paintbrushes, scissors, hot glue gun (adult supervision)
How to Make It
- Paint the jars in a gradient or solid color. Let them dry fully.
- Wrap the painted jars with twine for a rustic texture. Add a few dabs of hot glue to secure.
- Place the fairy lights inside and switch them on. Tuck the wire under the lip so it’s tidy from the outside.
- Optional: add a small tag or a faux fern sprig for a cozy vibe.
Pro Tips / Styling Ideas
- Try a metallic rim in gold or rose gold for a dash of glam.
- Group them on a mantel, or line them down a dining table for a warm, magical glow.
- For a seasonal twist, swap in colored lights for holidays or birthdays.
Who would love this? Anyone who adores soft ambient lighting, cozy nooks, and DIY decor that’s actually practical.
2. DIY Personalized Converse Are You Ready To Shine?
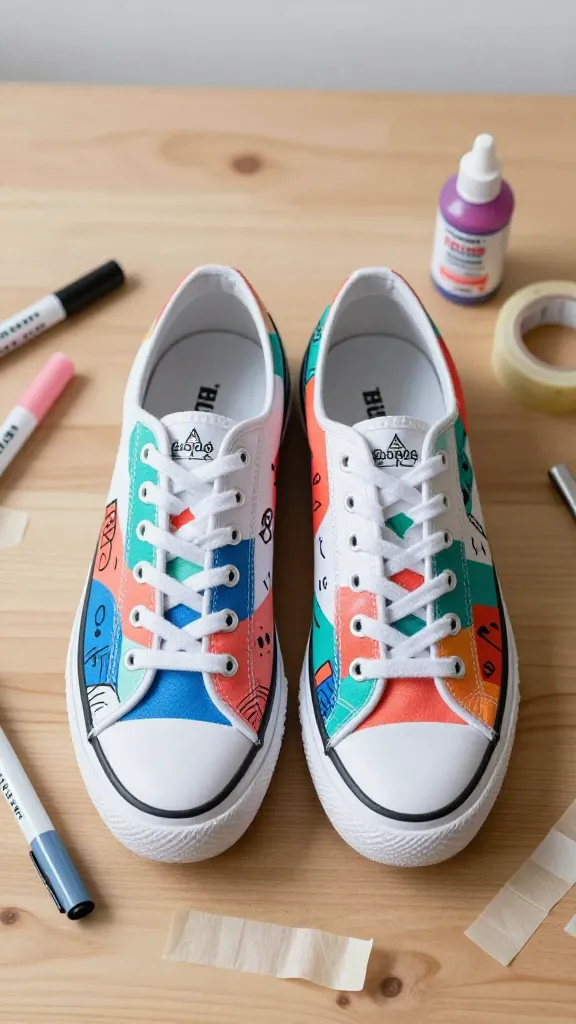
Imagine a pair of everyday sneakers transformed into a mini masterpiece—bold color blocks, doodled patterns, and a vibe that screams you. These aren’t just shoes; they’re a tiny wearable gallery for adventures.
Materials Needed
- White canvas sneakers in good condition
- Fabric markers or acrylic paint with fabric medium
- Painter’s tape for clean lines
- Sealant spray (clear, optional)
- Masking tape scraps for patterns
How to Make It
- Sketch a simple design with a pencil or light marker, then tape off sections for clean color blocks.
- Fill in your design with fabric markers or paint. Let each layer dry before adding more details.
- Add tiny doodles, stripes, or geometric shapes to keep it playful and unique.
- Seal with a clear spray once completely dry to extend wear and keep colors vibrant.
Pro Tips / Styling Ideas
- Coordinate colors with a favorite outfit or school spirit colors for a personalized twist.
- Experiment with minimalism (one bold emblem) or maximalism (a collage of tiny motifs) to match personality.
- Finish with a subtle lace or glitter trim around the laces for extra flair.
Who would love this? Creative kids who like to wear their art and those who love customizing everyday items.
3. Colorful Felt Wall Art Collage
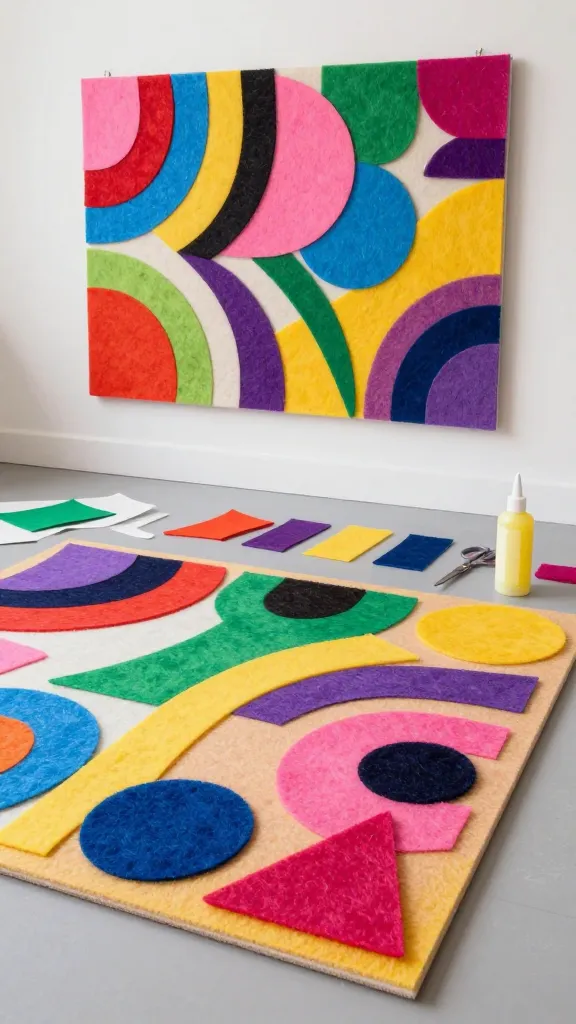
Big, bold, and totally gallery-worthy, this felt collage turns soft shapes into a vibrant wall statement. It’s tactile, forgiving, and endlessly customizable—a perfect project for experimenting with color and composition.
Materials Needed
- Sheets of felt in a rainbow of colors
- Fusible web or fabric glue
- Scissors or a craft knife
- Large poster board or canvas as a backing
- Optional: embroidery floss, decorative stitching
How to Make It
- Cut shapes (circles, triangles, irregular blobs) from felt. Create a few sizes for depth.
- Arrange on the backing board before gluing. Play with negative space and color balance.
- Glue shapes down, layering some over others for dimension. Add stitching accents if desired.
Pro Tips / Styling Ideas
- Theme the collage around a favorite season or mood (sunny, moody, playful).
- Leave a few shapes loose so you can rearrange later for a fresh look.
- Frame the finished piece for a polished display in a bedroom or playroom.
Who would love this? Kids who enjoy bright, tactile crafts and quick daily bursts of creativity.
4. Mini Herb Garden in Recycled Containers
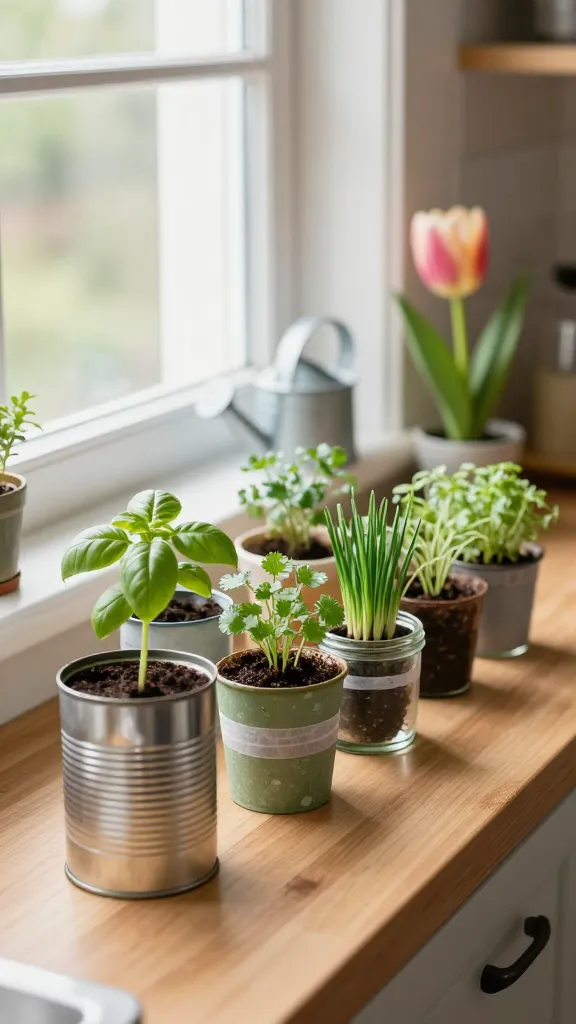
Who says crafts are only about decorations? This idea blends creativity with a touch of practicality by turning repurposed containers into a tiny, thriving herb garden. It’s satisfying to care for, easy to grow, and instantly elevates kitchen vibes.
Materials Needed
- Small recycled containers (tin cans with lids removed, yogurt cups, or jars)
- Potting soil
- Herb seeds or seedlings (basil, cilantro, chives)
- Paint or washi tape for decoration
- Drill or hammer (adult supervision) for drainage holes
How to Make It
- Decorate the containers with paint or tape to give each a unique personality.
- Drill small drainage holes if needed, then fill with soil.
- Plant a few seeds or small cuttings in each container and water gently.
Pro Tips / Styling Ideas
- Group the pots on a sunny windowsill or tabletop tray for a curated look.
- Label each herb with handmade tags for a crafty touch.
- Pair with a tiny watering can or pinch of decorative stones for flair.
Who would love this? Budding gardeners and students who want a green habit with a side of crafty decoration.
5. Paper Quill Wall Clock Oris
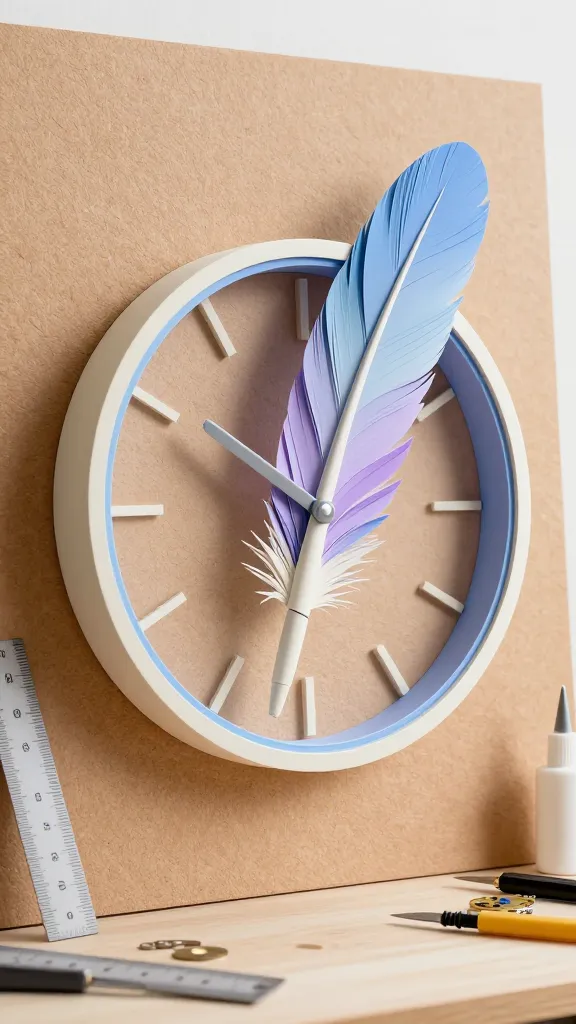
Okay, this one sounds grand, but it’s shockingly accessible. Use layered paper quills to craft a modern wall clock that’s both artful and functional. The color gradients and crisp lines make it a conversation starter in any room.
Materials Needed
- Sturdy cardstock in colors of choice
- Clock mechanism kit (movement, hands, and battery)
- Ruler, craft knife, glue
- Dense backing board or foam board
- Optional: gold or silver foil accents
How to Make It
- Cut cardstock into long, tapered strips to form the “quills.”
- Arrange blades radially on the backing board to create a striking sunburst pattern around where the clock will go.
- Glue each quill down, then install the clock mechanism in the center.
Pro Tips / Styling Ideas
- Play with color transitions from warm to cool to mimic a sunrise or sunset.
- Add metallic foil accents for a luxe touch without breaking the bank.
- Choose a bold 12-inch or larger size for major wall impact.
Who would love this? Kids who love geometry, bold wall art, and a dash of dramatic decor.
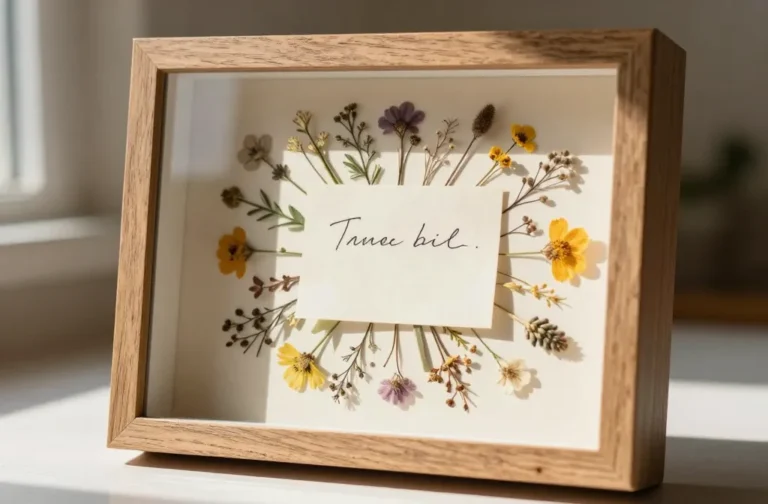
6. Upcycled Magazine Mosaic Picture Frames
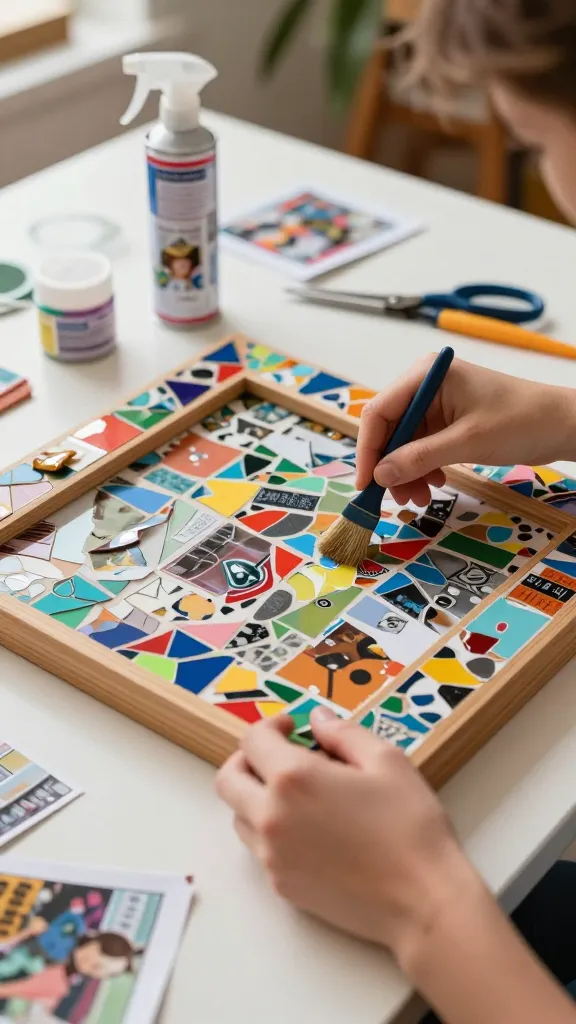
Tap into your inner collage artist with mosaic frames created from upcycled magazine clippings. It’s an approachable way to recycle, create texture, and end up with a super stylish gift or room accent.
Materials Needed
- Unopened magazine scraps or old catalogs
- Plain wooden picture frames
- Mod Podge or clear drying glue
- Foam brush, scissors, and a sealant spray
How to Make It
- Rip or cut magazine pieces into varied shapes and sizes.
- Brush a thin layer of glue on the frame and press pieces down, creating a mosaic pattern.
- Seal the finished frame with a clear protective spray for durability.
Pro Tips / Styling Ideas
- Use a color story—earth tones, ocean blues, or jewel tones—to guide the clippings.
- Leave some negative space for a modern, airy feel.
- Pair with a photo that tells a mini-story when displayed together.
Who would love this? The collage lovers, magazine recyclers, and kids who want gift-worthy frames with minimal mess.
Conclusion
These six ideas offer a vibrant mix of creativity, practicality, and wow-factor without being complicated. They’re all perfectly suited for 11-year-olds who crave hands-on projects that look polished and feel rewarding to finish. Ready to dive in? Pick one (or all six) and start crafting, pinning, and sharing the magic—your future DIY mastermind self will thank you.