7 recycled materials whimsical crafts
Ready to turn trash into treasure? These seven whimsical DIY ideas use everyday recycled goodies to create eye-catching decor, playful gifts, and cozy home accents. Trust me, they’re fun, surprisingly easy, and Pinterest-ready in seconds.
1. Whimsical Tin Can Planters With Painted Fairy-Tale Faces
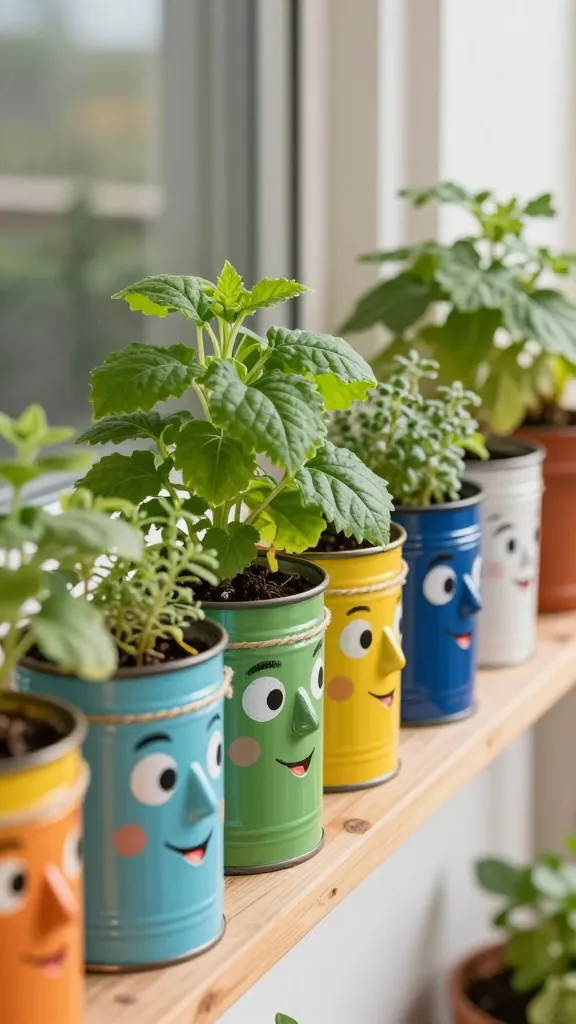
Picture this: a row of tin can planters, each with a cheeky, painted face peeking from among green leaves and pops of color. These little green friends brighten any shelves, balcony, or window sill, and they’re as charming as they are easy.
Materials Needed
- Old tin cans (washed and dried)
- Acrylic craft paints and brushes
- Twine or ribbon for hanging
- Small potting soil and your favorite small plants or herbs
- Sealant spray (optional)
How to Make It
- Clean cans thoroughly; remove any sharp edges with a file or sandpaper.
- Sketch simple face designs with pencil, then fill in with bold colors—think rosy cheeks, quirky smiles, and tiny freckles.
- Add a top coat of sealant to keep colors vibrant outdoors.
- Fill with soil and plant a little herb or succulent. Tie a twine loop for hanging, or group them on a sunny ledge.
Pro Tips / Styling Ideas
- Use different height cans for an offset, whimsical garden wall.
- Paint seasonal faces—sunny faces for summer, spooky smiles for Halloween.
- Line them up on a kitchen windowsill for a cheeky herb corner.
Who will love it? Anyone craving a splash of personality in their balcony or kitchen—especially plant lovers and playful decorators.
2. Denim Patchwork Wall Hanging From Old Jeans
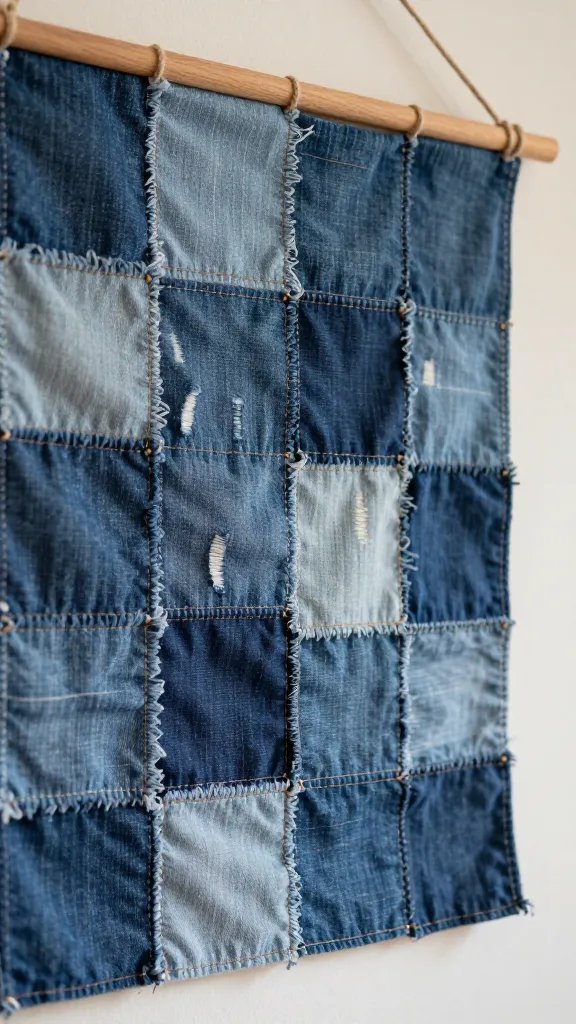
Imagine a cozy, textured wall piece made from old denim scraps stitched into a colorful patchwork. It’s a tactile piece that adds warmth to any nook, and you’ll feel smug every time you glance at it.
Materials Needed
- Old pair of jeans or denim scraps
- Fabric scissors
- Needle and sturdy thread or a sewing machine
- Fusible interfacing or canvas backing
- Wooden dowel and twine for hanging
How to Make It
- Cut denim into geometric shapes or friendly rectangles.
- Arrange on backing to form a cohesive patchwork pattern, then sew each piece in place.
- Attach to a dowel and hang with rustic twine for a clean, boho look.
Pro Tips / Styling Ideas
- Keep a color story—blue tones with a pop of red or yellow adds visual punch.
- Intersperse a few textured fabrics (corduroy, canvas) for extra depth.
- Hang near a reading chair or in a cozy hallway to anchor the space.
Love it if you’re a upcycle minimalist or a textile enthusiast who enjoys a tactile piece that tells a story.
3. Cardboard Zoo Wall Art
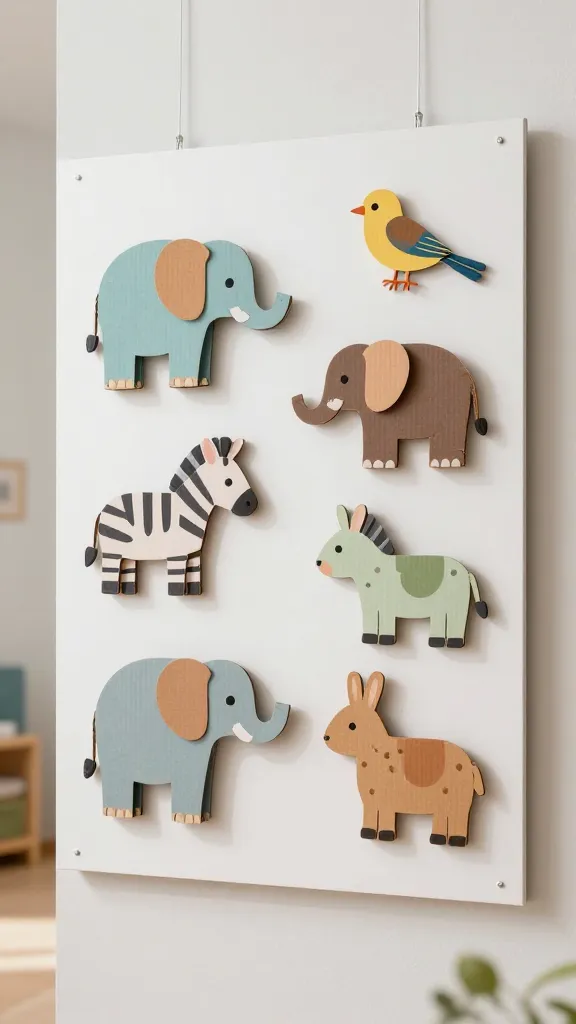
Turn simple cardboard into a playful menagerie you can mount like a gallery. This is a fantastic kids’ room project or a quirky home decor piece that’s light, affordable, and totally adorable.
Materials Needed
- Sturdy cardboard from boxes
- Acrylic paints, markers, or colored pencils
- Scissors or craft knife
- Glue or double-sided tape
- White poster board for backing (optional)
How to Make It
- Sketch playful animal shapes on cardboard—tiny elephants, zebras, bunnies, birds.
- Cut out shapes and paint with bright, friendly colors.
- Layer shapes on a backing board to create a little zoo, then mount on the wall.
Pro Tips / Styling Ideas
- Give each animal a tiny personality with eyes and a smile.
- Add a simple woodland or jungle vibe with a painted backdrop behind the animals.
- Rotate pieces seasonally or swap in new creatures over time.
Who’s this for? Perfect for kids’ rooms, play spaces, or anyone who loves whimsical, budget-friendly wall decor.
4. Recycled Bottle Cap Mosaic Coaster Set
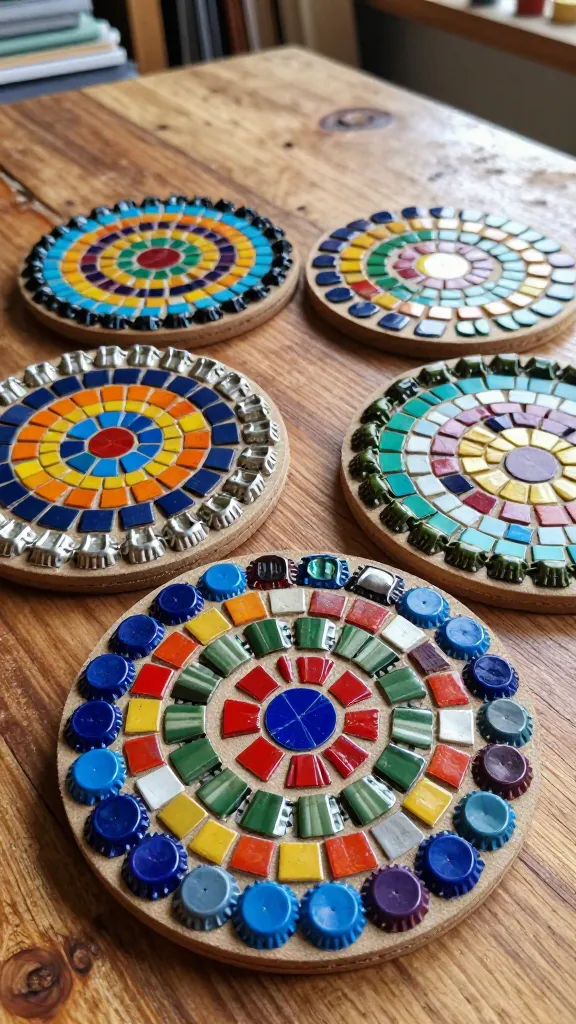
A mosaic of bottle caps creates a burst of color on sturdy coasters you’ll actually use. It’s a satisfying, tactile project that transforms everyday lids into functional art.
Materials Needed
- Plastic or metal bottle caps in assorted colors
- Cardboard or wooden coaster bases
- Strong glue or hot glue gun
- Grout or colored resin (optional for a smooth finish)
- Sealant spray (optional)
How to Make It
- Arrange bottle caps on coaster base to plan your color pattern.
- Glue caps in place, pressing firmly to ensure even adhesion.
- Optionally fill gaps with grout for a seamless look, then wipe clean.
- Seal with spray to protect from moisture.
Pro Tips / Styling Ideas
- Go monochrome for a chic, modern palette, or go neon for a playful vibe.
- Make a matching set with varying sizes for a coordinated coffee nook.
- Place on a tray with a small plant for a charming centerpiece.
Who would adore this? DIY lovers who crave color-blocked, textured surfaces and a hint of retro charm.
5. Upcycled Fabric Ribbon Wind Chimes
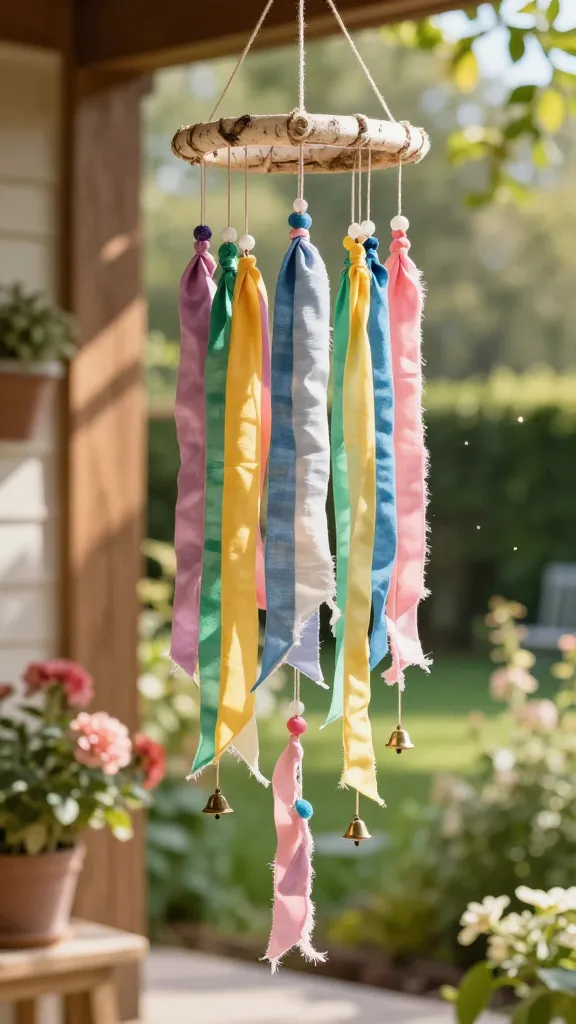
Create a kinetic piece of art with soft sounds and a rainbow of fabric scraps. These wind chimes add whimsy to porches, windows, or garden walls and are surprisingly forgiving for beginners.
Materials Needed
- Assorted fabric scraps or ribbon remnants
- Birch dowels or an old wooden embroidery hoop
- Fishing line or sturdy thread
- Beads, bells, or charms (optional)
- Hook or loop for hanging
How to Make It
- Cut fabric scraps into even strips (about 12–18 inches long).
- Attach strips to the dowel or hoop by tying securely at intervals.
- String the draped ends with beads or charms for a little jingle.
- Hang where a breeze can set it singing.
Pro Tips / Styling Ideas
- Keep colors within a theme—seafoam greens, blush pinks, or sunny yellows—for cohesive outdoor decor.
- Mix in a few wooden tags carved with short messages for a personal touch.
- DIY-friendly and gift-worthy for neighbors or teachers.
Who’ll love this? Sunlit porches, balcony spaces, and anyone who enjoys a gentle, musical accent with color.
6. Recycled Glass Jar Lanterns With Painted Glow
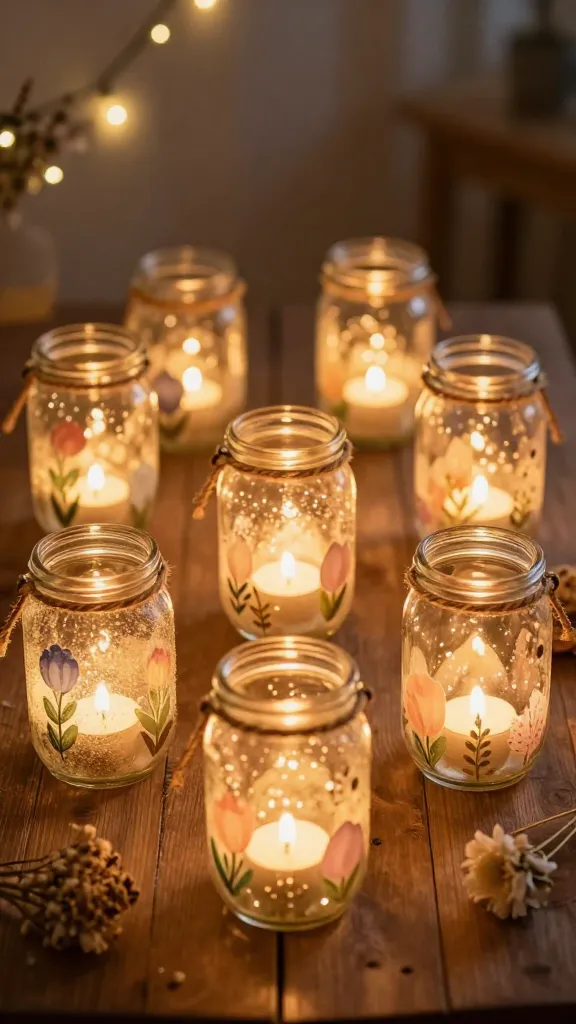
Old glass jars get a second life as glowing lanterns. A sprinkle of color and a few tealight candles turn them into magical evening accents for gatherings or cozy nights in.
Materials Needed
- Empty glass jars (mason jars or any glass jars)
- Acrylic paints or glass markers
- Tea light candles or LED tea lights
- Raffia, twine, or metal handles for hanging
- Glimmer or glitter (optional)
How to Make It
- Rinse jars well; dry completely.
- Paint designs or simple patterns on the outside, or wrap with thin decorative paper before painting.
- Place a candle inside and add a handle for hanging or a simple stand for tabletop display.
Pro Tips / Styling Ideas
- Pair with eucalyptus or lavender stems for a fresh scent and look.
- Create a string of lanterns along a patio or stairway for ambient lighting.
- Use softer hues for a romantic vibe or metallic accents for a glam touch.
Who would love it? Anyone who enjoys warm, inviting light, DIY decor, and a touch of rustic charm.
7. Scrap Fabric Book Pages Lanterns

Bright scraps and old book pages come together to form a delicate, lantern-style piece that’s part art, part cozy reading nook accessory. It’s a thoughtful gift for book lovers and crafters alike.
Materials Needed
- Old book pages or sheet music
- Thin cardboard or cardboard cylinder (like inside a paper towel roll)
- Fabric scraps or tissue paper
- Glue or mod podge
- String or ribbon for hanging
- LED fairy lights
How to Make It
- Wrap the cardboard cylinder with book pages, gluing as you go to form a cylinder.
- Layer fabric or tissue triangles over the page-covered cylinder, letting edges peek through for a collage effect.
- Wire fairy lights inside the lantern and hang from a hook or stand.
Pro Tips / Styling Ideas
- Choose pages with warm typography for a literary vibe.
- Alight them indoors on a bookshelf or outside for a magical garden glow.
- Match the colors to your seasonal decor for a cohesive look year-round.
Who’s this for? Book lovers, vintage lovers, and anyone who enjoys a soft, storybook glow in their space.
Conclusion
Whichever of these seven ideas you pick, you’re turning everyday recycled materials into whimsical, personal art. Grab a few scraps, unleash your inner crafter, and you’ll have decor that’s unique, affordable, and totally you. Start with one project or dive into all seven—either way, you’ll end up with handmade pieces you’ll love showing off.