8 Fresh & New Craft Ideas Trending Right Now
Ready to spill some creativity? These eight fresh DIY ideas are trending hard, and they’re delightfully doable for crafters at any level. Trust me, you’ll love the mix of quick wins and show-stopping pieces that actually fit into real life.
From cozy home decor to thoughtful gifts, these projects are designed to be fun, Pinterest-friendly, and totally shareable. Let’s dive in and find your next craft obsession.
1. Pastel Resin Coasters With Florals Encased
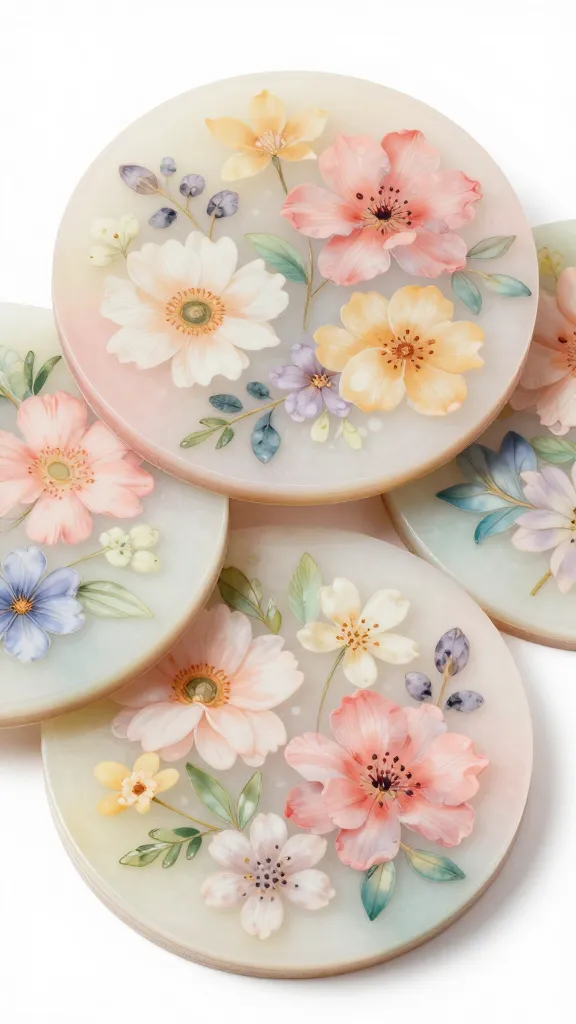
Imagine glossy, crystal-clear coasters that look like tiny art canvases. Layered with pressed flowers and a whisper of pastel color, these resin coasters catch the light and bring a soft, dreamy vibe to any coffee table. They’re practical, chic, and surprisingly addictive to make.
Materials Needed
- Clear epoxy resin kit (two parts)
- Silicone coaster molds
- Pressed flowers or tiny dried leaves
- Pastel acrylic paint (tiny amounts)
- Mixing cups, stirring sticks, gloves, and a heat gun
How to Make It
- Pour a thin base layer of resin in each mold and cure per the kit instructions.
- Arrange pressed florals on the surface, then mix a small amount of pastel color into your resin and pour a second layer to seal the design.
- Pop bubbles with a heat gun and let fully cure. Trim edges if needed.
Pro Tips / Styling Ideas
- Add a tiny gold leaf accent for luxe vibes.
- Seal with a final clear coat for extra gloss and durability.
- Match with a pastel tray for a coordinated centerpiece.
Who will love it? Anyone who adores glassy textures, springtime aesthetics, or custom entertaining pieces. These are perfect for gifting to a friend who loves botanicals, or for brightening your own coffee corner.
2. Knit-Garden String Art Framed Panels
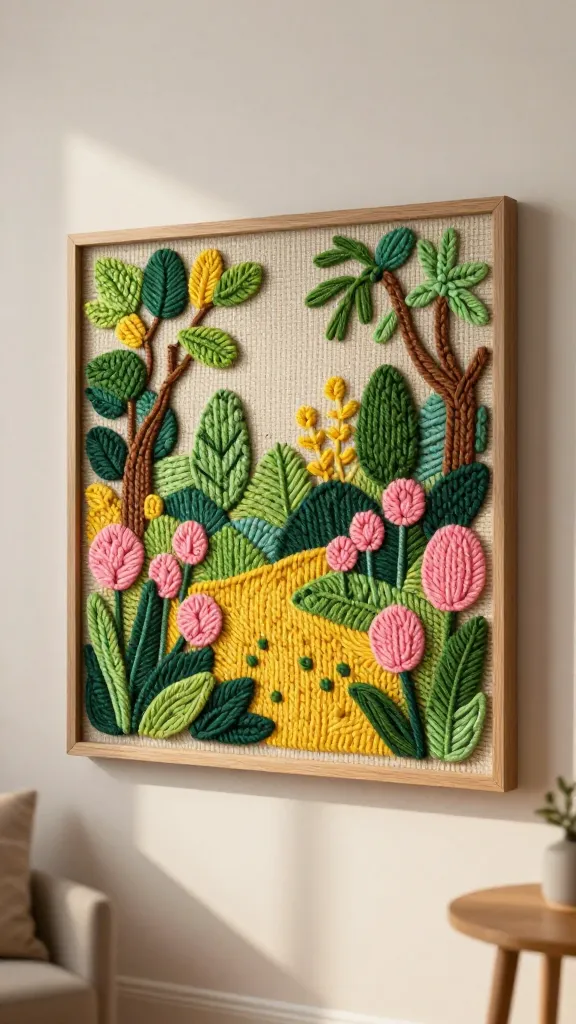
Turn a simple frame into a lush, tactile garden using a knotty, cozy string art technique. The “garden” pops with yarn in greens, pinks, and sunny yellows, and the texture makes this piece sing in any living space. It looks complicated but is actually a delightful breeze to assemble.
Materials Needed
- Wooden frame (square or rectangular)
- Wide needle and embroidery floss or bulky yarn
- Cardboard or foam board for the backing
- Push pins or small nails
- Scissors and tape
How to Make It
- Secure the backing board behind the frame and mark a grid pattern.
- Knot and weave the yarn in a floral or leafy silhouette, building texture with different stitch directions.
- Trim excess yarn and mount the finished panel in the frame.
Pro Tips / Styling Ideas
- Use variegated greens for a more natural look, or pastel tones for a whimsical vibe.
- Layer multiple panels in a grid for a bold gallery effect.
- Incorporate metallic thread for a subtle shimmer.
Who will love it? Textile lovers and people who want a nature-inspired piece with serious crafty wow factor but without the mess of real plants.
3. Upcycled Denim Wall Hanging Pillows
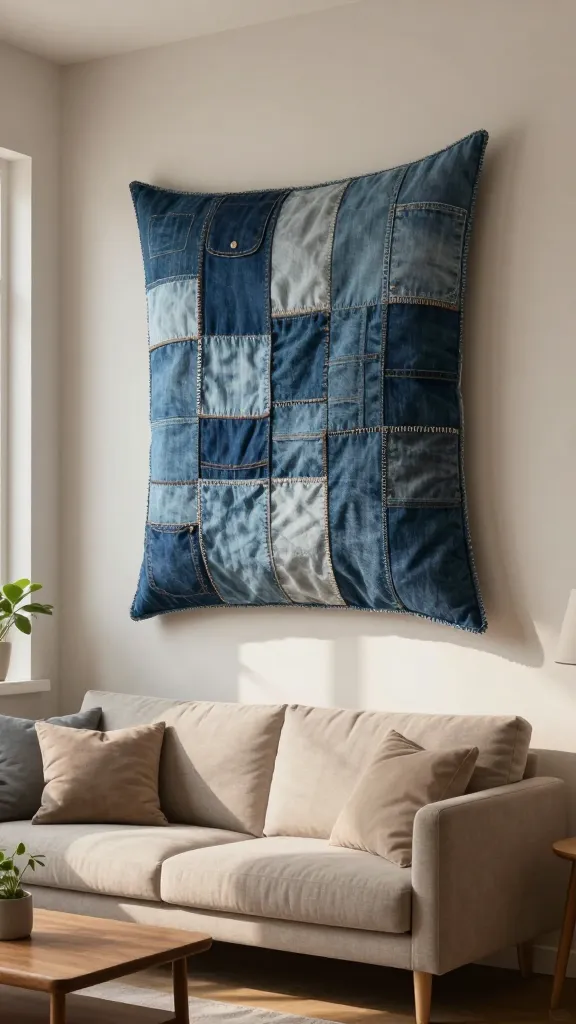
Turn old jeans into a soft, sculptural wall hanging that doubles as a cozy pillow when needed. The mix of denim textures, stitch patterns, and patch shapes adds a quirky, sustainable edge to any room. It’s both decorative and practical—two wins in one project.
Materials Needed
- Old jeans in assorted washes
- Fray check or fabric glue
- Batting or fluff for pillow form
- Canvas or sturdy textile backing
- Needle and thread or sewing machine
How to Make It
- Cut denim into varied patch shapes and arrange into a loose mosaic on the backing.
- Sew patches in place, leaving a gap for stuffing.
- Fill with batting, then stitch closed. Finish with a sleeve or loop for wall hanging.
Pro Tips / Styling Ideas
- Keep colors in the same family for a cohesive look, or mix bold contrast for a dramatic piece.
- Hang near seating to grab a quick, cozy vibe when you need a cushion.
Who will love it? Fans of sustainable fashion, texture lovers, and anyone wanting a functional art piece that doubles as decor and a throw pillow.
4. Botanical Terrarium Candles
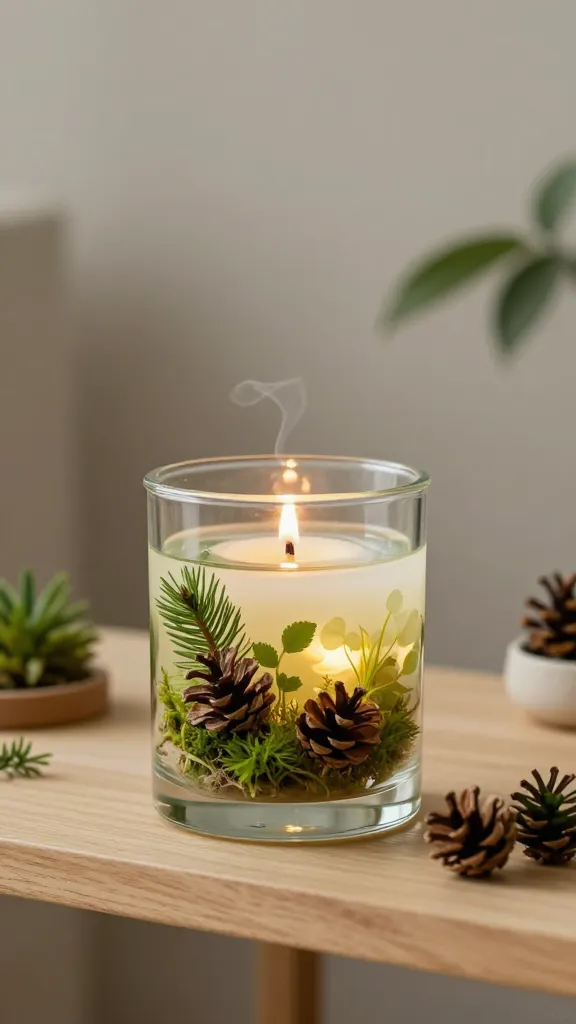
Luminescent, fragrant, and a touch magical, these tiny terrarium candles let you light up your space with a mini garden. Encasing botanicals in clear gel wax creates a glass-encased micro-ecosystem that smells incredible and looks absolutely stunning on shelves or mantels.
Materials Needed
- Clear gel wax or resin
- Small glass containers or jars
- Botanical samples (small leaves, moss, tiny pine cones)
- Candle wick, wax melter, scent oil
- Hot glue and silicone gasket (optional)
How to Make It
- Layer a base of moss and a few botanicals, then pour gel wax or resin to encase them.
- Embed a wick in the center, scent lightly, and let cure until solid.
Pro Tips / Styling Ideas
- Add a soft LED candle on a timer for a safe glow that mimics real flame.
- Vary jar sizes to create a tiny “terrarium forest” on a coffee table.
Who will love it? Gift lovers, plant fans, and anyone who enjoys calm, nature-inspired accents that bring warmth and light into a room.
5. Velvet-Winish Picture Frames
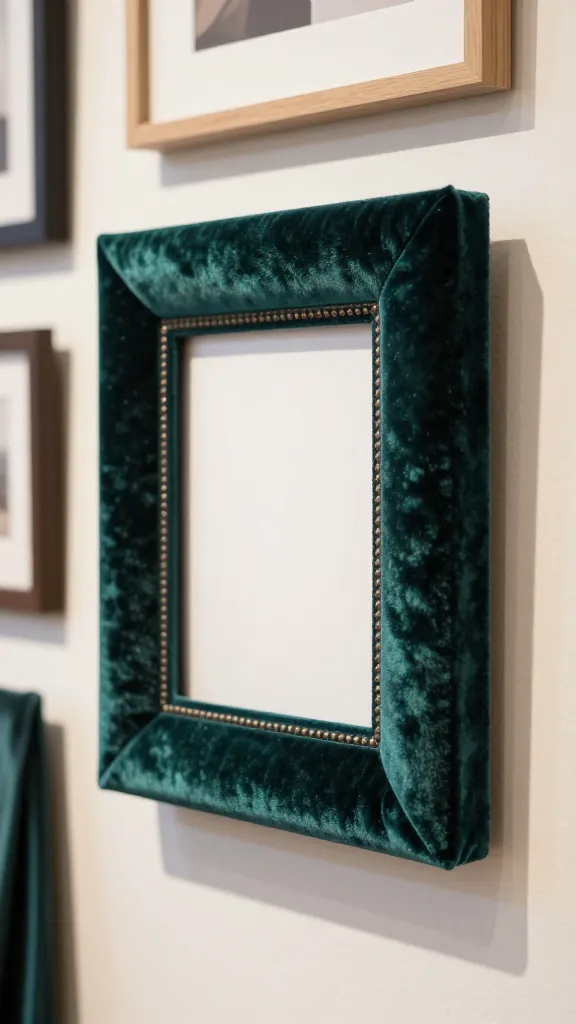
Convert plain frames into luxe, textured statement pieces with a velvet wrap and metallic accents. The soft pile and rich tones instantly upgrade your wall galleries and give your photos a plush backdrop that feels high-end yet approachable. Seriously, you’ll want to frame every memory this way.
Materials Needed
- Plain wooden picture frames
- Velvet fabric or adhesive velvet sheets
- Double-sided tape or a hot glue gun
- Metallic nailhead trim or small decorative studs
How to Make It
- Cut velvet to slightly larger than the frame front, wrap and secure with tape or glue.
- Apply nailhead trim along the edges for a refined border.
Pro Tips / Styling Ideas
- Choose jewel tones for a bold gallery wall; softer hues for a chic, subtle look.
- Pair velvet frames with black-and-white photography for contrast.
Who will love it? Design buffs who crave tactile, luxe finishes without a big budget, and anyone who wants a quick home décor upgrade.
6. Minimalist Scented Soy Jar Makeovers
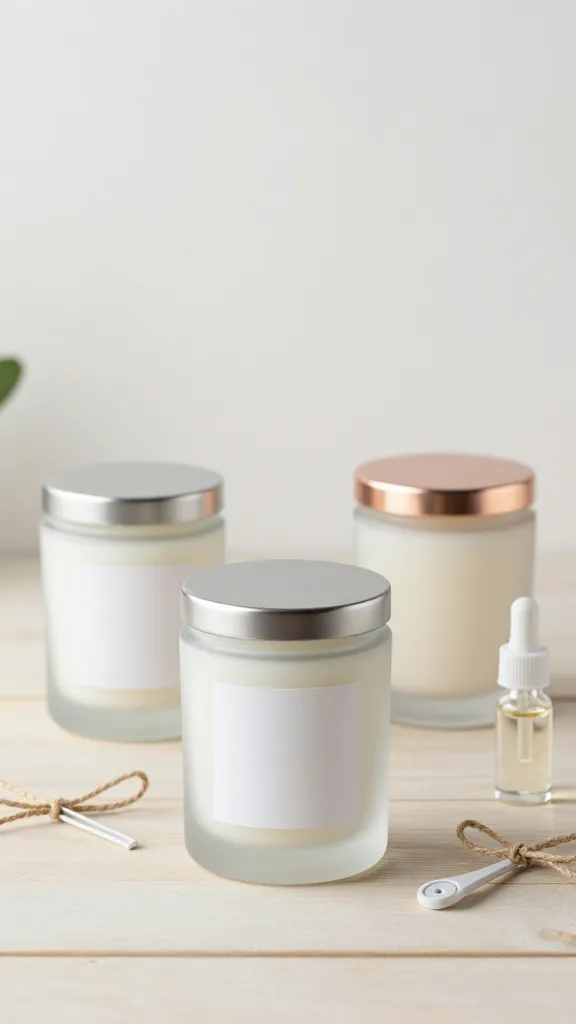
Give your old candle jars a fresh, minimalist facelift that’s both stylish and practical. Fresh scents, clean lines, and a touch of metallic make these jars perfect for shelves, desks, or gifting a spa-like vibe to a room. Simple, serene, and seriously satisfying.
Materials Needed
- Used or new soy candles in jars
- Decorative elements: twine, vinyl stickers, or chalk paint
- New wick or wick sustainers (optional)
- Essential oils for scent refresh (optional)
How to Make It
- Remove old wicks, clean jars, and sand labels if necessary.
- Paint or decorate the outside with a clean, modern finish. Add a subtle label or tiny plant sticker for flair.
- Refill with fresh soy wax and a few drops of essential oil if desired.
Pro Tips / Styling Ideas
- Pair with a matching trio of jars in varying heights for a balanced vignette.
- Use matte black lids or brass accents to elevate the look.
Who will love it? People who crave calm, tidy surfaces and a fragrance-free refresh that still feels luxe and intentional.
7. Glow-In-The-Dusk Shadow Box Dioramas
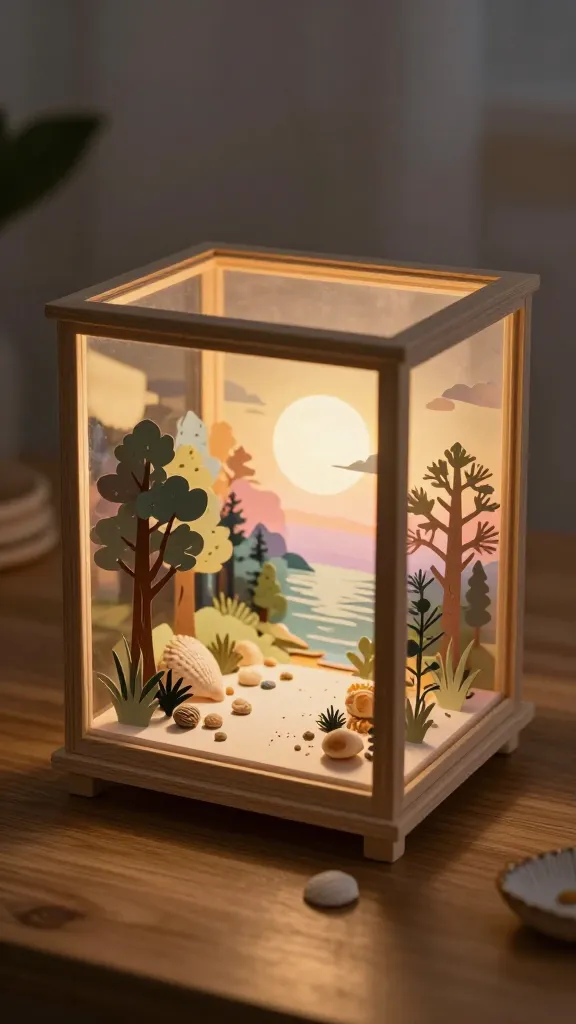
Bring tiny scenes to life with a glow-in-the-dark twist. These shadow boxes layer paper cutouts, natural textures, and a gentle LED backlight to create a mini-world you can admire day or night. A whimsical project that’s surprisingly soothing to assemble.
Materials Needed
- Shadow box frame
- Decorative papers, tiny faux plants, small shells or pebbles
- Battery-powered LED light strip or fairy lights
- Glue, scissors, needle and thread (optional)
How to Make It
- Layer a scenic background using colored papers and textures.
- Place and glue your 3D accents at varying depths to create depth.
- Line the back with a soft glow by attaching the LED light and secure the battery pack discreetly.
Pro Tips / Styling Ideas
- Choose a theme: forest, seaside, or starlit night—whatever sparks joy.
- Use a dimmable light if possible to shift mood from day to night.
Who will love it? Dreamers, color enthusiasts, and anyone who wants a tiny, magical vignette that doubles as night lighting.
8. Magnetic Plant Hangers With Recycled Wood

A clever, space-saving way to greenery up any kitchen or office wall. These magnetic plant holders use scrap wood and a few metal discs to create a modular, easy-to-move system. It’s sustainable, practical, and surprisingly chic when mixed with real plants or faux greenery.
Materials Needed
- Small scrap wood planks
- Magnetic discs or small strong magnets
- Jute twine or leather straps
- Mini pots or air plants
- Glue and nails (optional)
How to Make It
- Sand wood, seal with a clear finish, and attach magnets to the back of each planter or to the wood directly.
- Thread twine to create hanging loops and attach to magnets or frame hooks.
- Place plants in the pots and attach to magnetic mounts on the wall.
Pro Tips / Styling Ideas
- Mix metal finishes—brass, copper, and matte black—for a modern gallery feel.
- Group in odd numbers (3 or 5) for dynamic balance.
Who will love it? Green-thumbed organizers, apartment dwellers with limited space, and anyone who enjoys flexible, modular decor that’s easy to rearrange.
Conclusion
These eight ideas are crafted to spark creativity without overwhelming you. Pick one to start, or go bold and tackle them all—trust me, you’ll have a blast and end up with pieces you’ll proudly display or gift. The joy of DIY is in the play, the textures, and the little victories along the way. So grab your supplies, pick a project, and let your space bloom with handmade charm.