8 Inspiring Step-by-Step Craft Ideas with Pictures
Calling all DIY lovers! If you crave projects that look stunning and come together in a flash, you’re in the right place. These eight ideas are fun, accessible, and totally Pinterest-worthy—trust me, you’ll want to try all of them.
Each idea hops off the page with a clear finish, a touch of personality, and simple steps you can follow in an afternoon. So grab your glue gun, scissors, and a cup of coffee—the creative spree begins now.
1. Rustic Mason Jar Lanterns With Fairy Lights
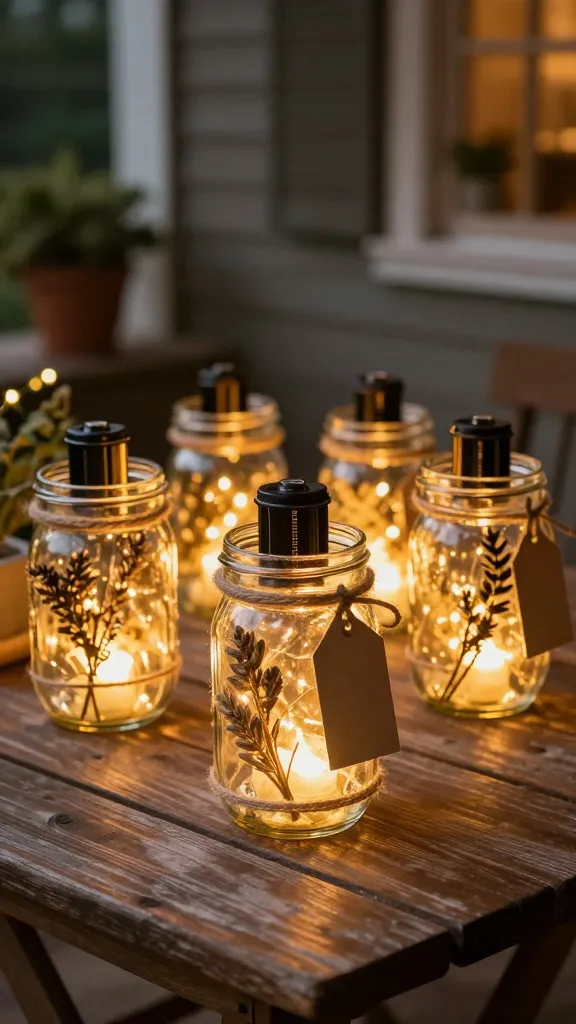
Imagine soft, warm light glowing from mason jars wrapped in twine and tiny fairy lights. This project looks effortlessly chic on a porch, dining table, or cozy bedroom shelves.
Materials:
- Mason jars (any size)
<liFairy lights (battery-operated)
<liJute twine or rustic ribbon
<liHot glue gun and glue sticks
<liOptional: dried flowers, eucalyptus, or cinnamon sticks
How to Make It:
- Wash and dry jars. Coil the lights inside so the battery pack sits outside the top.
- Wrap the outside with twine, securing with a dab of hot glue. Layer in a few dried botanicals for texture.
- Add a small ribbon bow or chalk-painted label for a personalized touch.
- Turn on the lights and set them on a tray or windowsill.
Pro Tips / Styling Ideas:
- Switch to a seaside vibe with whitewashed paint and seashell accents.
- Group different jar sizes for a dramatic centerpiece.
- Use them outdoors in a frost-safe lantern cluster—they look magical at dusk.
Who’ll love it: Perfect for weekend brunch vibes, patio vibes, or as a thoughtful handmade gift for neighbors and hosts.
2. Colorful Succulent Wall Planter Made From Reclaimed Wood
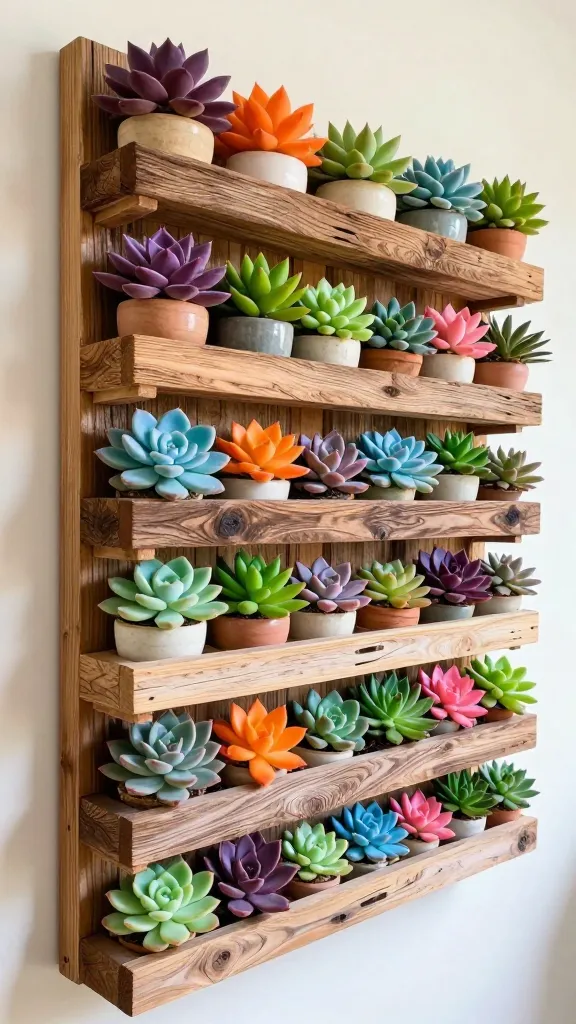
Picture a bright, living wall piece: a small vertical garden assembled from weathered wood scraps and crafty planters that hold succulents in a rainbow of hues. It’s a cheerful statement that brings life to any bare wall.
Materials:
- Reclaimed wood boards or a wooden crate
<liSmall terracotta pots or mini plant pots
<liStrong adhesive or hot glue
<liSanding block and wood stain or paint (optional)
<liAssorted succulents and soil
How to Make It:
- Cut boards into a shallow trough or frame, sand edges smooth.
- Paint or stain to match your decor, then let dry.
- Attach mini planters at intervals with glue or small brackets, leaving space for roots.
- Fill pots with succulent soil, plant, and press into the frame.
Pro Tips / Styling Ideas:
- Use a neutral backdrop and pop colors with the succulents—pinks, teals, purples all look striking.
- Mount at eye level for the best impact; add a lightweight hanging system if you plan to move it.
Who’ll love it: A fantastic addition to entryways, kitchens, or home offices—cheap to make and endlessly joyful to look at.
3. Marble-Effect Monogram Planter Pots
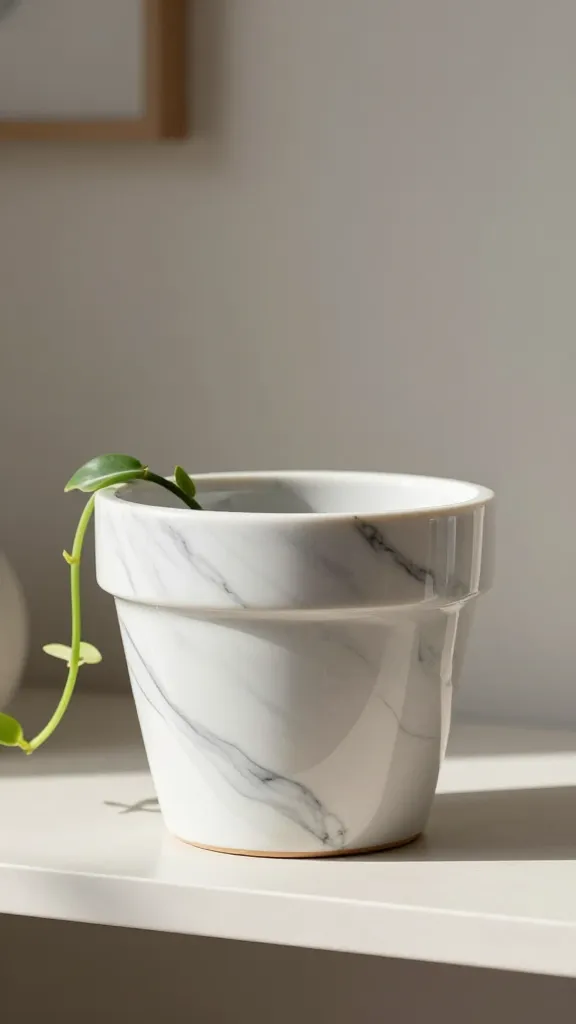
Who knew a plant pot could double as a mini sculpture? Create marble swirls on plain terracotta or ceramic planters to add a luxe vibe to shelves or desks.
Materials:
-
<liPlain ceramic planters (any size)
<liAcrylic paints in white, gray, and black
<liSea sponge or crumpled plastic wrap
<liClear sealant spray
How to Make It:
- Base coat the planters in white and let dry.
- Dip a sea sponge in gray and black, dab lightly to create marbling patterns.
- Toast the pattern around the pot, leaving clean edges for a refined look.
- Seal with a clear spray to protect the finish.
Pro Tips / Styling Ideas:
- Pair with a single trailing plant for a gallery-style vignette.
- Experiment with metallic accents (rose gold or silver) for extra glam.
Who’ll love it: Ideal for desk decor, living room shelves, or as a tactile gift for fellow plant lovers.
4. DIY Painted Stone Bookends With Mini Landscapes
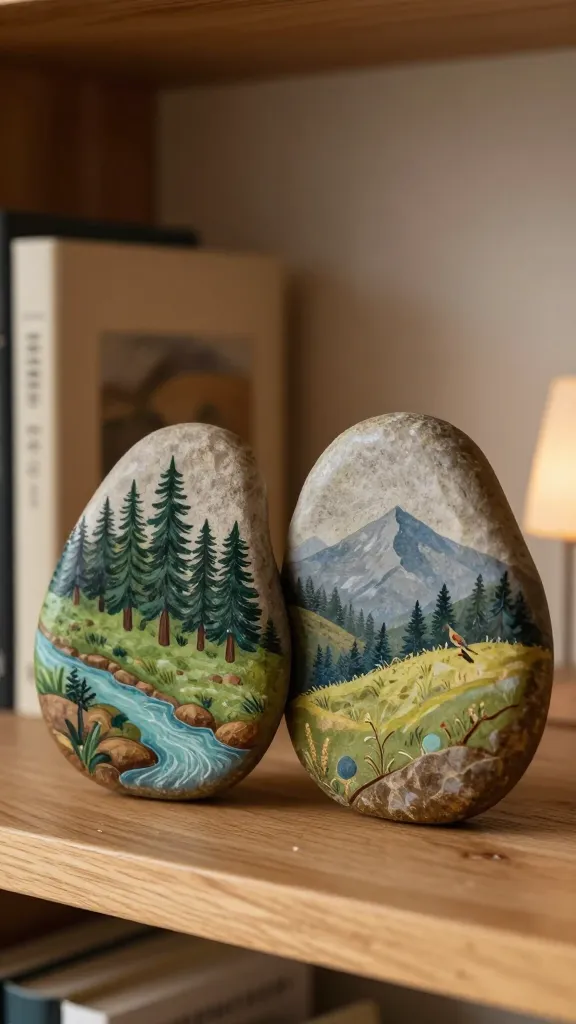
Turn plain stones into little landscapes—two bookends that are not only functional but also whimsical artworks. A small, satisfying project that packs a big visual punch.
Materials:
- Smooth stones or river rocks
<liAcrylic paints in sky blue, green, brown, and white
<liFine-tip brushes and a sealant
<liPencil for sketching outlines
How to Make It:
- Wash stones and dry completely.
- Sketch a tiny landscape or abstract design on each rock.
- Paint, layer for depth, and add tiny details like trees or birds.
- Seal when dry and let cure fully before placing books.
Pro Tips / Styling Ideas:
- Keep a cohesive palette so the pair matches your shelves—soft naturals work beautifully.
- Consider adding metallic highlights for a modern edge.
Who’ll love it: Great for book lovers, home libraries, or as a nature-inspired gift for teachers and friends.
5. Geometric Fabric Wall Hanging With Plush Texture
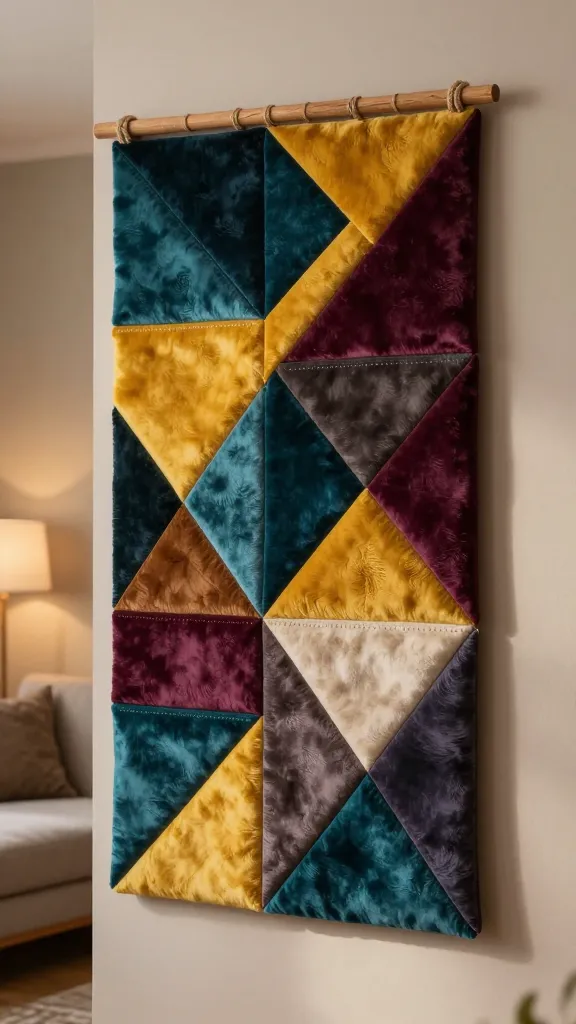
Soft, sculptural, and deeply cozy, this wall hanging brings tactile richness to any room. The geometric shapes and plush textures feel both modern and retro, depending on your fabric choices.
Materials:
-
<liCotton or fleece fabrics in at least 3 colors
<liWooden dowel and twine for hanging
<liFiberfill or batting
<liHot glue gun
How to Make It:
- Cut fabric into geometric shapes (triangles, diamonds, squares).
- Stack and glue shapes in an abstract arrangement, leaving a few airy gaps.
- Stuff with fiberfill and secure to a wooden dowel using twine.
Pro Tips / Styling Ideas:
- Use a bold color palette for a statement piece, or stick to neutrals for a calmer vibe.
- Hang near a reading nook or above a bed for instant coziness.
Who’ll love it: Perfect for dorm rooms, guest rooms, or as a modern, textural art piece.
6. Upcycled Tin Can Flower Garden Tulips
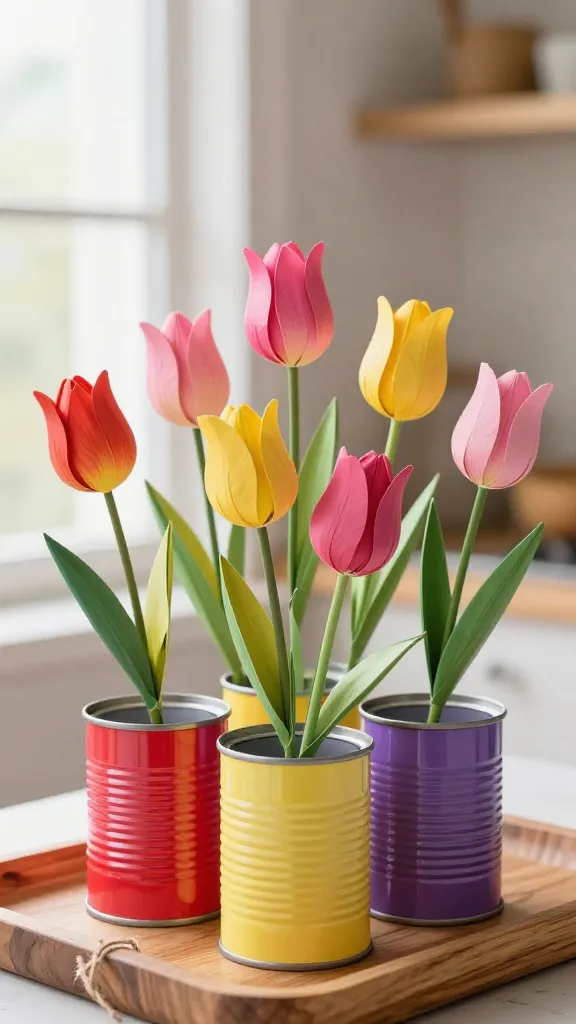
Bright, cheerful, and surprisingly easy, these tin-can stems pop with color and give old cans a fresh life. They’re as delightful on a kitchen window as they are on a dining table centerpiece.
Materials:
-
<liEmpty tin cans (safely cleaned, labels removed)
<liAcrylic paint in cheerful colors
<liFloral wire or pipe cleaners
<liArtificial flowers or paper petals
<liHot glue and scissors
How to Make It:
- Paint cans in your chosen colors; let dry.
- Glue a floral stem or built paper petals to mimic tulip heads; secure with wire for a natural bend.
- Combine in a small arrangement, tying with twine for cohesion.
Pro Tips / Styling Ideas:
- Group in varying heights on a tray for a playful display.
- Offer as a friendly, handmade housewarming gift.
Who’ll love it: Eco-conscious crafters, kitchen decor lovers, and anyone who adores bright, sunny vibes.
7. Scented Soy Jar Candles With Hand-Painted Labels
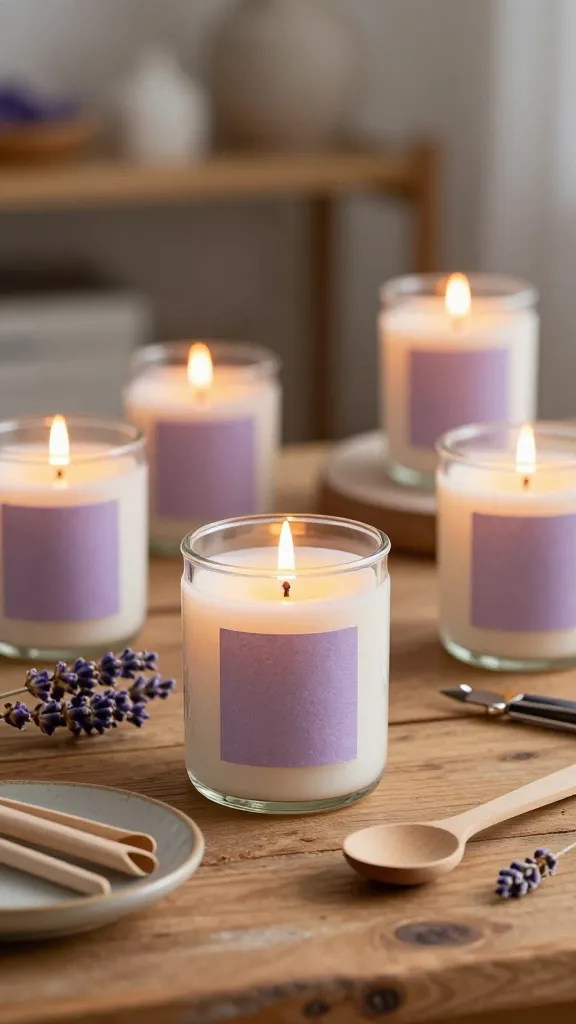
Cozy up any space with a simple soy candle project that smells divine and looks adorable on a coffee table or bathroom shelf. Personalize the label for gifts that feel extra special.
Materials:
-
<liSoy candle wax and wicks
<liSmall heat-safe jars
<liEssential oils or fragrance oils
<liAcrylic paint or label paper
<liAdhesive sealant
How to Make It:
- Melting wax safely, add fragrance, and pour into jars with wicks set in the center.
- Let the wax cure fully as per instructions.
- Paint or print custom labels and seal for a polished finish.
Pro Tips / Styling Ideas:
- Coordinate scents with colors—lavender with soft purple, citrus with sunny yellows.
- Top with a ribbon or kraft label for a gift-ready touch.
Who’ll love it: Candle lovers, spa-like bathroom vibes, or a thoughtful, homemade gift for friends and teachers.
8. Mini Terrarium Tea Light Orbs
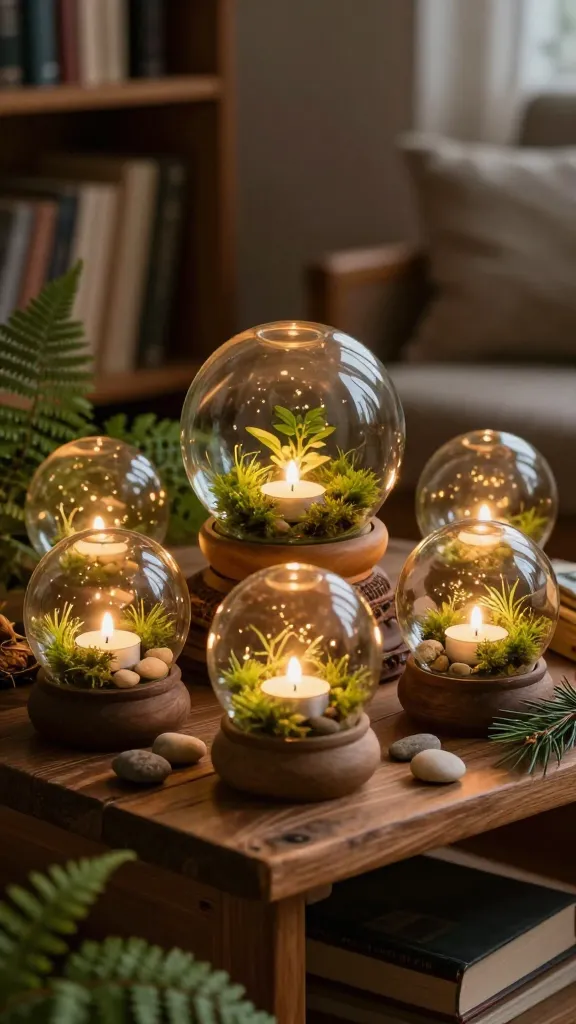
Delicate, luminous orbs that double as mini terrariums and quiet, ambient lighting. They’re a dreamy addition to shelves, desks, or a cozy reading nook.
Materials:
-
<liClear glass orbs or jars with lids
<liPebbles or decorative gravel
<liMoss or tiny faux succulents
<liBattery-operated tea lights
<liHot glue and decorative bits (mini figurines, tiny shells, etc.)
How to Make It:
- Layer pebbles at the bottom for drainage, add moss or tiny plants, then nestle a tea light inside.
- Close the orb or cover with a lid if using a jar, and secure with hot glue if needed.
- Decorate the outside with a mini charm or paint accents for personality.
Pro Tips / Styling Ideas:
- Place in a cluster of varying sizes for a magical centerpiece.
- Use as nightlights in a hallway or kid’s room; the soft glow is seriously calming.
Who’ll love it: Dreamy, easy ambiance makers for bedrooms, living rooms, or gift-worthy keepsakes.
Conclusion
These eight ideas are your fast-track ticket to a stylish, handmade home. Each project is designed to be approachable, affordable, and visually striking, so you can dive in without a ton of prep. Pick one (or all eight if you’re feeling inspired) and get crafting—your space, and your future pins, will thank you.