8 Trendy & Aesthetic Craft Ideas for Your Bedroom
1. Velvet-Rammed Peel-Back Wall Tapestry (DIY Textured Canvas Accent)
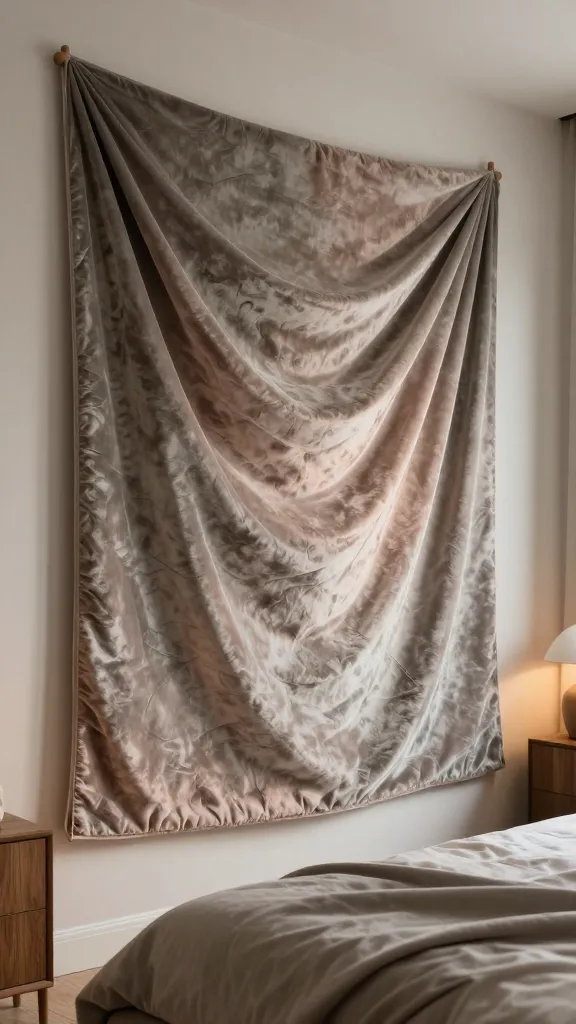
You walk into your room and boom—instant coziness. This tapestry isn’t a traditional wall hanging; it’s a sculpted canvas with velvet ruching and soft shading that catches the light just right. It’s luxe, tactile, and totally Instagrammable.
Materials Needed
- Canvases or plywood board (sizes vary)
- Velvet fabric in a few shades (sage, blush, charcoal)
- Heat-set transfer vinyl for shapes
- Hot glue gun and glue sticks
- Neutral wood stain or paint (optional)
- Foam padding or batting
How to Make It
- Stretch a base layer of light padding over the board to create depth.
- Layer velvet pieces in abstract shapes, gluing as you go to create a soft, cushioned mosaic.
- Use transfer vinyl to add minimal metallic accents or geometric lines for a modern twist.
- Finish with a light stain on the wood edges to frame the piece.
Pro Tips / Styling Ideas
- Hang centered above your bed with a slim, matte frame to emphasize texture.
- Pair with warm bedside lamps to highlight the velvet’s sheen.
- Switch out colors seasonally for a fresh vibe without redoing the whole wall.
Who will love this? Anyone craving tactile luxury—especially if your room already leans minimalist but could use a plush focal point. FYI, it’s surprisingly easy once you commit to laying out the velvet shapes first.
2. Glow-Under-Glass Nightstand Tray (Ambient & Practical)
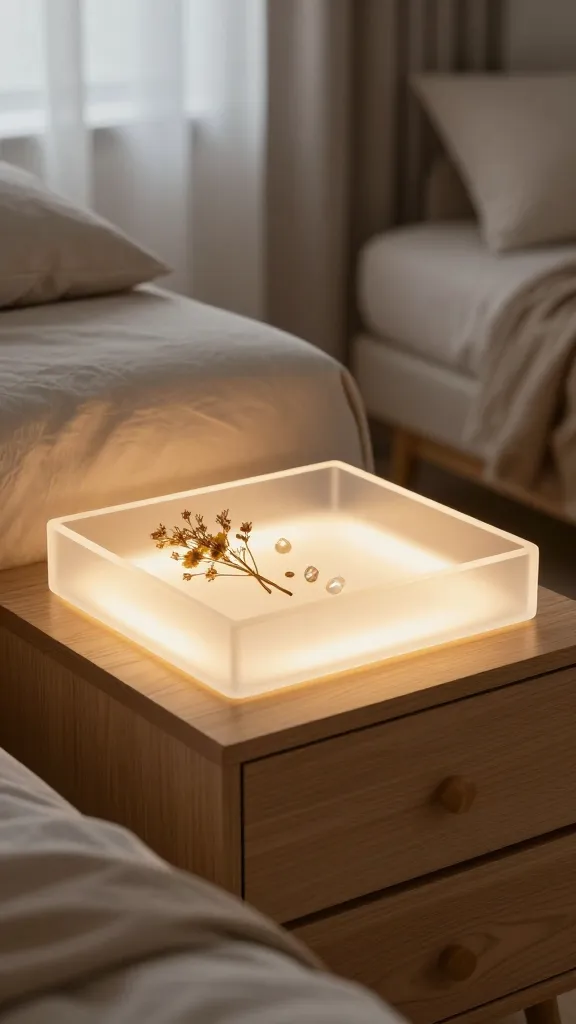
Imagine a nightstand that glows softly from within, giving just enough light for midnight page flips but still looking perfectly chic in daylight. This glow-under-glass tray is the secret sauce for a dreamy, modern bedroom vibe.
Materials Needed
- Two small wooden or acrylic trays
- LED light strip (warm white)
- Translucent acrylic or frosted glass sheet
- Double-sided tape or small screws
- Decor accents: dried flowers, crystals, or mini trinkets
How to Make It
- Place the LED strip along the inner edge of one tray, securing with tape.
- Stack the translucent sheet over the LED line so light diffuses softly beneath.
- Fill the tray with your chosen decorative items; top with the second tray to trap light inside.
- Hide the electronics with a neat border or slim frame cut from the same wood as the tray.
Pro Tips / Styling Ideas
- Use warm white LED strips for a cozy glow, not clinical brightness.
- Set it on a timer so it softly fades on at bedtime.
- Pair with a small plant and a minimal ceramic dish for jewelry.
Who will love this? Night owls and feng-shui fans alike—especially if you want a “soft glow” without a bulky lamp. Trust me, it’s such a mood booster on sleepy mornings.
3. Moonlit Floating Shelf with Shadow Box Frames
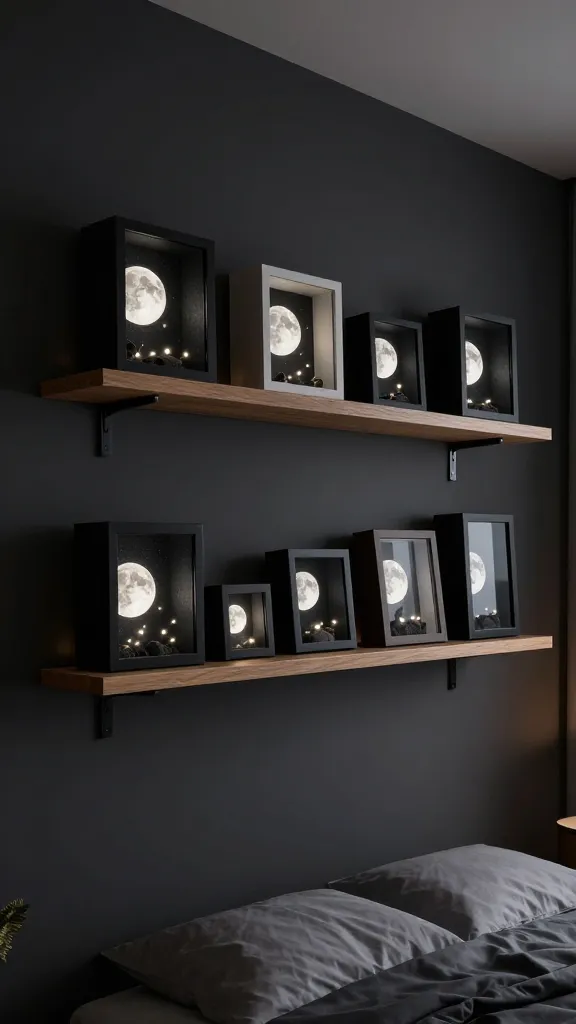
Picture a shelf that seemingly floats, with mini shadow boxes casting tiny moonlit scenes. This project blends whimsy with clean lines, giving your bedside a gallery-esque feel.
Materials Needed
- Lightweight wooden shelf boards
- Picture-hanging hooks and screws
- Shadow box frames (varied sizes)
- Black foamcore or dark wallpaper for backing
- LED fairy lights
How to Make It
- Mount the shelf in a staggered, stagger-free line across your wall for depth.
- Line the shadow boxes with black backing to make items pop.
- Arrange tiny crafted scenes (mini succulents, tiny books, starry beads) inside each box.
- Weave fairy lights behind the shelf to cast delicate shadows on the wall.
Pro Tips / Styling Ideas
- Use a consistent color palette across all shadow boxes for cohesion.
- Shuffle contents seasonally—mini autumn leaves in fall, faux snow in winter, etc.
- Keep one box feature for a small motted air plant or key keepsake.
Who will love this? Creative collectors and those who adore micro-dollhouse vibes. It’s a conversation starter that still looks polished in a grown-up room.
4. DIY Mossy Wall Planter Grid (Lush Greenery on a Wire)
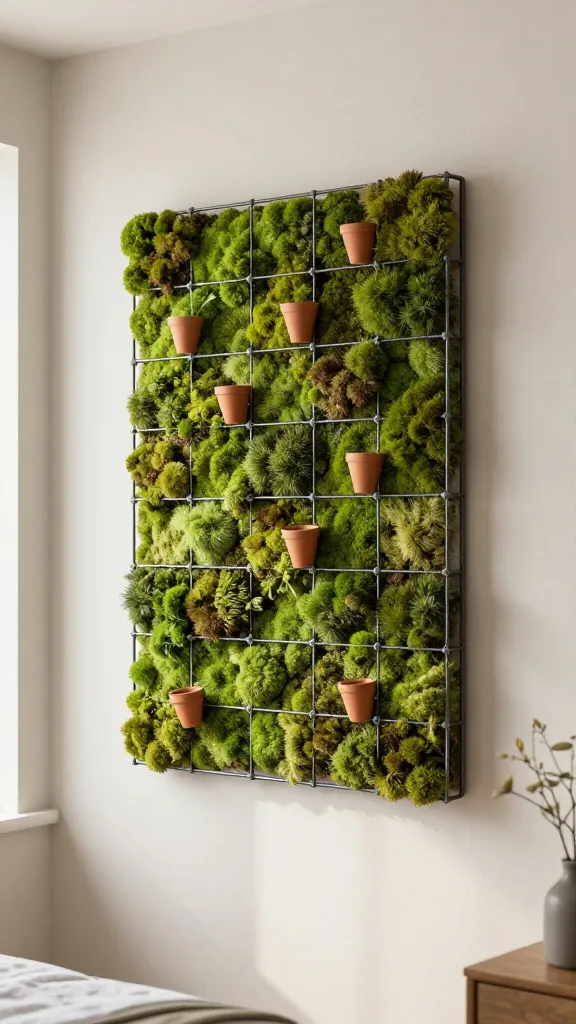
Greenery instantly softens any space, but you don’t need a jungle to get that fresh look. This mossy planter grid stitches nature into your walls with an airy, botanical vibe that feels both calm and current.
Materials Needed
- Metal grid or wire lattice panel
- Sustainable moss sheets or preserved moss
- Mini terracotta pots or plantable capsules
- Strong zip ties or small clamps
- Foam or cardboard backing for depth
How to Make It
- Mount the grid to the wall at eye level for best impact.
- Cut moss sheets to fit each square, tucking behind the grid for a full look.
- Attach small pots or capsules with zip ties, filling with tiny trailing plants or air plants.
- Add depth by mounting a foam backing behind the grid to push the moss forward.
Pro Tips / Styling Ideas
- Place near a window but avoid direct harsh sun to keep moss vibrant.
- Intermix tiny LED bulbs for twinkling nighttime greenery.
- Rotate plant positions monthly to keep the display fresh.
Who will love this? Plant lovers who want a low-maintenance green feature that doubles as wall art. Seriously, it makes your room feel like a chic conservatory in minutes.
5. Textile Framed Art with Thread-Color Gradients
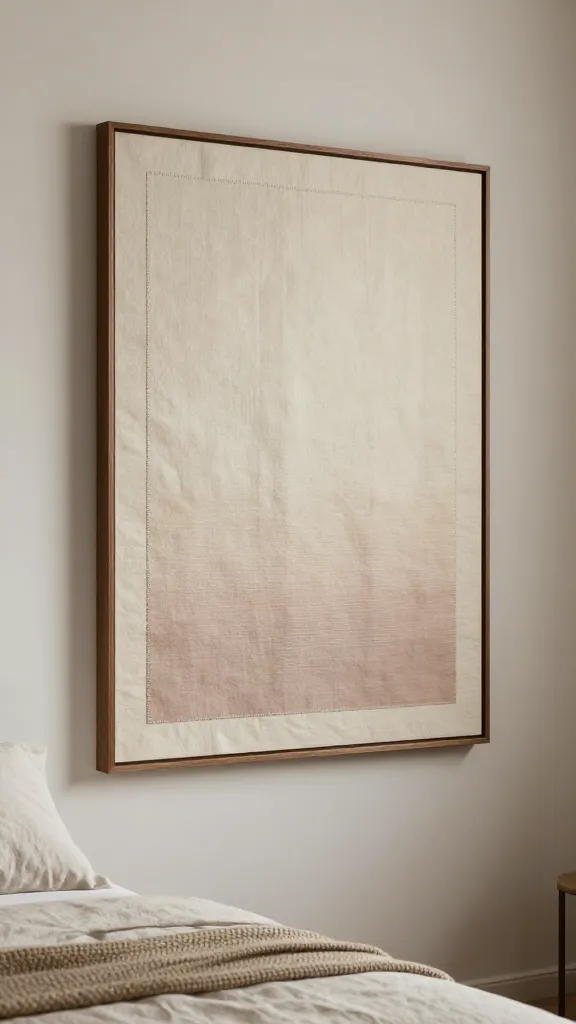
Texture meets color theory in a textile-backed framed art piece. Stretch dyed fabrics across a frame and let thread gradients stitch a soft, painterly mood into your wall.
Materials Needed
- Deep frames or canvas-profiles
- Natural fabric (cotton or linen) in two or three tones
- Embroidery floss in gradient colors
- Needle, scissors, chalk or fabric pen
How to Make It
- Stretch fabric across the frame, securing edges with staples or tacks.
- Begin a freehand gradient with embroidery floss from light to dark, following a subtle wave or zigzag pattern.
- Finish by framing with a slim border in a color that anchors the tones.
Pro Tips / Styling Ideas
- Keep the gradient restrained—two or three tones avoid visual clutter.
- Hang in a pair with a smaller accent piece for a cohesive gallery wall.
- Swap thread colors seasonally to refresh the look without a full redraw.
Who will love this? Textiles nerds and color-curious decorators who want warmth without busy prints. It’s a perfect DIY for a soft, artsy corner.
6. Geometric Resin Key Tray with Dried Flora
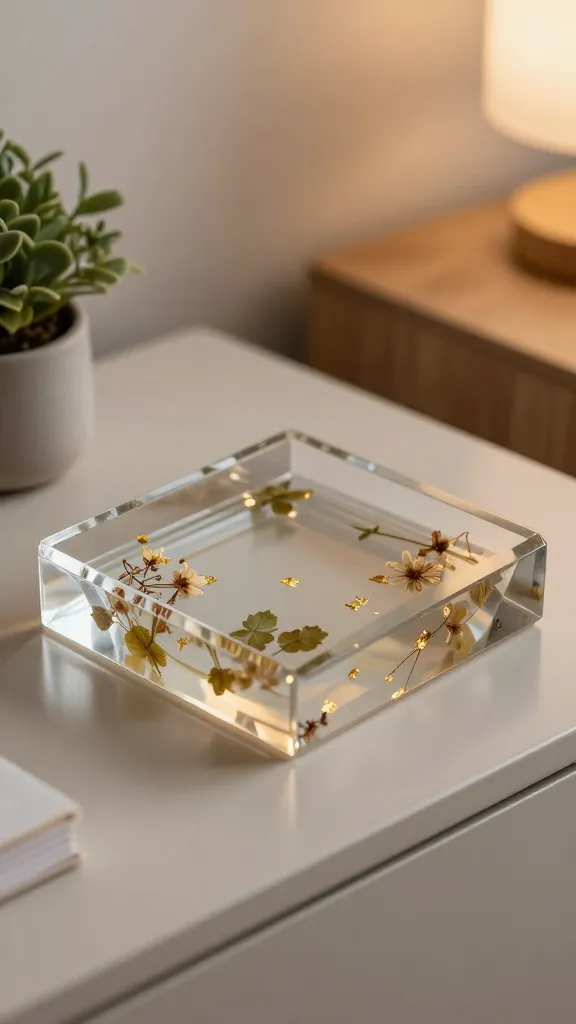
A small, functional art piece that doubles as a stylish entry to your bedside ritual. This resin tray features geometric edges and tiny dried blooms suspended in clear resin—modern, crisp, and oddly satisfying to touch.
Materials Needed
- Epoxy resin and hardener (follow safety guidelines)
- Geometric silicone mold
- Dried flowers or leaves
- Gold or copper foil flakes (optional)
- Nonstick spray and a heat gun
How to Make It
- Prepare resin per package instructions, adding a small amount of color if desired.
- Pour a thin layer, lay in dried flora, then top with another resin pour to seal.
- Dust surface and pop air bubbles with a heat gun; cure fully before demolding.
Pro Tips / Styling Ideas
- Finish edges with metallic foil for a luxe finish.
- Use as a key tray by the door or a jewelry catch near a mirror.
- Pair with a matching coaster set for a coordinated look.
Who will love this? Resin crafters and anyone who wants a tiny piece of art that’s also practical. FYI, it’s surprisingly forgiving for beginners when you pour slowly and cover during curing.
7. Woven Rope Wall Vase Trio (Natural Texture Statement)

Texture comes alive with three woven rope vases that hold single stems or dried arrangements. The natural rope, rattan hues, and simple shapes create a serene, organic vibe that’s easy to style with other neutrals.
Materials Needed
- Three different sizes of cylindrical vases or bottles
- Jute rope or cotton cord
- Hot glue gun, scissors
- Air plants or tiny dried pampas stems
How to Make It
- Wrap rope around each vase in a tight, even pattern, securing with hot glue at the start and end.
- Leave an open top for flowers or stems; optionally seal rope with a thin clear spray to protect and preserve color.
- Group the trio on a shelf or mounted hook at varying heights for a dynamic display.
Pro Tips / Styling Ideas
- Mix light and dark rope for subtle contrast.
- Coordinate with woven wall hangings or a jute rug to pull the room together.
- Use faux stems if you want zero maintenance—and it still looks lush.
Who will love this? Fans of natural textures and rustic-modern spaces. It’s a small project with a big tactile payoff that fits nearly any bedroom vibe.
8. Layered Light Curtain Panels with Hidden Pocket LEDs
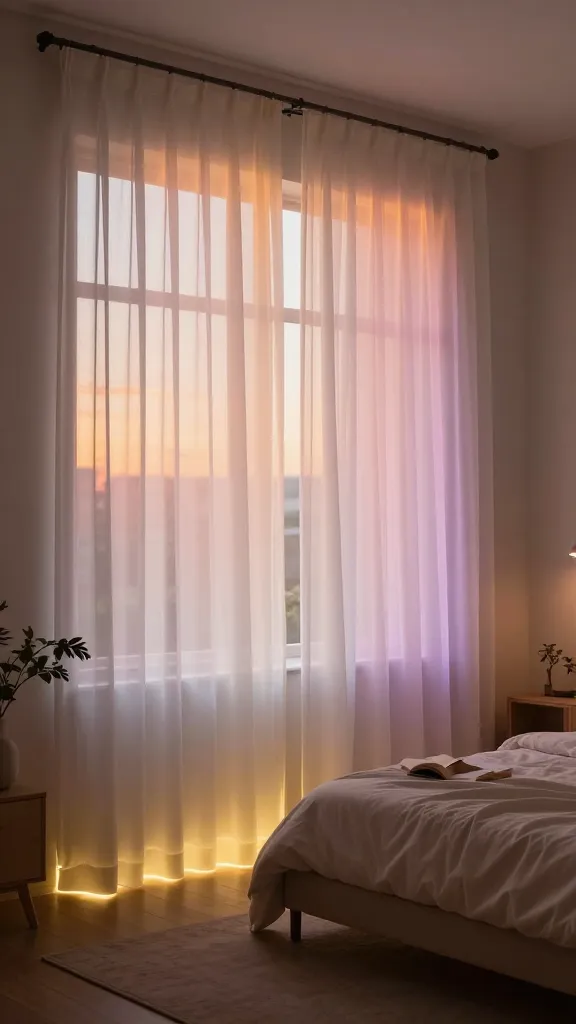
Soft, layered curtains get a tech twist: hidden pocket LEDs stitched into the hem to wash your room in gentle, color-tunable light. It’s dreamy, cinematic, and incredibly mood-making for late-night reading or playlists.
Materials Needed
- Two lightweight curtain panels in a soft neutral
- LED strip with adhesive backing or tiny battery-operated LEDs
- Fabric-safe adhesive, neutral thread
- Small hook-and-loop fasteners for a discreet pocket
- Remote control or app control for color/brightness
How to Make It
- Sew a narrow pocket along the top edge of each curtain to house the LED strip or lights.
- Hide the battery pack or controller behind the curtain rod or in a decorative tassel tie-back.
- Program soft color shifts or keep a warm steady tone for a cozy atmosphere.
Pro Tips / Styling Ideas
- Choose a color palette in the curtain that complements other textiles in the room.
- Use a dimmer setting for late-night wind-down vibes.
- Pair with a simple bookshelf and a rug for a layered, luxe look.
Who will love this? Night owls who crave cinematic ambiance and anyone who loves ambient lighting without bulky lamps. Seriously, it feels like a hotel mood every night.
Conclusion
These eight crafts prove that a bedroom makeover can be playful, approachable, and incredibly stylish. Pick one project to start, or go all-in and weave them into a cohesive, cozy sanctuary. Trust me—your space (and your imagination) will thank you.
So grab your tools, pick a vibe, and dive into these ideas. You’ll love the quick wins, the textures, and the little moments of personal flair that turn a bedroom into a true haven.