7 Adorable Nursery Decor Craft Ideas to Make
Ready to spark joy in the nursery with handmade touches? These seven unique crafts are fun, doable, and totally pint-able for quick Pinterest wins. Trust me, you’ll adore how these tiny projects transform sleepy spaces into cozy, whimsical havens.
1. Cloudy Mobile Dreamscapes

Picture a ceiling dotted with fluffy clouds softly floating above a lullaby-worthy crib. This cloud mobile combines light felt, twine, and a dash of sparkle to create a serene, dreamy vibe. It’s simple, airy, and endlessly customizable.
Materials
- Felt in white, pale gray, and pastel accents
- Light wooden hoop or embroidery hoop
- Though not essential, white embroidery thread or twine
- Wire or string for hanging
- Optional tiny pearl beads or sequins
How to Make It
- Cut cloud shapes from felt in varying sizes.
- Stitch or glue small silver or pastel accents for a twinkly touch.
- Attach clouds at different heights to the hoop with twine, creating a layered mobile.
- Hang over the crib where it won’t snag little fingers, and add a gentle sway with a light breeze.
Pro Tips
- Use a thin, neutral thread so the strings barely peek out—letting the clouds float.
- Balancing clouds on opposite sides keeps the mobile visually light and dreamy.
Who will love it? Parents chasing a calming, soothing focal point in the nursery—and anyone who loves soft, whimsical details.
2. Night Sky Wall Decal Collage
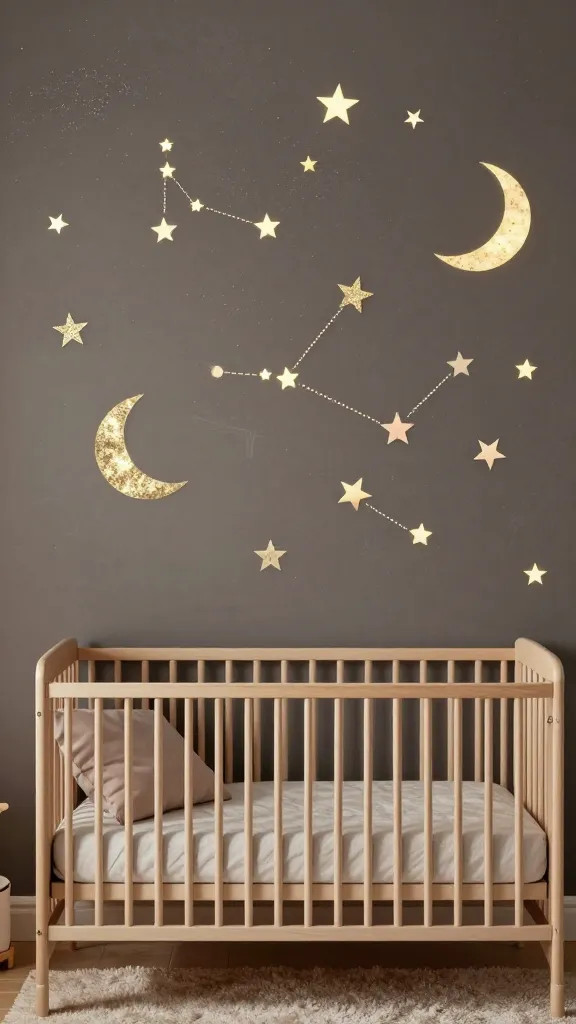
A wall that feels like a tiny universe—stars, moons, and a favored constellation. This DIY wall collage uses removable decals, chalky paints, and a sprinkle of glitter for a celestial ambiance that grows with baby’s imagination.
Materials
- Removable star and moon decals in metallic or pastel tones
- Painter’s tape and chalk or chalk paint
- Soft glow-in-the-dark stars (optional)
- Painter’s ruler for precise spacing
How to Make It
- Plan a layout across a small wall panel or section behind the crib.
- Paint a soft night-sky gradient using chalk paint for a muted backdrop.
- Place decals in clusters—stargazer pockets with a playful crescent moon.
- Dot select areas with glow-in-the-dark stars for subtle night-time magic.
Pro Tips
- Start with a rough sketch on paper to map spacing before committing to the wall.
- Switch up the arrangement as the nursery grows—it’s easy to alter with removable decals.
Who will love it? Design lovers who crave an inspiring, serene wall that’s as adaptable as it is adorable.
3. Plush Animal Corner Cushions
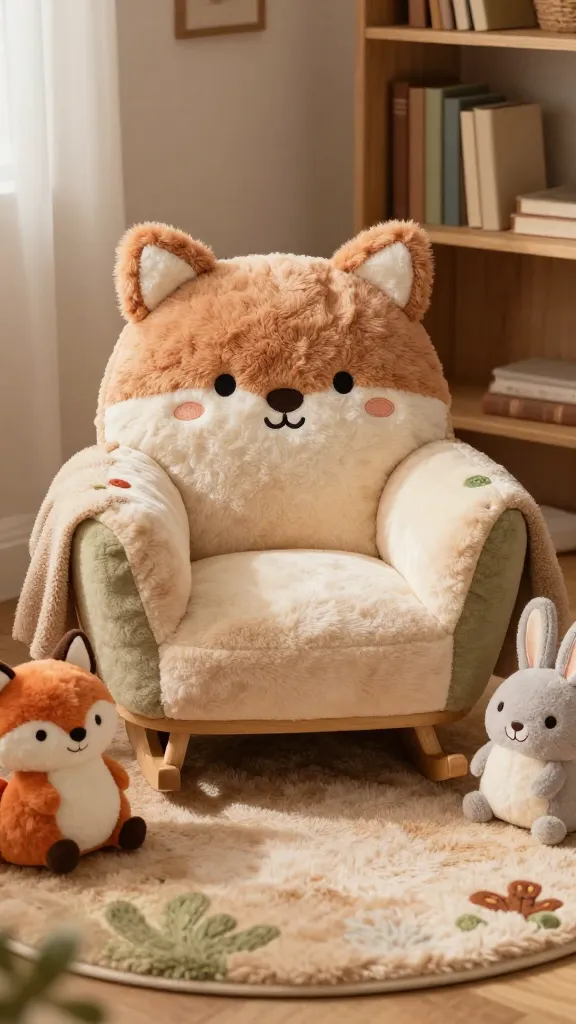
Cozy, huggable cushions shaped like woodland friends bring softness and whimsy to reading nooks and rocking chairs. This project is all about plush textures, kid-friendly shapes, and a pop of color that makes cuddle time even sweeter.
Materials
- Fleece or minky fabric in chosen animal shapes (bear, fox, bunny, etc.)
- Polyester stuffing
- Fabric felt for facial features
- Fabric glue or needle and thread
- Colorful buttons or embroidery floss for details
How to Make It
- Cut out the animal shapes from fabric, leaving a seam allowance.
- Stitch or glue facial features, then stuff firmly for plush comfort.
- Close the seam and give the finished piece a soft, tactile finish.
Pro Tips
- Choose fabrics that are machine-washable for easy care.
- Mix textures—faux fur, velour, and cotton provide delightful contrast.
Who will love it? Storytime fans and those who want to turn a chair corner into a cozy, character-filled haven.
4. Mini Heartbeat Wall Clock Painted in Pastel
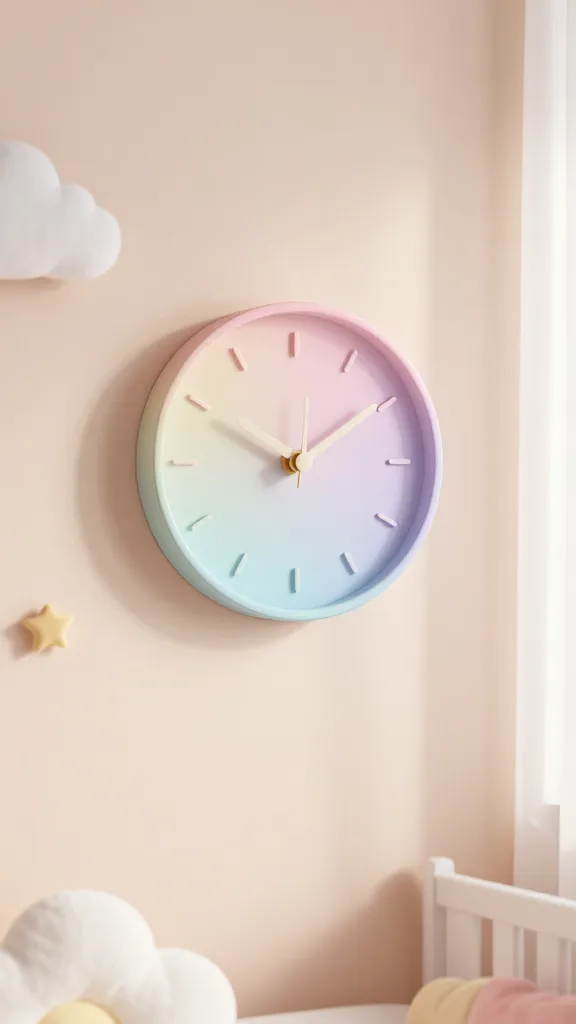
A tiny, dreamy clock that mutes the nursery with a gentle heartbeat of color. This project combines a ready-made clock kit with soft pastels or muted tones for a piece that’s both functional and utterly charming.
Materials
- Small wall clock kit (kit includes hands and mechanism)
- Pastel acrylic paints or watercolor paints
- Painter’s tape for clean edges
- Soft brush or sponge for paint application
How to Make It
- Paint the clock face in a gradient or solid pastel shade that matches the nursery palette.
- Add a delicate border or tiny motifs (stars, hearts) around the edges.
- Assemble the clock mechanism and hang where it’s easily visible from the crib or reading chair.
Pro Tips
- Seal with a matte finish to avoid glare in natural light.
- Choose colors that pair well with the room’s rug and textiles for a cohesive look.
Who will love it? Parents who want a subtle, timeless clock that doubles as wall art.
5. Biome-Tone Mobile Plant Hangers
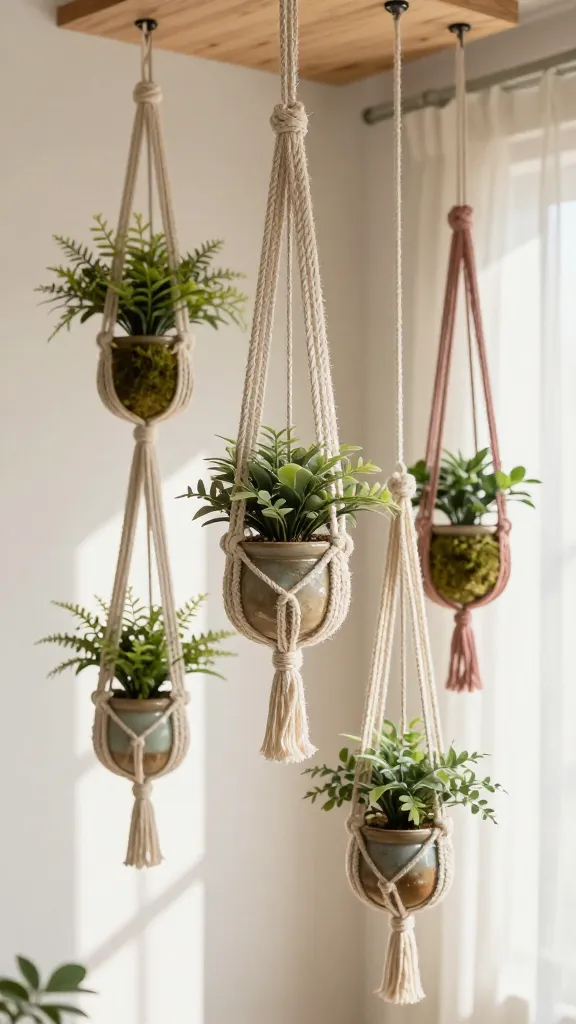
Yes, you can bring a touch of nature indoors with faux plants suspended in soft-toned moss and macramé-inspired holders. This craft is perfect for adding height, texture, and a gentle botanical vibe without maintenance headaches.
Materials
- Assorted small faux plants or preserved moss
- Macramé cord or soft jute
- Small ceramic or clay pots
- Touch of gold or pastel beads for accents
How to Make It
- Wrap cords into simple macramé knots to form a hanging cradle for each plant.
- Affix the plants securely and arrange in clusters at varying lengths.
- Hang near a window or corner to catch light and shadow play.
Pro Tips
- Use lightweight pots to keep the mobile balanced.
- Rotate the arrangement seasonally for fresh appeal.
Who will love it? Nature lovers and anyone wanting a serene, green touch without real plants.
6. Soft-Glow Lantern String Orbs
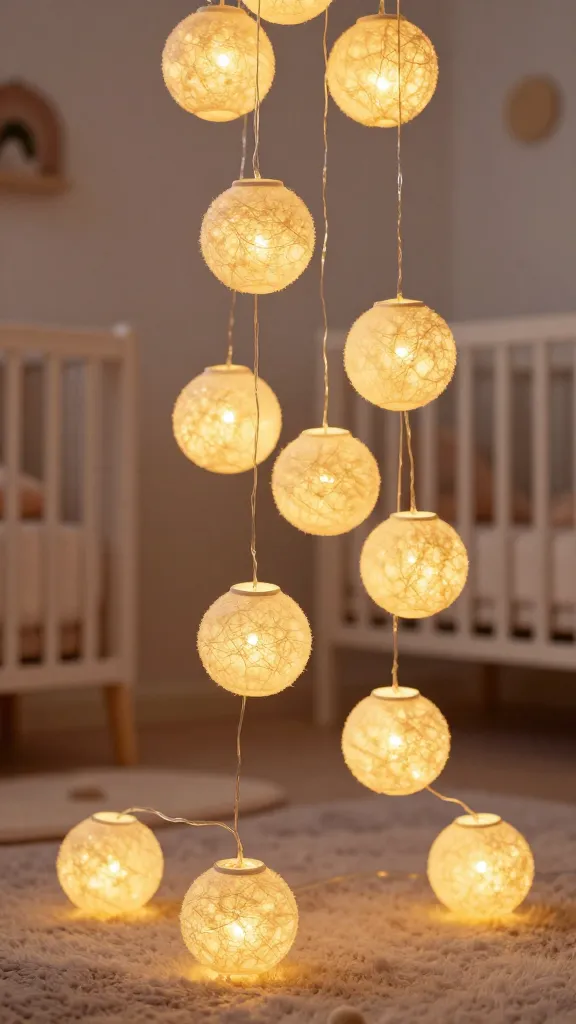
Lanterns aren’t just for fall evenings—soft-lit string orbs make a cozy nursery centerpiece. Plush fabric lanterns with gentle LED micro-lights create a warm, insta-worthy glow perfect for bedtime stories.
Materials
- Battery-powered LED string lights
- Translucent fabric or lightweight paper
- Cardboard or foam ball bases
- Glue gun or craft glue
How to Make It
- Stretch the fabric around the foam balls to form lantern shells.
- Wrap the LED string around the inside, securing discreetly with glue.
- Hang at varying heights for a soft constellation effect.
Pro Tips
- Opt for warm white LEDs to keep the glow soothing and baby-friendly.
- Use removable adhesive clips for easy repositioning.
Who will love it? Nighttime readers, cosiness seekers, and anyone who wants a twinkle that’s both decorative and practical.
7. Memory Lane Photo Garland
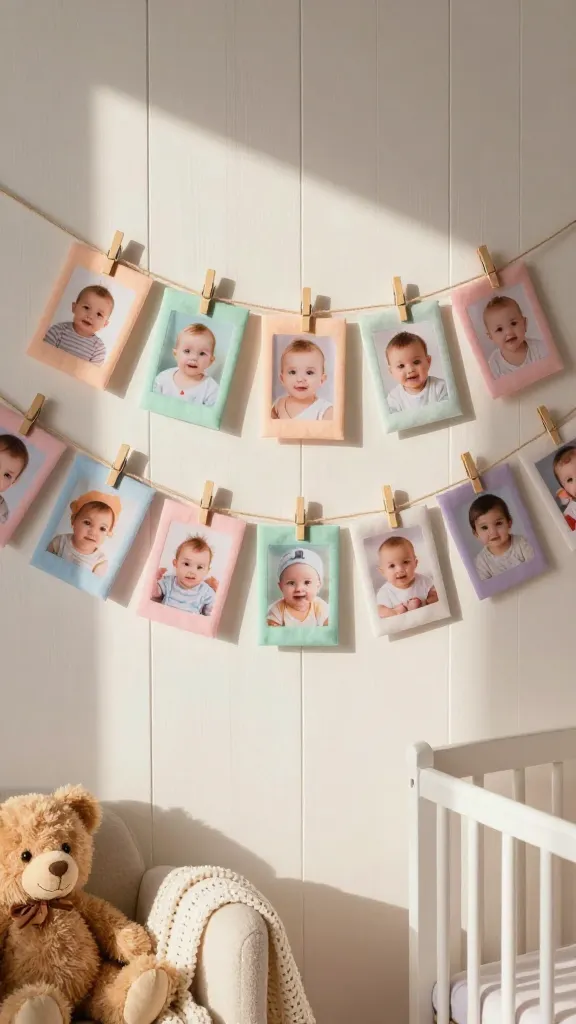
Capture precious baby milestones with a stitched-together photo garland that doubles as decor. This project blends heirloom vibes with modern color blocking for a sweet keepsake that evolves with the baby’s first year.
Materials
- Ribbon or twine
- Small clothes pegs or mini wooden frames
- Printed baby photos or mini prints
- Colored paper or fabric scraps for background shields
How to Make It
- Attach photos to the twine using pegs or set them into small frames.
- Place color-blocked backgrounds behind each photo to create a cohesive rainbow of memories.
- Hang across a wall, bed headboard, or the back of a baby dresser.
Pro Tips
- Switch out photos as milestones pass for an ever-evolving display.
- Coordinate photo borders with the room’s color palette for a polished look.
Who will love it? Grandparents and parents who want a tangible timeline of adorable moments.
Conclusion: It’s time to craft the joy
These seven ideas offer a playful mix of texture, light, and whimsy that will transform a nursery into a cozy, design-forward haven. Each project is approachable, with room for customization to fit your space and vibe. Pick one, or go all out—your nursery will thank you with calmer mornings, sweeter dreams, and a space you’ll love pinning and sharing.