11 3d Craft Ideas for Classroom Stem Lessons That Wow
Ready to spark curiosity in the classroom with hands-on, creative STEM crafts? These 11 unique DIY projects blend theory with tactile play, making learning feel like a playful adventure. Trust me, your students—and your Pinterest board—will thank you.
1. Floating Solar Boat Diorama
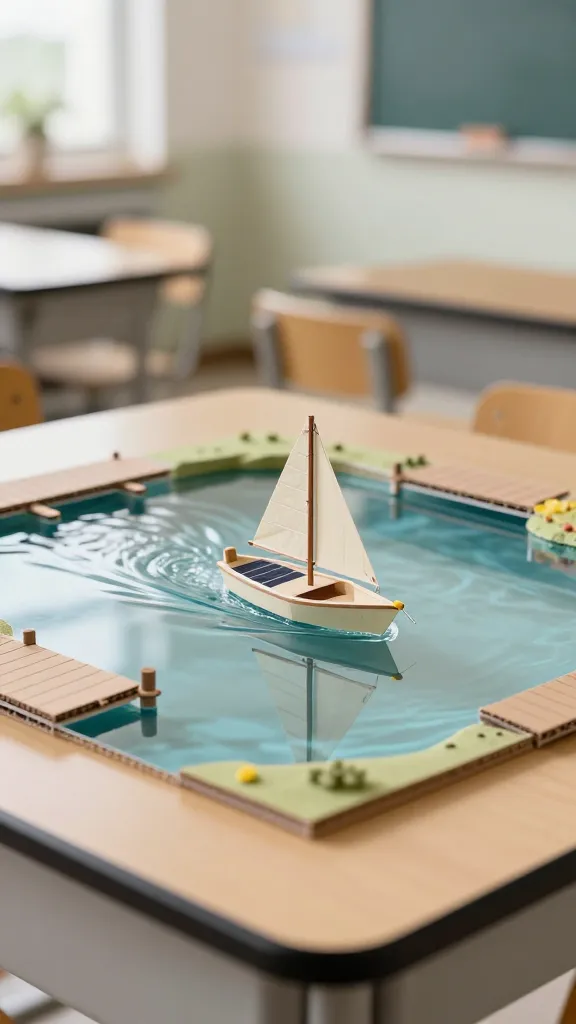
Imagine a tiny solar-powered boat gliding across a glassy lake inside a desk diorama. This project pairs engineering with renewable energy in a visually striking display. It’s not just a lesson; it’s a mini-science show-and-tell.
Materials Needed
- Mini solar cell kit or small solar panel
- Foam board or lightweight cardboard
- Clear plastic or acrylic sheet (for water surface)
- Cardstock for boats, cardboard for docks
- Waterproof paint or resin (optional for water effects)
- Glue, scissors, ruler
How to Make It
- Cut a shallow tray from foam board and cover the bottom with the clear sheet to mimic water.
- Create a tiny harbor scene with docks and a boat shaped from cardstock.
- Mount the solar cell so it captures light and powers a small propeller on the boat.
- Place the boat on the water surface and watch it glide when light hits the panel.
Pro Tips / Styling Ideas
- Paint the water with blue watercolor washes for depth.
- Add a tiny windmill or lighthouse to boost the scene’s drama.
- Label the solar setup with a quick explanation of how sunlight becomes motion.
Who’ll love it: curious engineers and visual learners who enjoy a scenographic heartbeat in science class. It’s seriously the “wow” moment for photos and presentations.
2. 3D Printed DNA Helix Noggin Pals
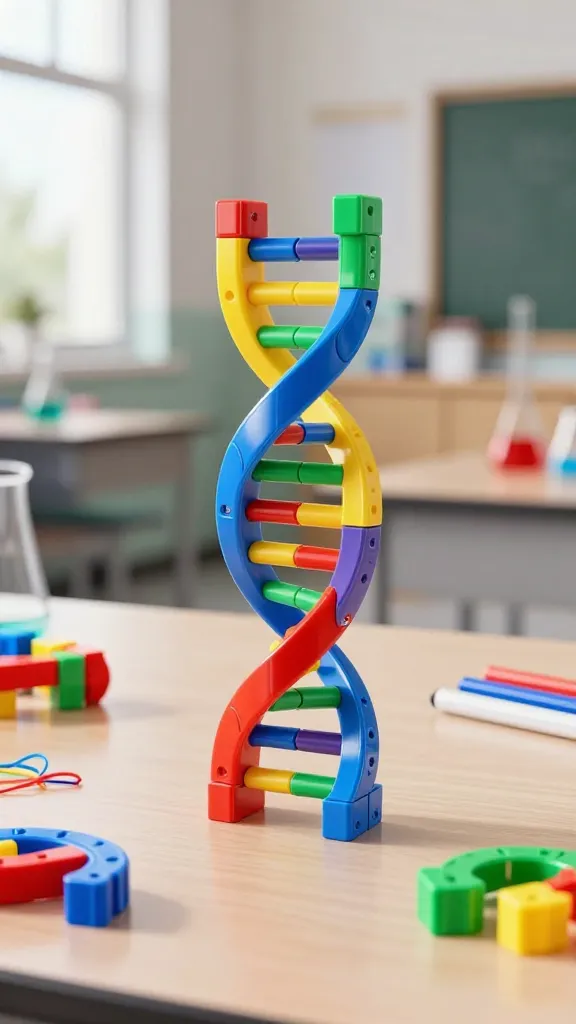
Turn your DNA into a friendly, tangible toy that kids can assemble and manipulate. These 3D-printed helix pals bring genetics to life in a approachable, huggable form. A quirky, memorable way to teach structure and replication.
Materials Needed
- 3D-printed DNA helix pieces (pre-ordered or printed in class)
- Colorful markers or paint
- Elastic cords or magnets for linking segments
- Optional: small plastic stands for display
How to Make It
- Assemble the helix segments with cords or magnets to form a flexible DNA model.
- Color each base pair to emphasize coding rules (A-T, C-G).
- Mount on a stand for a desk-friendly display or build a handheld pocket version.
Pro Tips / Styling Ideas
- Pair with a quick poster explaining base pairing rules in kid-friendly language.
- Encourage students to create their own “molecular outfits” by decorating bases.
Who’ll love it: visual learners and younger students who crave tactile, sculptural science. It’s a trust-me delight for your STEM shelf.
3. Cardboard Spaghetti Bridge Challenge
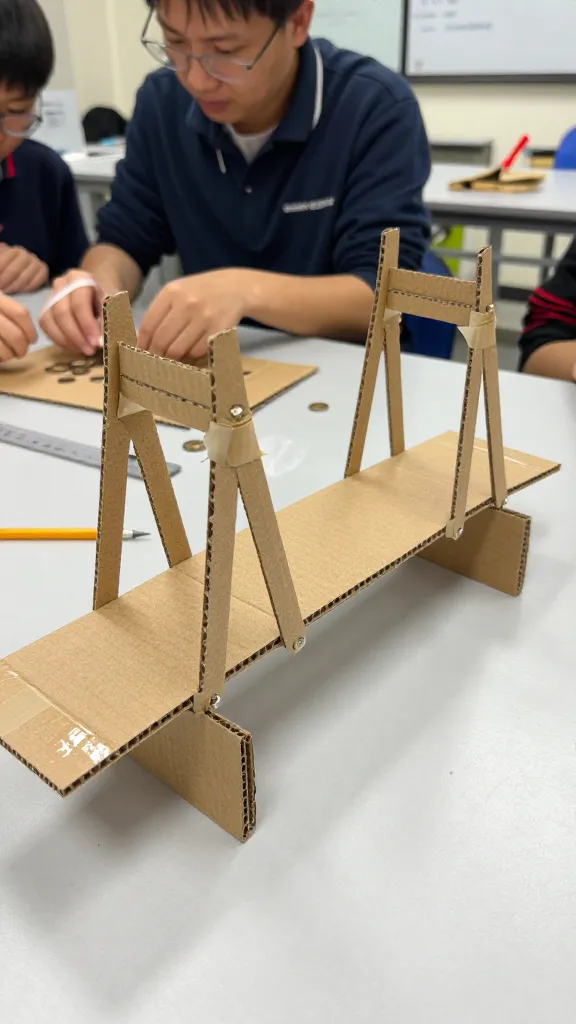
Build a bridge that actually carries weight using only cardboard and tape. This classic STEM activity celebrates engineering, measurement, and teamwork with a surprisingly sturdy result. It’s amazing how far a simple idea can travel.
Materials Needed
- Corrugated cardboard scraps
- Masking tape or packing tape
- Ruler, pencil, scissors
- Small weights for testing (coins, washers)
How to Make It
- Sketch a simple truss design, then cut cardboard pieces into beams and arches.
- Assemble into a bridge with a flat deck, reinforcing joints with tape.
- Test by adding weights until the structure buckles, then refine for strength.
Pro Tips / Styling Ideas
- Challenge teams to meet a weight-to-span ratio and race for the best efficiency.
- Decorate with school colors or create ratios on the deck for a math crossover.
Who’ll love it: makers who enjoy sturdy builds and friendly competition. It’s a crowd-pleaser for class-wide STEM fairs.
4. Paper Circuit Mosaic Wall Art
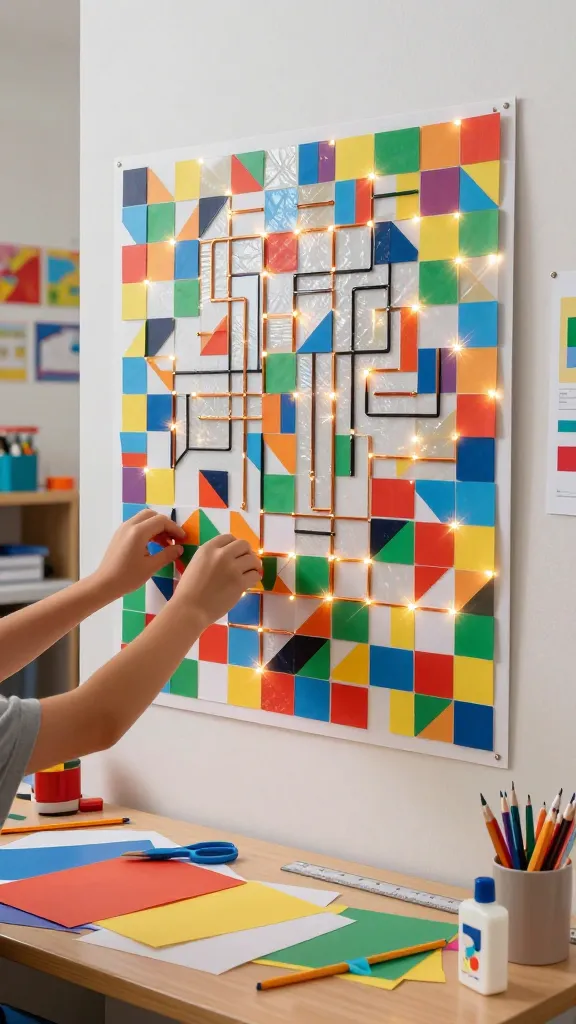
Brighten the classroom with a mosaic made from cut paper, LEDs, and a simple circuit. This project blends art, electronics, and design into a shimmering, hands-on display you can hang for everyone to admire.
Materials Needed
- Copper tape
- Coin cell battery holder
- LEDs (various colors)
- Colored construction paper or cardstock
- Cardboard or poster board
- Glue, scissors, ruler
- Sharp pencil for circuit traces
How to Make It
- Sketch a bold grid on the poster board as your mosaic base.
- Arrange colored paper shapes and trace circuit lines with copper tape behind them.
- Place LEDs at key points and wire them to the battery holder, securing with tape.
Pro Tips / Styling Ideas
- Use a color palette inspired by a recent science topic (space, rainforest, etc.).
- Create a “spotlight” section with brighter LEDs for emphasis.
Who’ll love it: art-and-science fans who want a tangible, luminous classroom centerpiece. It’s a seriously chic learning mural you’ll be proud to show off.
5. Biome Diorama With 3D Printed Habitat Grids

Craft a tiny ecosystem inside a self-contained diorama. Students design and print habitat grids that fit into a reusable acrylic box, then simulate food webs and climate effects with simple materials.
Materials Needed
- Small acrylic display box
- 3D-printed habitat grid templates
- Colored sand, rocks, faux plants
- Miniature animal figures or cutouts
- Label cards for organisms and climate notes
How to Make It
- Layer sand, rocks, and plants in the box to form microhabitats.
- Place habitat grids and position animal figures to show interactions.
- Annotate with climate notes and a simple food web poster nearby.
Pro Tips / Styling Ideas
- Rotate seasons by swapping plant pieces and adjusting colors.
- Encourage students to hypothesize how changes affect the ecosystem and test with adjustments.
Who’ll love it: biology buffs and visual learners who crave miniature worlds. It’s a tiny, powerful look at big ecological ideas.
6. Rubik’s Cube Genome Puzzle
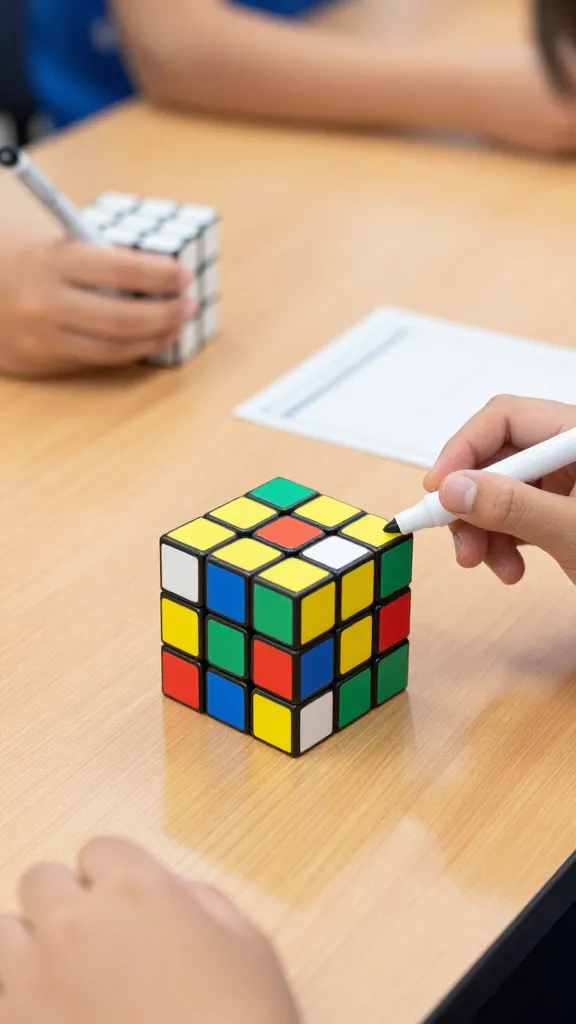
Turn genetics into a puzzle challenge by labeling cube faces with base pairs and building a “genome scramble” game. Students solve the cube while reinforcing base-pair rules and mutation thinking.
Materials Needed
- Rubik’s Cube or blank cube for customization
- Base-pair color sticker set (A-T, C-G)
- Marker for quick labeling
- Small guide card with pairing rules
How to Make It
- Color-code each face of the cube to represent different segments of DNA.
- Give students a scramble and a target genome to reach by rotating the cube.
- Include a mini cheat sheet with base-pair pairing principles.
Pro Tips / Styling Ideas
- Turn it into a quick timed challenge to add excitement.
- Use themed stickers for different organisms or genes for variation.
Who’ll love it: puzzle lovers and film-like thinkers who enjoy a hands-on twist on genetics. It’s a brain-teasing, portable lesson you can carry home in a backpack.
7. Fermentation Ferret: Microbe Soiree in a Jar
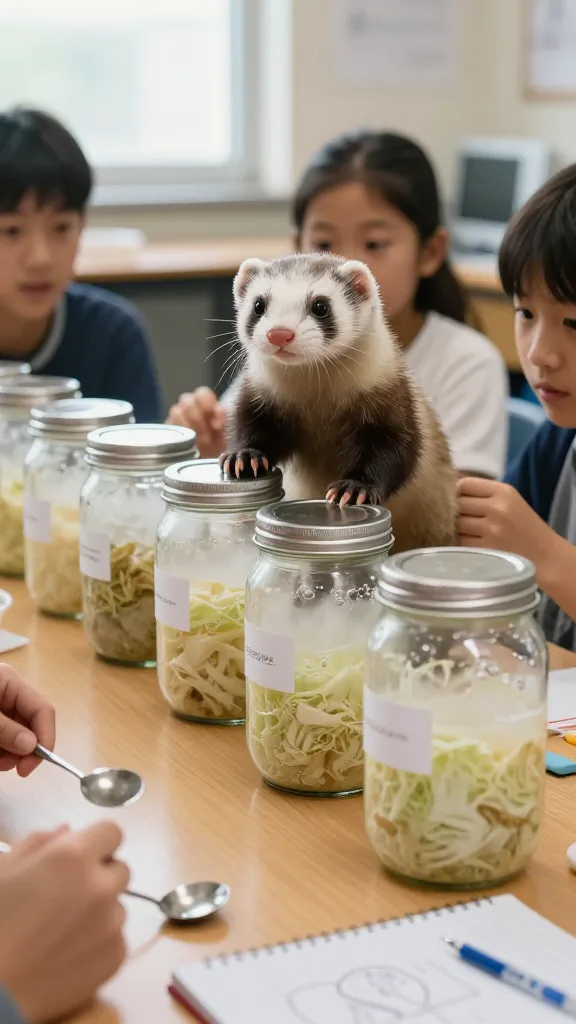
Explore microbiology by culturing safe, edible ferments in clear jars. This edible science party makes unseen biology visible and tasty, with a practical lesson on fermentation science and microbial growth.
Materials Needed
- Glass jars with lids
- Fermentation ingredients (e.g., sauerkraut mix or labeled starter cultures)
- Water and salt solutions (as needed)
- Labels and quick science notes
How to Make It
- Prepare a simple fermentation medium and seal jars with observation windows.
- Track signs of fermentation, like bubbles and aroma changes, over a few days.
- Record observations and discuss microbial growth and anaerobic environments.
Pro Tips / Styling Ideas
- Keep it safe with food-grade ingredients and supervision guidelines.
- Create a classroom “Fermentation Journal” for daily notes and photos.
Who’ll love it: curious minds who enjoy living science and a tasty outcome. It’s a memorable, taste-tested science moment.
8. Geometric Wind-Tunnel Chrome Orbs
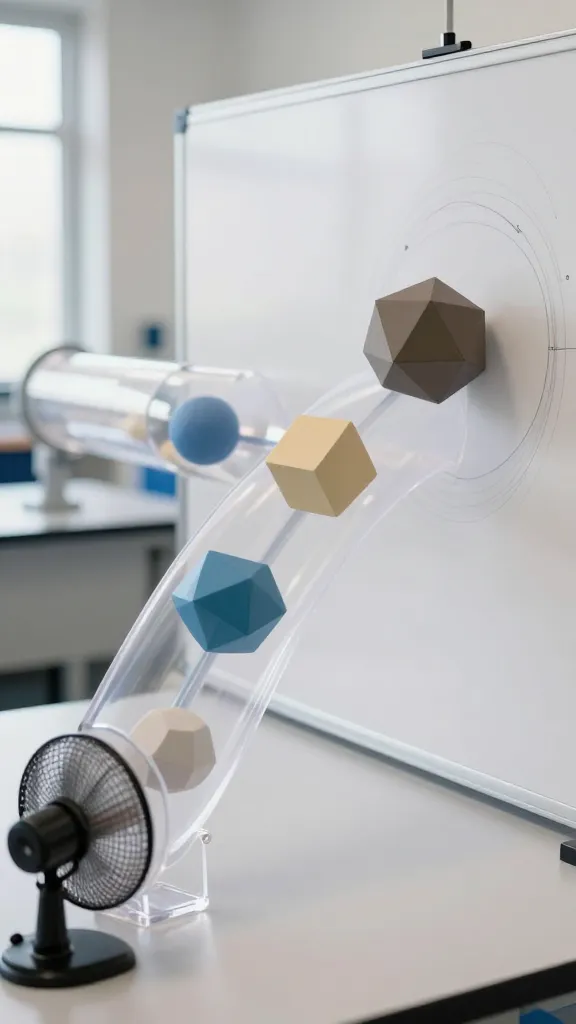
Craft a mini wind tunnel and observe airflow around 3D-printed geometric shapes. This visual, kinetic project explains aerodynamics in a playful, eye-catching way that will wow students and parents alike.
Materials Needed
- 3D-printed or craft foam geometric spheres
- Small handheld fan or desk fan
- Clear plastic tubing or tubing connectors
- White poster board to trace wind paths
How to Make It
- Set up the wind tunnel with the fan blowing through a clear tube path.
- Place geometric shapes in the stream and observe how air flows around edges and corners.
- Draw or print flow lines on the board to visualize paths and turbulence.
Pro Tips / Styling Ideas
- Use different shapes and sizes to compare drag and lift visually.
- Include a quick worksheet with questions about why certain shapes fare better.
Who’ll love it: science geeks who adore motion and visuals. It’s a kinetic classroom moment that pays off in curiosity.
9. LED Weather Station Jar
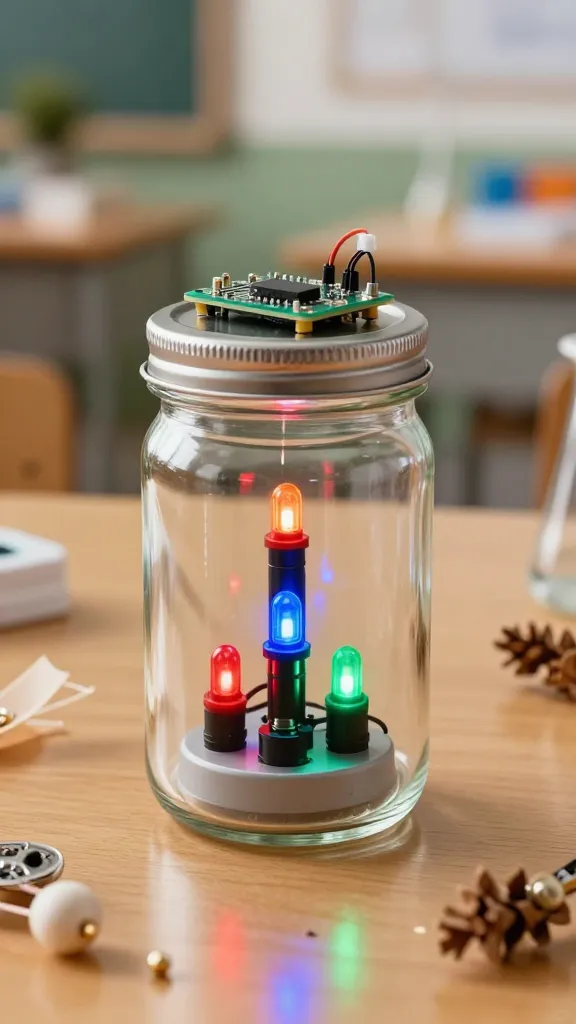
Build a self-contained micro weather station in a jar with LED indicators for temperature, humidity, and pressure. It’s a charming, pocket-sized data collection station that kids can decorate and monitor daily.
Materials Needed
- Glass jar with lid
- Mini LEDs in red/blue/green
- Small sensors or mock sensors (pre-made modules)
- Battery pack and wire glue
- Decorative elements for the jar lid
How to Make It
- Install LEDs to represent different weather readings on a small circuit board inside the lid.
- Mount mock sensors in the jar and connect wires neatly to the LEDs.
- Decorate the lid and label each indicator with a quick explanation.
Pro Tips / Styling Ideas
- Turn it into a daily habit: log the LED colors and discuss weather changes.
- Pair with a simple data graph to plot trends over a week.
Who’ll love it: data lovers and creative campers who want a portable weather studio. It’s a bright, homely desk companion.
10. 3D-Printed Obstacle Course for Robots
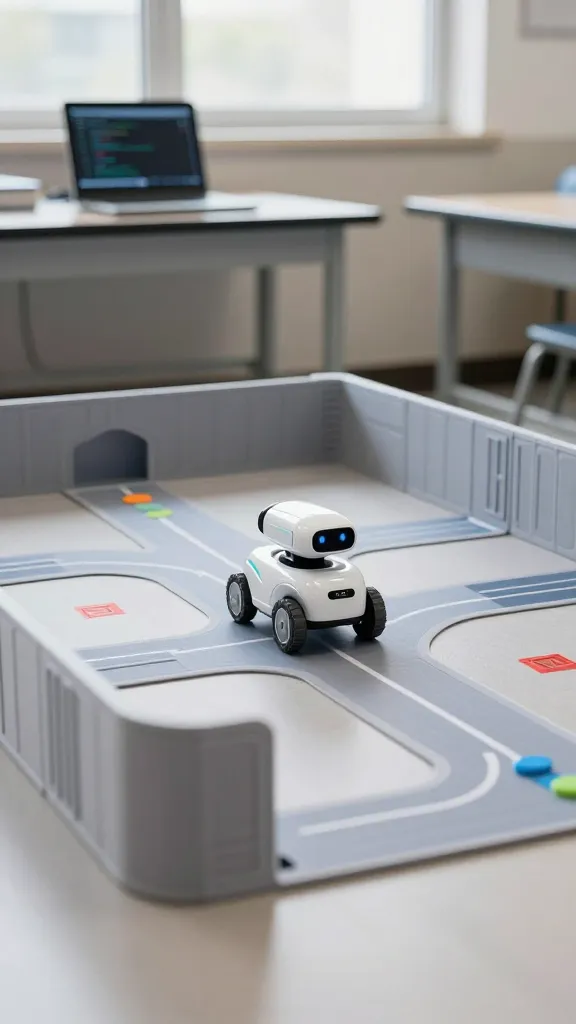
Design a tiny obstacle course and program a classroom robot to navigate it. This project blends robotics, coding, and design, delivering a sleek, hands-on experience that feels futuristic yet accessible.
Materials Needed
- 3D-printed obstacle pieces (walls, ramps, gates)
- Small programmable robot (e.g., educational rover)
- Ramps, mats, and markers for the course
- Tablet or computer for coding
How to Make It
- Arrange printed pieces into a challenging but solvable course.
- Program the robot to follow lines or navigate waypoints.
- Iterate with students to improve speed and accuracy.
Pro Tips / Styling Ideas
- Incorporate branding from a science fair or school color scheme.
- Record run times and discuss how changes impact performance.
Who’ll love it: budding coders and robotics enthusiasts who crave a tangible, timed, competition-ready challenge. It’s a tech-nerd dream with classroom sparkle.
11. Magnetic Orb City: Field-Scale Magnetic Lab
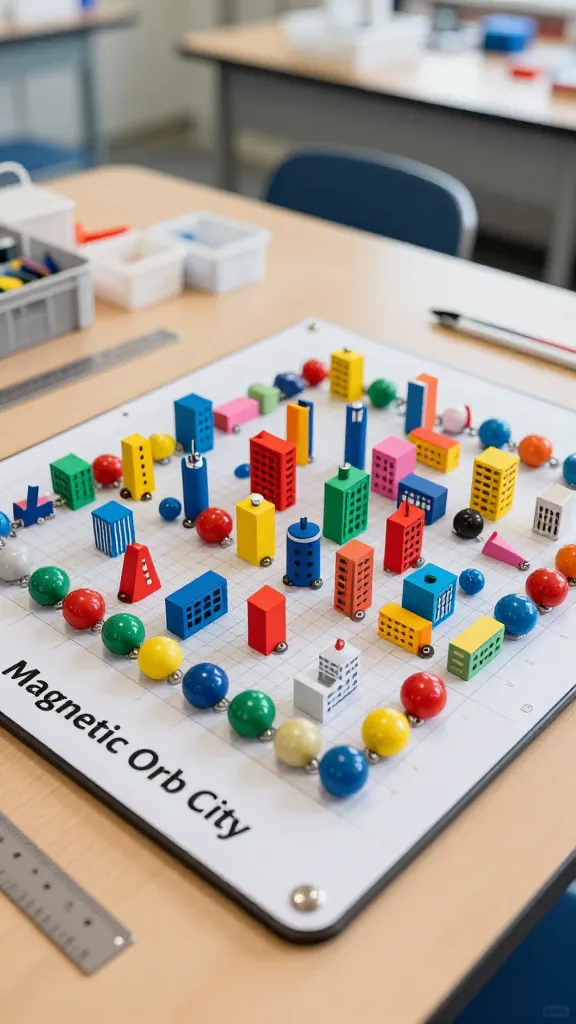
Craft a magnetic cityscape using magnetic spheres and a plotting grid. This idea turns magnetism into a visible, interactive map—perfect for exploring force, attraction, and engineering design without the heavy math.
Materials Needed
- Magnetic balls or spheres
- Thin metal or magnet-friendly boards
- Colorful paper or cardboard shapes for buildings
- Strong glue or putty for attaching buildings
How to Make It
- Arrange magnetic spheres on a board to form a city grid.
- Click buildings into place using magnets and decorative shapes to create skyline silhouettes.
- Label different districts with a mini poster explaining the magnetic properties at play.
Pro Tips / Styling Ideas
- Create “zones” to demonstrate repulsion vs. attraction with color-coded magnets.
- Use the city as a data display, charting which configurations are most stable.
Who’ll love it: visual thinkers who enjoy tactile, portable labs. It’s a magnetic, modern centerpiece for any STEM corner.
Conclusion: Each of these 11 completely unique and distinct 3D craft ideas for classroom STEM lessons offers a fun, hands-on way to connect creativity with core concepts. Pick one to pilot this week, or unleash them all across a month-long project series. You’ll see students light up, ask more questions, and actually enjoy the learning journey. Go ahead—grab a few supplies, rally your crew, and start crafting your next STEM win. You’ll love the momentum these projects generate in your classroom.