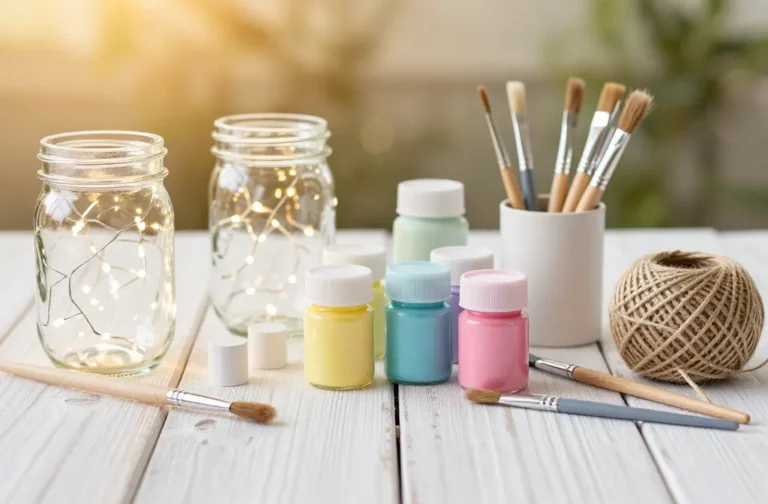
9 3d Paper Craft Ideas for Beginners: Adorable Fixes for Quick Wins
Ready to dive into a world of wearable whimsy and pop-off-your-driend décor? These 9 3d paper craft ideas for beginners prove you don’t need fancy tools to make magic at home. Each project is simple, satisfying, and totally Pinterest-worthy.
Trust me, you’ll love this mix of color, texture, and tiny artistry you can actually finish in a weekend. FYI, these are beginner-friendly, but they look seriously impressive when you’re done. Let’s get crafting!
1. Petite 3D Paper Floral Frames You Can Display Anywhere
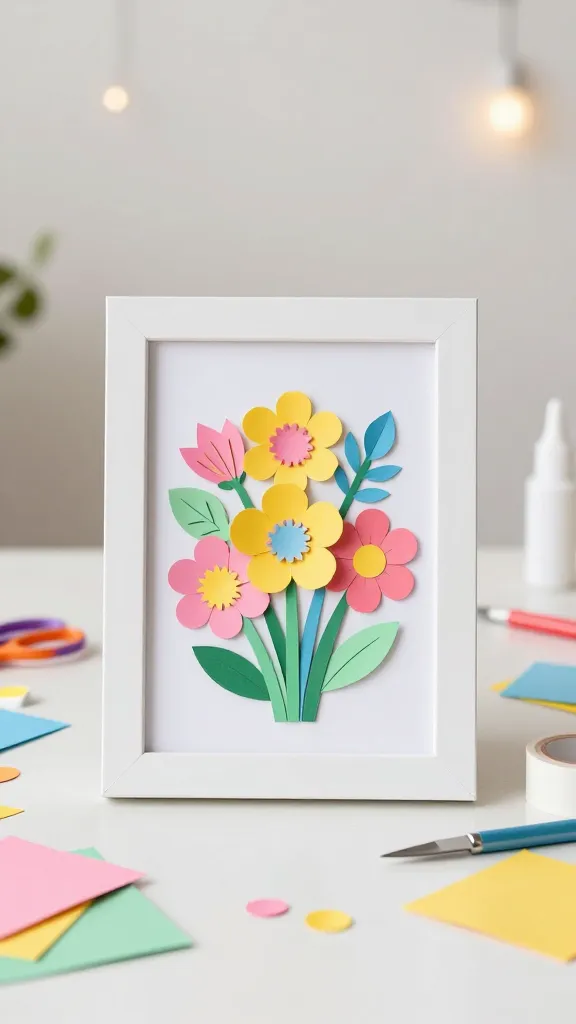
Imagine bright, layered petals popping from a delicate frame—like a tiny garden that never wilts. These 3D paper flowers bring cheerful color and a touch of whimsy to your photos, desk, or gallery wall. They’re the perfect entrance into dimensional paper craft with an instant mood boost.
Materials Needed
- Colored cardstock in your chosen palette
- Scissors or craft knife
- Glue or double-sided tape
- Plain 4×6 or 5×7 frames
- Optional: a splash of metallic pen for details
How to Make It
- Cut layered petal shapes in three sizes per flower.
- Fold petals slightly to create dimension, then glue layers together with a tiny circular center.
- Attach the finished flowers to the frame backing in an offset cluster for a lively bouquet look.
- Repeat with varying colors and sizes for depth.
Pro tips: keep colors in the same family for a cohesive vibe, and use foam pads between layers for extra lift. This is a gift-worthy piece, or a bright corner accent for your living room.
Who? Anyone who loves a fresh, soft botanical aesthetic without real petals. Perfect decor for dorm rooms or a sunny home office.
2. Paper Folded Coral Lamp Shade Illusion
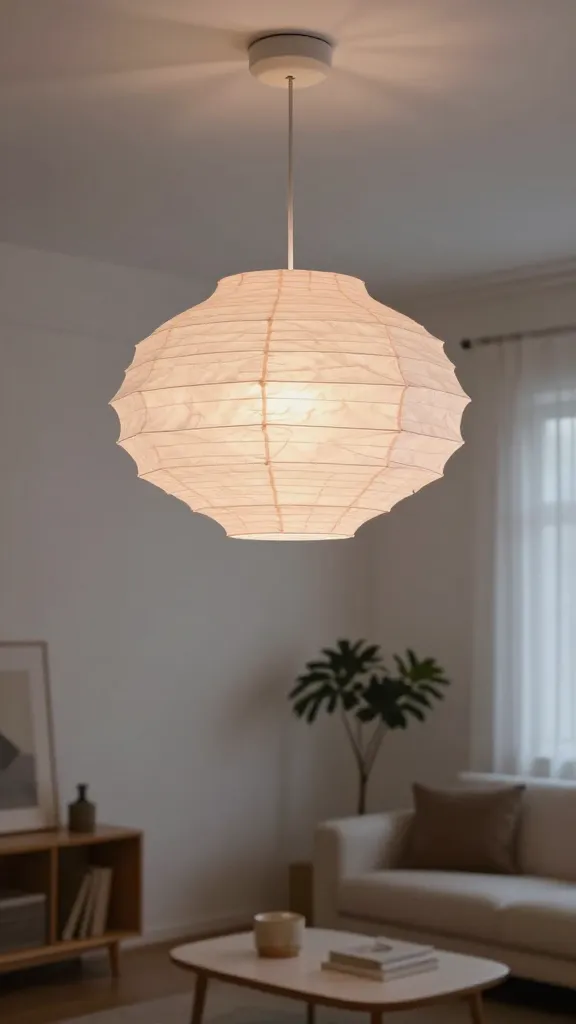
Light up a room with a sculptural paper shade that catches the eye with its coral-like depth. This 3d paper craft folds into a radiant, textural lampshade that instantly elevates ambient lighting. It’s a bold, contemporary upgrade you can actually finish fast.
Materials Needed
- White or pale pink cardstock
- Ribbon or lamp-clip system
- Scissors, bone folder (optional)
- Adhesive
- LED string light or small lamp base
How to Make It
- Cut hexagonal or circular panels that can be folded to create a honeycomb/ coral texture.
- Crease and fold each panel to form a curved, sculptural shape.
- Glue panels onto a lightweight circular ring or top/bottom rims to build the shade structure.
- Slip the shade over a small lamp or attach to a clip-on base.
Pro tips: keep the color light to maximize glow; experiment with subtle color shifts across panels for a watercolor effect. Great for bedrooms or living rooms seeking an art-piece aura.
Who? Aesthetic lovers who crave statement lighting without heavy carpentry. It’s a chic project for a weekend and a striking conversation starter.
3. 3D Paper Corners of a Cozy Mini House Scene
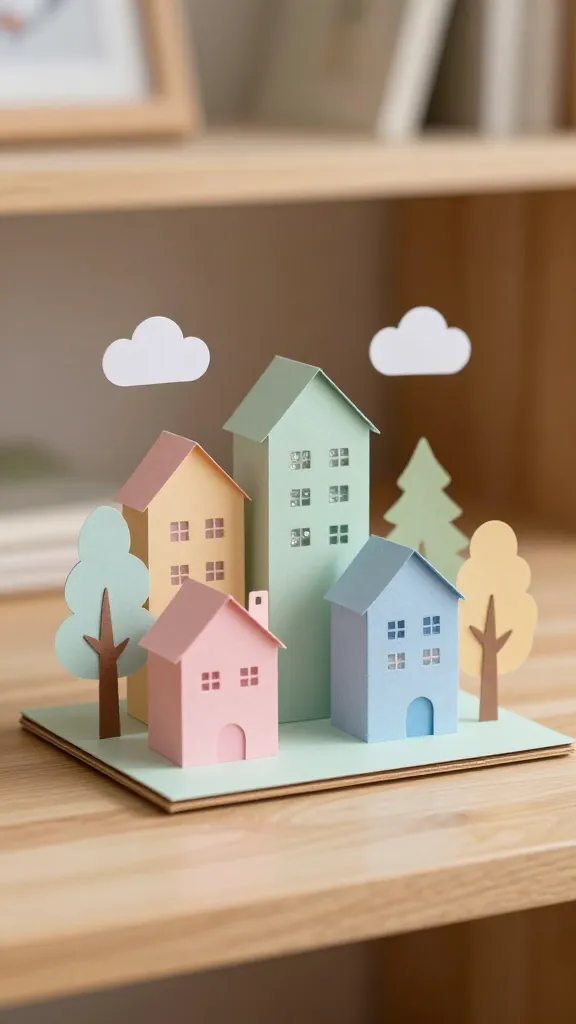
Create a pocket-sized diorama that sits on a shelf or desk—the perfect little micro-world. Layered houses, trees, and tiny clouds rise up from a flat base, giving you a whimsical 3D scene you can customize for seasons or memories.
Materials Needed
- Colored or patterned paper
- Cardstock for base and silhouettes
- Scissors, craft knife
- Glue or double-sided tape
- Optional: sequins or tiny beads for sparkly windows
How to Make It
- Cut multiple layers of house shapes, trees, and clouds.
- Score and fold to create shallow 3D profiles—glue edges to the base, stacking to create depth.
- Arrange the layers to form a tiny landscape, then secure with the base.
Pro tips: play with scale—mix tall and short houses for a lively skyline; add a clock-face or door details with a fine pen. A charming desk companion or a gift toppers’ dream.
Who? Daydreamers and tiny-scene lovers, plus anyone who wants a playful seasonal display—think winter village or spring town square.
4. Origami-Inspired 3D Paper Ball Orbs
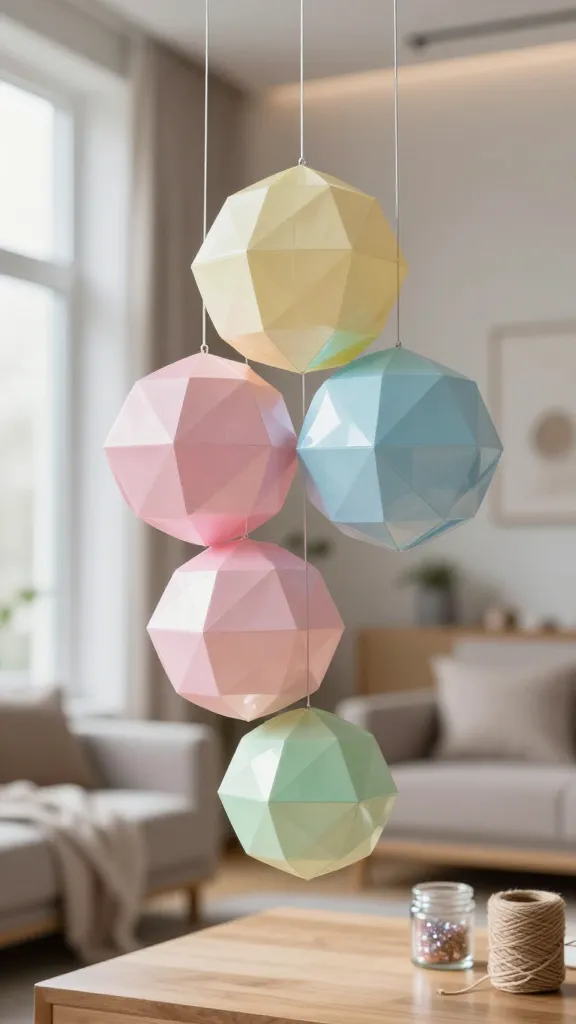
These delicate orbs feel both modern and playful, like floating lanterns you can customize with color and texture. Each orb is a few simple folds away from a stunning centerpiece or hanging decor that catches the light just right.
Materials Needed
- Colorful origami paper or lightweight cardstock
- John-clip or string for hanging
- Glue and scissors
- Optional: glitter or washi tape for embellishment
How to Make It
- Fold a series of pentagon/polygon units and connect them with glue to form a sphere.
- Continue building until your orb is complete with a delicate lattice effect.
- Seal with a light layer of glue to keep everything sturdy, and string for hanging.
Pro tips: keep to a single color family for a clean, modern look, or alternate two complementary colors for a bold statement. They look gorgeous in a corner nook or grouped as a ceiling garland.
Who? Fans of minimalist design, fans of soft glow, and party planners who love floating decor with a low-effort payoff.
5. 3D Paper Pet Succulent Planters
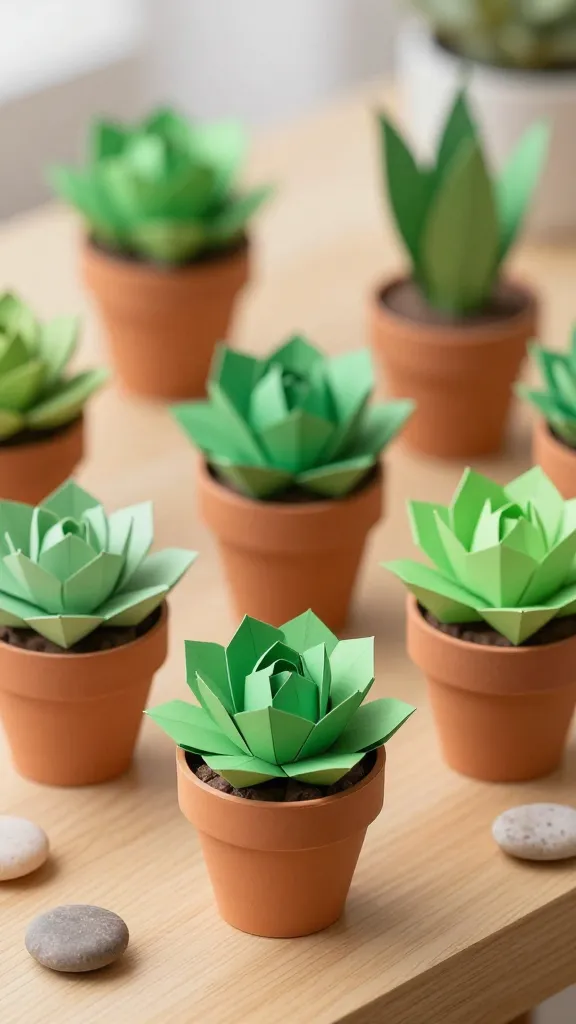
Who says plastic plants are the only option? Build tiny, printable succulents from paper that stand up in mini planters. These 3D faux greens are perfect for desks, shelves, or as a cheeky gift for plant-lovers without watering duties.
Materials Needed
- Green cardstock in shades of your choice
- Mini terra-cotta pots or small containers
- Glue, scissors, scoring tool
- Optional: faux pebbles and decorative sand
How to Make It
- Cut layered rosettes or sculpted leaf shapes, then twist and glue to form succulent heads.
- Attach to short stems or toothpicks to insert into pots.
- Decorate the pot with paint or markers to suit your style.
Pro tips: choose a palette ranging from sage to moss to create a realistic succulent vibe; place a few in a row for a green motivation wall. The kind of simple joy that brightens a workspace or kitchen counter.
Who? Office décor enthusiasts and anyone who wants greenery without the mess. Tiny plant therapy, honestly.
6. Layered Paper Feather Wall Hanging
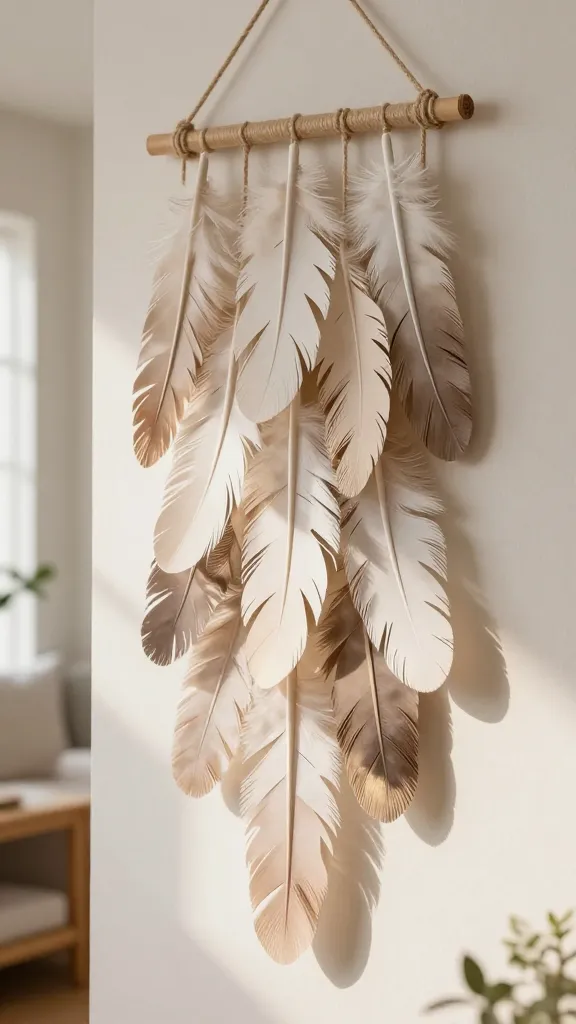
Soft, airy, and incredibly soothing to look at, this 3d paper wall hanging brings texture and a touch of-boho chic to any room. Feathers with graduated layers create depth and motion when the light hits just right.
Materials Needed
- Assorted feather-shaped cutouts in lightweight cardstock
- Jute or cotton cord for hanging
- Glue, scissors
- Optional: metallic pen or watercolor wash for shimmer
How to Make It
- Cut feather shapes and fold to create a gentle curved profile.
- Layer multiple feathers on a single strand, spacing a little apart for airiness.
- Hang from a dowel or hook to create a cascading effect.
Pro tips: vary the sizes and finish textures for visual interest—mix matte with slight gloss for depth. This piece shines in a reading nook or above a bed, catching the eye without shouting.
Who? Boho lovers and those who want a calm, nature-inspired backdrop. It’s a soothing project you’ll be glad you started.
7. 3D Paper Word Art: Create Your Own Floating Letters
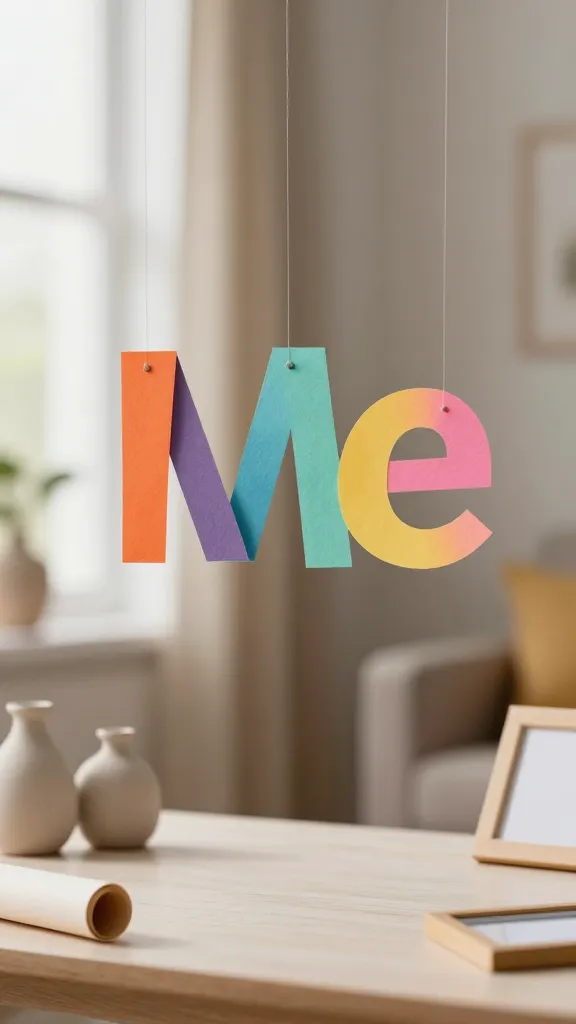
Turn a favorite word or short phrase into a tactile piece of art with layered, three-dimensional letters. This is typography meets craft, offering a personal touch for living rooms, nurseries, or office spaces. It’s surprisingly quick and endlessly customizable.
Materials Needed
- Cardstock in chosen colors
- Word templates or printable letter guides
- Scissors, glue, foam squares for lift
- Optional: small picture frame or shadow box
How to Make It
- Cut each letter in multiple layers—slightly offset—to create a 3D effect.
- Glue layers together, stacking gradually for dimension.
- Display in a frame or mount directly on the wall using foam tape to lift from the surface.
Pro tips: choose a bold color combination or keep it monochrome for a sleek look. You could spell out “dream,” “bloom,” or your initials for a personalized touch.
Who? Typography lovers and gift-givers who want a heartfelt, one-of-a-kind piece. Great for birthdays, anniversaries, or dorm-room decor.
8. 3D Paper Cloud Mobile for Calm Corners
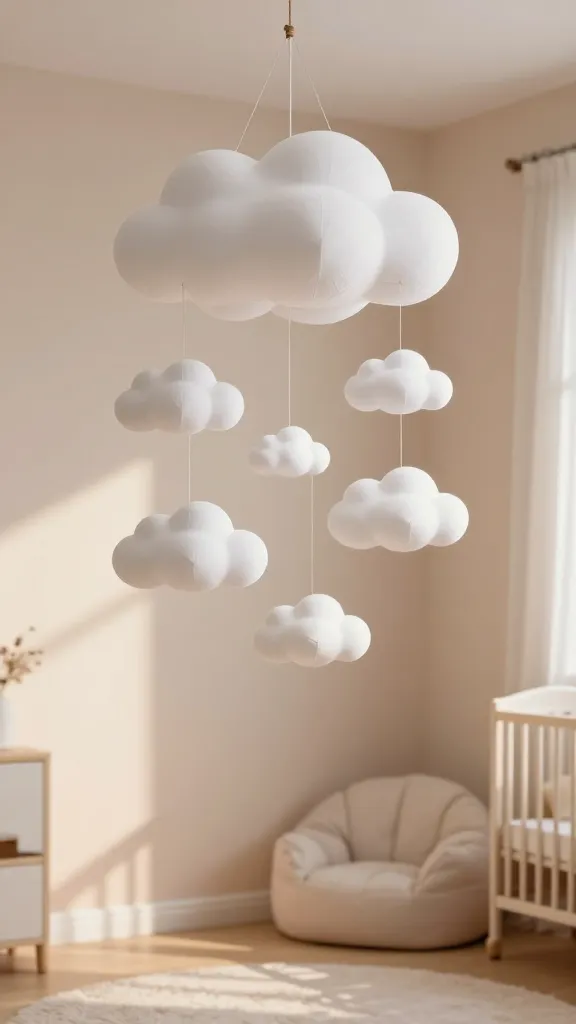
Soft clouds made from paper create a dreamy mobile that gently floats and comforts any space. This project looks marvelous over a crib, nursery corner, or cozy reading nook, filtering light into soft, fluffy shapes.
Materials Needed
- Lightweight white cardstock or vellum
- Thread or thin fishing line
- Wooden hoop or yarn-wrapped ring
- Glue, scissors
How to Make It
- Cut multiple cloud shapes with rounded edges and fold slightly to add volume.
- Glue layers together and attach to short threads at varying heights.
- Hang the strings from the hoop to create a soft, drifting mobile.
Pro tips: keep clouds in different sizes for a natural cascade; a touch of shimmer on some edges catches light for a gentle glow. It’s a serene addition to nurseries or reading nooks, honestly calming and adorable.
Who? Parents, nursery designers, and anyone craving a tranquil, whimsical accent piece.
9. 3D Paper Constellation Cards That Spark Joy
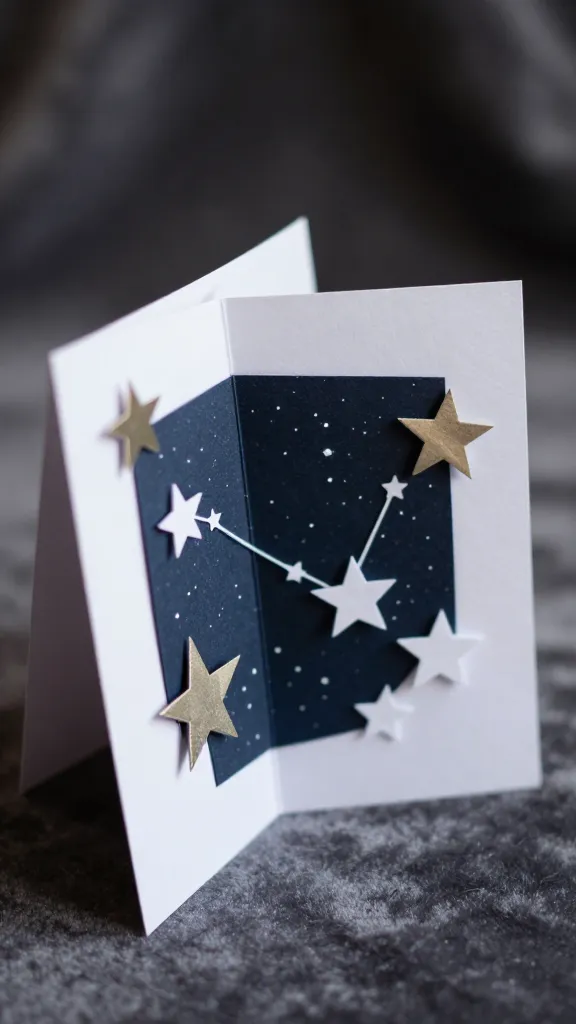
Give the cosmos a paper glow with 3D starry cards you can mail or gift. Layered stars create a pocket of night-sky depth that feels magical yet attainable. These are perfect for birthdays, anniversaries, or “just because” moments that deserve a little stardust.
Materials Needed
- Dark-toned cardstock for the card base
- White or metallic paper for stars
- Glue or double-sided tape
- Fine-tip pen for constellations or notes
How to Make It
- Cut multiple star shapes in various sizes; fold slightly to create a gentle 3D lift.
- Layer stars inside the card so they appear to float when opened.
- Optionally draw delicate constellation lines and add a short personal message.
Pro tips: use metallic papers or a touch of glitter for twinkle; keep the card minimal so the dimensional stars take center stage. A thoughtful, handmade greeting that truly shines.
Who? Card-givers who want to add a celestial twist, and anyone who loves a touch of whimsy in their mail. It’s a heartfelt surprise that feels luxe but is easy to assemble.
Conclusion
These 9 3d paper craft ideas for beginners prove that you don’t need to be a pro to create stunning, share-worthy art. Each project is designed to be approachable, visually striking, and endlessly customizable to fit your space and personality. Pick one and start today—or, honestly, sprint through all nine for a full weekend of crafty joy. You’ll finish with new skills, a bright home, and a goofy sense of pride from making something beautiful with your own two hands.
Ready to pin, save, and start? Grab your scissors and a stack of colorful paper—the fun is just getting started, and trust me, you’ll love this creative stretch.