13 Insanely Cheap Dollar Tree Paper Crafts Worthy of a High-End Boutique—Diy Glam on a Budget
Ready to transform everyday Dollar Tree finds into boutique-worthy decor? You’ll love how quick, colorful, and totally doable these paper crafts are. Trust me — your home will feel chic, not cheap, and your wallet will thank you.
1. Luxe Look Paper Rosette Wall Gallery
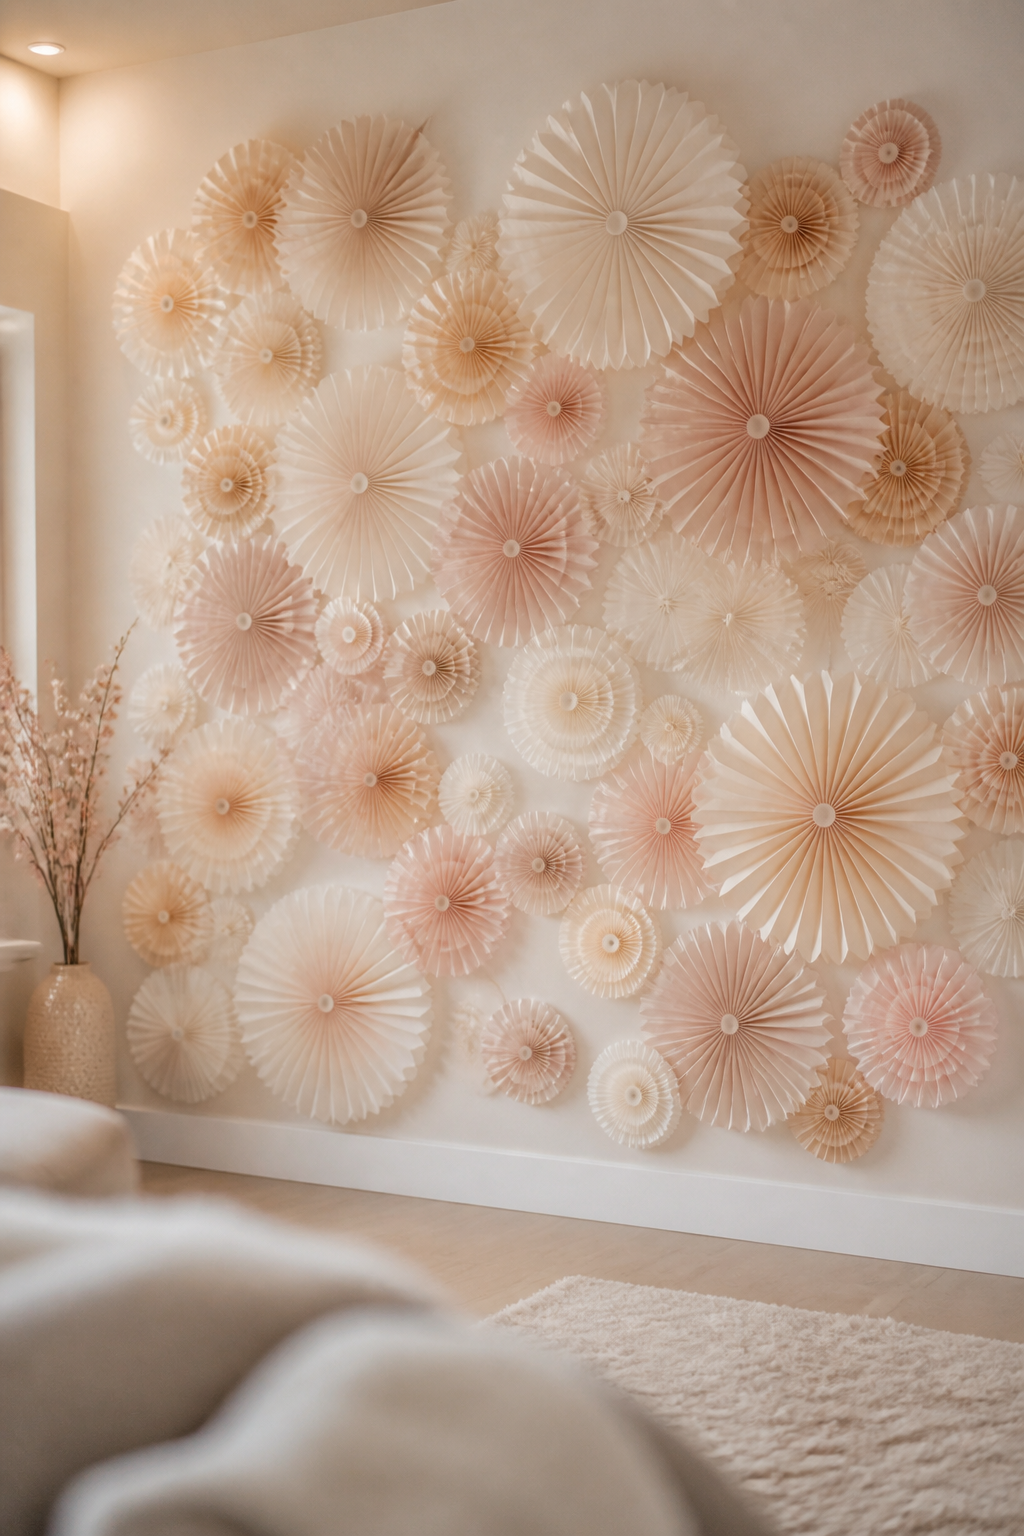
Imagine a wall blooming with delicate rosettes in soft ivory, blush, and champagne. This project feels fancy, but it’s surprisingly simple and cheap. The result is a dreamy, gallery-worthy display you’d swear came from a boutique shop.
Materials Needed
- Assorted wedding or pastel tissue paper (Dollar Tree)
- Fence pickets or a blank foam board for backing
- Double-sided tape or hot glue
- Ribbon or twine for hanging
How to Make It
- Stack tissue sheets, accordion-fold, and round into a rosette shape with a small dot of glue.
- Peel back one or two layers for a fuller look, then pinch the center and secure to the backing.
- Arrange rosettes in a freeform cluster or symmetrical pattern on the board.
Pro Tips / Styling Ideas
- Vary sizes for depth, and mix warm neutrals with a pop of mint or blush.
- Hang above a sofa, bed, or entryway table for instant chic.
Who loves it: perfect for bedroom accents, wedding-ready backdrops, or a graceful living room statement.
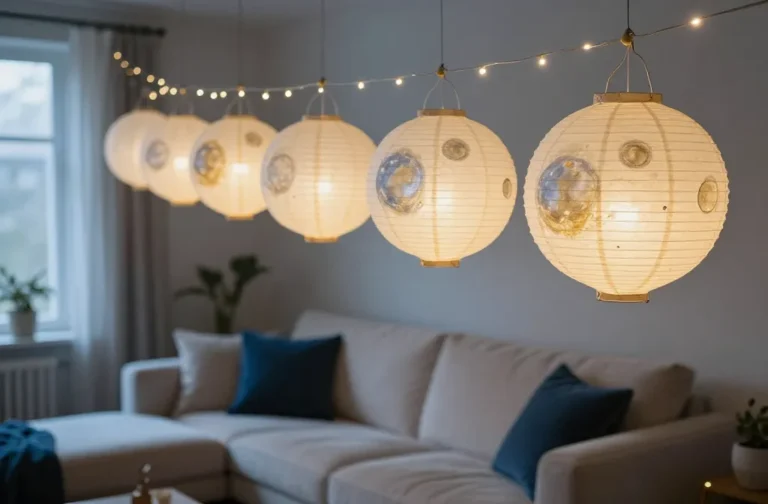
2. Velvet-Iz Multicolor Paper Lanterns
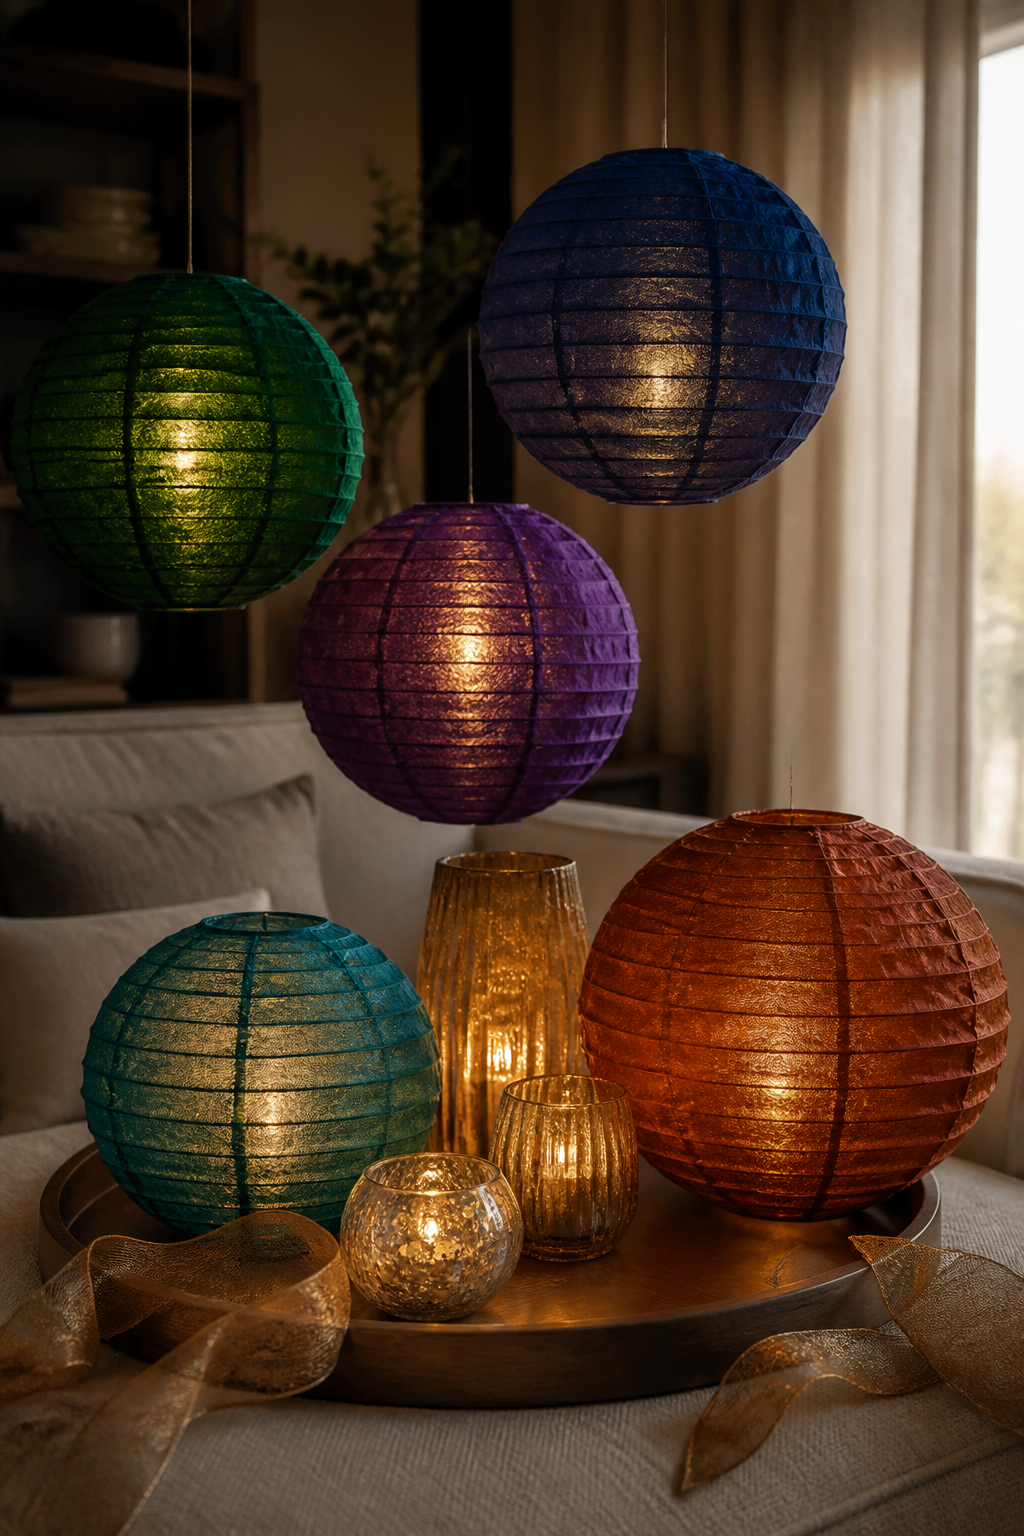
Lanterns aren’t just for outdoor spaces. These paper lanterns get a luxe upgrade with rich colors and a soft glow. They look expertly crafted, but they’re simple to assemble with items from the Dollar Tree.
Materials Needed
- Colorful tissue or origami paper (Dollar Tree)
- String lights (battery-operated)
- Paper lanterns or circle templates
- Double-sided tape
How to Make It
- Wrap the lanterns with layered tissue to create a velveted surface. Secure with tape.
- Insert string lights through the center and gently press to diffuse light.
Pro Tips / Styling Ideas
- Pair warm burgundies with sage greens for a sophisticated palette.
- Suspend at different heights for a boutique-inspired vignette.
Who loves it: great for cozy corners, parties, or a dramatic ceiling installation.
3. Minimalist Monochrome Paper Bead Garland
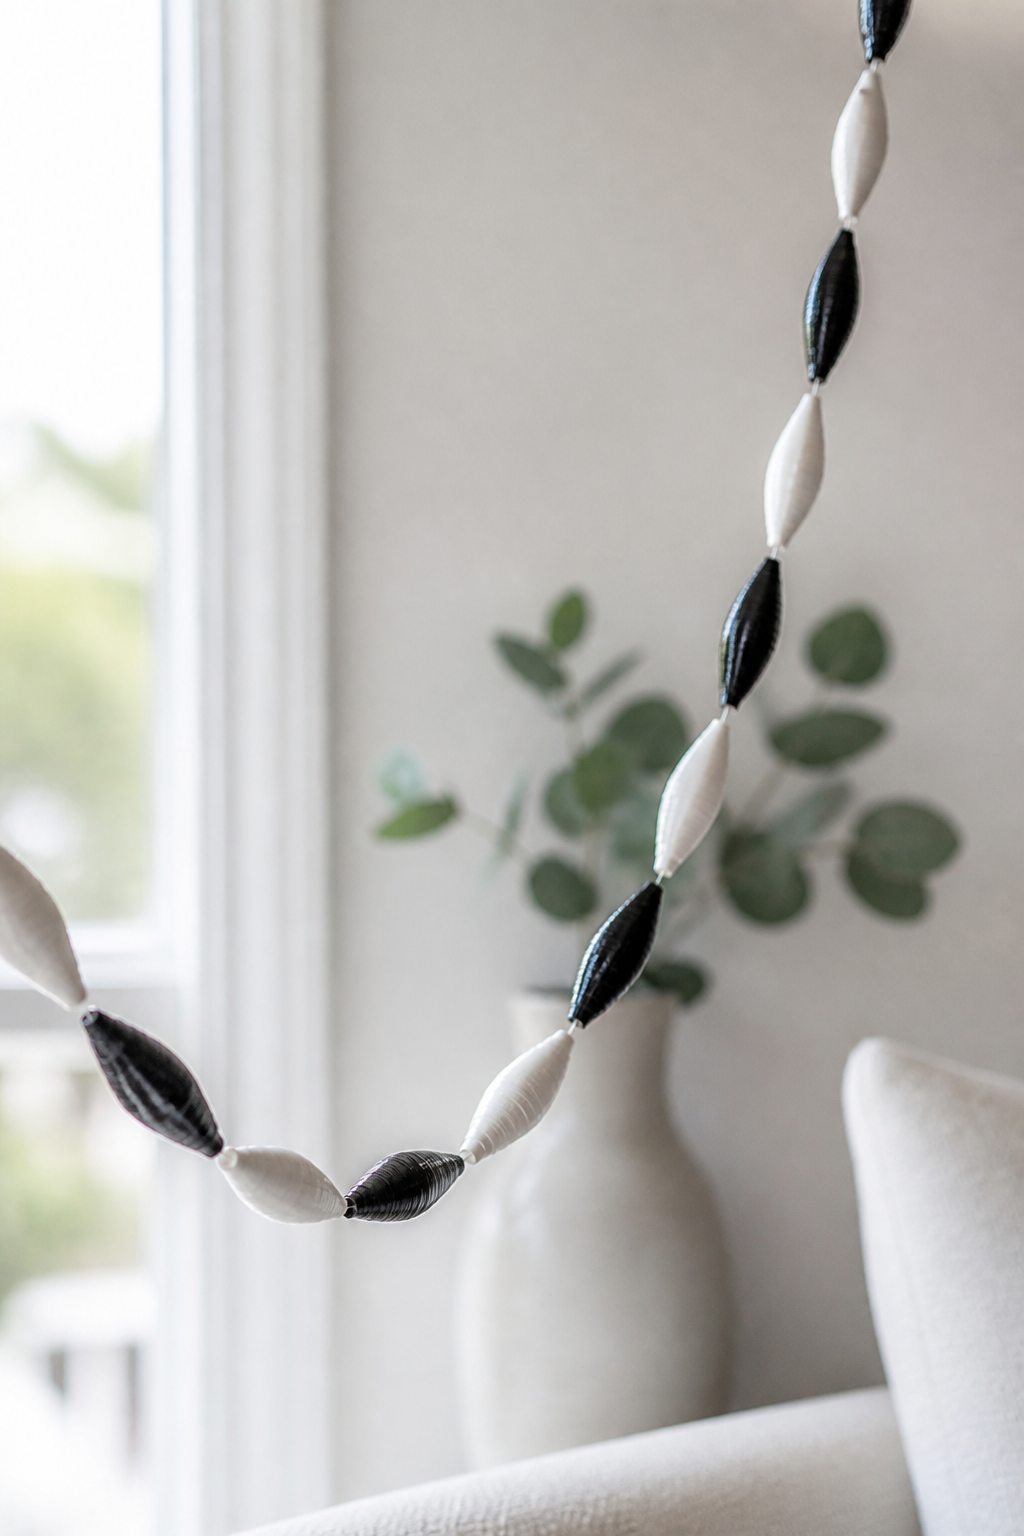
Beads don’t have to be heavy or expensive. Create slender paper beads from as-shown colors for a clean, modern garland that feels upscale yet playful.
Materials Needed
- Printer-weight paper or cereal box paper (Dollar Tree)
- Craft glue or Mod Podge
- Toothpicks or small skewers
- Clear fishing line or thin ribbon
How to Make It
- Cut strips of paper, roll tightly around a skewer, seal with glue, and trim ends.
- Thread beads onto the line in a repeating pattern.
Pro Tips / Styling Ideas
- Keep to two colors for a modern, high-fashion look.
- Hang over a mirror or mantel for a chic accent piece.
Who loves it: for modern living rooms, entryways, or gift-worthy homemade decor.
4. Couture Corner Book Page Wreath
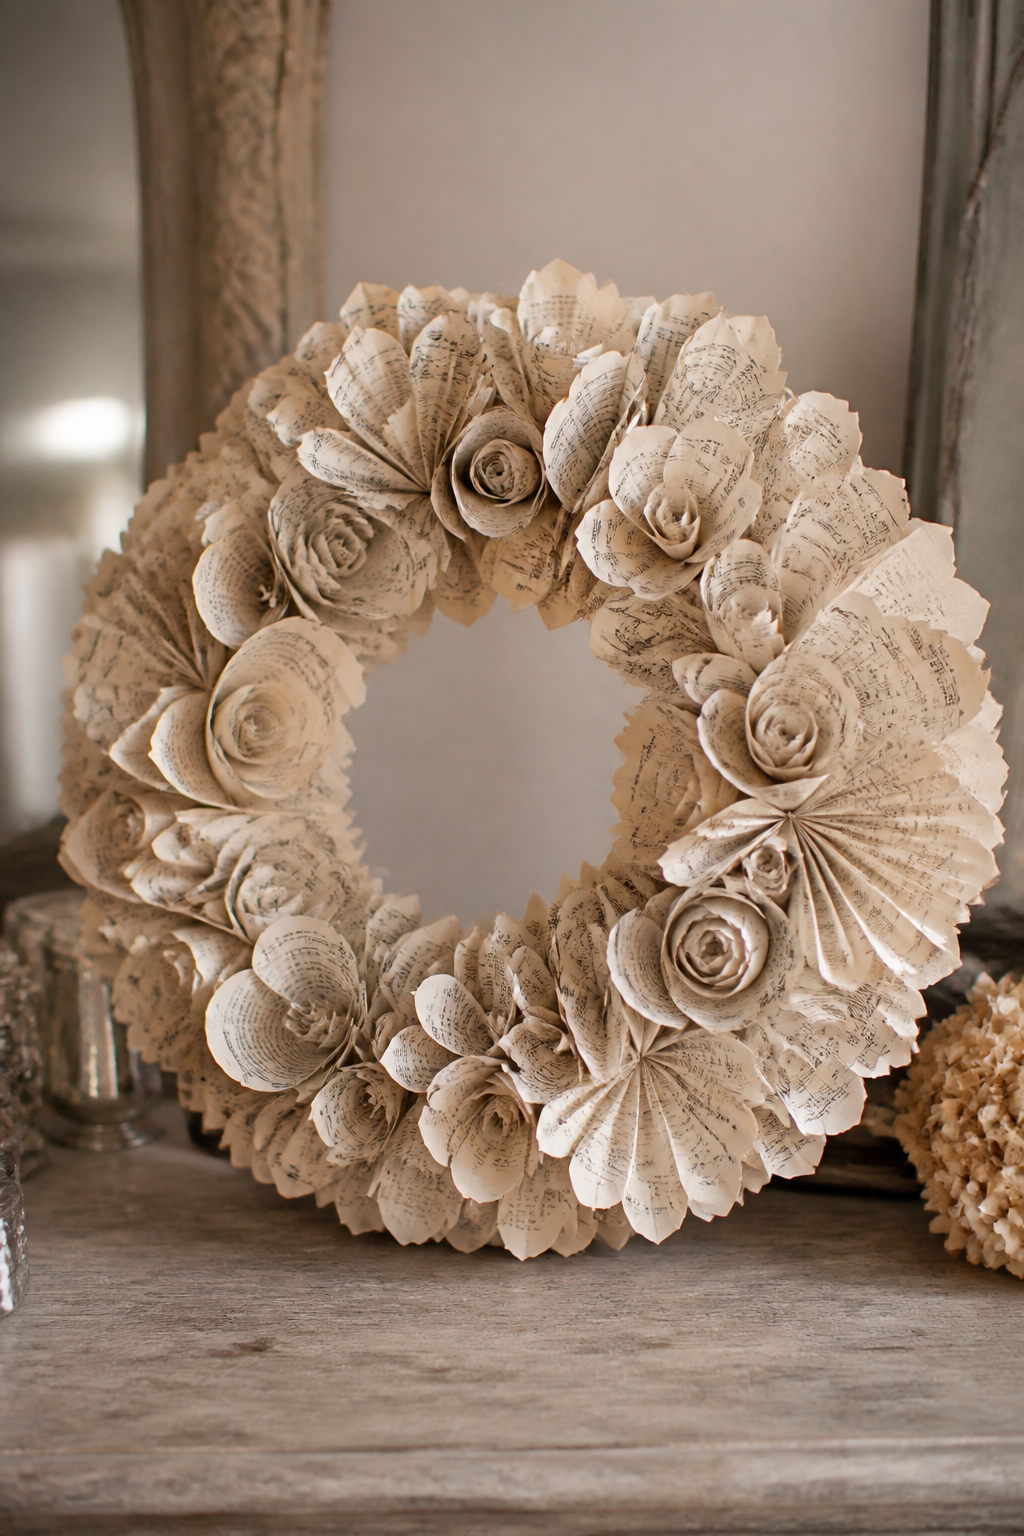
Repurpose old book pages into a lush, textured wreath that looks like it came from a boutique studio. It’s an artful nod to vintage glam without breaking the bank.
Materials Needed
- Old book pages or sheet music
- Cardboard ring or hollow styrofoam wreath form
- Hot glue or craft glue
- Spray-safe acrylic or clear sealant (optional)
How to Make It
- Cut pages into shapes (petals, squares, or circles). Roll or fold into 3D bits.
- Attach a dense cluster to the wreath form, layering for fullness.
Pro Tips / Styling Ideas
- Finish with a satin ribbon bow for a luxe touch.
- Pair with a monochrome palette to keep it refined.
Who loves it: literary lovers, vintage enthusiasts, or anyone craving a warm, old-world vibe.
5. Pearl-On-Print Frame Art
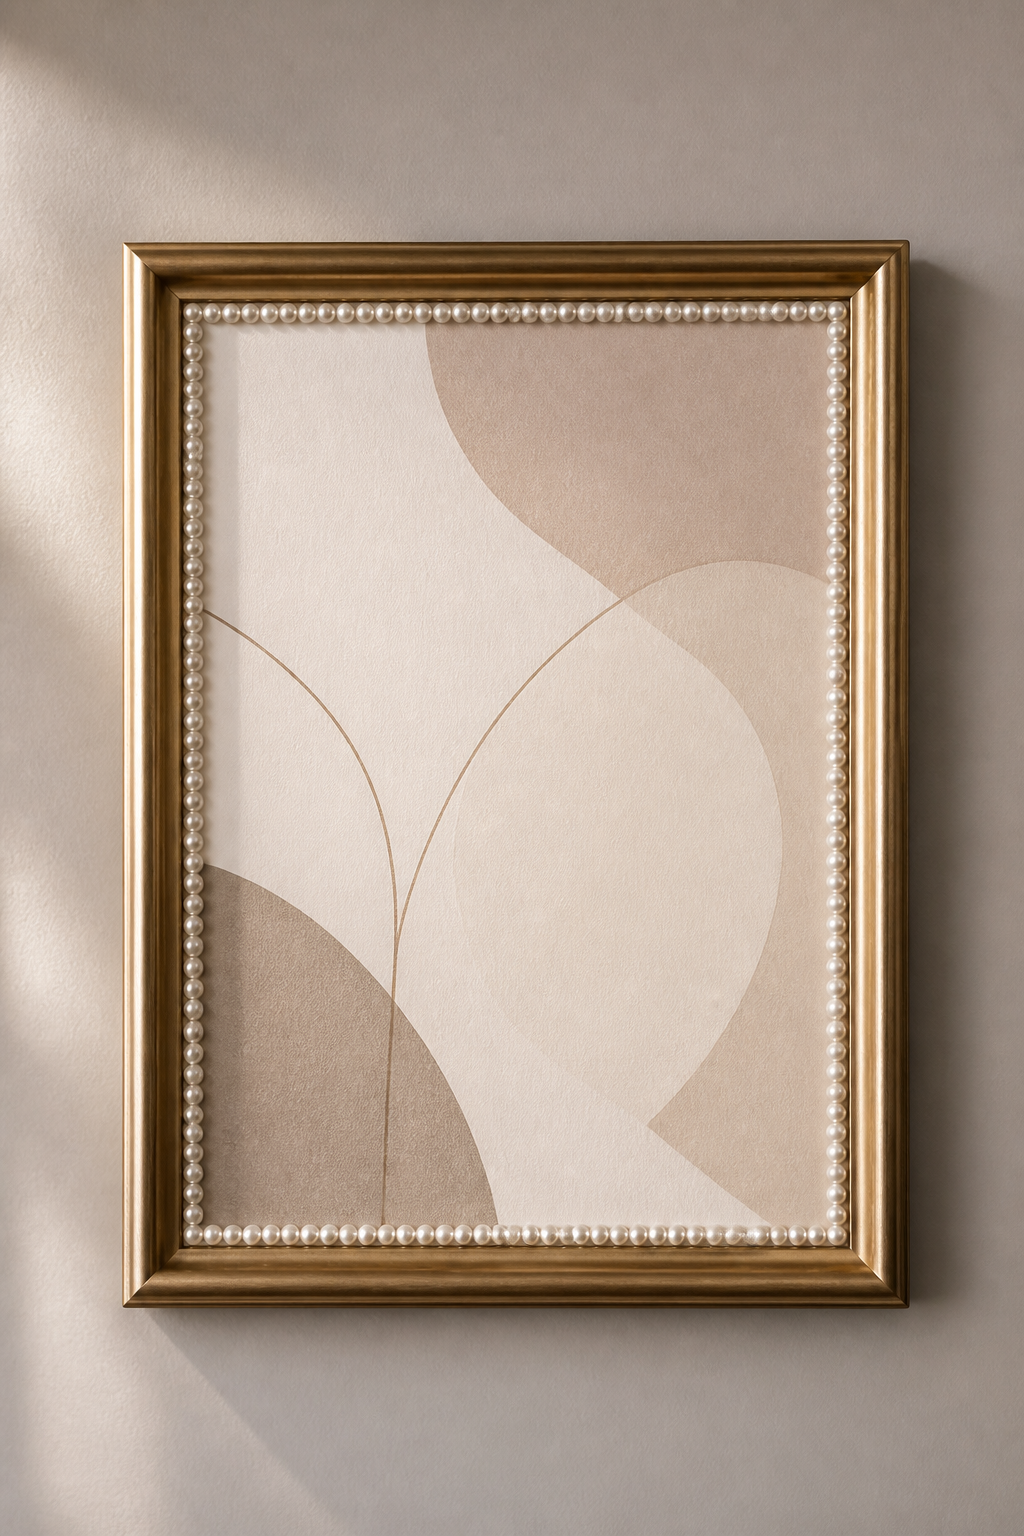
Affordable faux pearls and printed paper combine to create elegant framed art that looks museum-worthy. It’s an adorable, frame-ready piece you’ll proudly hang anywhere.
Materials Needed
- Plain printable paper or cardstock (Dollar Tree)
- Assorted pearl beads (plastic) and a hot glue gun
- Simple pre-made frame
- Optional metallic paint for the frame
How to Make It
- Print a chic quote or abstract design on the paper.
- Glue strategically placed pearls in a border or pattern on the page.
- Slide into the frame and display with pride.
Pro Tips / Styling Ideas
- Go all-out with a sparkling border or keep it minimal for modern vibes.
- Coordinate with a gallery wall for a luxe look.
Who loves it: perfect for hallways, bathrooms, or a dressing room corner.
6. Origami Plant Pot Ornaments
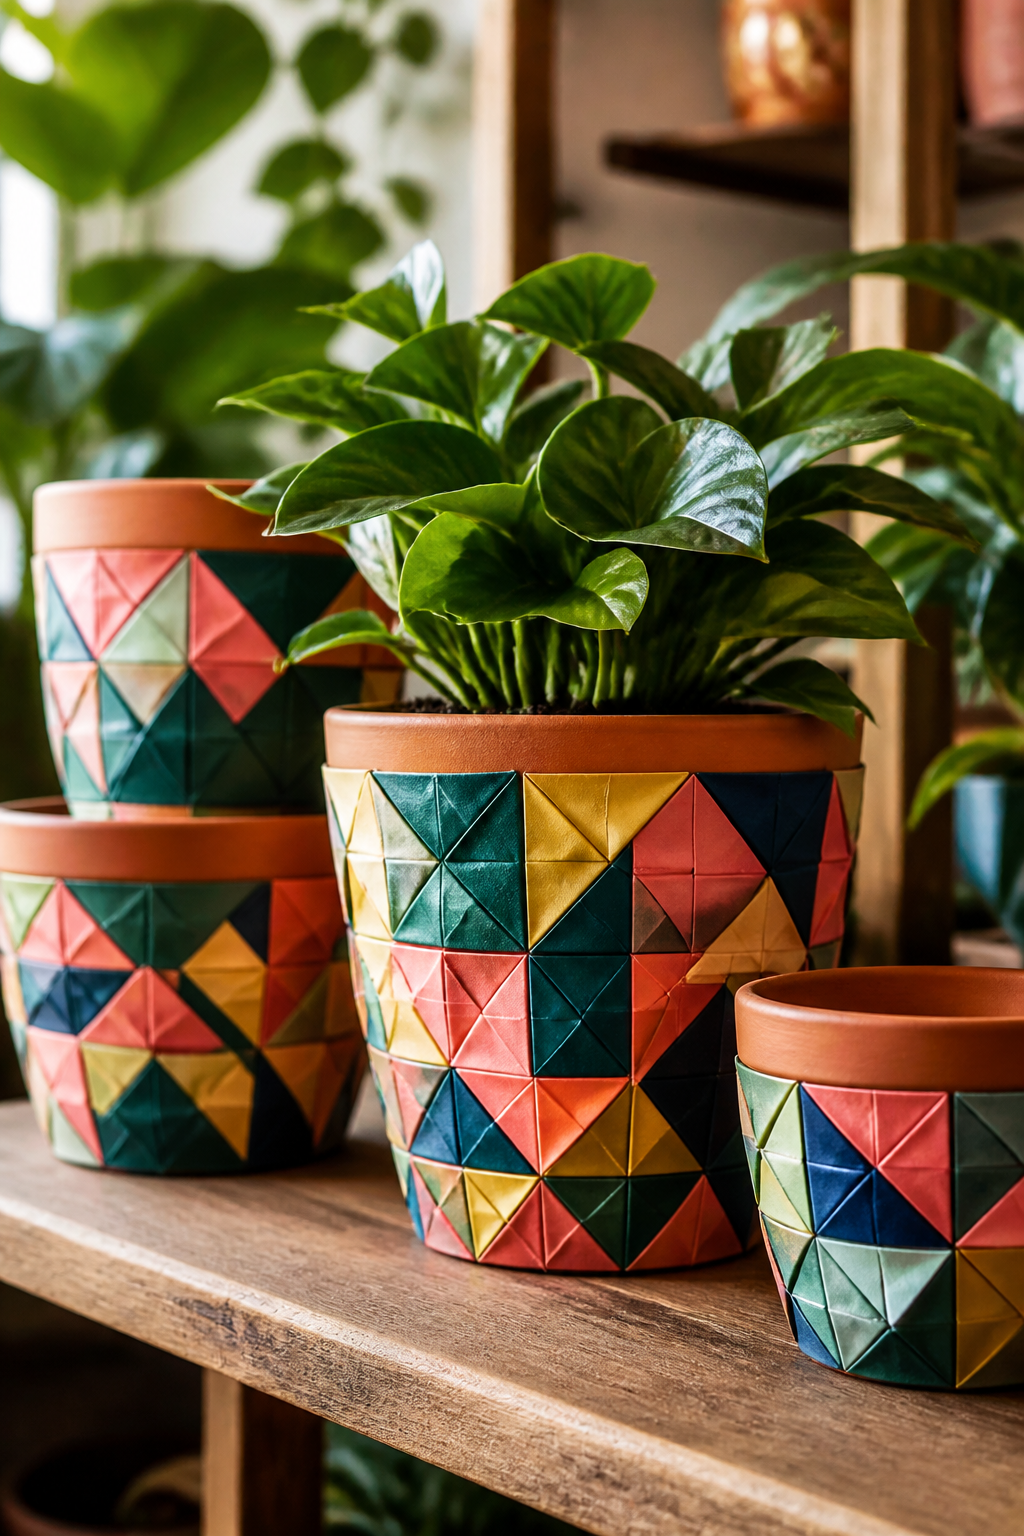
Turn plain Dollar Tree pots into high-end botanical charmer with origami paper folds. It’s a delightful blend of texture and color that instantly elevates indoor greenery.
Materials Needed
- Small paper packs or origami paper (Dollar Tree)
- Plain terracotta or ceramic pots
- Mod Podge or glue
- Black marker for doodle accents (optional)
How to Make It
- Fold decorative papers into triangles or squares and glue to the pot surface in a patchwork pattern.
- Seal with Mod Podge for durability.
Pro Tips / Styling Ideas
- Choose a color family to keep the look cohesive.
- Pair with glossy green plants for that boutique contrast.
Who loves it: ideal for windowsills, shelves, or as a charming housewarming gift.
7. Golden Ticket Gift Wrap Mini-Talismans
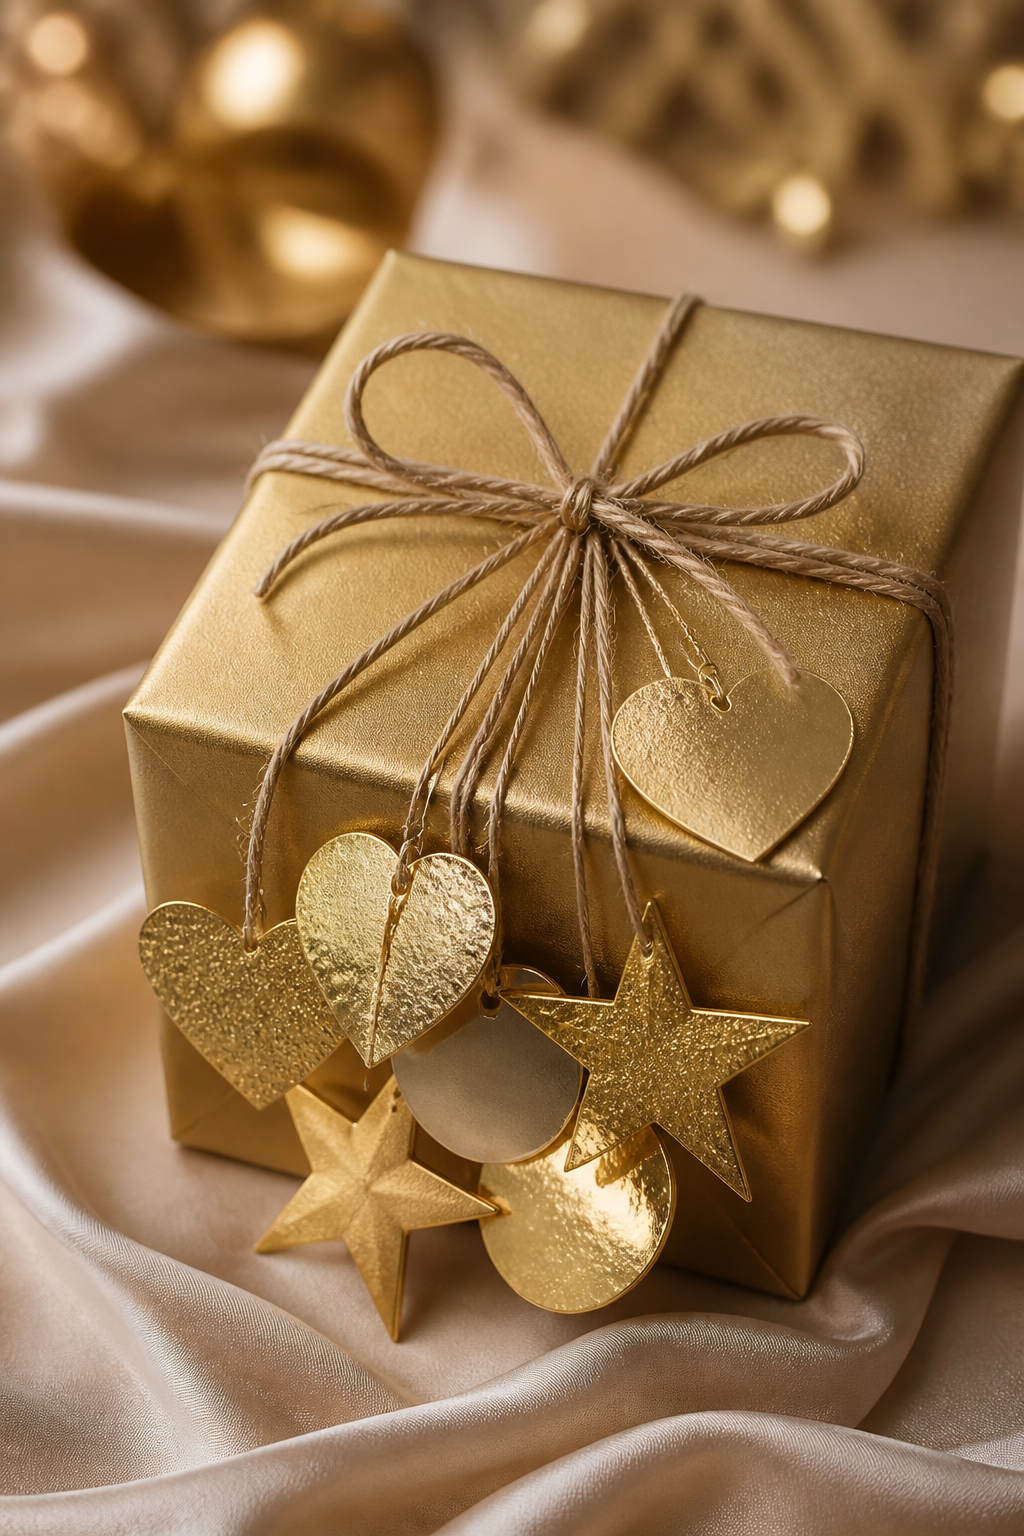
Elevate wrapped gifts with handmade paper talismans that look pricey but cost next to nothing. The golden accent instantly screams boutique quality.
Materials Needed
- Gold foil or metallic paper (Dollar Tree)
- Twine or ribbon
- Paper punch or scissors
- Glue or double-sided tape
How to Make It
- Cut shapes (hearts, stars, circles) and pin onto twine. Tie to wrapped gifts.
- Optionally stamp or write a tiny message on the back.
Pro Tips / Styling Ideas
- Match with the gift wrap color for a cohesive look.
- Use on holiday packages for a luxe vibe.
Who loves it: perfect for gifting, packaging enthusiasts, or anyone who loves a little sparkle.
8. Paper Texture Wall Panels

Create faux paneling using stacked textured paper to mimic a chic, architectural interior. It’s bold, modern, and budget-friendly.
Materials Needed
- Textured craft paper or construction paper (Dollar Tree)
- Adhesive or double-sided tape
- Straightedge or ruler
How to Make It
- Cut panels in a grid and mount them on a wall to form a subtle geometric pattern.
- Alternate colors for depth or keep monochrome for a sophisticated look.
Pro Tips / Styling Ideas
- Use behind a sofa or bed as a dramatic backdrop.
- Finish with a light varnish to mimic real paneling texture.
Who loves it: home renovators, renters needing a polish, or anyone craving architectural flair.
9. Delicate Paper Flower Chandelier
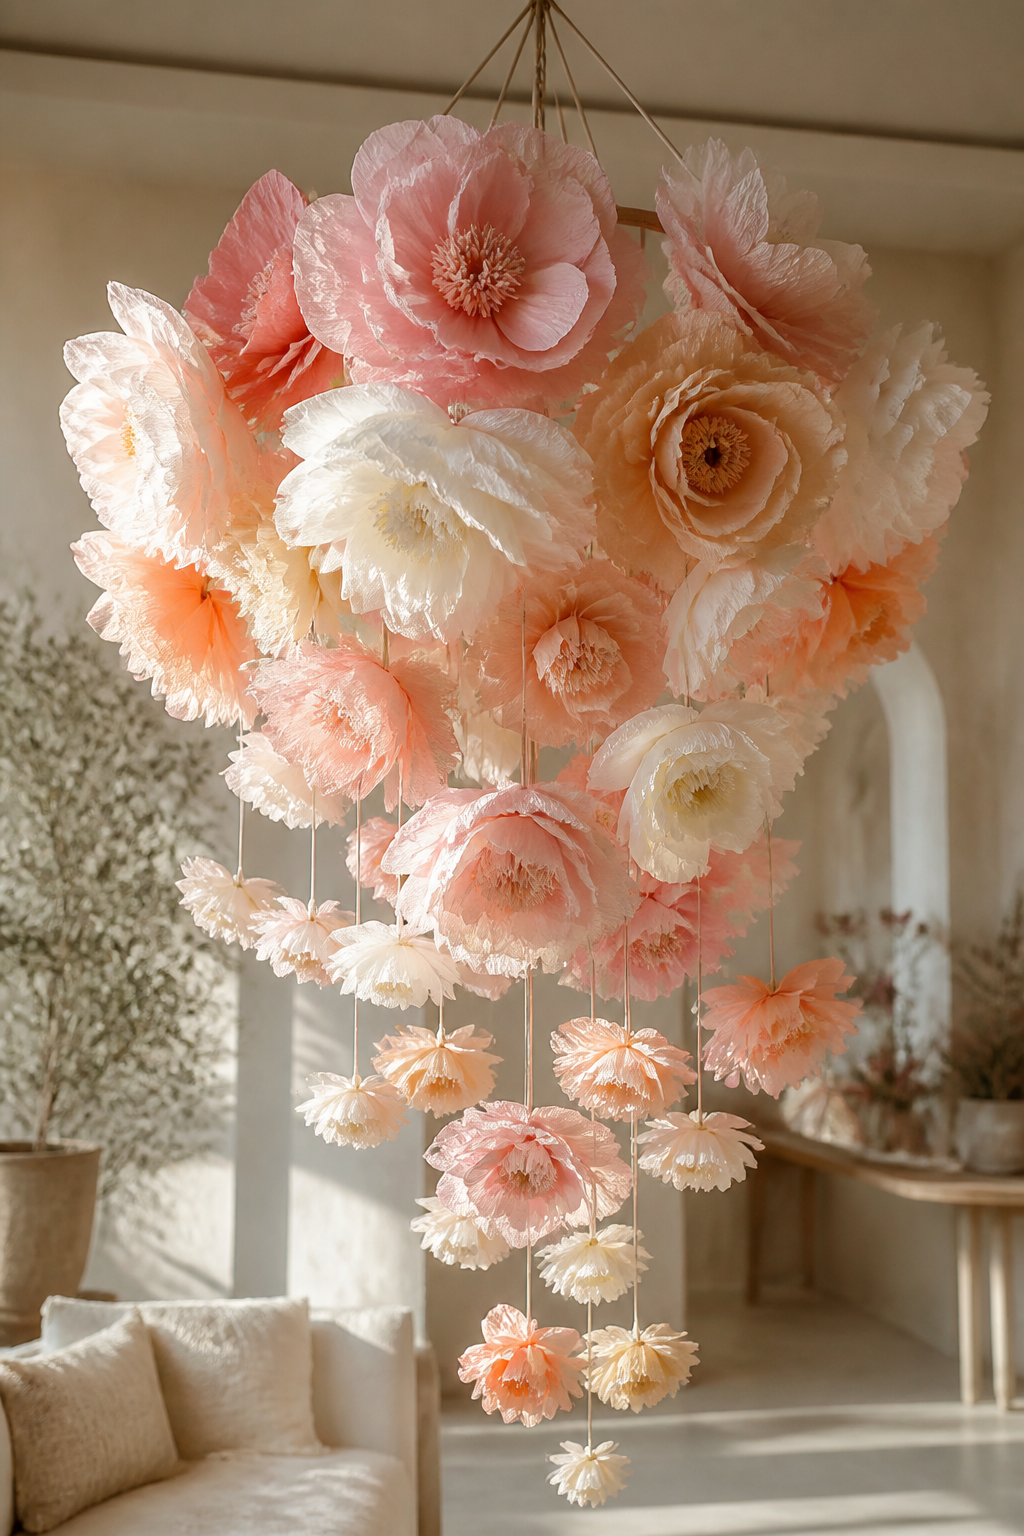
A chandelier made from paper blooms adds romantic whimsy to any room. It feels boutique-level but is refreshingly approachable with simple folds and glue.
Materials Needed
- Colored tissue or crepe paper (Dollar Tree)
- Wire, string, or a plastic hanger
- Glue or tape
How to Make It
- Twist and fan out paper into flower shapes, then attach to the frame to form a chandelier silhouette.
- Hang at varying depths for a lush, cascading effect.
Pro Tips / Styling Ideas
- Choose soft pastels for a romantic vibe or bold hues for a dramatic focal point.
- Pair with warm lighting to enhance the glow.
Who loves it: ideal for dining rooms, nurseries, or a statement entryway.
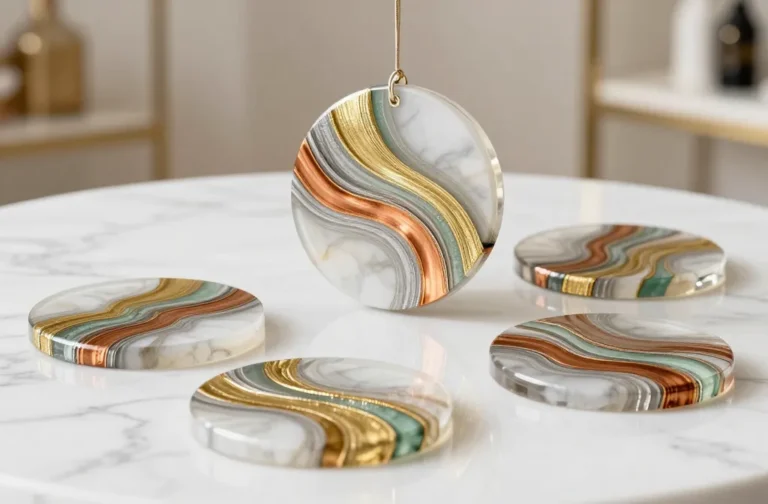
10. Marble-Print Cardstock Framed Mini Gallery
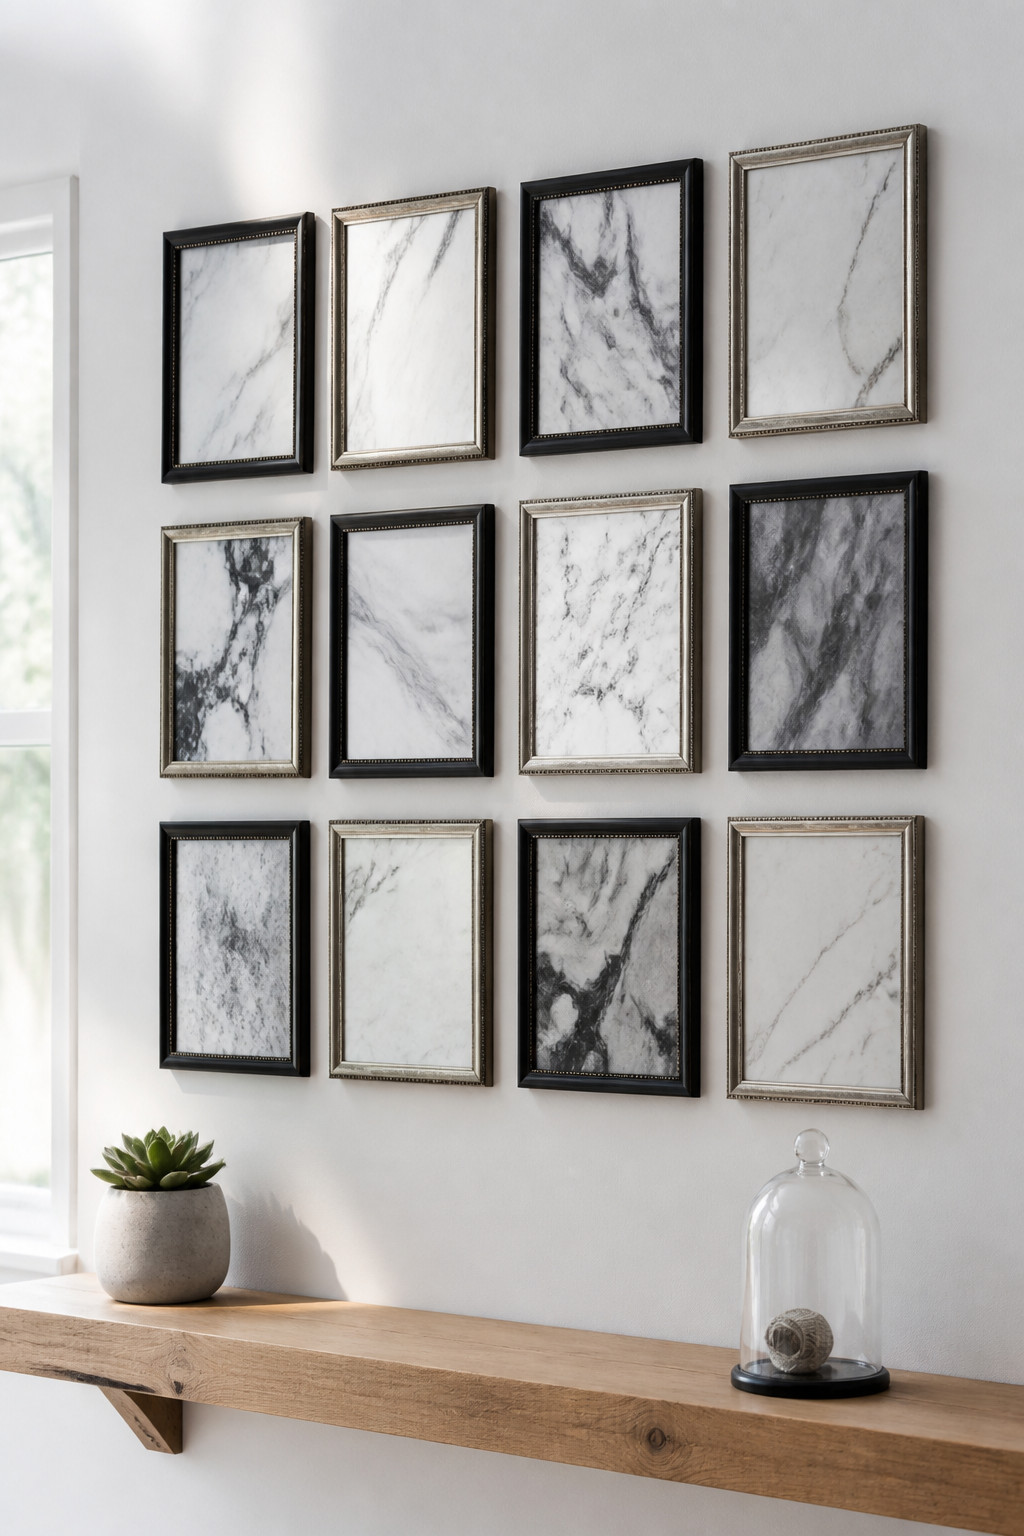
Marble is timeless, and you can fake a chic marble look with printable or hand-painted paper. A tiny gallery frame set adds instant high-end vibe without the price.
Materials Needed
- Cardstock or printer paper (Dollar Tree)
- Black or gray ink or paint to create marbling
- Small frames or thrifted ones
How to Make It
- Create marble patterns with a simple color wash or print a marbled design.
- Cut to fit frames and arrange in a grid or salon-style display.
Pro Tips / Styling Ideas
- Keep a consistent color palette across all frames for a polished look.
- Hang near a light source to highlight the marbling.
Who loves it: gallery wall lovers, coffee shop vibes at home, or a chic office corner.
11. Glam Paper Ribbon Backdrop Board
A ready-to-hang backdrop board made from rolled ribbon-like paper creates instant party vibes or a luxurious photo wall at a fraction of the cost.
Materials Needed
- Long strips of colored paper or ribbon (Dollar Tree)
- Thin board or foam board
- Glue or adhesive
How to Make It
- Glue paper strips in a fan or grid pattern across the board.
- Seal and mount on the wall for a bold, high-fashion moment.
Pro Tips / Styling Ideas
- Use metallics for a luxe edge or soft pastels for a romantic vibe.
- Place behind a dessert table or photo area for maximum wow.
Who loves it: event planners at heart, home party hosts, or anyone who loves a dramatic backdrop.
12. Journal-Style Paper Clip Organizer
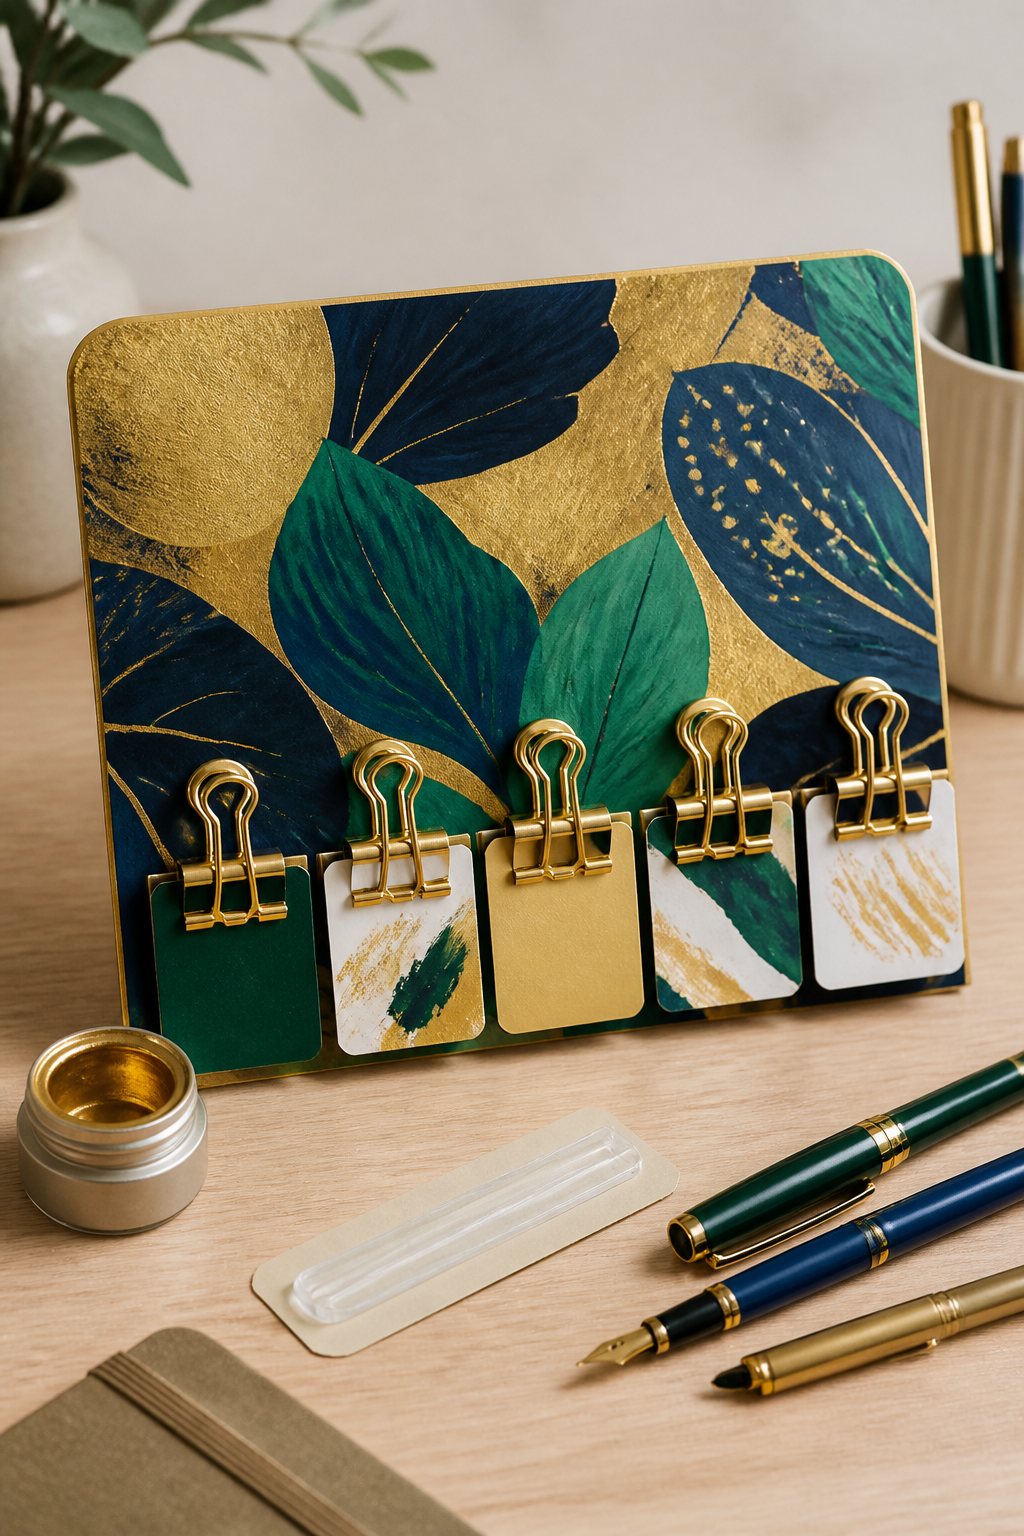
Turn simple paper clips and a decorated card into a chic desk organizer that looks straight out of a boutique stationery shop.
Materials Needed
- Cardstock, a metal binder clip, or small clipboard
- Metallic marker or paint
- Glue or double-sided tape
How to Make It
- Decorate the cardstock with a bold geometric or floral pattern.
- Attach the paper clips in a neat row to hold notes, receipts, or tags.
Pro Tips / Styling Ideas
- Place on a desk with a few bold pens for a cohesive workspace.
- Use in entryway for keys and small accessories.
Who loves it: students, home offices, or anyone who loves organized beauty with a touch of glam.
13. DIY Shimmer Soap Favors in Glass Jars
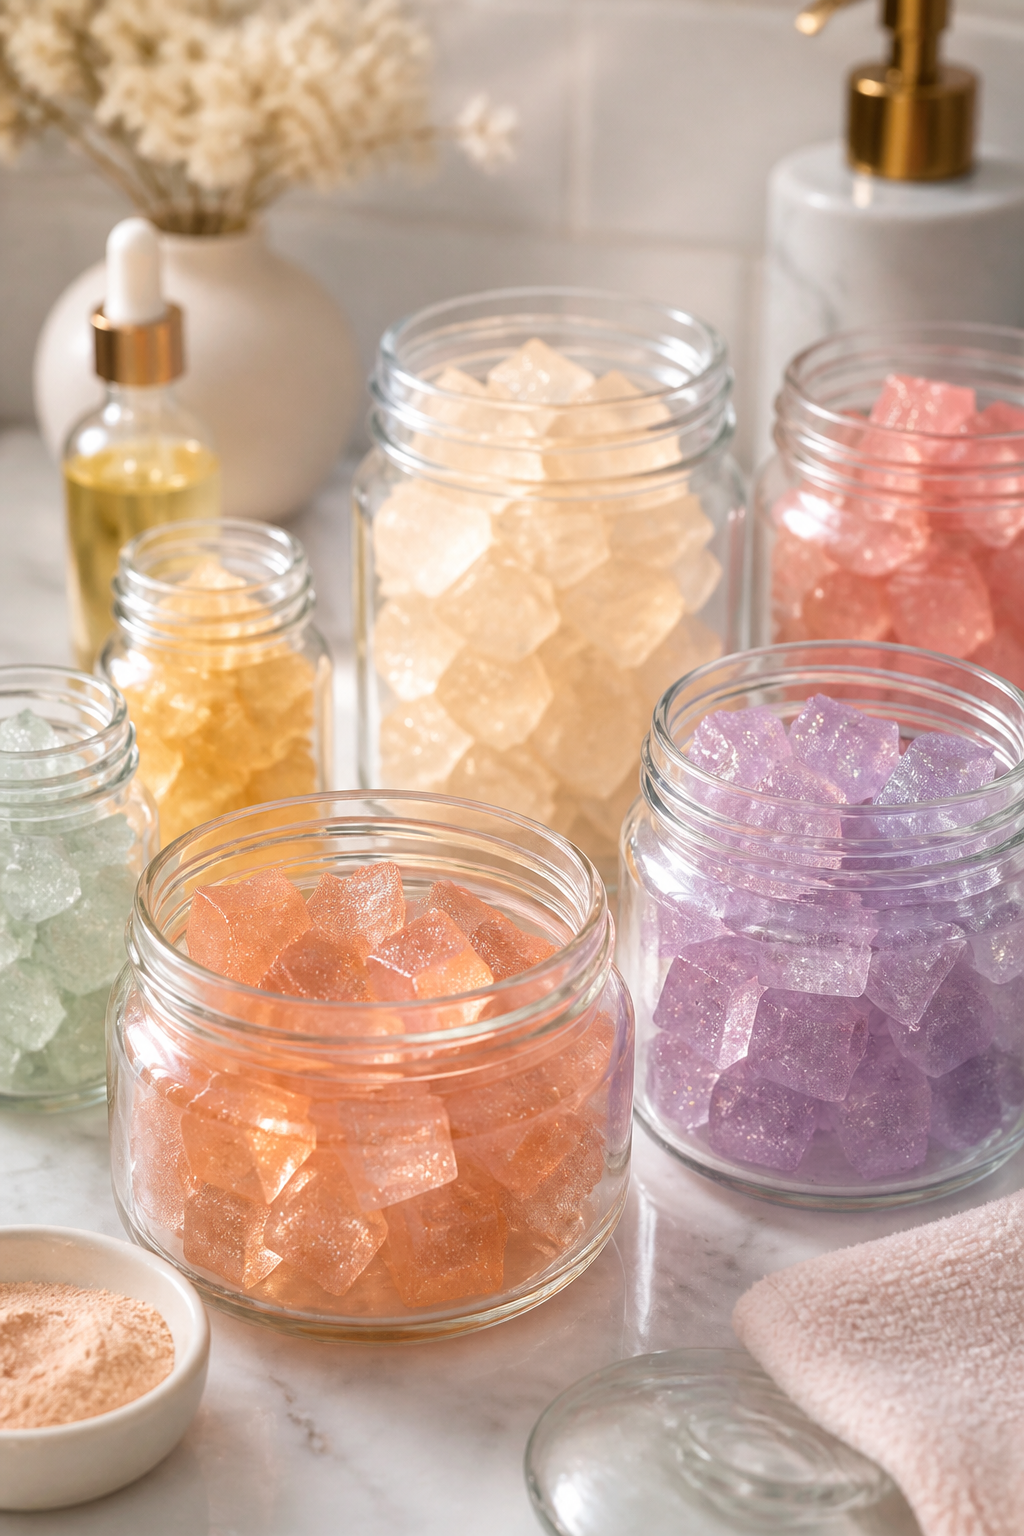
Okay, this is a little different, but hear me out: DIY shimmer soaps in clear jars are a mini-boutique gift you can keep for yourself or share. They look luxe on a bathroom shelf and cost a fraction of store-bought options.
Materials Needed
- Transparent soap base (or glycerin, Dollar Tree)
- Champagne shimmer powder or mica
- Mini jars or upcycled spice jars
- Fragrance oil or essential oil (optional)
How to Make It
- Cube soap base and melt safely, add shimmer and scent, then pour into jars.
- Smooth the top and let set. Add a ribbon lid for a boutique finish.
Pro Tips / Styling Ideas
- Label with handwritten tags for a charming, artisanal touch.
- Group in a tray on a bath counter or guest bathroom for a luxe feel.
Who loves it: guests, spa lovers, or anyone who enjoys little home luxuries on a budget.
Conclusion: Ready to dive in? Each of these 13 insanely affordable Dollar Tree paper crafts brings boutique flair into everyday spaces. Pick one to start tiny, or go all-in and create a cohesive, stylish vignette that makes you smile every time you pass by. Have fun, and happy crafting!