13 Clever Paper Crafts for Teachers to Make Classroom Bulletin Boards Pop: Quick Wins
Hooked on classroom vibes that spark curiosity without breaking the budget? You’re in the right spot. These 13 clever paper crafts will turn boring bulletin boards into vibrant teaching moments—and you can finish them in an afternoon. Trust me, your colleagues will be asking for the tutorial links.
1. Interactive Interactive Alphabet Habitat
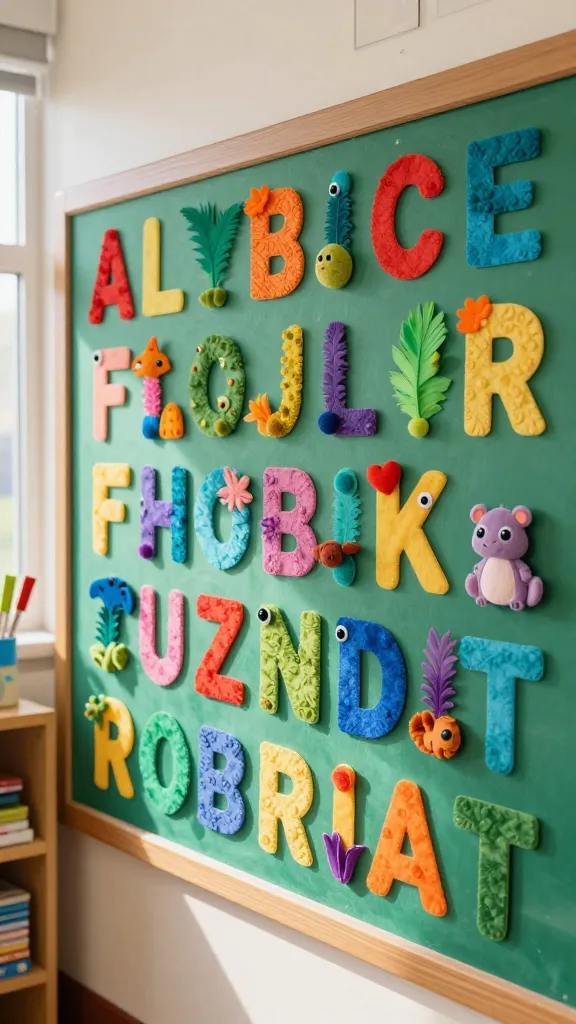
Imagine a tiny jungle where each letter hides a colorful creature. This project combines learning with whimsy, turning your alphabet wall into an explorer’s map. The textures and pops of color make kids pause, point, and shout out letters.
Materials Needed
- Colored construction paper in a rainbow of hues
- Scissors, glue sticks, and double-sided tape
- Black marker or gel pen
- Optional: googly eyes, sequins, chalk markers
How to Make It
- Cut big cardboard-like shapes for each letter, then layer colored paper to create bold, blocky letters.
- Cut out simple animal shapes to tuck around each letter—lions for L, elephants for E, etc.—and glue them in place.
- Add small captions with fun alliteration for each letter (A is for Amazing Ants, B is for Bright Bear, etc.).
Pro Tips / Styling Ideas
- Use metallic pens to outline letters for extra zing.
- Hang a string of “footprints” leading from one corner to the next to guide the eye.
End Note
This is perfect for early elementary rooms. Kids will love spotting the animal friends and shouting out the alphabet as you point along.
2. Peel-and-Place Seasonal Bloom Board
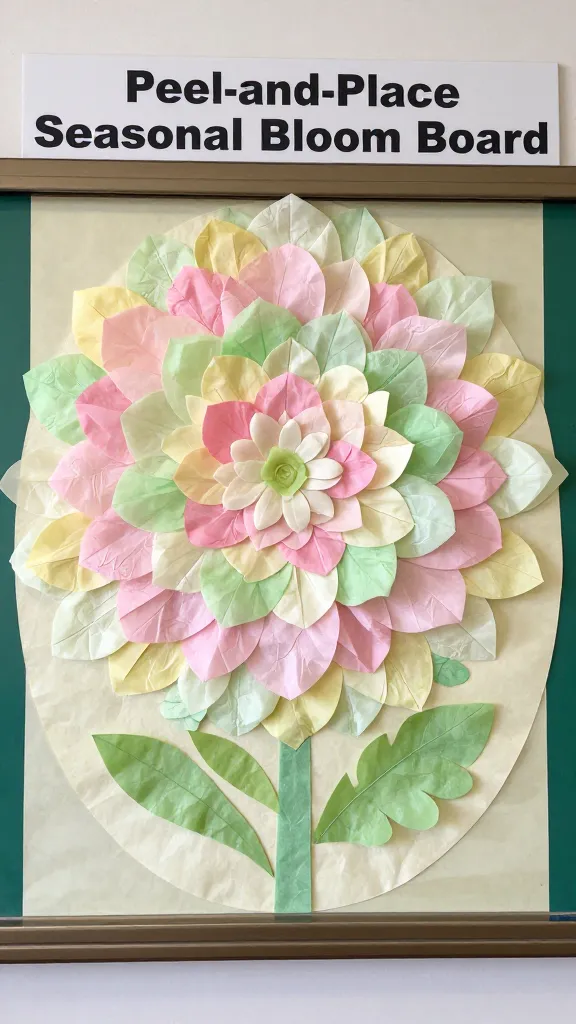
Think seasonal chic: a large floral backdrop built from layered paper petals. It’s a stunning, photo-worthy centerpiece that evolves with the calendar. The petals are lightweight, easy to rearrange, and endlessly adaptable.
Materials Needed
- Colored tissue paper or crepe paper
- Cardstock for stems and leaf shapes
- Adhesive pine strips or mounting putty
- Scissors and craft knife
How to Make It
- Cut a large circular or oval base from light-colored paper.
- Layer dozens of tissue petals in concentric rings, stapling or gluing at the center.
- Extend paper stems downward with leaves to create a garden-like frame around the board.
Pro Tips / Styling Ideas
- Change petals seasonally—soft pastels for spring, warm tones for autumn.
- Pop in tiny chalkboard tags with student names or prompts.
End Note
Best for language arts days or science corners. It’s a living display that teachers and students will revisit all season.
3. Weather Vibe Bulletin Cloud
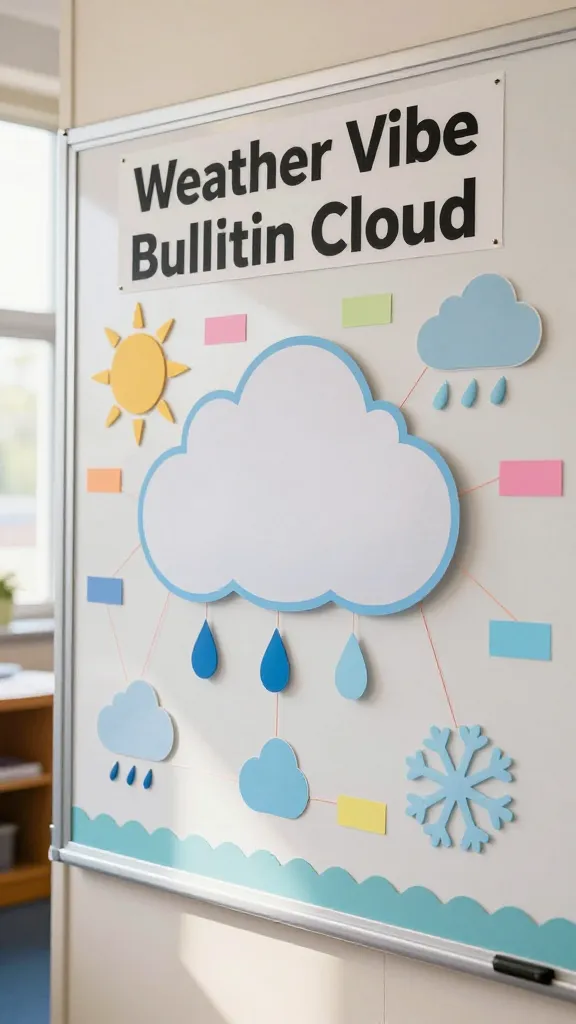
A soft, dreamy cloud that tracks daily weather with playful icons. It’s both decorative and educational, giving a gentle daily routine a splash of whimsy.
Materials Needed
- White or light-gray poster board
- Colored paper shapes (sun, clouds, raindrops, snowflakes)
- Push pins or tape for mounting
- Markers for labels
How to Make It
- Cut a large cloud silhouette and mount it in the center of the board.
- Arrange weather icons around the cloud; use strings to connect the daily forecast line.
- Write the date and a one-liner prompt for student participation.
Pro Tips / Styling Ideas
- Let students pick the day’s icon for personal connection.
- Laminate chosen icons for reusable use—FYI, it saves tears when the cleaning crew comes by.
End Note
Seriously charming for morning routines and science days alike. Kids will love predicting and discussing weather patterns.
4. Colorful Classroom Conversation Starbursts
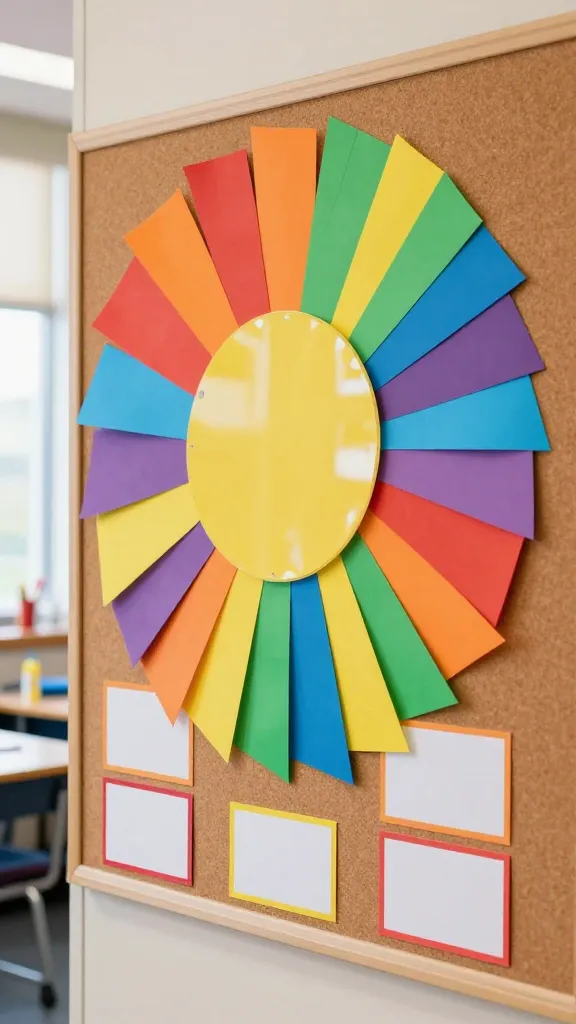
Rays of color emanating from a central prompt spark discussion and collaboration. This project is quick, punchy, and incredibly adaptable for debate prompts, book themes, or problem-solving tasks.
Materials Needed
- Colored construction paper or cardstock
- Glue sticks and tape
- Markers or gel pens
How to Make It
- Cut triangular “rays” in multiple colors and arrange around a central circle containing a prompt.
- Laminate the central circle or mount on sturdy board for durability.
- Add student names to each ray as they contribute ideas.
Pro Tips / Styling Ideas
- Rotate prompts weekly to keep the board fresh.
- Use metallic accents for a modern twist.
End Note
A crowd-pleasing anchor for writing stations, science investigations, or current events discussions.
5. Paper Ribbon Timeline of Achievements
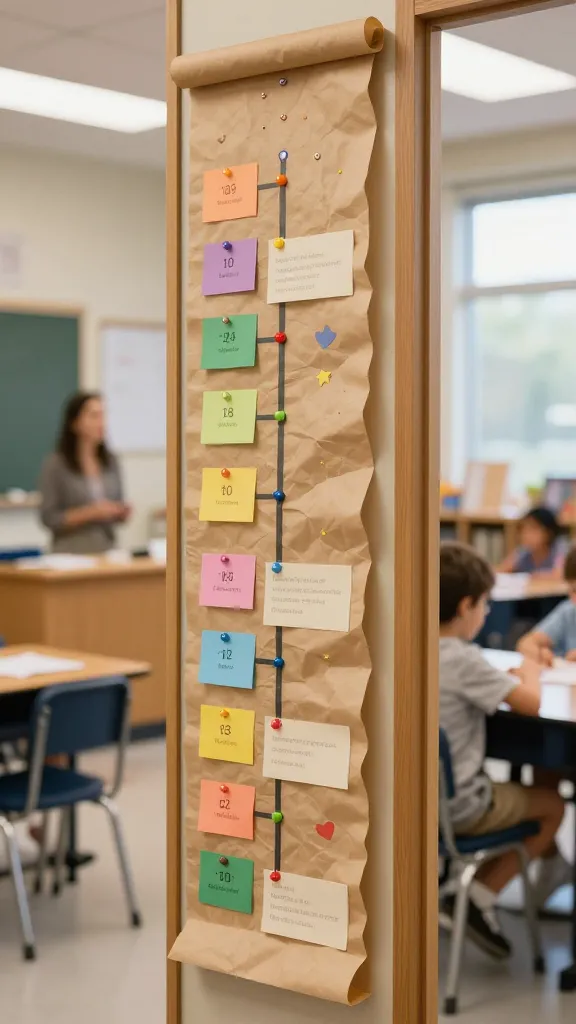
Celebrate growth with a vertical ribbon timeline. It’s a warm, motivating showcase that honors milestones—big and small—throughout the year.
Materials Needed
- Long strip of butcher paper or bulletin tape
- Colored tag cards or small paper banners
- Push pins or adhesive
How to Make It
- Stretch the ribbon vertically along the board edge.
- Attach milestone banners with dates and short descriptions (e.g., “Mastered Addition”).
- Add decorative stars or hearts to highlight achievements.
Pro Tips / Styling Ideas
- Leave space at the bottom for future achievements.
- Incorporate a student photo cluster for a personal touch.
End Note
Any grade would love a personalized timeline. It’s surprisingly motivational and incredibly easy to update.
6. Origami Doorway Gallery
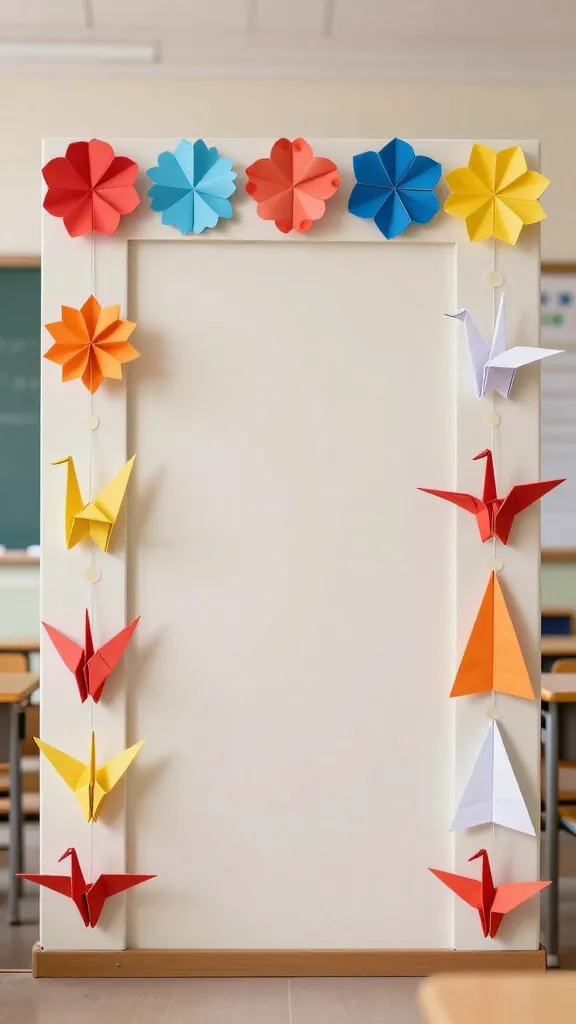
A row of folded paper art that frames a gallery-style board. This project brings depth and texture without needing heavy materials.
Materials Needed
- Colored origami paper or regular scrap paper in bold colors
- Thin string or washi tape
- Markers for captions
How to Make It
- Fold several sheets into decorative origami shapes (flowers, cranes, or sails).
- Aligned in a row, attach them with string or tape to mimic a doorframe.
- Label each fold with a short prompt or student’s name and achievement.
Pro Tips / Styling Ideas
- Vary sizes for a dynamic, doorway-like effect.
- Switch out shapes to match seasons or themes.
End Note
Gorgeous, airy, and surprisingly simple. It invites kids to move along the board and explore each piece.
7. Paper Tile Inspiration Grid
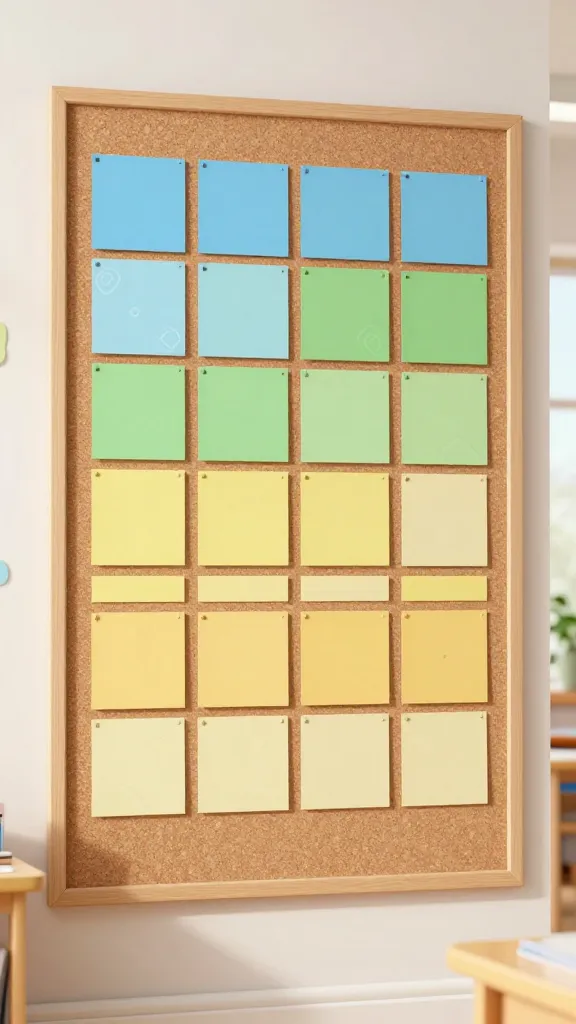
A grid of little tiles that impart lessons, quotes, or goals. It’s neat, organized, and visually satisfying—the perfect “save, pin, do” project.
Materials Needed
- Square paper tiles (3×3 inches works well)
- Colored pens or markers
- Adhesive or mounting putty
How to Make It
- Fill each tile with a word, statement, or quick fact.
- Arrange in a 4×4 or 5×5 grid and mount on the board.
- Leave a few blank tiles to invite student input.
Pro Tips / Styling Ideas
- Color-code tiles by subject (math in blue, language arts in pink, etc.).
- Swap in seasonal quotes to keep it fresh.
End Note
Minimalistic but bold. It’s a quiet hero of any classroom display, offering bite-sized wisdom at a glance.
8. Creature Classroom Clock Face
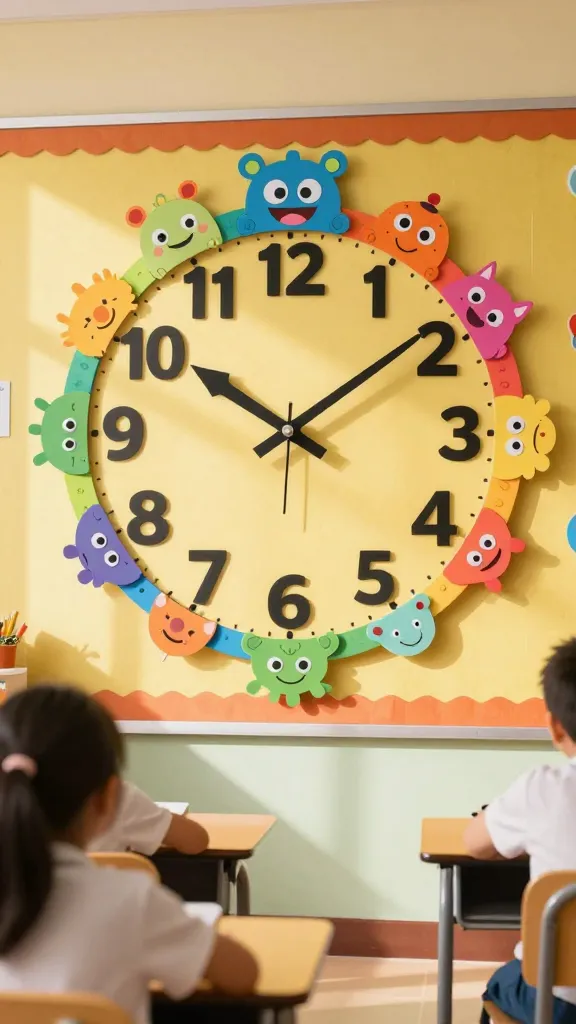
A playful clock made of circles and creatures that teaches telling time while brightening the wall. Students will orbit around this display daily.
Materials Needed
- Large circular cutouts in front-facing colors
- Smaller circles for numbers and hour markers
- Paper eyes, noses, smiles for character faces
How to Make It
- Assemble a big clock face with numbers arranged around the edge.
- Turn each number into a cute creature by adding eyes and smiles.
- Mount on the board with a movable clock hand (cut from paper).
Pro Tips / Styling Ideas
- Invite students to decorate the numbers on a rotating basis.
- Use glitter glue for a magical shimmer (if your school permits).
End Note
Educational and adorable—this one makes time-telling feel like playtime.
9. Minimalist Monochrome Monster Countdown
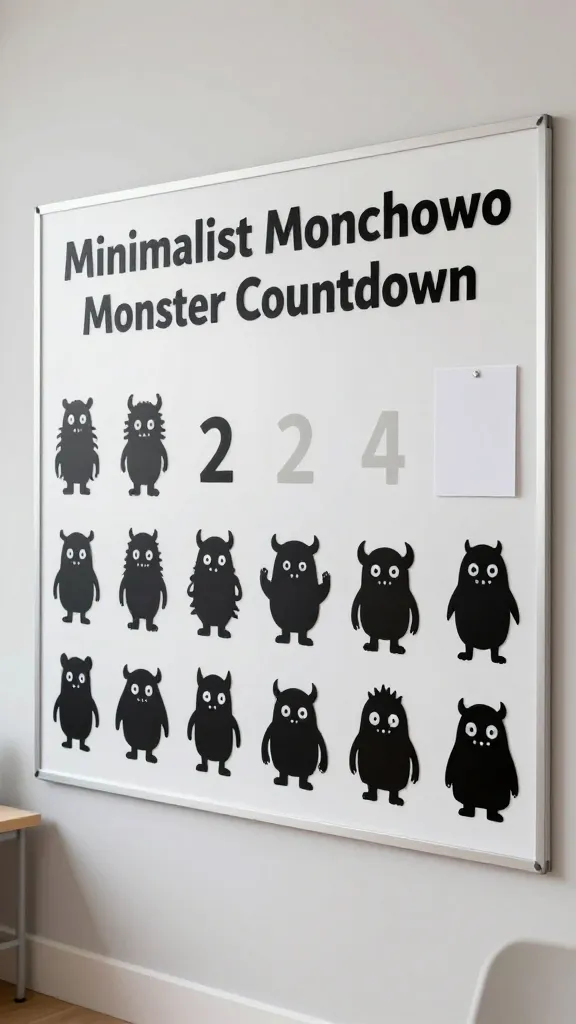
A chic countdown board using simple monochrome shapes. It feels modern and is super adaptable for holiday counts or daily tasks.
Materials Needed
- Black and white paper, or one color plus white
- Masking tape or mounting putty
- Number stickers or drawn numbers
How to Make It
- Create a row of small monster silhouettes with a single bold color.
- Label each with numbers counting down to a special day or event.
- Add a small sticky note with a task or goal for the day.
Pro Tips / Styling Ideas
- Keep the color palette tight to maintain the minimalist vibe.
- Change the countdown to a countdown to summer break or a project due date.
End Note
For teachers who love clean lines and a modern feel, this is your new go-to countdown board.
10. Quirky Quote Fold-Outs
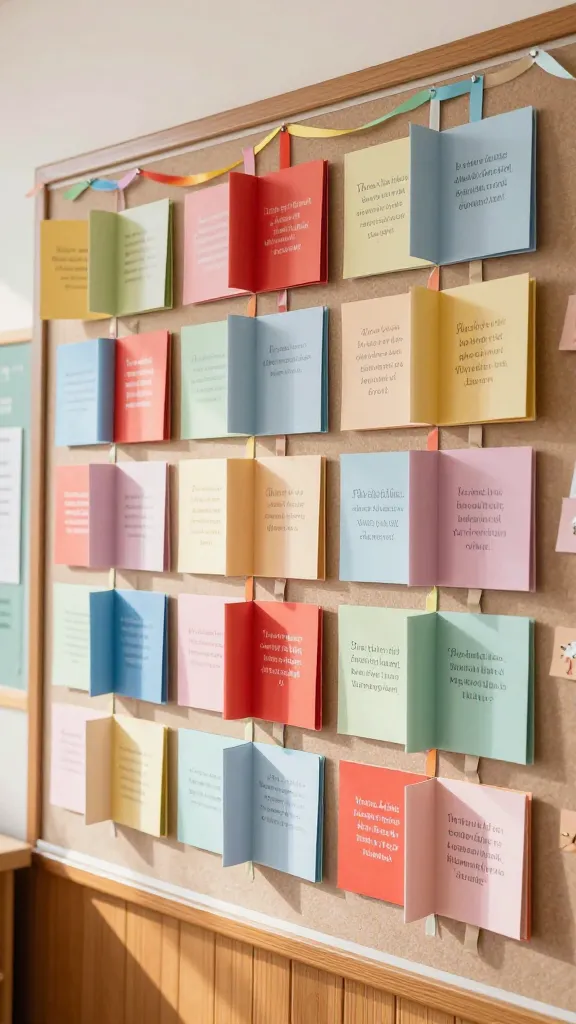
Paper folds turn into tiny 3D quotes that pop when opened. It’s a tiny theater on your wall—dramatic, delightful, and surprisingly easy to assemble.
Materials Needed
- Cardstock in various colors
- Ribbon or string for hanging
- Printed or handwritten quotes
How to Make It
- Fold small cards into a hinge with a short quote on the front.
- Attach to the board so they can flip open like a little book.
- Arrange in a cluster for a playful focal point.
Pro Tips / Styling Ideas
- Rotate quotes monthly to keep the inspiration fresh.
- Pair with a tiny decorative frame for a gallery look.
End Note
Who wouldn’t smile at a wall full of tiny, revealing surprises? It’s motivating and irresistibly cute.
11. Origami Banner of Growth
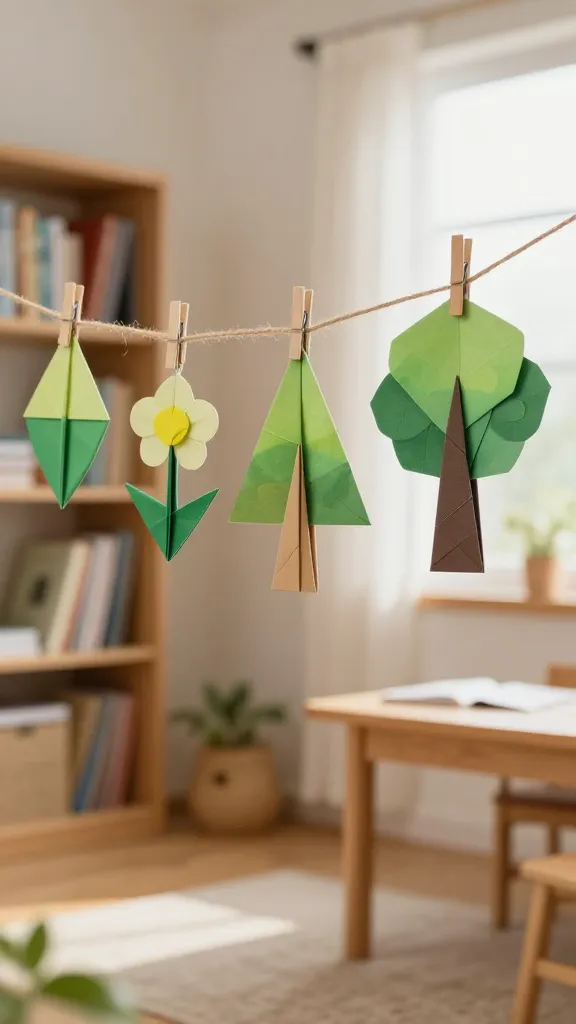
A string of origami shapes that tells a growth story—from seed to tree. It’s perfect for reading corners, science fairs, or student goal displays.
Materials Needed
- Square origami paper in a gradient
- String or twine
- Double-sided tape or mini clothespins
How to Make It
- Fold a series of origami shapes (flowers, trees, stars) in order from smallest to largest.
- Hang along a string with clips to swap in new shapes as students grow.
Pro Tips / Styling Ideas
- Label each shape with a milestone or skill.
- Mix matte and metallic papers for depth.
End Note
Elegant, symbolic, and surprisingly versatile for any grade level.
12. Paper Quilt Activity Wall
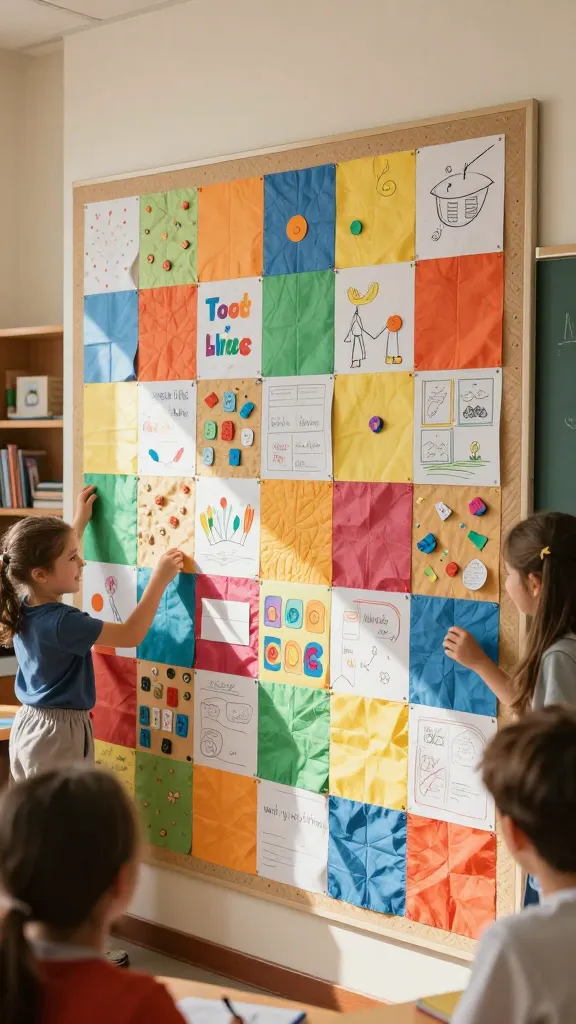
A quilt-like patchwork board where each square highlights a mini-lesson, student work, or a favorite concept. It’s warm, collaborative, and endlessly reconfigurable.
Materials Needed
- Colored paper squares (4×4 inches)
- Glue sticks or removable mounting putty
- Marker lines to create a grid on the board
How to Make It
- Decorate each square with a mini-lesson, a student quote, or a craft sample.
- Arrange into a large quilt grid; keep some squares open for new pieces.
Pro Tips / Styling Ideas
- Coordinate color families to illustrate themes (color-coded by unit).
- Encourage students to contribute a square during their unit celebration.
End Note
Cozy and collaborative, with a homey feel that kids naturally gravitate toward.
13. Paper Lanterns of Learning Milestones
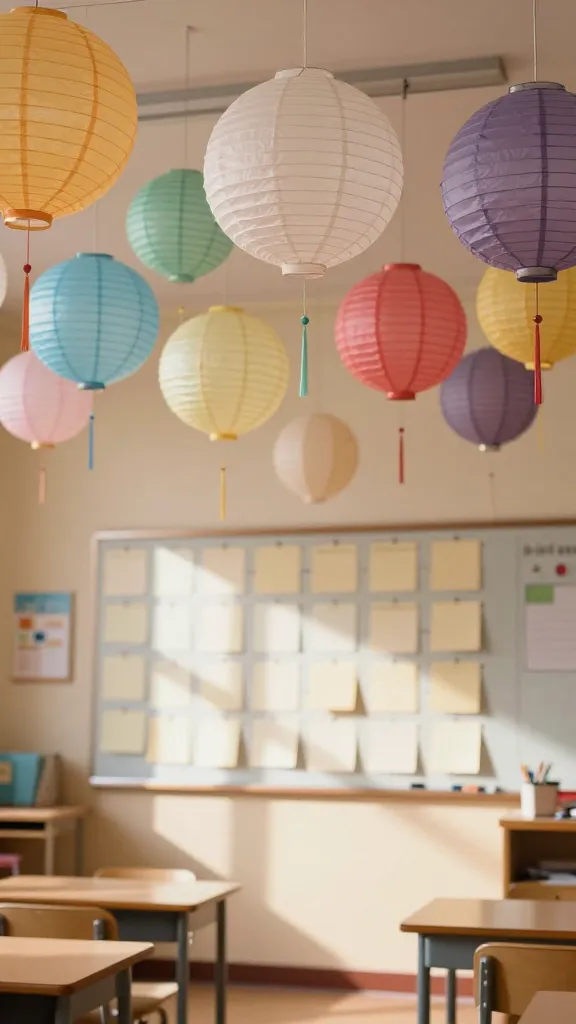
Delicate paper lanterns floating above a milestone wall. This ceiling-to-wall display gives a sense of celebration and growth—without needing a single string of real lanterns.
Materials Needed
- Colored tissue paper in multiple shades
- Thin string or fishing line
- Scissors and glue
How to Make It
- Layer tissue paper to create soft lantern shapes, sealing the edges with glue.
- Attach lanterns along a string at various heights to simulate a floating effect.
- Populate with milestone notes on the lanterns if desired.
Pro Tips / Styling Ideas
- Choose colors to match school spirit or current units.
- Mix sizes for a dynamic, whimsical look.
End Note
Enchanting and festive, this display brings a party vibe to the classroom every day.
Conclusion
Whether you’re decorating a year’s worth of units or just jazzing up a single wall, these 13 paper crafts offer quick, affordable, and highly shareable ways to make bulletin boards shine. Pick one to start, or dive in and try them all—your class will thank you with engaged eyes, curious questions, and a little extra buzz in the room.