15 Craft Ideas Birthday for Boys: Epic Diy Fun
Stuck on birthday crafts for the kid who already has everything? You’re in luck. These 15 completely unique ideas turn party prep into playtime, with quick builds, bold colors, and plenty of wow factor. Trust me, you’ll love how easy they come together—and how proudly the birthday boy claims each creation.
Let’s dive into a whirlwind of DIY delight that translates into party decor, gifts, and memorable keepsakes. FYI, these projects are crafted to be playful, a touch rugged, and absolutely Pinterest-worthy.
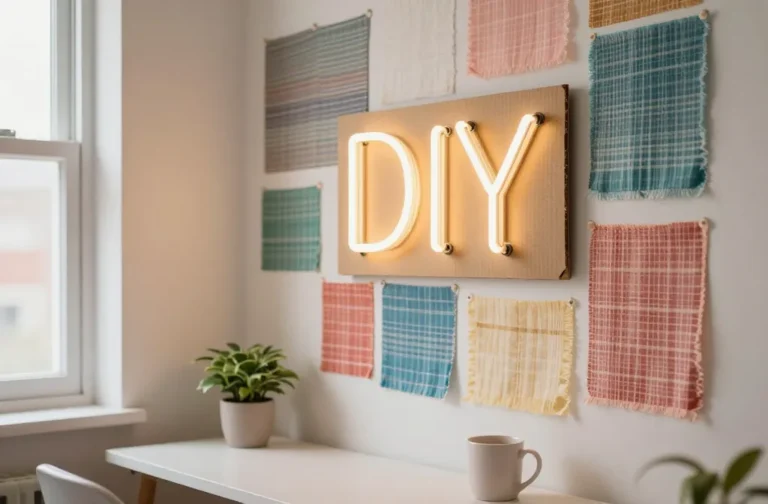
1. Neon Shield Wall Decals: Superhero Birthday Gallery
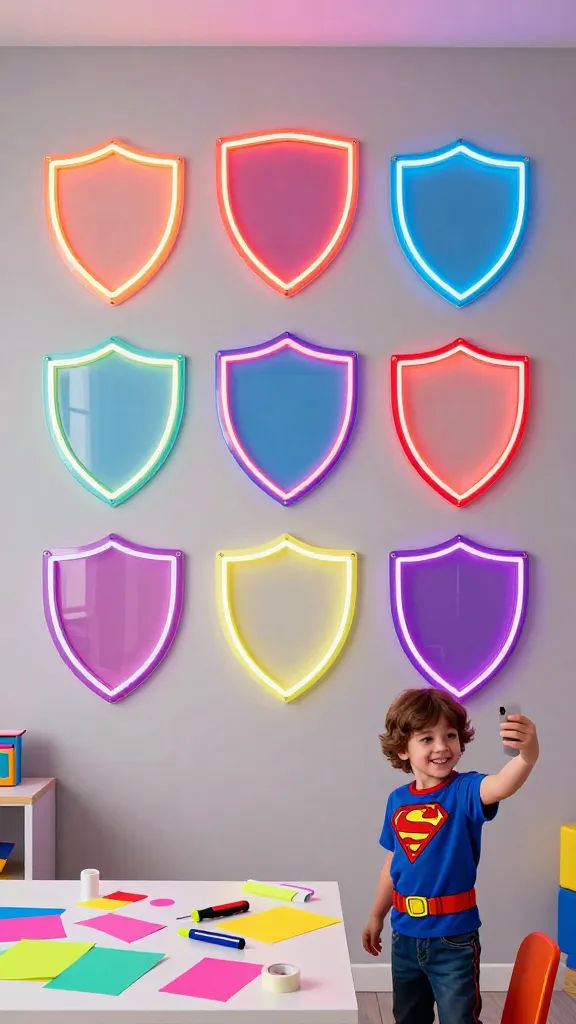
Imagine a wall transformed into a protection zone of bold neon shapes, ready to snap selfies in front of. This craft blends easy stenciling with removable decals to create a superhero vibe without committing to permanent walls.
Materials Needed
- Cardstock in bright neon colors
- Adhesive vinyl or removable sticker paper
- Stencil for shield shapes
- Scissors and craft knife
- Masking tape
How to Make It
- Trace shield shapes onto vinyl and cut out with a craft knife.
- Arrange on the wall in a dynamic grid or arc above the dessert table.
- Secure with low-tack tape so it won’t peel paint; remove easily after the party.
Pro Tips / Styling Ideas
- Mix neon pink, electric blue, and lime for high-impact visuals.
- Pair with a “Mission Complete” banner for a complete scene.
Who would love it: Aspiring superheroes and action-loving kids, perfect for a playroom makeover or birthday backdrop.
2. Cardboard Castle Dash Courses
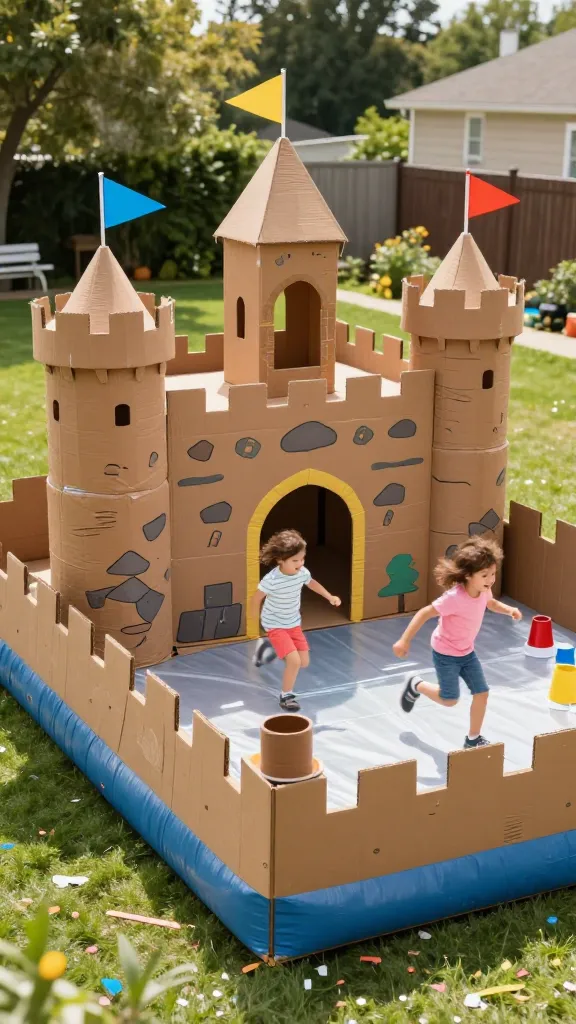
Turn a pile of cardboard into a miniature obstacle course fit for tiny knights. It’s inexpensive, sturdy, and endlessly adjustable for different party games or show-and-tell moments.
Materials Needed
- Large cardboard boxes
- Masking tape and scissors
- Colored markers or spray paint
- Plastic cups or hollow plastic tubes for towers
How to Make It
- Cut battlements and doorways into the boxes; tape structures together to form a castle layout.
- Decorate with faux flags and stone textures using markers or paint.
- Create a finish line and challenge kids to “defend the castle” with a mini race.
Pro Tips / Styling Ideas
- Use a timer and tiny shields as tokens for points.
- Store modular walls for future pretend-play or sleepover games.
Who would love it: Backyard adventurers and sci-fi fans who crave epic play spaces.
3. Space Rocket Cupcake Stand Makeover
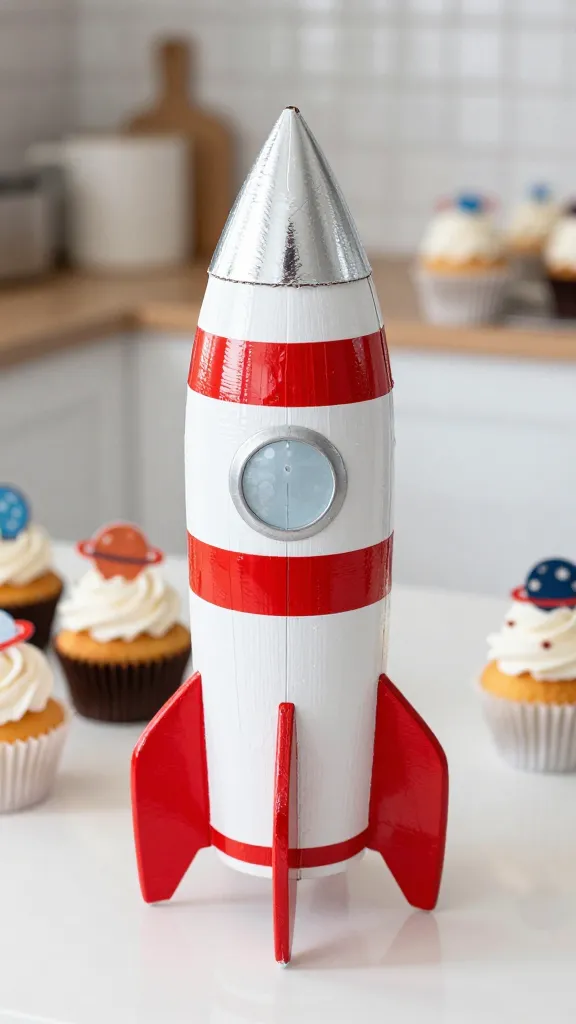
Transform a simple cupcake stand into a space rocket with a few bold paints and metallic accents. It’s dessert-display meets out-of-this-world décor, and your photos will glow on social feeds.
Materials Needed
- Plain wooden or cardboard cupcake stand
- Red, white, and metallic silver paint
- Painter’s tape for clean lines
- Glitter or metallic stickers
How to Make It
- Paint the stand in white with red accents. Use tape to create rocket stripes.
- Add a cone-top using silver-painted cardboard to mimic a rocket nose cone.
- Adorn with tiny window stickers and a metallic finish for splashy drama.
Pro Tips / Styling Ideas
- Place a “Launch” banner above the dessert table for a themed reveal.
- Top cupcakes with mini foil stars to carry the rocket vibe.
Who would love it: Space lovers and budding astronauts, ideal for a celestial party theme.
4. Giant Cardboard Dino Fossil Dig Kit
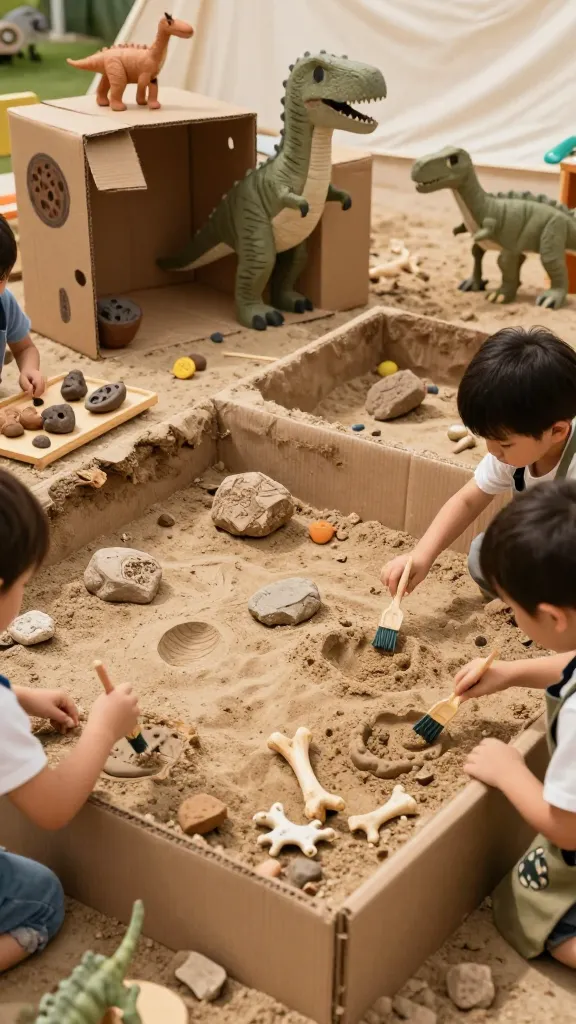
Dig up a prehistoric party moment with a DIY fossil dig that doubles as decor and a scavenger game. Kids get to unearth treasure while you bask in the dinosaur-mad joy.
Materials Needed
- Cardboard boxes, craft brushes
- Air-dry clay or plaster strips
- Paints in earthy tones
- Small plastic “fossil” items or shells
How to Make It
- Shape faux fossils by pressing clay into shell shapes and imprinting with toy bones.
- Let dry, then bury them in a shallow sandbox or a big cardboard tray filled with sand or rice.
Pro Tips / Styling Ideas
- Label sections with tiny memory notes of “fossil findings.”
- Use brown, tan, and slate colors for an authentic look.
Who would love it: Young paleontologists and adventure seekers, great for an indoor sandbox alternative.
5. DIY Mini Basketball Hoop Gift Jars
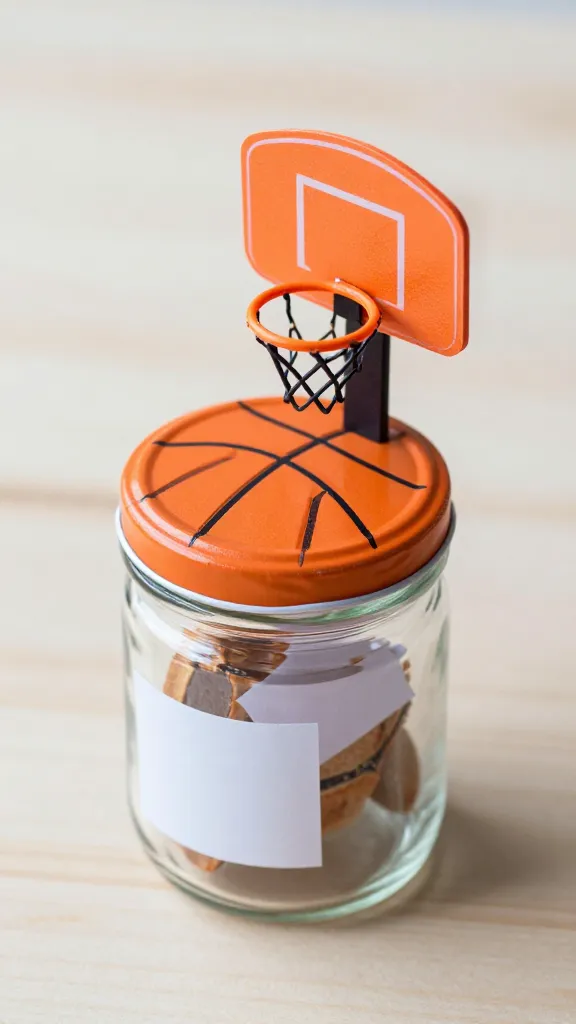
Give a gift that’s both cute and useful: mini jars with tiny hoops. They’re perfect for party favors, desk decor, or a playful stocking stuffer come winter.
Materials Needed
- Small glass jars with lids
- Mini basketball hoops or DIY hoops with wire and hoop
- Orange paint, black markers
- Small treats or notes for filling
How to Make It
- Paint the lids orange and add a black line to mimic a basketball seam.
- Affix a tiny hoop on the side of the jar or lid using glue.
- Fill with treats and cap with a label like “Score!”
Pro Tips / Styling Ideas
- Use a row of jars on a dessert table as a visual game challenge.
- Personalize with the birthday boy’s name on each jar.
Who would love it: Sports fans and party planners wanting sweet takes on party favors.
6. Grassy Lawn Dice Toss Game
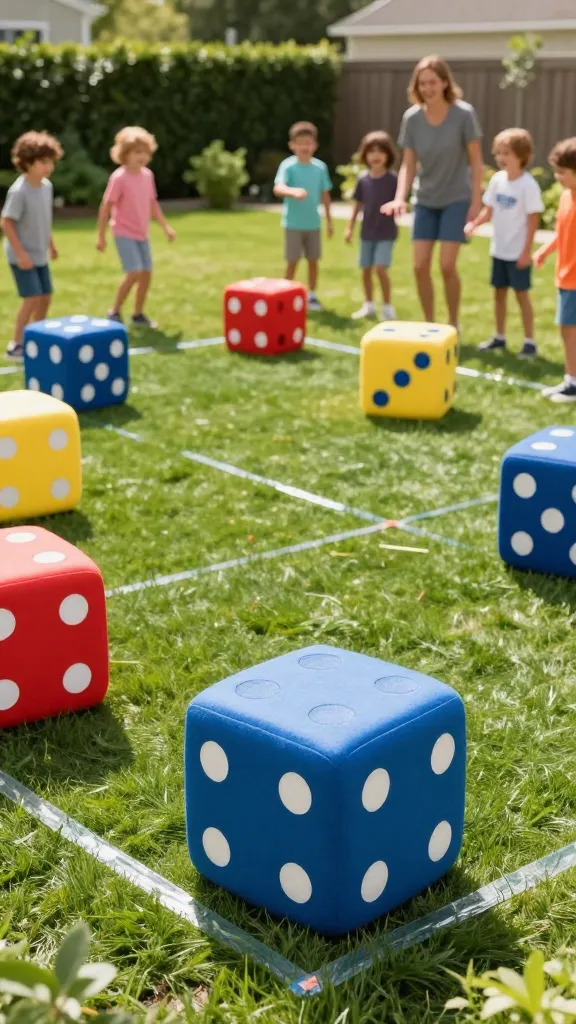
Turn the yard into a battlefield of luck and skill with oversized foam dice and a turf-like playing field. It’s quick to set up and endlessly reusable.
Materials Needed
- Foam dice (large size)
- Astroturf or green felt
- Duct tape for border
- Marker for scoring
How to Make It
- Lay turf/felt on the ground and mark score lines with tape.
- Decorate dice faces with numbers or symbols that match the game rules.
- Let kids take turns tossing and tally scores with a simple scorecard.
Pro Tips / Styling Ideas
- Use chalk to write the rules on a small board for quick reference.
- Create a trophy ribbon for the winner to celebrate!
Who would love it: Outdoor-loving kids who crave active party games and friendly competition.
7. Glow-Glow Balloon Monster Bouquets
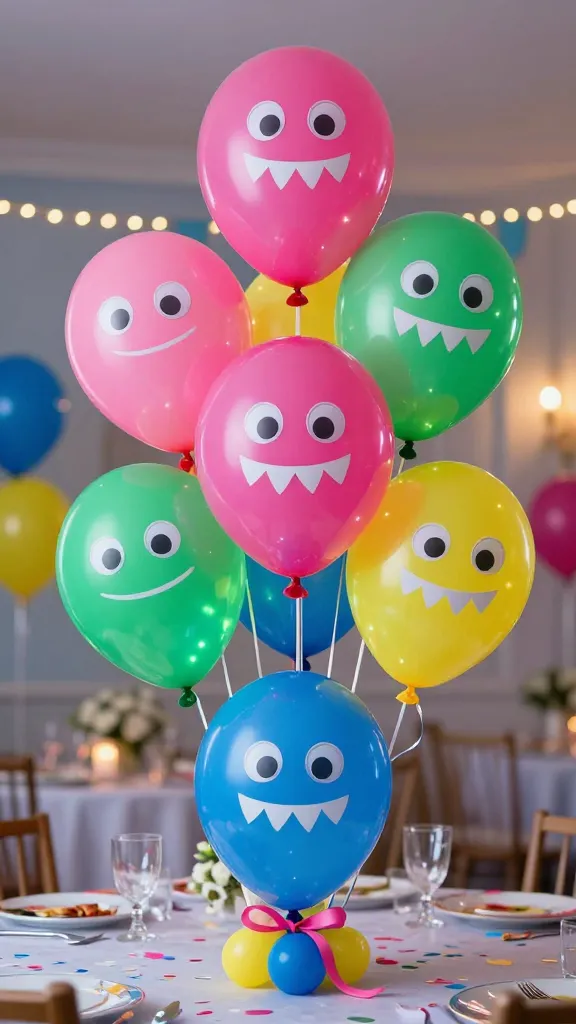
Every birthday needs a little glow. Turn balloons into friendly “monsters” by adding eyes, teeth, and glow sticks for a beaming centerpiece that glows after sundown.
Materials Needed
- Assorted balloons in bold colors
- Glow sticks or LED balloons
- Googly eyes, cardstock teeth
- Ribbon or string for ties
How to Make It
- Insert glow sticks inside uninflated balloons before inflating; tie securely.
- Attach googly eyes and candy-tooth smiles using paper or sticker materials.
- Group balloons into a few monster bouquets with ribbons for hanging or table centers.
Pro Tips / Styling Ideas
- Place a dim lamp nearby to let the glow pop in photos.
- Name each monster for a playful photo wall caption.
Who would love it: Grinning kids who adore cute creatures and glow-in-the-dark vibes.
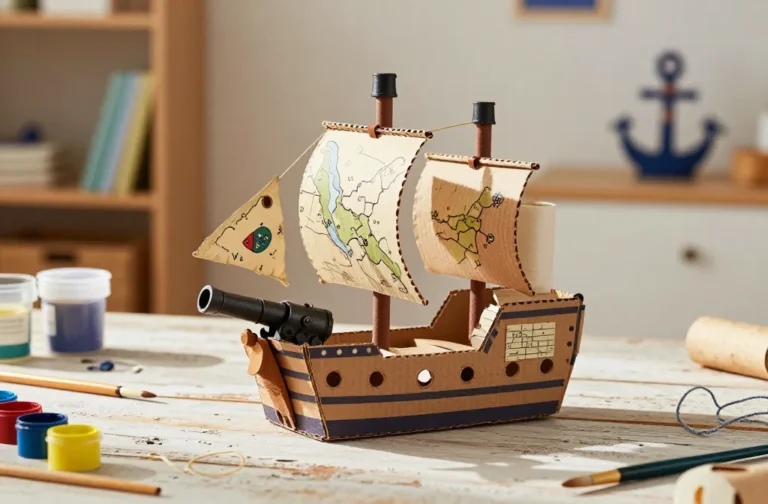
8. Pirate Map Treasure Hunt Banner
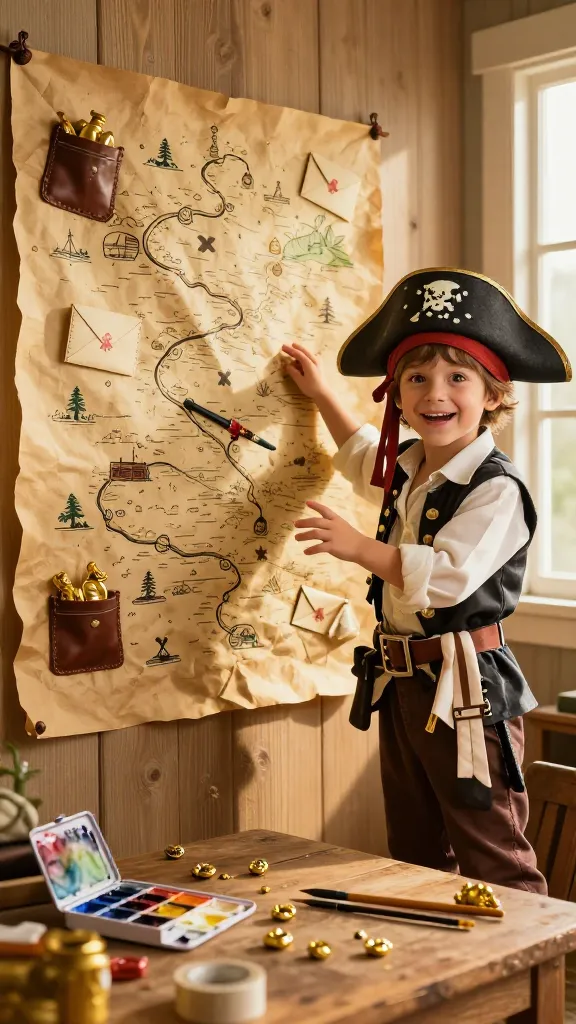
Set the scene with a treasure-hunting banner that doubles as a map and keepsake. The birthday kid can guide guests through a mini scavenger hunt for hidden loot.
Materials Needed
- Brown kraft paper or fabric banner
- Markers, ink pads, or watercolor
- Small gold-painted trinkets as “treasure”
- Masking tape to hang
How to Make It
- Paint a winding path across the banner with landmarks and X marks the spot.
- Attach tiny pockets or envelopes containing clues or small prizes.
- Hide real treasures around the party area for a map-guided hunt.
Pro Tips / Styling Ideas
- Roll up the map into tubes for a dramatic opening reveal.
- Include a “Captain’s Log” guestbook where guests sign their names.
Who would love it: Adventure seekers and treasure-hunting fans who crave immersive party games.
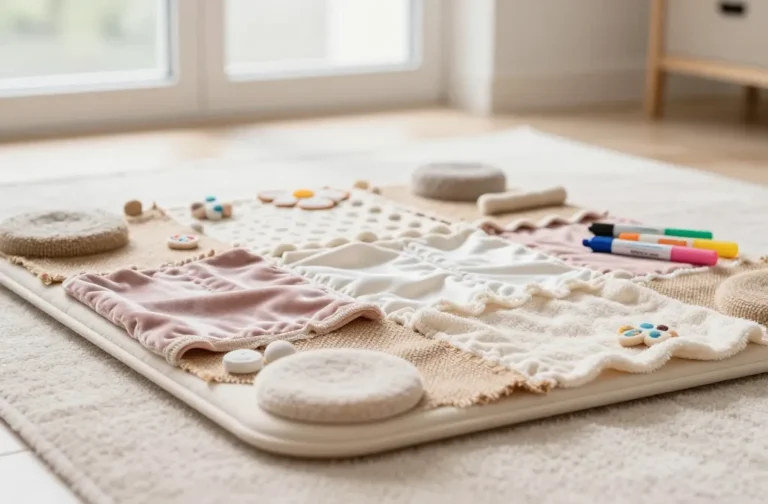
9. Monster-Felt Plush Horns Desk Ornaments
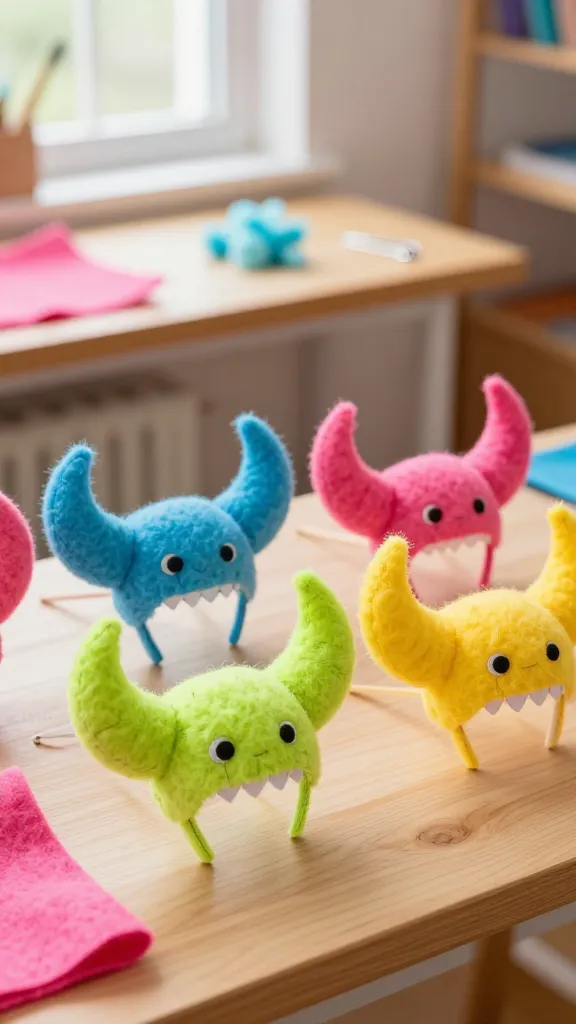
Soft, goofy, totally charming—these felt horns become desk decor or party favors that kids can keep. They’re easy to sew or even glue for a no-sew version.
Materials Needed
- Felt sheets in bold colors
- Polyfill stuffing
- Safety pins or small pins to attach to headbands
- Optional eyes or teeth embellishments
How to Make It
- Cut horn shapes, stitch or glue with a quick hand-stitch or fabric glue, and stuff lightly.
- Attach to headbands or simple sticks to display on desks as mini mascots.
Pro Tips / Styling Ideas
- Offer a DIY station where kids color horns with fabric markers.
- Pair with a “Roar, Birthday Boy!” banner for a playful vibe.
Who would love it: Crafters who want soft, child-safe keepsakes with big personality.
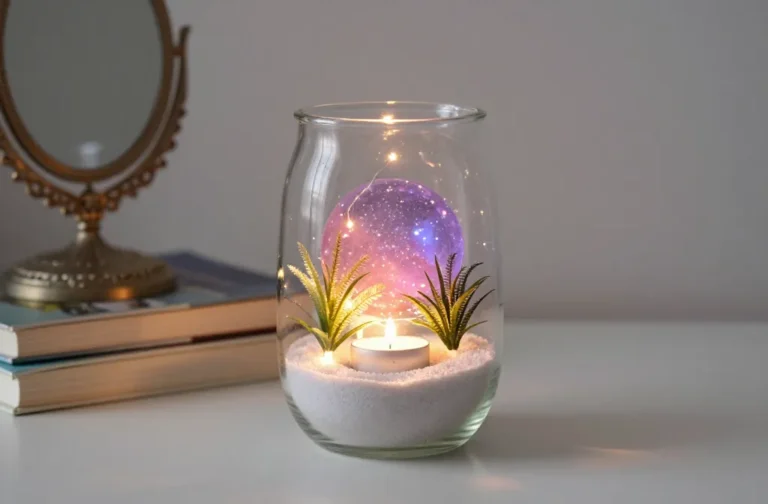
10. Rain Cloud Lockets: Tiny Water-World Keepsakes
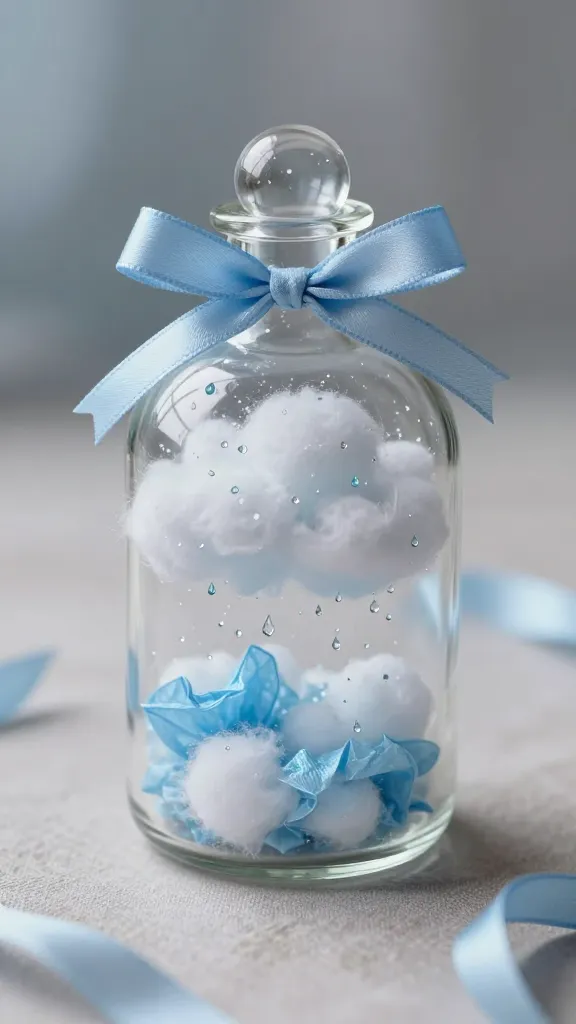
Capture a rainstorm in a bottle—well, sort of. These mini rain cloud lockets are adorable, portable, and surprisingly soothing as desk decor or pocket surprises.
Materials Needed
- Small clear bottles or jars
- Blue tissue paper, cotton batting
- Gems or tiny beads for raindrops
- Blue ribbon to seal and decorate
How to Make It
- Fill jar with blue tissue and cotton to resemble a cloud; drop little beads as raindrops.
- Seal with lid and decorate with a ribbon bow.
Pro Tips / Styling Ideas
- Label with the birthday year or the child’s name for a keepsake effect.
- Gift in a little drawstring pouch for an extra special presentation.
Who would love it: Dreamy, whimsical souls who adore small, tactile toys.
11. Upcycled Tin Toy Canvas Art
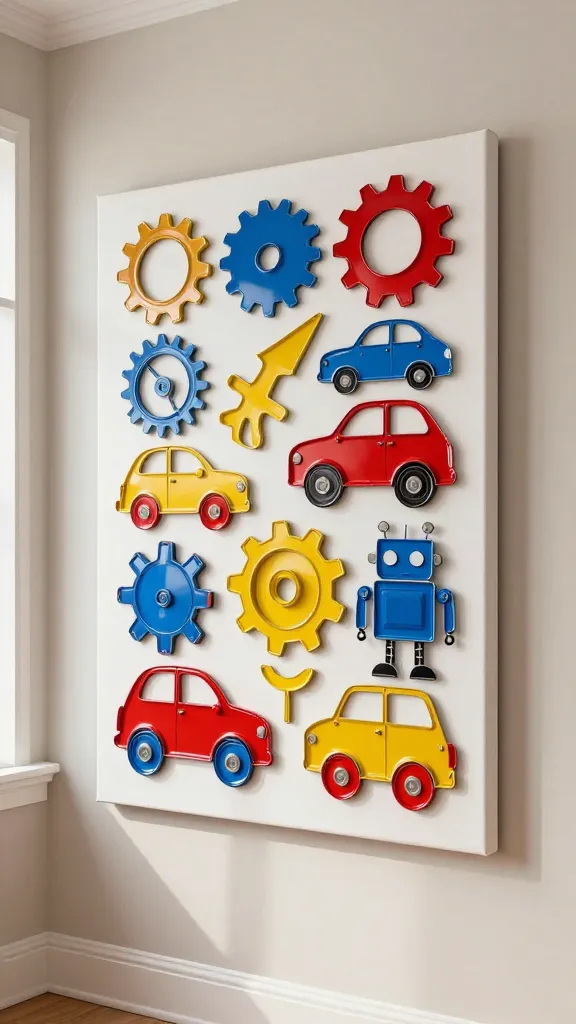
Give old tin toys a fresh life as bold wall art. It’s an eco-friendly project with a modern, graphic edge that looks amazing in a playroom or hallway gallery wall.
Materials Needed
- Old tin toy pieces or metal shapes
- Canvas or sturdy display board
- Acrylic paints in bright primaries
- Adhesive spray or fast-setting glue
How to Make It
- Arrange the tin shapes on the canvas to form a playful scene or abstract composition.
- Adhere with spray glue and paint around the edges for cohesion.
Pro Tips / Styling Ideas
- Keep the palette bold and child-friendly—red, yellow, blue, and black.
- Hang in a grid with other art blocks for a dynamic wall.
Who would love it: Upcyclers and lovers of bold, industrial-chic décor.
12. DIY Rock-Painting Passport Coaster Set
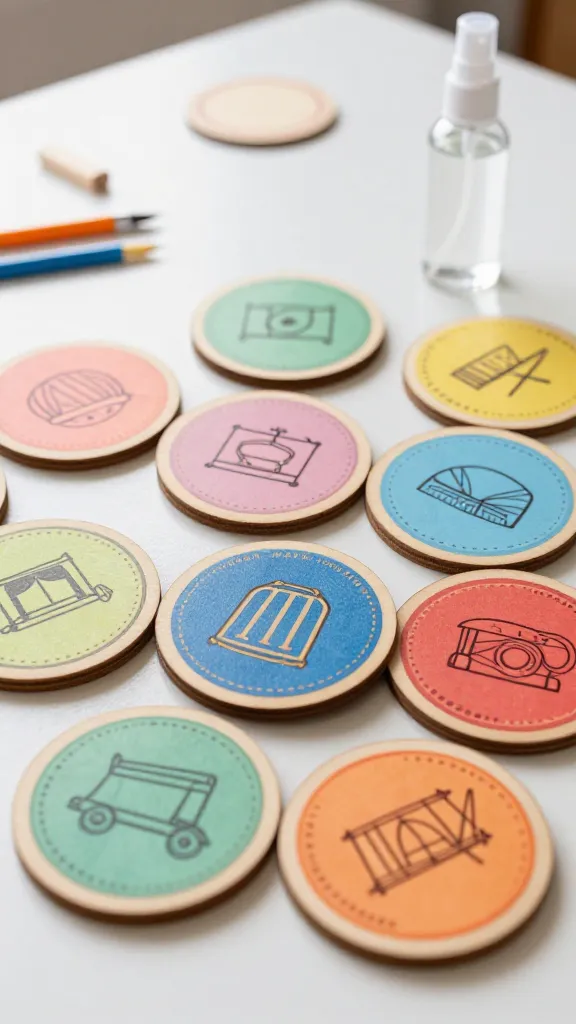
Turn ordinary coasters into passport-inspired mini works of art. Each coaster features a country motif, stamp, or flag—perfect for travel-obsessed birthday kids.
Materials Needed
- Wooden or cork coasters
- Acrylic paints, fine-tipped markers
- Clear sealant spray
- Small stamps or stencils for uniform shapes
How to Make It
- Paint each coaster with a different country’s color palette and a simple icon.
- Stamp or stencil a “passport stamp” on each one for a cohesive theme.
- Seal to protect from drink rings and spills.
Pro Tips / Styling Ideas
- Package in a mini travel folder with a note about “adventurer’s shelf.”
- Include a small map graphic on the back of the set for flair.
Who would love it: Travel fans, souvenir lovers, and those who appreciate functional art.
13. Steampunk Gear Mobile for Wall or Ceiling
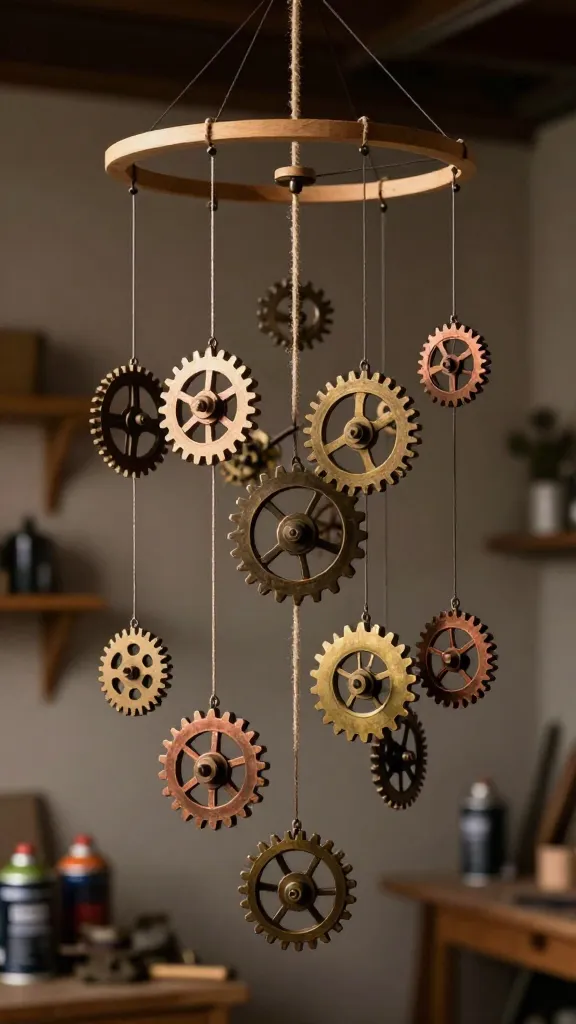
Bring a hint of Victorian sci-fi to the party with a hanging mobile crafted from mini gears, cogs, and metal tones. It’s a striking focal point that’s surprisingly easy to assemble.
Materials Needed
- Assorted small metal gears and washers
- Natural twine or black string
- Foam or light wooden dowels
- Spray paint in bronze, copper, and brass tones
How to Make It
- Spray paint gears and washers; let dry. Tie them at varying lengths along the string to form a mobile.
- Attach strings to a central dowel or hoop to hang from the ceiling.
Pro Tips / Styling Ideas
- Hang near a reading nook or play corner for an industrial vibe.
- Pair with a “Mechanic’s Workshop” party theme banner.
Who would love it: Fans of retro-future aesthetics and bold metallic textures.
14. Cardstock Battle Shields: DIY Gladiator Arena
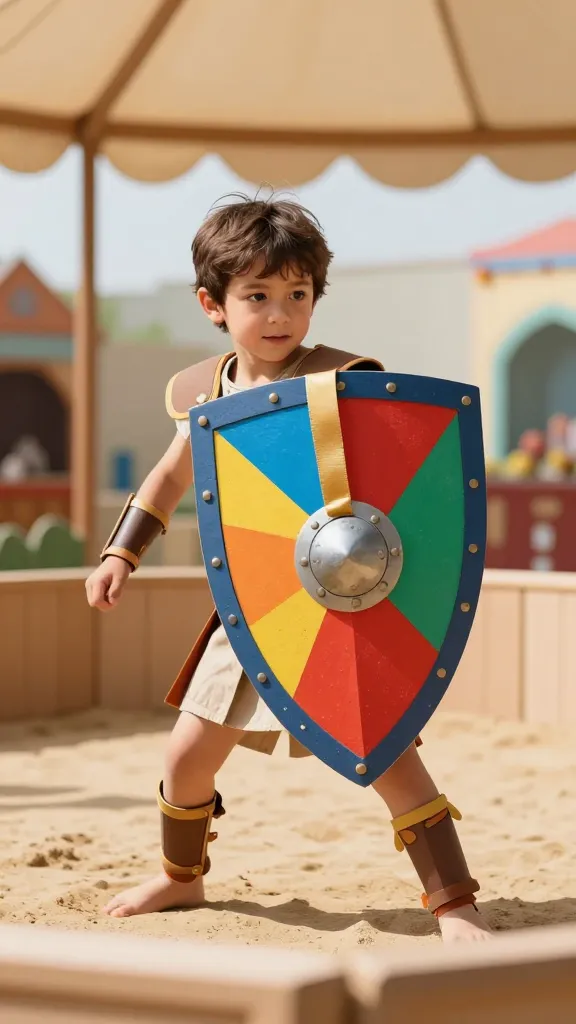
Shields made from cardstock become the perfect prop for a playful battle game or a dramatic photo booth moment. Quick to cut, easy to decorate, endlessly customizable.
Materials Needed
- Thick cardstock or foam board
- Poster paints or markers
- Ribbon or yarn for grip
- Optional stickers or foil tape for details
How to Make It
- Cut shield shapes and decorate with bold color blocks, stripes, and symbols.
- Attach a ribbon handle to the back for easy grip.
Pro Tips / Styling Ideas
- Host a mini “arena” with a target or foam sword play, then switch to photo booth mode.
- Name each shield after mythical beasts for extra character.
Who would love it: Fans of role-play, knights, and bold graphic art.
15. Hand-Painted Cosmic Rocket Snail Races
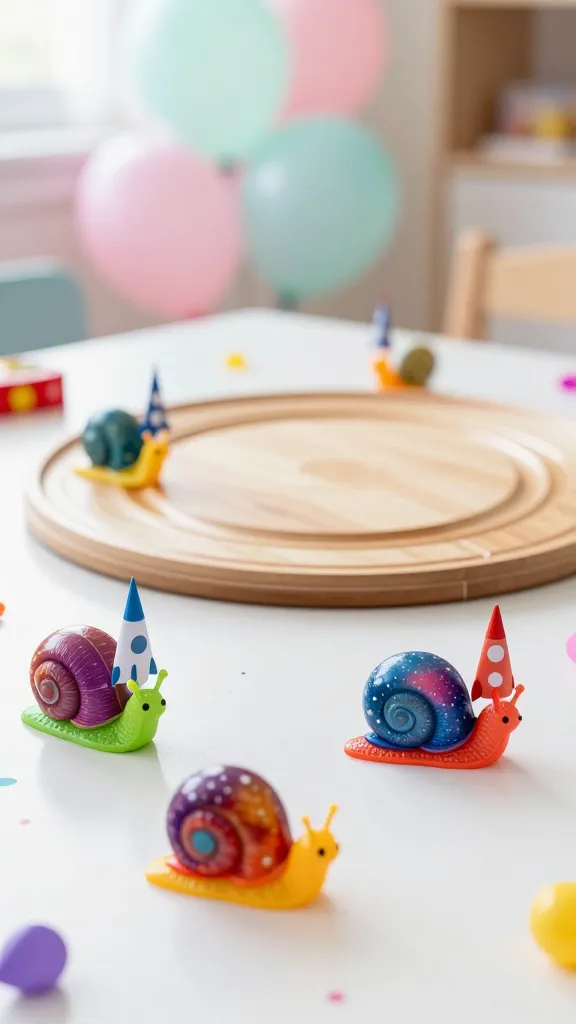
Yes, you read that right—snail races with cosmic rockets. It’s a quirky, funny, kid-friendly activity that doubles as a quirky centerpiece and a story-worthy moment.
Materials Needed
- Plastic snail toys or DIY snail shapes using clay
- Mini plastic rockets or paper cone tops
- Bright acrylic paints
- Turntable or lazy Susan for race track
How to Make It
- Paint snail bodies in vibrant colors; attach a paper rocket to the shell as a “rocket cap.”
- Set up a simple race track on a table and let the snails glide to the finish line with a gentle push.
Pro Tips / Styling Ideas
- Offer small prizes for fastest, most colorful, and best-looking snail.
- Document the race with a playful commentary board for photos.
Who would love it: Kids who adore whimsy, science fiction, and goofy games.
Conclusion
These 15 completely unique craft ideas for a birthday party are designed to spark imagination, be easy to assemble, and deliver big, shareable moments. Pick a few that match your space, time, and budget—and you’ll have a memorable celebration that kids will still talk about weeks later. Ready to dive in? Try one (or all) of these crafts and watch the party come alive with color, creativity, and a whole lot of joy.