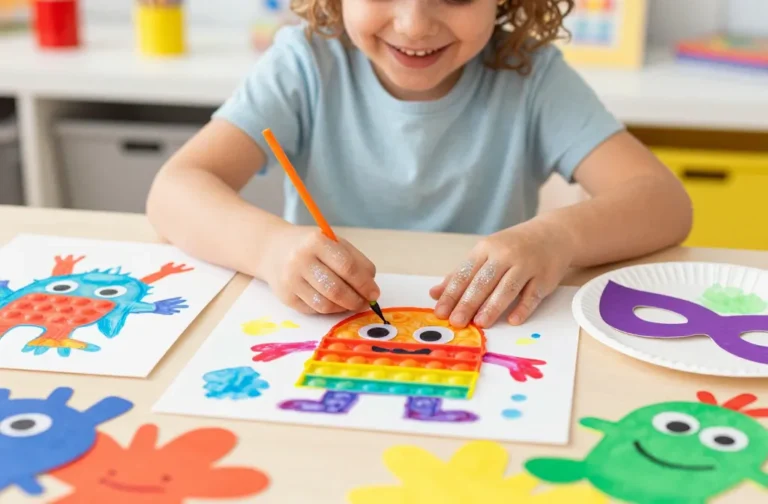
5 Actually Cool Activities for Teens and Tweens to Do at Home
Ready to shake up weekend vibes with buzzworthy DIYs? These five totally unique crafts are perfect for teens and tweens who want stylish, doable projects without a ton of fuss. Trust me, you’ll love the creativity payoff and the brag-worthy photos that come with each piece.
1. Neon Resin Coaster Tiles That Glow in the Dark
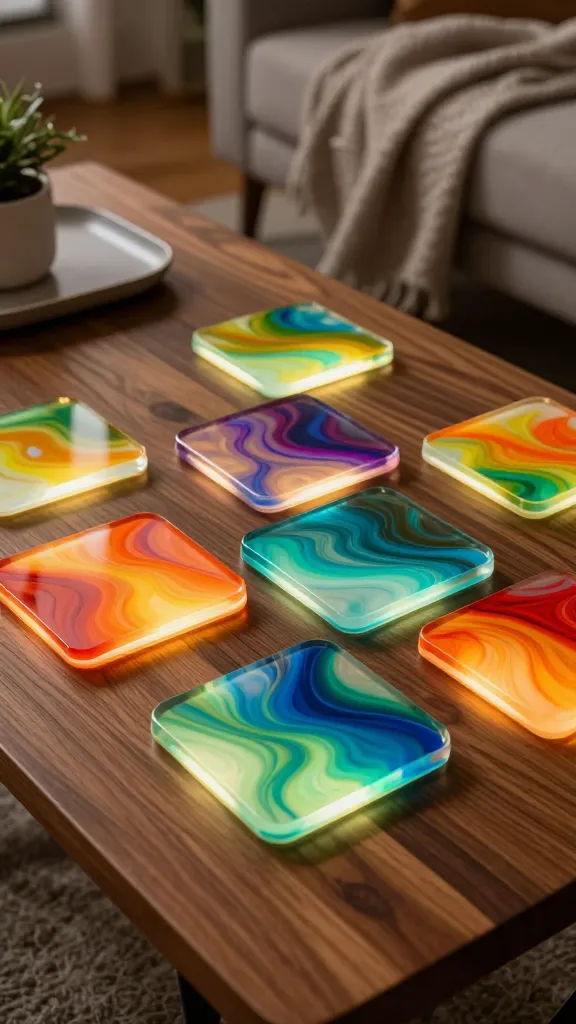
Picture this: a set of glossy, glow-in-the-dark coasters that look epic on any coffee table or desk. These resin coaster tiles are a sleek blend of color, glow, and clean lines—perfect for slow Saturdays or last-minute gift-giving. The result feels high-end but is totally doable with basic supplies.
Materials Needed
- Clear epoxy resin kit (includes hardener)
- Plastic or silicone coaster molds
- Acrylic paints or dye drops in bold colors
- Glow-in-the-dark powder or resin pigment with glow
- Disposable cups and stir sticks
- Mixing cups, gloves, and a protected work surface
How to Make It
- Prep your molds with a light silicone spray or a quick wipe of oil for easy release.
- Mix resin per the package directions, then divide into 3–4 cups for color choices.
- Add bold colors and a pinch of glow powder to each cup. Stir until smooth.
- Pour a thin base layer into each mold, then add swirling color layers for a marbled look.
- Finish with a clear top layer. Allow to cure in a dust-free area overnight.
Pro Tips / Styling Ideas
- Layer glow powder more heavily in the center for a bright “orb” effect when dark.
- Seal with a thin clear coat if you want extra shine and scratch resistance.
- Pair with a matching glowing tray or jewelry dish for a cohesive set.
These neon glow coasters are ideal for dorm rooms, living rooms, or gifting a friend who loves bold color. They scream playful sophistication and are a perfect weekend project you’ll actually use.
2. Textile Tie-Dye Wall Toppers: Stencil Silk Scarves
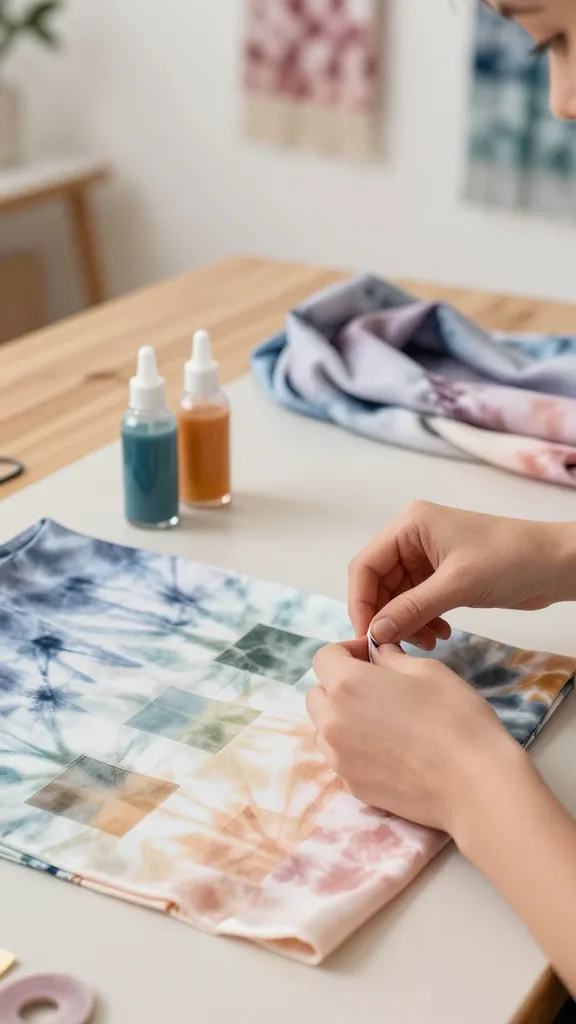
Turn plain fabric into gallery-worthy wall art with a chic tie-dye technique using stencils. This isn’t your average “choose a color” DIY—think geometric shapes, negative space, and soft, wearable textures that double as decor. It’s easy to customize for your room’s vibe, from retro to modern minimalist.
Materials Needed
- 2–3 lightweight scarves or thin cotton bandanas
- Fabric dye in 2–3 complementary colors
- Stencils (geometric shapes work great)
- Squeeze bottles or droppers for precise color
- Plastic bags or plastic wrap to keep colors from blending uncontrollably
- Iron and parchment paper for heat-setting (follow dye instructions)
How to Make It
- Lay fabric flat and position stencils where you want color blocks to appear.
- Apply dye through the stencil with a droplet or light spritz, keeping colors separate.
- Peel away stencils while the dye is wet to preserve clean edges.
- Wrap each scarf in plastic and let the colors set according to dye instructions.
- Rinse, air-dry, then heat-set with an iron for lasting vibrancy.
Pro Tips / Styling Ideas
- Use a muted palette for a sophisticated wall piece, or go bold with neon accents for a pop of energy.
- Frame a few as a gallery wall or hang solo over a bed or desk for instant mood.
- Experiment with metallic dyes for a luxe twist.
These wall toppers bring texture and color into any teen room. They’re a stylish, wearable craft that translates beautifully into home decor—designer vibes at DIY prices.
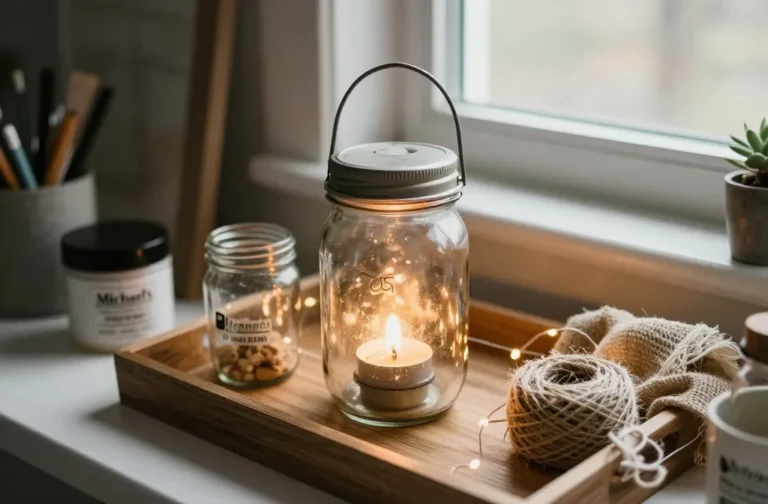
3. Terrarium Night Light Jars
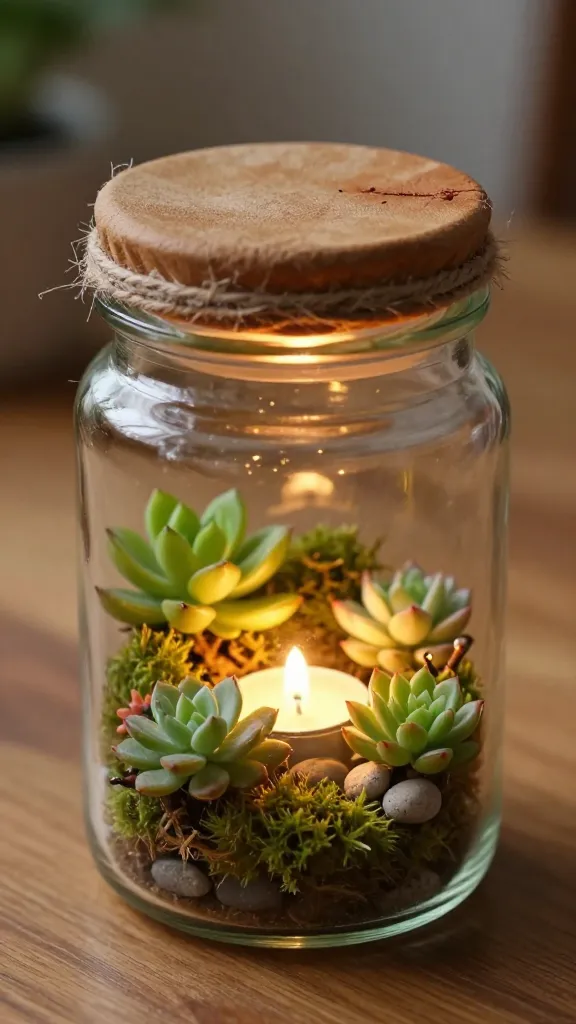
Small glass jars become your nighttime heroes with tiny fairy gardens and a warm glow. This project blends nature-inspired pieces with cozy lighting, making a perfect centerpiece or bedside light. It’s adorable, functional, and surprisingly simple to assemble.
Materials Needed
- Small glass jars with lids or decorative bottles
- Mini faux succulents, moss, small stones
- Battery-operated LED tea lights
- Fine twine or faux leather for a rustic cap
- Hot glue gun or strong craft glue
- Optional: tiny figurines or charms for personality
How to Make It
- Layer a small bed of pebbles in the bottom for drainage, add moss, and tuck in tiny plants.
- Place a LED light in the center and position the lid so the light shines softly through the glass.
- Wrap the jar with twine around the neck and secure with glue for a cozy cap.
- Pop a tiny charm inside or attach a note to give it a personal touch.
Pro Tips / Styling Ideas
- Display in clusters of three at different heights for maximum impact.
- Swap in longer-lasting moss and dried florals for a low-maintenance option.
- Use warm white LED lights to maintain a tranquil glow in bedrooms.
Terrarium night lights offer a peaceful, nature-inspired aesthetic with a gentle glow. They’re perfect as dorm-room accents, nightstands, or giftable keepsakes that feel thoughtful and stylish.
4. Upcycled Magazine Wall Mobiles
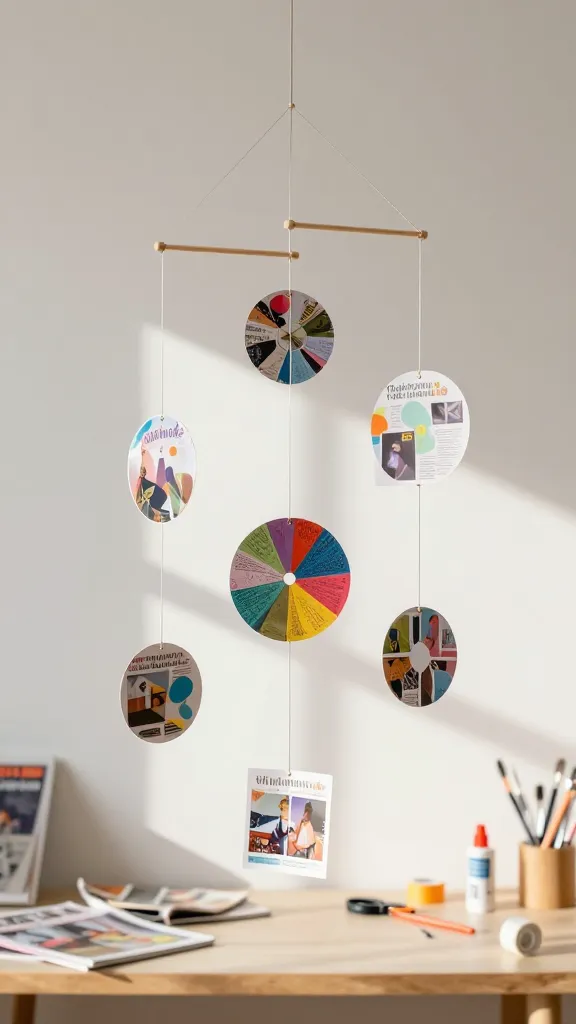
Turn recycled paper into airy kinetic art you can hang anywhere. These mobiles dance with the slightest breeze and add a whimsical, Instagram-worthy touch to any space. They’re lightweight, customizable, and seriously satisfying to create.
Materials Needed
- Old magazines or printed gift wrap
- Cardstock or lightweight cardboard for shapes
- String, yarn, or fishing line
- Thin dowel or metal embroidery hoop for the frame
- Hole punch and scissors
- Glue or double-sided tape
How to Make It
- Cut magazine pages into various shapes: circles, diamonds, teardrops.
- Fold lightly to add dimension, then attach shapes to strings at different lengths.
- Anchor strings to the dowel or hoop, creating a balanced, multi-tiered mobile.
- Adjust lengths so pieces float at different heights when hung.
Pro Tips / Styling Ideas
- Choose a color palette that matches your room for a cohesive look.
- Hang near a sunny window so the light filters through the paper for a kaleidoscope effect.
- Use metallic accents or glossy magazine pages to catch the eye in photos.
Upcycled magazine wall mobiles are a clever, eco-friendly way to add motion and whimsy to a space. They’re conversation starters and a gentle DIY that yields big visual payoff without heavy materials.
5. Personalized Plaid-Pillow Painted Canvas
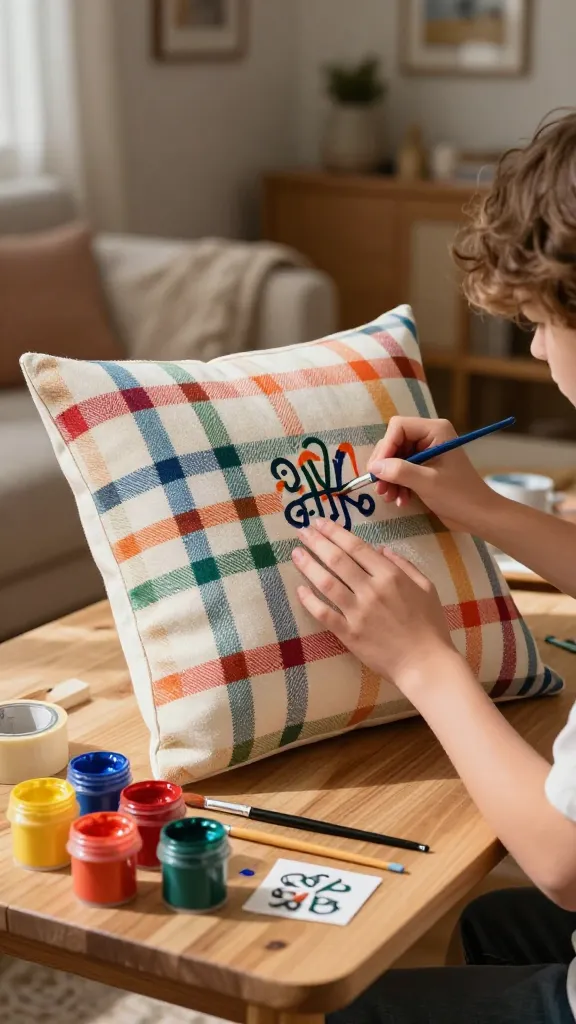
Canvas, paint, and a splash of personality—this project lets teens and tweens craft a one-of-a-kind pillow design that doubles as wall art or a cozy throw. With bold patterns, monograms, or doodle-style slogans, the canvas pillow becomes a plush centerpiece for bedrooms or lounge corners.
Materials Needed
- Stretched canvas or pre-stuffed pillow form with washable cover
- Acrylic paints in your chosen colors
- Paint brushes of varying sizes
- Painter’s tape for clean lines
- Optional: stencils, fabric markers, or mod podge
- Sealant spray for fabric protection (if pillow form is used)
How to Make It
- Plan your design with a quick sketch on paper, then tape off clean lines on the canvas.
- Paint bold stripes, plaid checks, or a modern abstract motif. Don’t worry about being perfect—quirky is the charm.
- Let the paint dry, then add a secondary color for contrast or a monogram for a personal touch.
- If using a pillow form, seal the painted surface and insert the form back into the case.
Pro Tips / Styling Ideas
- Match the palette to your room’s textiles for a cohesive vibe.
- Use a stencil for precise lettering if you want a slogan.
- For wall display, skip the pillow form and mount the canvas on a decorative frame to mimic modern art.
This personalized plaid-pillow canvas is a versatile keepsake you’ll love lounging with or showing off on a bed or couch. It’s an expressive, playful project that invites you to put your stamp on your space.
Conclusion
Five completely distinct crafts, five chances to flex creativity and have real-world, photo-worthy results. Each project blends easy-to-find materials with stylish outcomes, so you can dive in without a ton of fuss. Pick one, or go all in and turn your home into a gallery of teen-made goodness. Have fun, and happy crafting!