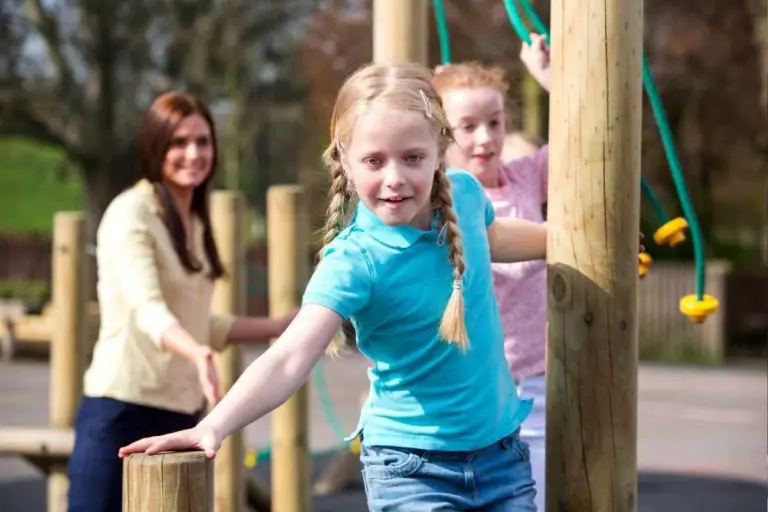
6 High-Energy Kids Activities for Hyperactive Kids to Burn Energy
Hey, crafty parents and buzzing-beyond-belief caregivers! If you’ve got a kid who can’t sit still for more than a minute, you’re in the right place. These six DIY crafts are designed to burn energy, spark creativity, and double as awesome payoff-worthy projects for your living room studio. Trust me, they’re fun, fast, and totally doable with stuff you already have around the house.
Ready to turn noisy energy into colorful, productive play? Let’s jump into six completely unique ideas that will have your hyperactive kiddo beaming with pride—and you with a calmer, happier afternoon.
1. Jump-Pad Obstacle Wall Art Studio
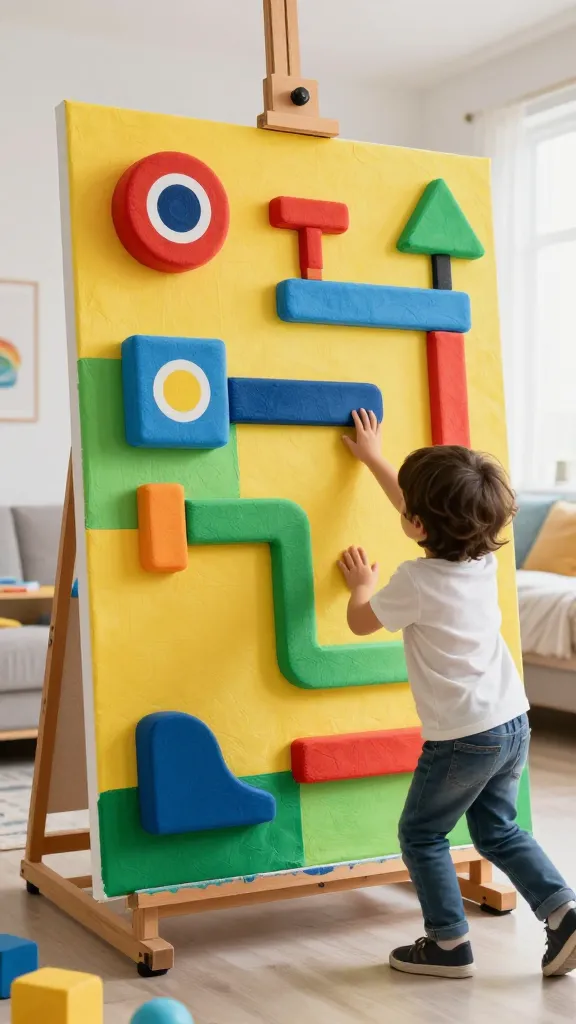
Imagine a kid-friendly mini obstacle course mapped out on a sturdy canvas, with a splash of bold colors you can customize for your space. This project blends active play with a visual payoff—perfect for burning energy while creating personalized wall art.
In the finished piece, the canvas bursts with color blocks, pushable foam shapes, and a few simple targets you can aim for during quick burst games. It’s tactile, interactive, and makes a bold statement in a playroom or bedroom.
Materials Needed
- Canvas panel or thick cardboard sheet (18×24 inches works well)
- Foam shapes (circles, stars, squares) in bright colors
- Painter’s tape or double-sided mounting tape
- Acrylic paints and brushes
- Soft padding or foam mats (optional for safety)
- Sturdy ribbon or elastic bands for pull targets
How to Make It
- Sketch a playful layout on the canvas, marking zones for jumping points and targets.
- Paint bold color blocks as the base and let dry. Use painter’s tape to create clean edge lines.
- Attach foam shapes with tape to form a dimensional, tactile surface you can press, push, or flick.
- Add pull targets with ribbons or elastic bands that kids can tug to “score” points.
Pro Tips / Styling Ideas
- Keep the color palette high-energy with neon accents or warm rainbow tones.
- Place the wall art within easy reach so kids can poke and adjust during play.
- Incorporate a “challenge corner” where kids set a timer and try to beat their own record.
Who’ll love it: This is perfect for kids who love movement and instant rewards—great for playrooms and classrooms alike, especially if you want a statement piece that doubles as workout fun.
2. Sensory Ribbon Dash Course
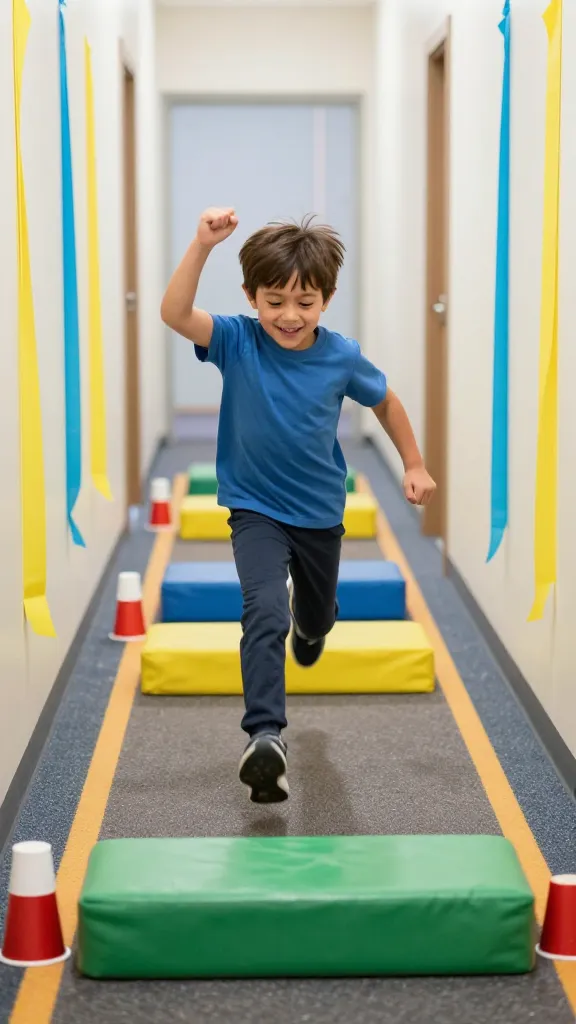
Turn your hallway into a buzzing sensory playground with a lightweight ribbon dash course. It feels like a pit stop at a raceway, complete with stripes, colors, and a little obstacle flair that your energetic kid can sprint through, weave around, and finish with a victory fist pump.
Materials Needed
- Colored ribbons or streamers (washable fabric works best)
- Painter’s tape or sticky dots to create lane lines
- Low-curvature floor obstacles (foam blocks, paper cups)
- Non-slip mats or a soft rug for safety
- Optional: small bells or shakers for auditory cues
How to Make It
- Layout lanes with tape on a clear floor path. Alternate bright ribbon colors for each lane.
- Place soft obstacles along the course to zigzag through.
- Attach bells at the start and finish lines so your kid can hear every burst of speed.
Pro Tips / Styling Ideas
- Swap ribbons weekly for fresh energy and a new course vibe.
- Make it a “beat the clock” challenge and keep a simple scorecard.
- Use a small mat at the start to help little ones plant their feet before sprinting.
Who’ll love it: Great for hallway play, PT-friendly warmups, or a quick burst before homework. It’s simple, energetic, and endlessly adaptable.
3. Cardboard Battle-Bot Arena
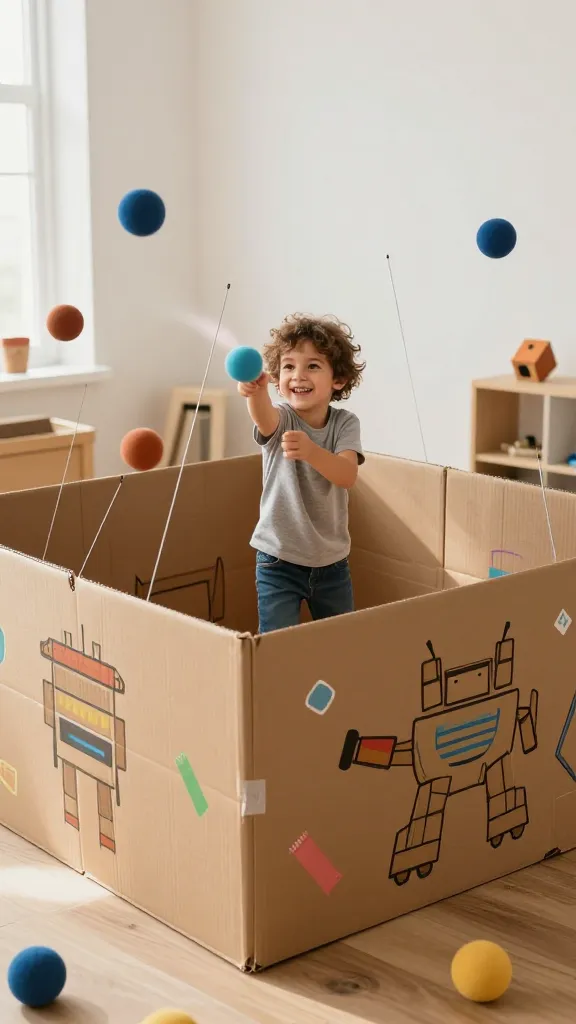
Grab sturdy cardboard, a dash of imagination, and you’ve got a tabletop arena that’s all about mock battles with safe, soft “laser” beeps. This project turns cardboard into a kinetic, noisy, giggle-filled battleground your kids will adore—and you’ll adore the minimal mess and maximum creativity.
Materials Needed
- Two large cardboard boxes or one large piece cut into panels
- Colored markers, tape, and stickers for decoration
- Foam dice or soft pom-poms for “blaster” hits
- Elastic cord or string to create a simple pull-weapon system
- Optional: battery-operated LED lights for glow effects
How to Make It
- Cut panels to form a little arena with two sides and a middle barrier.
- Decorate with banners, faux metal trim, and sci-fi decals.
- Attach a safe “weapon” system using elastic cord so kids can flick soft pom-poms into the other side.
Pro Tips / Styling Ideas
- Laminate some friendly “laser” stickers or use glow-in-the-dark tape for night battles.
- Incorporate a timer and scoreboard for pretend tournaments.
- Keep the arena at a safe height for standing or kneeling battles—no tipping!
Who’ll love it: Budding game designers and action-hero fans will adore this. It doubles as a clever storage spot when not in use, too.
4. Balloon-Pop Countdown Tower
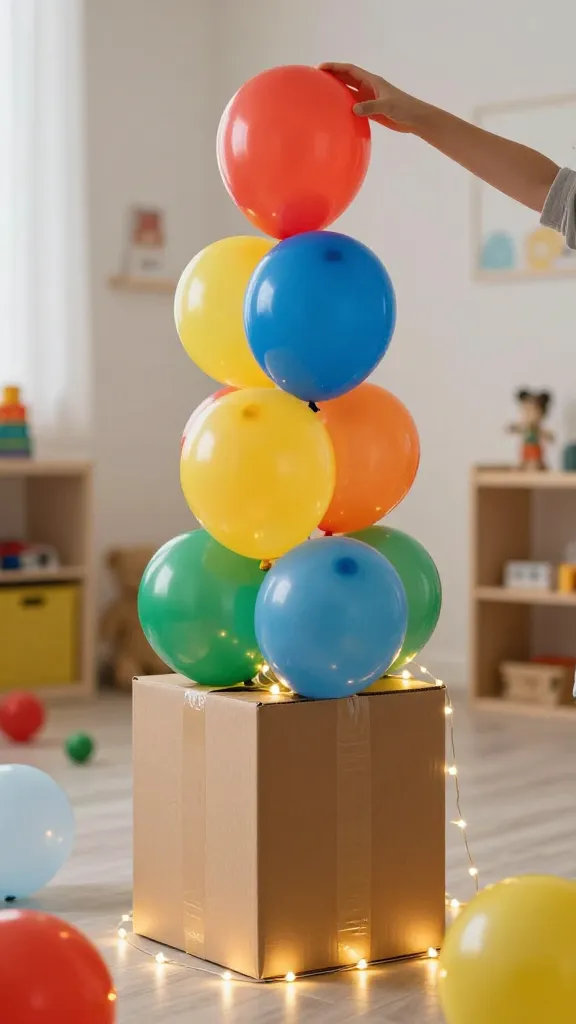
Here’s a fast-paced, glow-in-the-dark-friendly tower you can build with simple craft supplies. Each balloon pop is a mini victory and a burst of colorful energy. The countdown element adds anticipation, which keeps kids engaged and moving.
Materials Needed
- Large cardboard box (to create a vertical tower) or a sturdy vase-like form
- Air-dilled or water-filled balloons (assorted colors)
- Masked tape and a mini stapler (optional for securing balloons)
- LED string lights (battery operated) for added glow
How to Make It
- Construct a tall, sturdy tower from cardboard or a repurposed container. Secure with tape.
- Fill balloons with a little air or water to keep them light and bouncy.
- Wrap LED lights around the tower for a magical glow, especially useful for evening play.
- Stagger balloon pops by tying them to the tower with strings—kids pull to pop and listen for the satisfying pop.
Pro Tips / Styling Ideas
- Color-code balloon sets to play “color targets” where kids pop a color when a task is completed.
- Use the tower as a visual timer: remove one balloon every 60 seconds to shorten the game.
- Turn it into a party game with friends—pop a balloon to reveal a mini challenge inside.
Who’ll love it: Kids who crave quick, explosive play and a bright centerpiece will go wild for this. It looks gorgeous in photos, too!
5. Tap-Tap Drum Wall Canvas
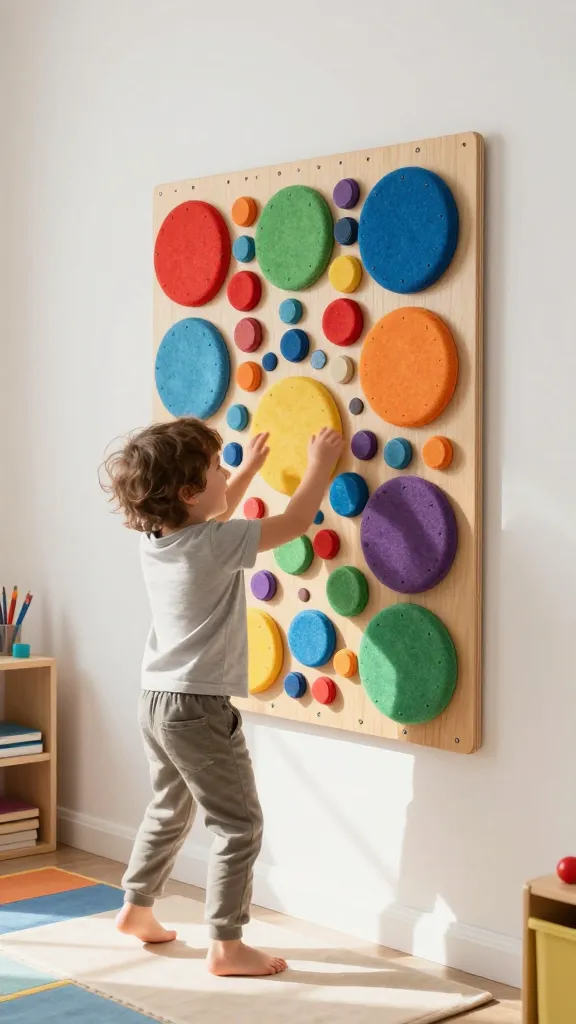
Create a compact, tactile drum wall that lets kids unleash rhythm and energy in a safe, responsible way. This canvas doubles as art and instrument, blending creativity with exercise for a satisfying, musical finish.
Materials Needed
- Stretched canvas or wood panel
- Rubber-backed, soft-telt drum pads or upcycled bottle caps
- Felt or foam circles in assorted sizes
- Non-slip mounting hardware or double-sided tape
- Optional: small bells or chimes for added texture
How to Make It
- Arrange foam and felt circles in a rhythmic pattern on the canvas.
- Attach bottle caps or drum pads as “struck” areas with gentle adhesive that won’t damage the surface.
- If using bells, attach in a way that creates a light jingle with each strike.
Pro Tips / Styling Ideas
- Create a simple drum chart on the side to guide kids through a mini rhythm lesson.
- Pair this with a small mallet or drumstick for a satisfying percussion experience.
- Coordinate colors with a musical scale to sneak in a learning moment while they bang away.
Who’ll love it: Perfect for little musicians who want to move and make noise in a controlled, stylish way. It also makes for an eye-catching nursery or playroom piece.
6. Water-Play Treasure Hunt Board
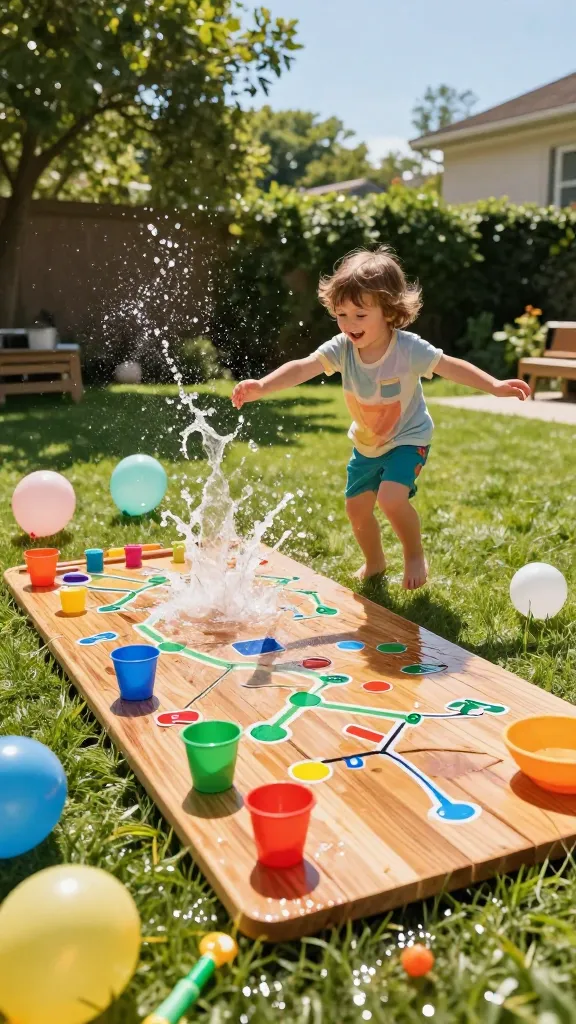
Turn a simple board into a splashy treasure quest that doubles as a sensory water play area. It’s the kind of project that keeps hyperactive kids busy, curious, and moving—especially on warm days whenever you’re up for a soggy, giggly adventure.
Materials Needed
- Sturdy wooden board or thick corkboard
- Plastic cups, small bowls, and water-safe stickers
- Washable markers, waterproof tape, and a shallow tray
- Water balloons or squirt toys for treasure action
How to Make It
- Draw a map-like treasure route on the board with markers and tape a few cups along the path as “treasure caches.”
- Fill the cups with water-safe treasures (glitter shells, marbles, or colored beads) to discover as you go.
- Add a shallow tray beneath to catch drips and keep the space tidy.
Pro Tips / Styling Ideas
- Make it a timed treasure sprint—kids move from cache to cache until the timer runs out.
- Use color coding for different treasure types to teach color recognition while playing.
- For dry days, swap water treasures with magnetic tokens and a magnetic tray for a no-mess version.
Who’ll love it: Water-loving explorers and sensory-seekers will flock to this. It’s a playful, refreshing way to channel energy into exploration.
Conclusion
Six unique, completely distinct crafts to help hyperactive kids burn energy while staying creative and engaged. Each project blends movement with color, texture, and a little bit of magic—perfect for quick afternoons, rainy days, or weekend DIY sessions. Pick one (or, yes, all six) and watch the chaos transform into laughter, pride, and a calmer, happier you.