7 Creative Cardboard Box DIY Kids Activities (Recycled Fun)
Looking for playful, budget-friendly activities that sparklе with imagination? These 7 completely unique cardboard box crafts prove you don’t need fancy materials to spark big creativity. Each idea is easy, engaging, and totally share-worthy—trust me, your kids will beg to make them all.
Here’s to turning everyday cardboard into marvelous mini-worlds. Grab a box, scissors, tape, and a splash of color—let’s dive in!
1. Cardboard Box Rocket Ship Adventure
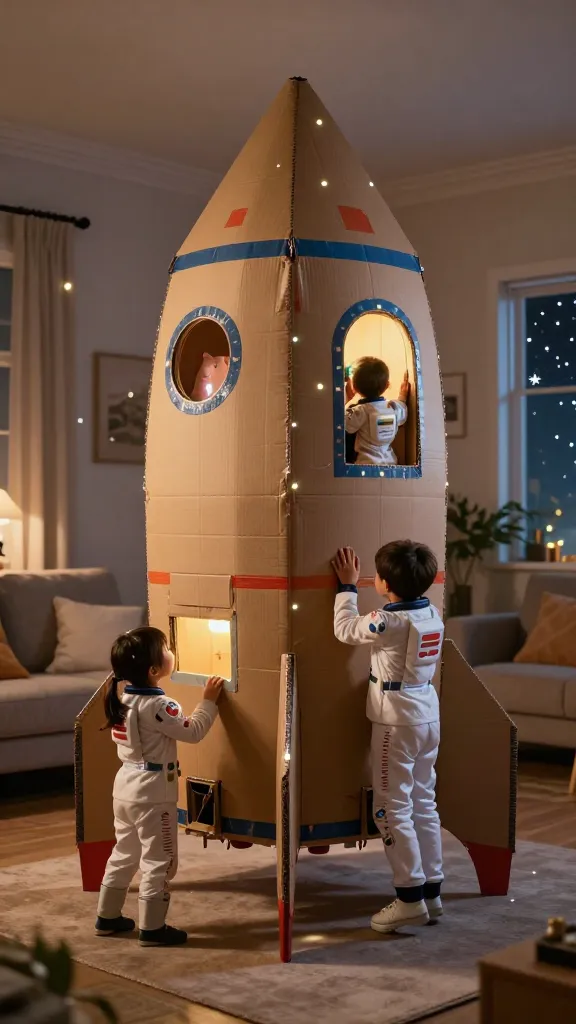
Imagine big blasts off and twinkling stars as your living room becomes a space station. This cardboard rocket ship is roomy enough for a space crew (aka your kids) and doubles as a dramatic backdrop for pretend play. The magic is in the details—portholes, a hatch, and glow-in-the-dark accents that glow when the lights go out. Seriously, it’s a rocket ship that fits a whole squad.
Materials Needed
- One large cardboard box (with flaps intact)
- Craft knife or scissors
- Colored duct tape or painter’s tape
- Acrylic paint or markers
- Tin foil, stickers, and glow-in-the-dark paint
- Paper plates (for control panel) or cardboard circles
How to Make It
- Trim the box into a tall, sleek rocket shape. Keep the bottom open for easy entry.
- Cut a circular window for portholes and a door opening near the bottom hatch.
- Decorate with metallic paint, foil accents, and color bands using tape as stripes.
- Create a control panel on a paper plate or cardboard circle; attach inside near the opening so it’s visible from the outside.
- Finish with glow-in-the-dark stars or paint for a night-sky vibe.
Pro Tips / Styling Ideas
- Use a flashlight to create dramatic “launch” moments during play.
- Turn it into a year-round prop by swapping decals for seasons—pumpkins in autumn, stars at night, etc.
End note: This is a crowd-pleaser for curious kids, budding astronauts, and playful siblings who want to stage a space mission together.
2. Cardboard Castle Playhouse
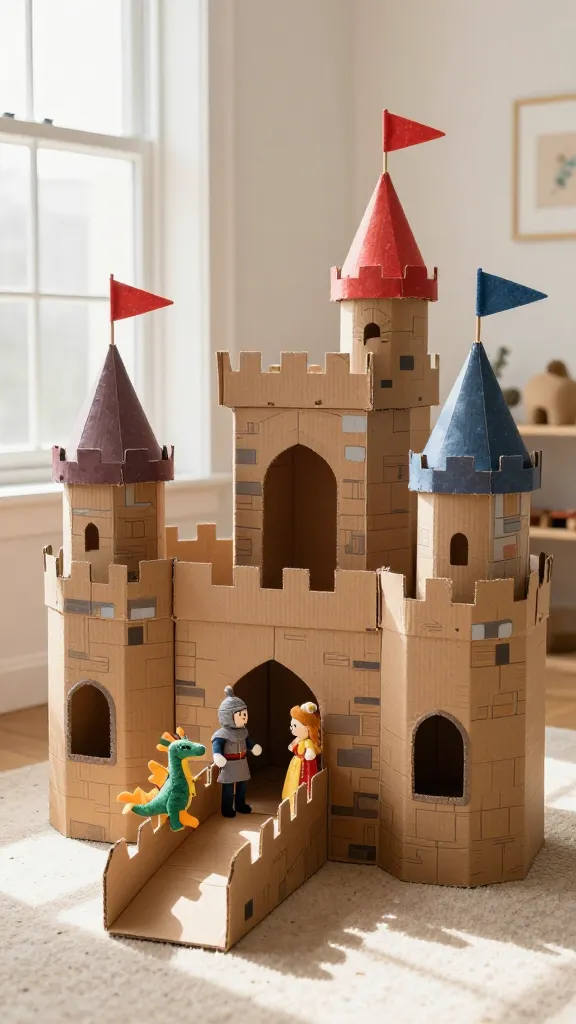
Turn a simple box into a magical fortress where knights, princesses, and dragons hold court. The castle’s layered towers and drawbridge make every pretend scenario feel grand. It’s charming, sturdy, and endlessly imaginative—a legit DIY throne room for kids.
Materials Needed
- Two or more medium boxes or one large box
- Colored craft paper, markers, and paint
- Masking tape, scissors, and a glue stick
- Foam sheets for banners and flags
- Optional: ribbon, fabric scraps, and sticker jewels
How to Make It
- Build a central box as the main tower. Add two side towers by attaching additional boxes or folding flaps.
- Cut crenellations along the top edges for a classic castle silhouette.
- Decorate with painted bricks, banners, and a grand entryway with a drawbridge (a strip of cardboard you can lift).
- Line the interior with cushions and fabric to create comfy throne rooms or sleeping chambers.
Pro Tips / Styling Ideas
- Explain the “royal decree” by designing a crown banner and lovable royal crests.
- Make it reusable for different plays by swapping color schemes seasonally.
End note: Perfect for dramatic lunchtime storytelling or a pretend tea party in a regal setting.
3. Cardboard Box City Builder
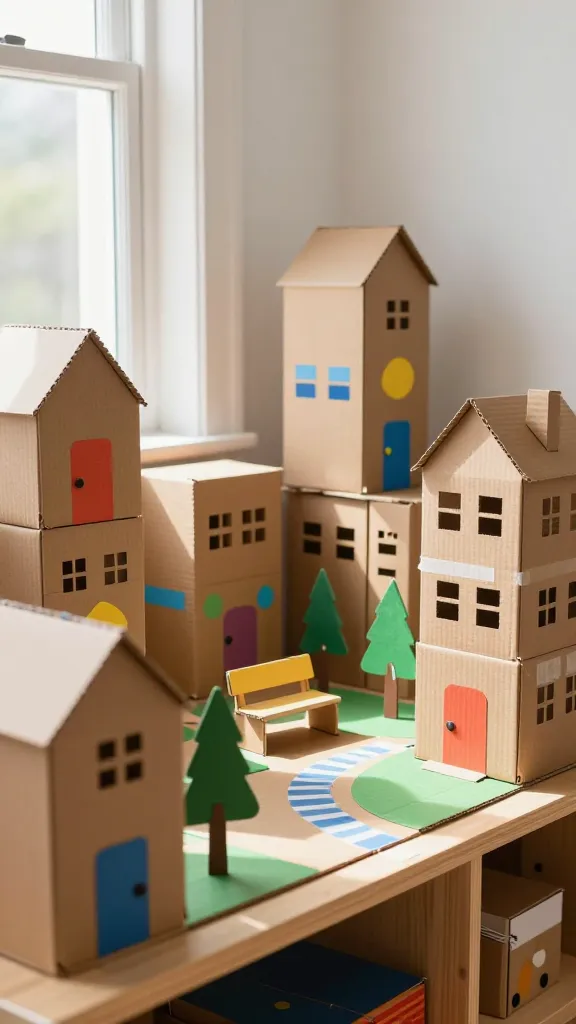
City planning meets art class with this modular cardboard neighborhood. Build flats, townhouses, and a little park—all from reused boxes. It’s a creative playground that grows with your kid’s imagination and doubles as a cute shelf display when not in use.
Materials Needed
- Multiple small to medium boxes
- Acrylic paints or markers
- Masked tape or washi tape
- Construction paper or foam shapes for windows and doors
- Scissors and glue
How to Make It
- Flatten boxes carefully and cut them into modular building blocks (rectangles, squares).
- Paint each block in bright colors; add windows, doors, and rooftops with tape and paper shapes.
- Stack blocks to form towers or line them up as a cute street grid. Create a tiny park using a cut-down green paper or fabric square.
Pro Tips / Styling Ideas
- Introduce tiny cardboard “cars” or scooters by shaping small box pieces and painting them.
- Create a skyline display on a tabletop or wall shelf for a delightful diorama.
A note: It’s a fantastic collaborative project—older kids can plan layouts, while younger ones focus on color and shapes.
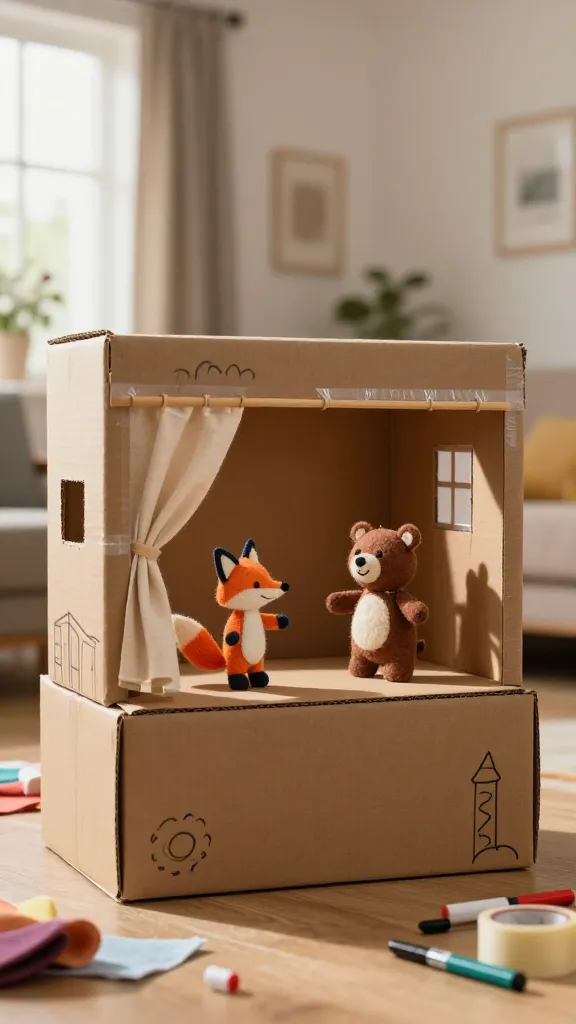
4. Cardboard Box Animal Theater
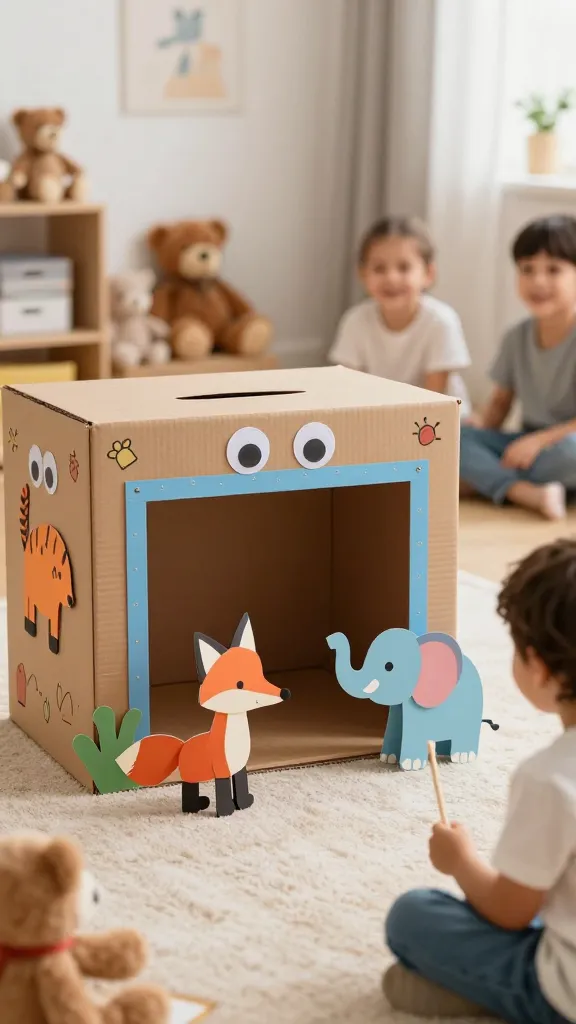
Bring playful critters to life with a portable cardboard animal theater. The stage folds up for easy storage, and your little performers become fearless forest friends or jungle gym stars. It’s a hit for storytime, puppet shows, and giggle-worthy rehearsals.
Materials Needed
- One or two cardboard boxes
- Scissors and tape
- Construction paper, markers, and googly eyes
- String or craft sticks for puppets
How to Make It
- Cut out a rectangular stage opening on the front of the box; decorate the frame with bright paper and stamps.
- Turn the inner flaps into simple sock puppets: draw faces or add paper ears and noses.
- Attach a string or wooden sticks to hold puppets for easy swapping during performances.
Pro Tips / Styling Ideas
- Make a “curtain” using a fabric scrap to give the stage a real theater vibe.
- Use fabric or felt for soft, tactile animal features that kids can touch and admire.
End note: Best for cozy, giggly storytimes and endless animal adventures with family or friends.
5. Cardboard Box Kitchen Set
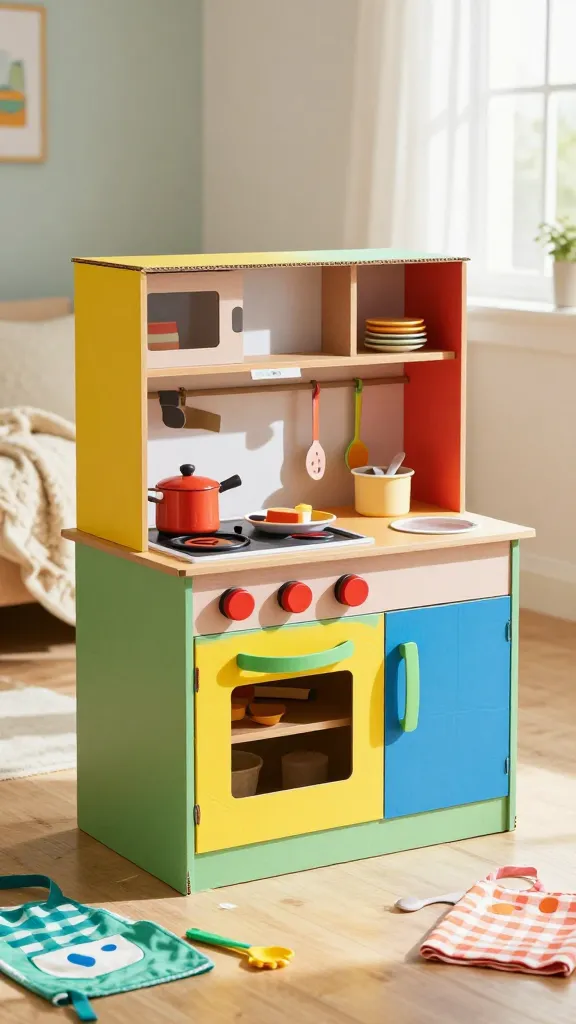
Whip up a mini culinary world with a cardboard kitchen set that doubles as a pretend cooking station and a cozy reading nook when not in use. The hat-trick here is bright colors, playful textures, and a pretend stove that sparks imaginative menus from breakfast to dessert.
Materials Needed
- One large box with a flap or two smaller boxes
- Colored paper, markers, and paint
- Foam shapes for buttons and knobs
- Tape, scissors, glue
How to Make It
- Cut a window on the front to serve as the “oven” or “stove” display; decorate with burners and knobs.
- Craft a pretend sink using a small bowl or a painted cutout; add a faucet using a bottle cap and straw.
- Create shelves inside the box with tape and extra cardboard to hold toy dishes and pretend food.
Pro Tips / Styling Ideas
- Label shelves with cute chalkboard-style writing for a kitchen-like feel.
- Pair with felt food or DIY felt utensils for tactile play.
End note: A deliciously fun setup for role-playing games, birthday parties, or a cozy corner for little chefs.
6. Cardboard Box Puppet Theater
Ready-made stage, ready-made smiles. This puppet theater uses a large box and a simple curtain, turning your living space into a tiny theater. Kids love performing, crafting their puppets, and adding their own sound effects—encore, please!
Materials Needed
- One large cardboard box
- Fabric scraps or felt for a curtain
- Markers or paint for stage design
- String or dowel for the curtain rod
- Glue and tape
How to Make It
- Cut a rectangular window to serve as the stage opening; reinforce the edges with tape.
- Attach a curtain across the top using a string or dowel; secure with tape or glue.
- Decorate a backdrop with scenery and add a few painted props on the sides for variety.
Pro Tips / Styling Ideas
- Invite friends or siblings to create a mini-puppet cast with paper puppets or sock puppets.
- Host a “show night” with snacks for a family-friendly event.
End note: It’s a theater-in-a-box that grows with your child’s creativity and performance dreams.
7. Cardboard Box Robot Workshop
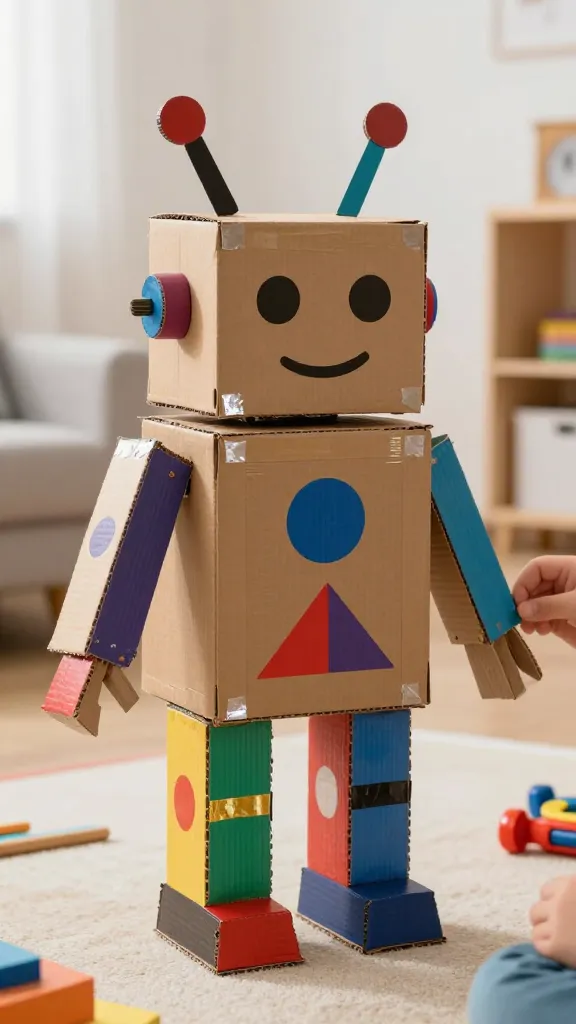
Blast into a futuristic vibe with a friendly cardboard robot that kids can customize. This buildable buddy teaches basic shapes and color pairing, and you’ll love how sturdy it stands—perfect for active play and photo-worthy moments.
Materials Needed
- One large box plus an extra small box or a paper towel tube
- Bright paints, markers, and metallic tape
- Cardboard scraps for antenna and arms
- Glue, tape, and scissors
How to Make It
- Turn the large box into the robot’s torso and the small box or tube into the head or hat.
- Paint the robot in bold colors; add panels with marker lines and metallic tape for a shiny look.
- Attach cardboard arms and legs with tape; create an antenna from a twisted pipe cleaner or straw.
Pro Tips / Styling Ideas
- Give your robot a name and a tiny backstory to spark storytelling moments.
- Place the robot on a “charging station” with a small fabric mat for a cute display.
End note: A futuristic friend for playtime and a wall-worthy piece for a kids’ room gallery.
Conclusion
These 7 completely unique cardboard box crafts prove that recycled fun can be bold, beautiful, and endlessly entertaining. Pick one (or all) to spark creativity, foster imaginative play, and breathe new life into everyday boxes. You’ll love how quick, affordable, and endlessly adaptable these ideas are—trust me, your kids will thank you with endless giggles and proud “I made this” moments.