7 Fun Preschool Craft Ideas for Early Learning
Ready to spark tiny minds and big smiles? These seven DIY crafts are simple, colorful, and totally kid-friendly—perfect for busy afternoons and playful learning. trust me, you’ll love how quick they come together and how proud little makers feel completing them.
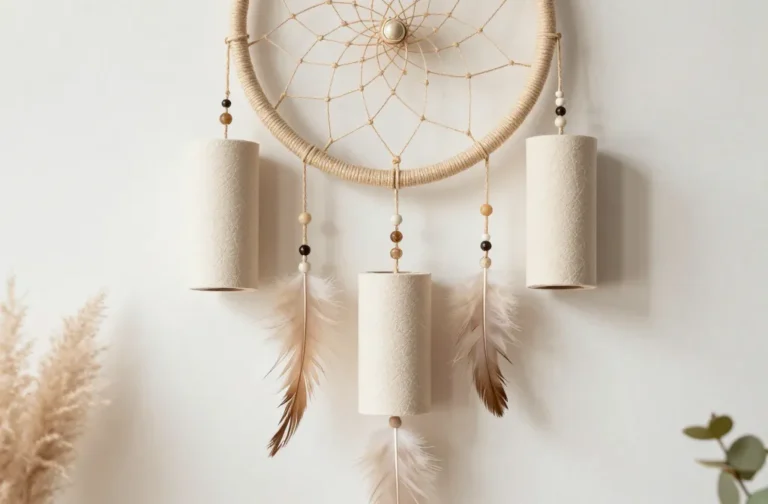
1. Button-Flower Rainbow Wall Hanging

Imagine a cheerful wall piece that doubles as fine motor practice. This button-flower rainbow adds a pop of texture and color to any kid-friendly space. It’s as satisfying to assemble as it is delightful to look at.
Materials Needed
- Wooden dowel or sturdy ribbon for hanging
- Colorful buttons in a rainbow palette
- Hot glue gun or craft glue (adult supervision)
- Felt circles or fabric scraps for petals
- Thin cardboard or canvas as the backing
How to Make It
- Lay out a rainbow arc on the backing board, planning where each color will go.
- Glue felt circles as petals and layer small buttons in the center for extra texture.
- Attach the finished flower shapes along a curved line, like petals blooming across the board.
- Secure the dowel or ribbon at the top for hanging.
Pro Tips / Styling Ideas
- Use larger buttons for a bold, graphic look; mix in metallics for shine.
- Hang near a window to catch light and cast playful shadows.
- Offer a mini button swap session—kids swap colors and place them in fresh arrangements.
Who would love it: preschoolers who love color play and texture exploration. It’s a cozy, gallery-wall-worthy piece you’ll proudly display in a learning corner.
2. Sensory Sack Letters
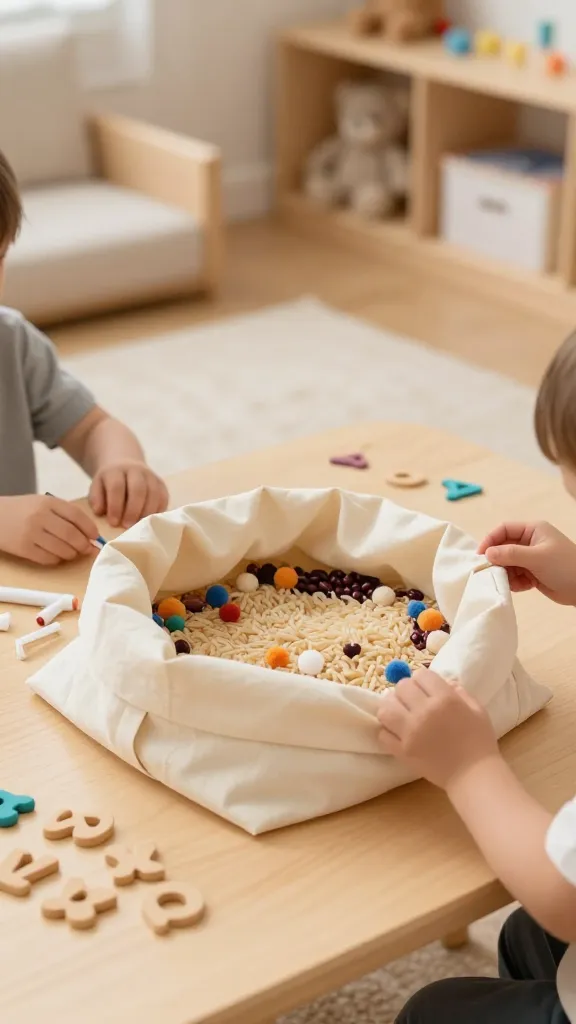
Turn learning letters into a tactile adventure. These soft sensory sacks invite little hands to trace, feel, and say each letter—great for pre-reading confidence and calm-down corners alike.
Materials Needed
- Plain fabric squares (washable if possible)
- Rice, dry beans, or pom-poms for filling
- Alphabet stamps or fabric markers
- Secure thread or small zipper bags (optional)
- Safety pins or glue (for sealing)
How to Make It
- Write the letter on the fabric with a marker, or stamp a big bold letter on one side.
- Fill the sack with a handful of rice or beans for a satisfying weight that helps focus.
- Seal the sack securely with stitches or a zipper bag for easy reuse.
Pro Tips / Styling Ideas
- Make a small lowercase/uppercase pair set for letter recognition games.
- Keep colors bright and high-contrast against the fabric for visual appeal.
Who would love it: kids who benefit from sensory input while learning the alphabet. Great for literacy centers and quiet time activities.
3. Cupcake Lrocket Color Blending Art
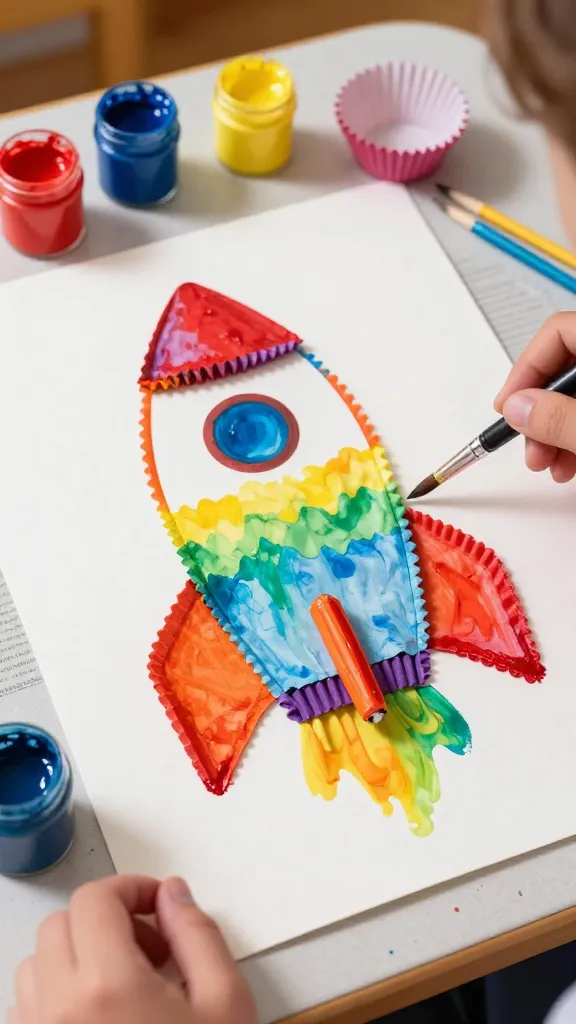
Turn paint and pastry into a playful space of color discovery. This “cupcake rocket” craft teaches color blending in a bite-sized, deliciously visual way—perfect for preschool artists who love a little science with their art.
Materials Needed
- Cake cup liners in assorted colors
- Water-based paints or food coloring
- Newspaper or drop cloth to protect surfaces
- Paint brushes or sponge daubers
- White card stock or a canvas board
How to Make It
- Group the cupcake liners on the card to resemble a rocket ship in flight.
- Dip brushes into color blends and apply swirling patterns—try a rainbow fade from red to purple.
- Let colors blend at the edges for a soft, dreamy gradient.
Pro Tips / Styling Ideas
- Label each color blend with simple words (hot, cold, light, dark) to add a learning twist.
- Frame the finished piece for a cute art wall or swap liners to change the look.
Who would love it: budding artists who enjoy color experiments and a dash of whimsy. A bright centerpiece for hallway galleries or classroom walls.
4. Mini Nature Terrarium in a Jar
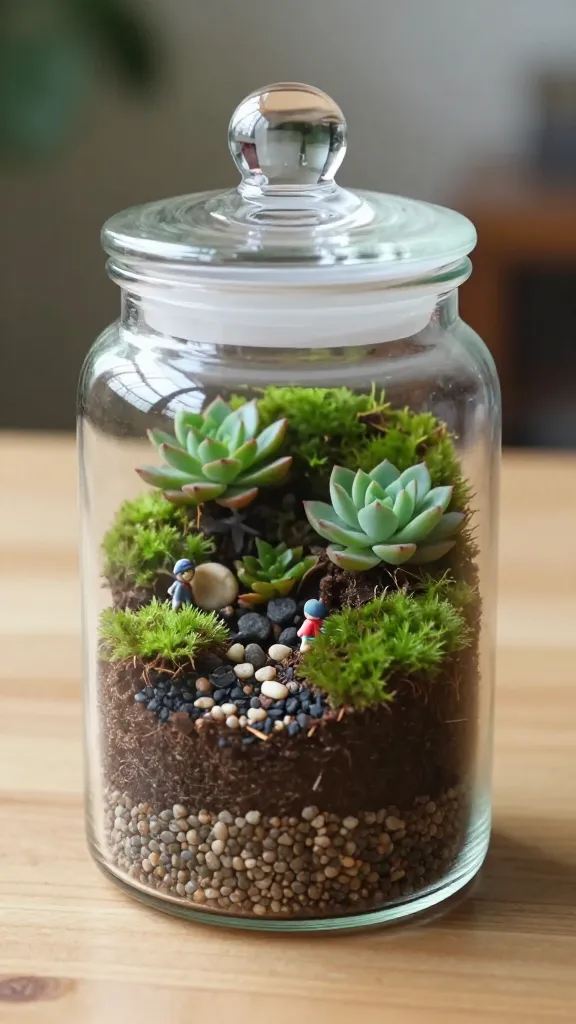
Tiny ecosystems are endlessly fascinating. Create a miniature nature terrarium that doubles as a quiet, hands-on science moment and a charming decor piece. It’s like a tiny rainforest you can carry home in a jar.
Materials Needed
- Clear glass jar with lid
- Gravel or pebbles
- Charcoal (optional, for drainage)
- Small potting soil
- Little plants or moss patches
- Mini figurines or decorative stones
How to Make It
- Layer a little gravel, then charcoal, then soil into the jar.
- Plant a tiny succulent or moss patch and tuck decorative bits around it.
- Seal the lid or leave open for airflow, depending on plant needs.
Pro Tips / Styling Ideas
- Choose low-water plants to minimize maintenance—think moss and small succulents.
- Label the scene with a tiny printable tag for a classroom-friendly touch.
Who would love it: curious preschool scientists and nature lovers. It’s an adorable display piece and a passive science lesson in one.
5. DIY Shape Stamps and Pattern Playboard
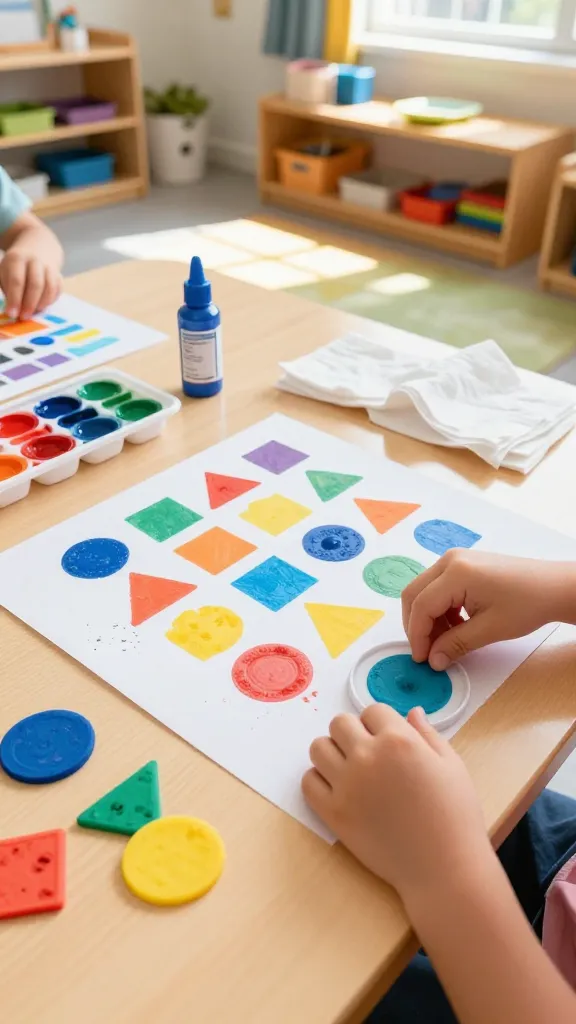
Shape exploration meets stamping magic. This craft turns plain craft play into a pattern-building party, strengthening geometry recognition and early math readiness.
Materials Needed
- Bubble foam sheets or erasers cut into basic shapes
- Washable ink pads or acrylic paint
- White construction paper or poster board
- Paper towels for quick cleanups
How to Make It
- Cut shapes like circles, squares, triangles, and rectangles from foam or erasers.
- Dip shapes into paint and stamp to create repeating patterns on the paper.
- Encourage kids to fill a grid with a harmonious rhythm of shapes and colors.
Pro Tips / Styling Ideas
- Challenge kids to recreate a simple pattern or to design their own using a color wheel.
- Glue a laminated sheet to reuse the stamps with dry-erase markers for a quick pattern-design activity.
Who would love it: little designers who adore orderly patterns and color coordination. A fantastic quick activity for centers or rainy-day crafts.
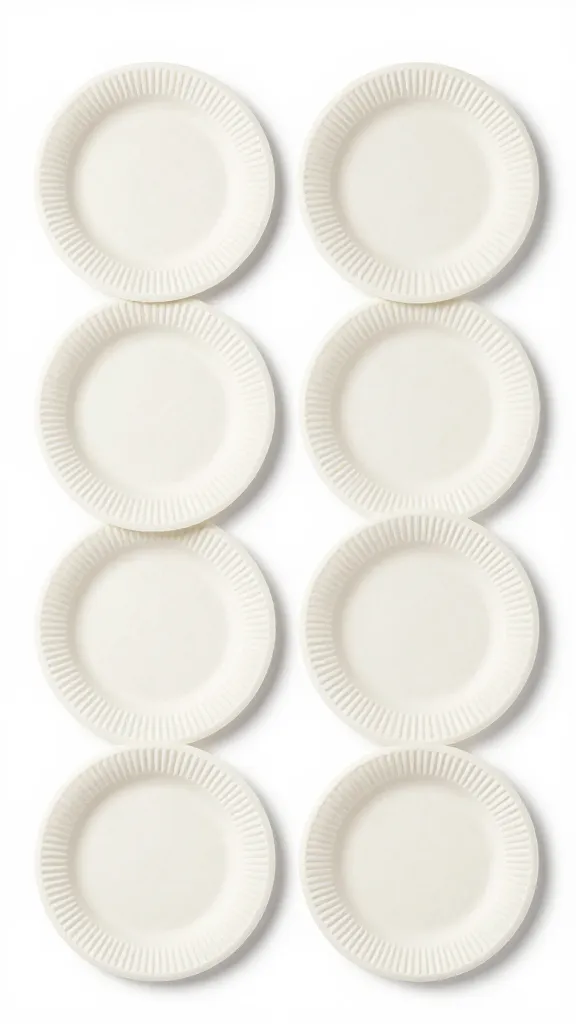
6. Paper Plate Puppet Theater
Bring stories to life with a little paper plate theater. This interactive craft invites storytelling, role-play, and bold, expressive faces—plus it’s a terrific performance for family and friends.
Materials Needed
- Paper plates
- Markers, crayons, and colored pencils
- Googly eyes, yarn for hair, fabric scraps for costumes
- Glue sticks and scissors (kid-safe)
- Optional: craft sticks to attach as handles
How to Make It
- Transform each plate into a unique character with bright facial features.
- Glue a craft stick to the back so it becomes a puppet you can control.
- Pair up plates with simple props and create a mini show—bonus points for a tiny script!
Pro Tips / Styling Ideas
- Use felt for hair or capes to add texture and color variety.
- Laminate the fabric scraps for easy cleaning after practice runs.
Who would love it: aspiring actors and storytellers who enjoy performance and imaginative play. A delightful project for family nights or classroom storytelling corners.
7. Magnetic Marble Run Block Tower
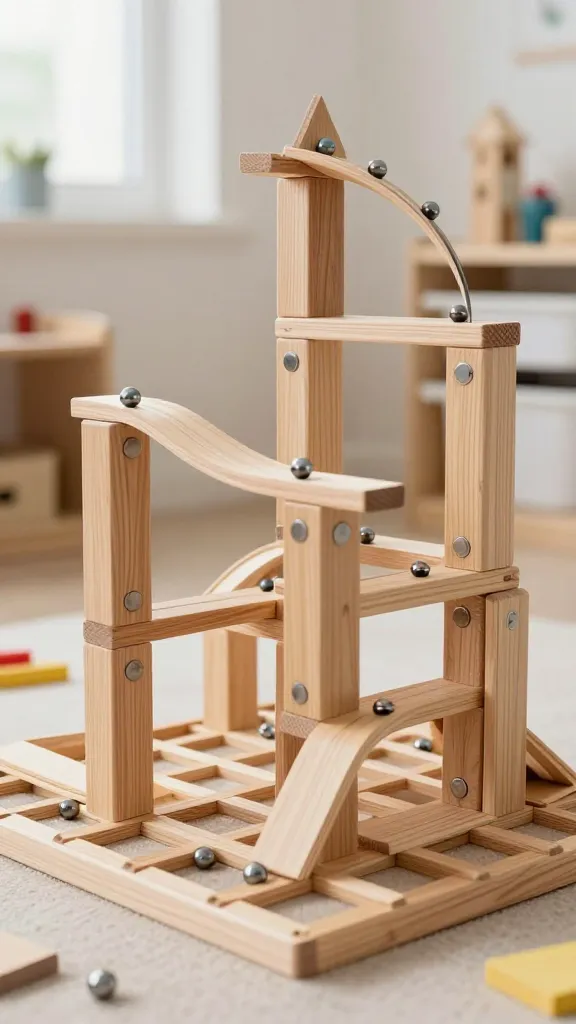
Engineering meets art in a magnetic marble run that doubles as a magnetic sculpture. This project is all about problem-solving, building confidence, and watching marbles zoom with satisfying physics physics vibes.
Materials Needed
- Magnetic marbles or small metal balls
- Wooden blocks or cardboard bricks with magnets (or a magnetic toy base)
- Cardboard or foam base to build on
- Masking tape for quick fixes and shaping
How to Make It
- Arrange blocks on a base to create a loose grid or tower with magnetic potential.
- Drop marbles from the top and watch them glide through magnet-friendly paths.
- Experiment with different tower shapes to alter the marble’s path.
Pro Tips / Styling Ideas
- Keep pieces lightweight and kid-safe; pre-glue any tricky joints for easier assembly.
- Use color-coded blocks to teach counting and sequencing as marbles travel down the run.
Who would love it: curious engineers and kinetic art lovers who crave hands-on problem solving. A standout centerpiece for a playroom shelf or classroom building station.
Conclusion
These seven crafts are crafted to spark curiosity, nurture fine motor skills, and give preschoolers a sense of mastery. Pick one that matches your kiddo’s energy, or try them all for a full week of learning-and-lightning-fast fun. Each project is easy to adapt, mess-light, and perfect for pin-worthy photos you’ll want to share with friends and family. Happy crafting, and enjoy the creative journey together!