7 Screen-Free Rainy Day Kids Activities (Boredom Busters)
Stuck indoors while the rain drums on the windows? Grab your kids, a stash of supplies, and a splash of imagination. These seven screen-free crafts are quick, charming, and endlessly sharable—perfect for turning a gray day into a bright, playful memory.
Trust me, these ideas are as easy as they are delightful. Each project sparks creativity, uses simple materials, and ends with a finished piece you’ll be proud to display or gift.
1. Cloudy Day Felt Board Story Scenes
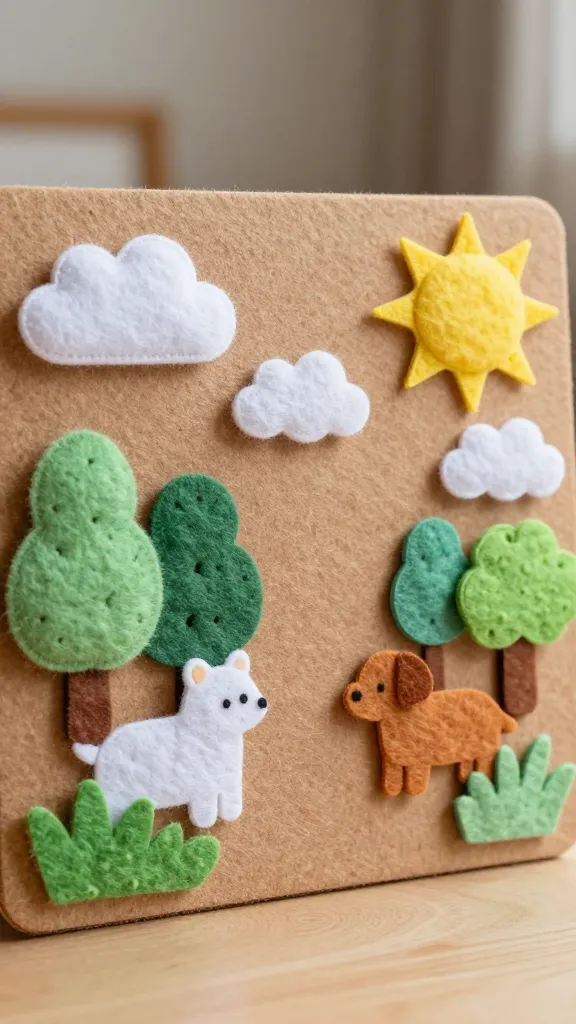
Picture a mini canvas of felt shapes coming to life on a soft, squeezable board. The finished scenes feel cozy and imaginative, like a portable theater waiting for a new bedtime tale. You’ll love how lightweight and kid-friendly this project is.
Materials Needed
- Assorted felt sheets in cloud, sun, trees, animals, and shapes
- Felt scraps for small details
- A simple corkboard or thick cardboard as the base
- Fabric glue or hot glue (adult supervision for hot glue)
- Safety scissors
How to Make It
- Cut cloud shapes, sun rays, trees, and animals from felt. Layer colors for depth—think a sun peeking from behind trees.
- Attach pieces to the corkboard with glue, leaving room to rearrange as stories evolve.
- Create mini story prompts on small felt squares to spark imaginative scenes.
Pro Tips / Styling Ideas
- Mount the board on a wall or prop it on a stand for easy storytelling sessions.
- Swap in seasonal pieces—snowflakes in winter, flowers in spring—for year-round play.
Who will love it: budding storytellers, younger siblings who crave a gentle craft, and families who want a tactile screen-free storytelling option.
2. Marshmallow Fishing Pond

A sweet, silly activity that doubles as a snack-time favorite. You’ll feel like a carnival game host as you guide your kids through catching marshmallow “fish” with a homemade pole. It’s quirky, colorful, and seriously giggle-inducing.
Materials Needed
- Mini marshmallows (fruit-flavored for color variety)
- Blue construction paper or a shallow tray with blue paper laid inside
- Paper clips or small magnets
- Glittery stickers or googly eyes (optional)
- Craft sticks or small dowels for fishing poles
How to Make It
- Glue a paper clip to each marshmallow or attach a tiny magnet for magnetic fishing.
- Scatter the marshmallow fish on the blue pond. Create a pretend stream with crinkled paper or tissue for extra whimsy.
- Kids use the pole to “catch” a marshmallow and tally their catches.
Pro Tips / Styling Ideas
- Add a pretend sign with a kid-friendly pond name and a little leaderboard.
- Sprinkle edible glitter on marshmallows for a celebratory splash (FYI: this is optional and edible).
Who will love it: snack-loving painters of the rainbow and kids who adore playful competitions without pressure.
3. Tape Resist Rainbow Art Gallery

Roll out the painter’s courage with a tape-resist project that reveals bold, color-splashed designs. The finished pieces look gallery-worthy and seriously vibrant hanging near a sunny window.
Materials Needed
- Thick white poster paper or canvas panels
- Masking tape or painter’s tape
- Acrylic paints in at least 6 colors
- Paintbrushes in various sizes
How to Make It
- Lay down geometric shapes with tape, creating a path for color blocks.
- Paint within the taped areas, then peel tape away to reveal clean lines.
- Layer colors for depth and mimic a rainbow gradient across the sheet.
Pro Tips / Styling Ideas
- Hang as a coordinated trio or as a single oversized statement piece.
- Seal with a clear acrylic spray to preserve bold colors.
Who will love it: aspiring abstract artists, room-decor lovers, and kids who like neat, satisfying results.
4. Cardboard City Builders
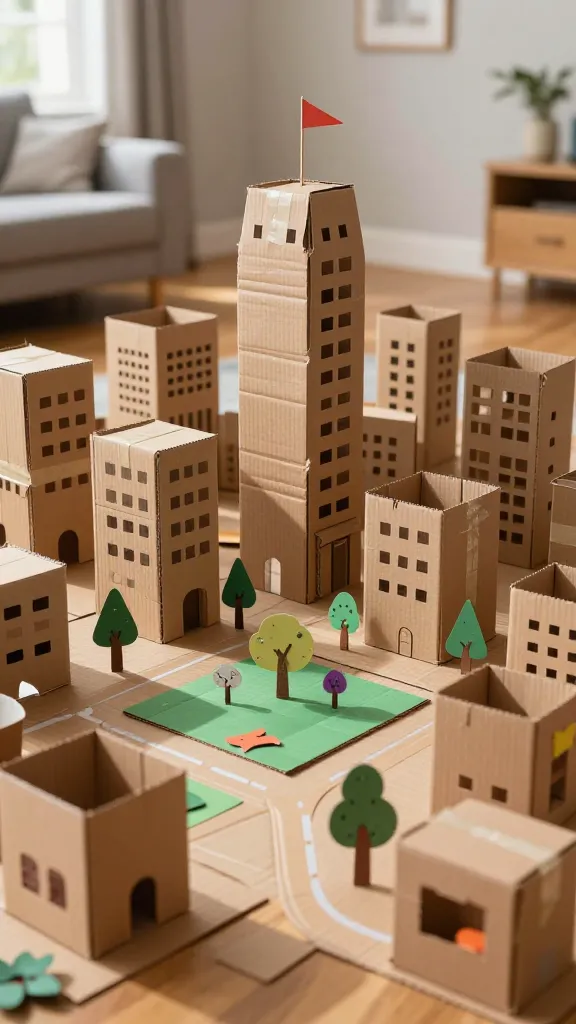
Turn a stash of cardboard boxes into a bustling cardboard metropolis. Think skyline silhouettes, mini parks, and tiny green spaces. It’s a constructive, thrifty, endlessly playable project that stretches imagination and spatial thinking.
Materials Needed
- Used cardboard boxes of various sizes
- Masking tape or packing tape
- Acrylic paints or markers for color
- Scissors or safety utility knife (adult supervision)
- Optional: stickers, paper scraps for windows and doors
How to Make It
- Dismantle boxes and cut into squares, rectangles, and bricks for building blocks.
- Stack and tape to create buildings, a park, and a road grid.
- Add windows, doors, and tiny details with markers or paint.
Pro Tips / Styling Ideas
- Create a skyline that reflects your neighborhood or a fantastical cityscape.
- Use a large, flat tray as the base to keep the city portable.
Who will love it: future city planners, little engineers, and kids who love immersive pretend play.
5. Nature-Bingo Collage
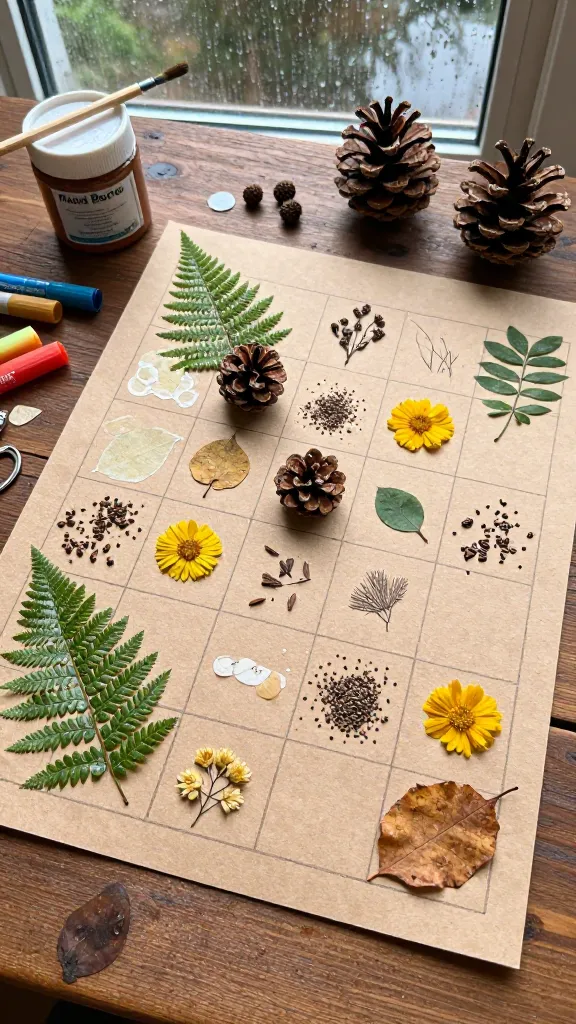
A tactile treasure hunt that leads to a quirky collage full of natural textures. Gather leaves, pinecones, and crinkly papers to craft a keepsake that celebrates a rainy day stroll turned art project.
Materials Needed
- Thick cardstock or a sturdy poster board
- Nature finds: leaves, twigs, pinecones, seeds, flowers (dried or pressed)
- Mod Podge or craft glue
- Small bingo chips or colorful stickers for markers
- Scissors and optional clear sealant
How to Make It
- Arrange a grid on the board with the items you collected, creating an organic, nature-inspired bingo layout.
- Glue down the pieces, letting each layer dry before adding the next.
- Let kids place chips on the board as they identify matched textures or colors.
Pro Tips / Styling Ideas
- Laminate or seal the piece to preserve natural textures for a wall-mounted keepsake.
- Turn the collage into a seasonal display—fall leaves with acorns, spring blossoms, etc.
Who will love it: nature-loving kids, collectors of textures, and families who enjoy slow, mindful crafts.
6. DIY Marble Run Studio
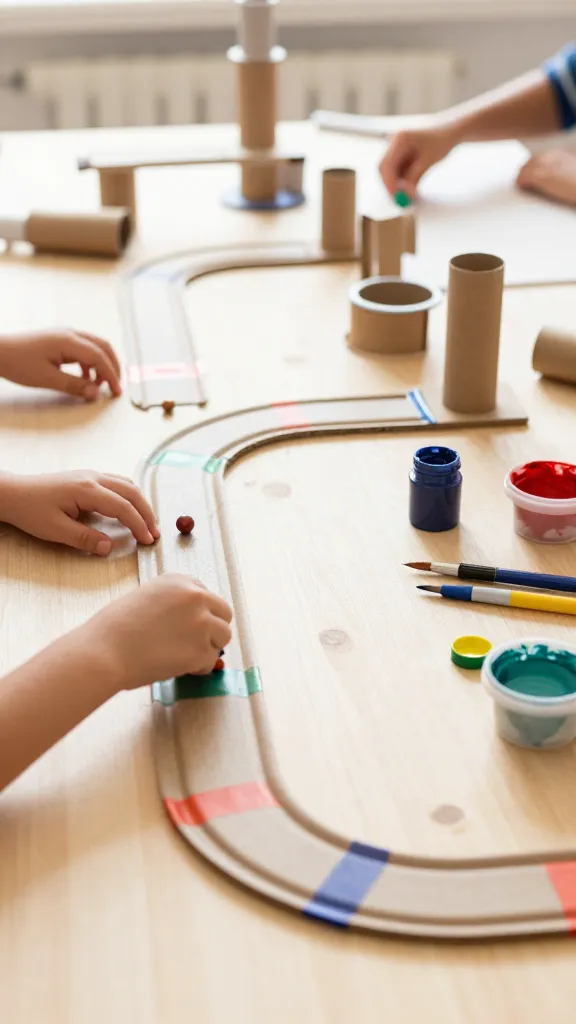
Transform a simple cardboard gutter or track into a looping marble adventure. This project blends engineering with art as kids design twists, add color, and race marbles to a finish line.
Materials Needed
- Cardboard tubes or gutters (store-bought or DIY with poster board)
- Masking tape
- Paints and brushes or markers for color
- Marbles or small balls
- Scissors or a craft knife (adult supervision)
How to Make It
- Assemble a winding track by taping sections together in a gentle slope.
- Decorate the run with color blocks, stickers, and doodles along the sides.
- Test with marbles, adjusting curves and speed for a smooth ride.
Pro Tips / Styling Ideas
- Create multiple tracks that converge at a finish line for a friendly competition.
- Use washi tape to add festive patterns and keep edges clean.
Who will love it: curious tinkerers, science-minded kids, and anyone who enjoys a playful engineering challenge.
7. DIY Fortune-Tale Bookmark Mobiles
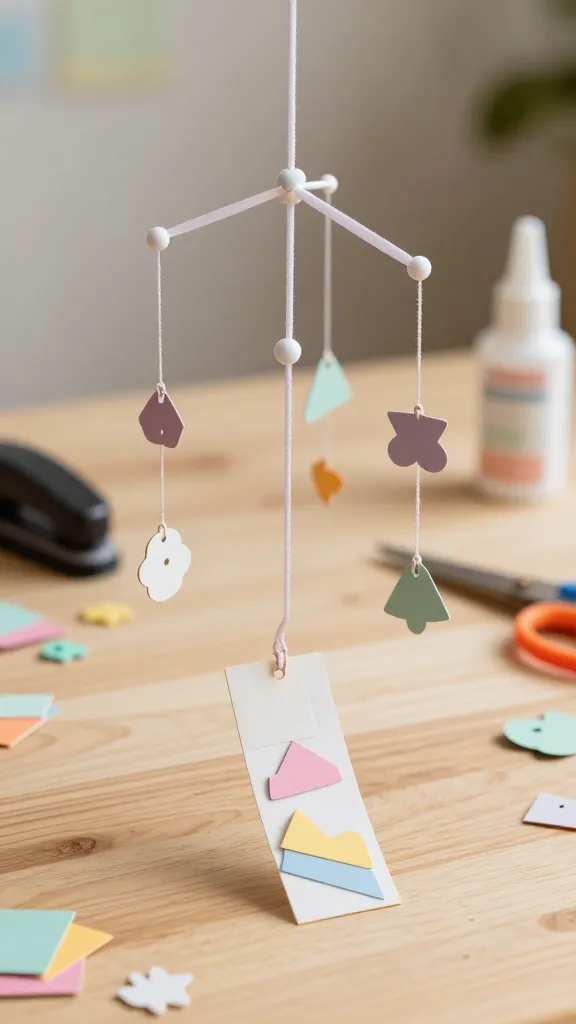
A tiny, portable art project that doubles as a sweet reading accessory. Create delicate bookmarks with dangling charms to bring stories to life. It’s a cozy craft that travels from bookshelf to desk with ease.
Materials Needed
- Colorful cardstock or thin foam sheets
- Ribbons, strings, or thread
- Small lightweight charms or punched paper shapes
- Hole punch, scissors, and glue
- Clear lamination sheets (optional for durability)
How to Make It
- Cut a bookmark shape from cardstock and punch a hole at the top.
- Thread a ribbon or string through the hole and tie a decorative charm or shape to the end.
- Laminate if you want extra durability, then trim to size.
Pro Tips / Styling Ideas
- Match colors to favorite book covers for a coordinated shelf display.
- Gift a set to friends or teachers, letting kids sign each bookmark with a doodle.
Who will love it: book lovers, gift-givers, and kids who adore tiny, portable crafts.
Conclusion
These seven screen-free rain-day projects prove that boredom has no chance when imagination is the main ingredient. Each idea is quick to start, easy to customize, and endlessly re-usable for future afternoons that need a little sparkle. Pick one (or all seven) and turn a gray day into a colorful, handcrafted memory you’ll still be smiling about weeks from now.