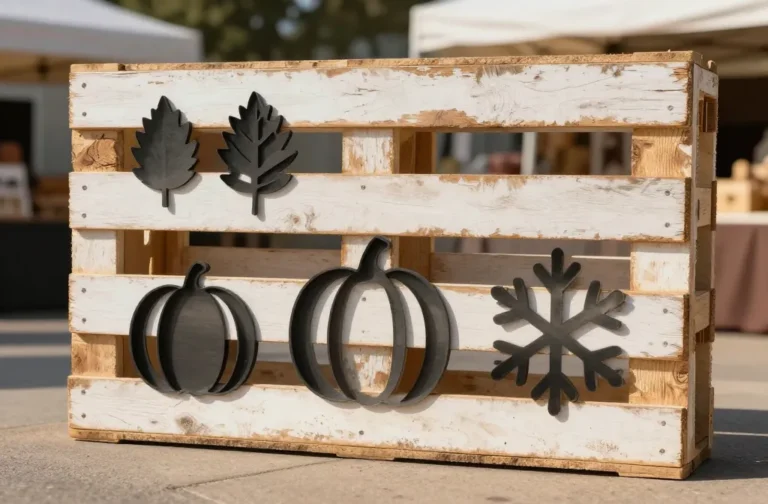
8 Easy DIY Craft Ideas for Creative Weekends
Kick off your weekend with projects that spark joy, not frustration. These eight ideas are short, stylish, and totally doable—perfect for a weekend sprucing up your space or gifting with personality. Trust me, you’ll feel instant bragging-right vibes once you finish each one.
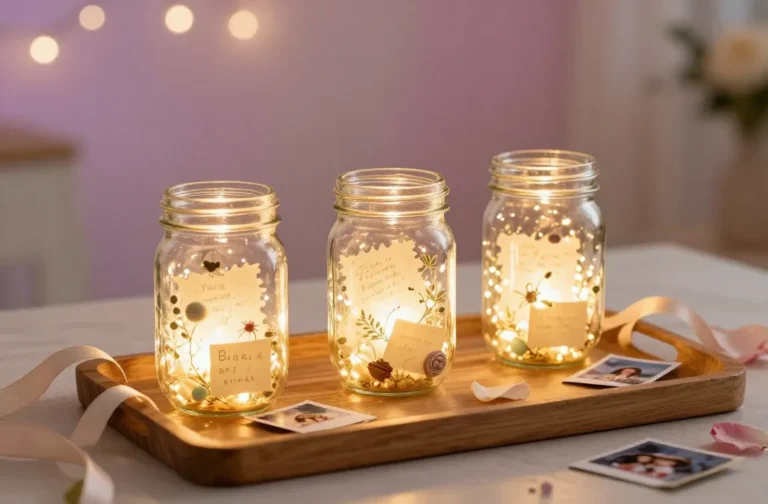
1. Rustic Mason Jar Lantern With Fairy Lights
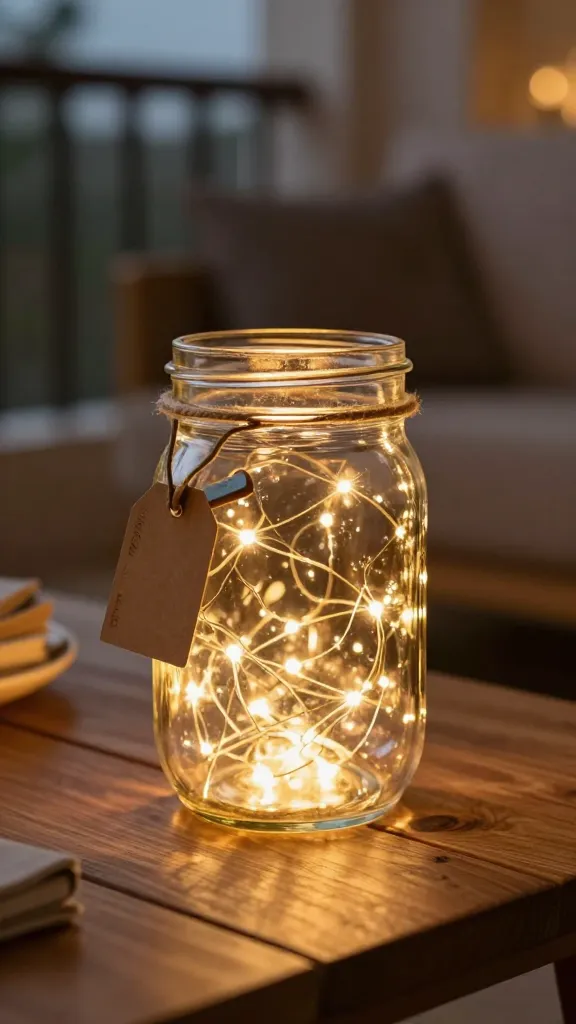
Imagine soft, amber glow wafting through a jar full of twinkle lights and a touch of woodsy charm. This lantern looks cozy on a coffee table or lit up on a balcony as evening settles in. It’s simple, ambient, and surprisingly chic.
Materials Needed
- Clear mason jars (any size)
- Fairy string lights (battery powered)
- Thin jute twine or leather cord
- Mini wooden handles or thick twine for a top loop
- Optional: metallic paint or stencil for a DIY tag
How to Make It
- Fill the jar with fairy lights, keeping the battery pack outside for easy on/off.
- Wrap twine around the neck and base, securing with a knot or hot glue for a rustic finish.
- Attach a small wooden handle or create a loop from thick twine so you can hang it or carry it easily.
- Optional: paint a tiny label or stencil initials on a wooden tag for a personal touch.
Pro Tips / Styling Ideas
- Pair with a metal tray and a few pinecones for a cabin-chic vignette.
- Use with a warm white or amber light to enhance coziness in any room.
- Switch to pastel twine for a springy, airy look.
Who will love it? DIY lovers who crave warm glow and a dash of rustic charm in their living spaces.
2. Upcycled Teacup Planters
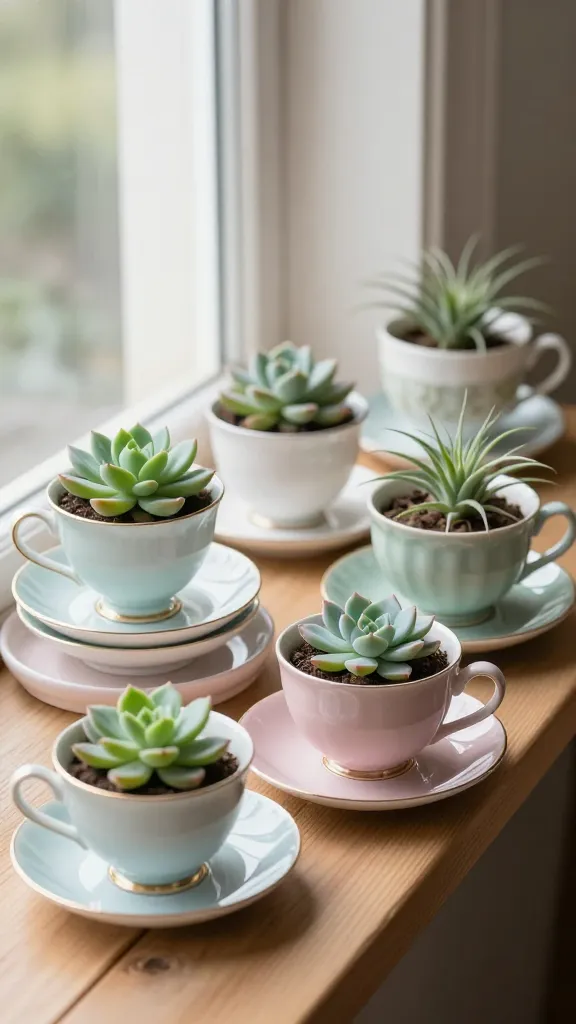
Delicate teacups get a second life as quirky plant homes. They look adorable on windowsills, desks, or as a colorful centerpiece. It’s a playful mix of vintage chic and indoor greenery.
Materials Needed
- Assorted teacups and saucers
- Small succulent or air plant varieties
- Potting mix or succulent soil
- Low-profile saucers or a tray to catch drainage
- Hot glue (optional for extra stability)
How to Make It
- Fill each teacup with a bit of soil and place a small plant inside.
- Add a tiny layer of decorative pebbles on top for drainage and charm.
- Glue the saucer to the base of the teacup if you want extra stability—especially for slick surfaces.
Pro Tips / Styling Ideas
- Group in a tray with a mix of teacups in coordinating colors for a whimsical still-life.
- Drill a tiny drainage hole if you’re planting real succulents in porous cups—FYI, use a plastic liner to protect the teacup.
- Label with mini chalkboard tags for a cute herb or succulent display.
Who would love it? Plant lovers and vintage-curation fans looking for tiny, delightfully unexpected decor.
3. Washi Tape Gallery Wall Cards
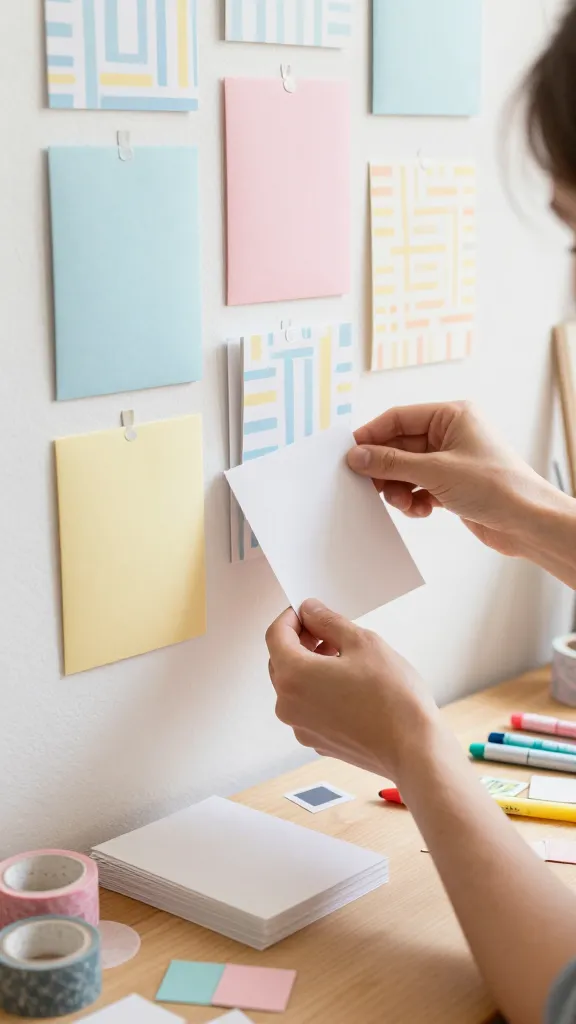
A quick, reversible way to brighten a space with color and pattern. Create a mini gallery with handmade cards, then swap out designs as the mood shifts. It feels like a celebratory, personal wallpaper—without commitment.
Materials Needed
- Blank index cards or heavy cardstock
- Washi tapes in assorted colors and patterns
- Fine-tipped markers or pens
- Double-sided mounting squares
How to Make It
- Decorate each card with layered washi tape stripes, shapes, and doodles.
- Write a short quote or word on the front for a personal touch.
- Mount on the wall in a grid or salon-style arrangement using double-sided squares.
Pro Tips / Styling Ideas
- Choose a color family to keep the display cohesive.
- Rotate designs seasonally—plus, it’s mess-free and reversible.
Who would love it? Friends who adore color-coding, typography, and fast, mess-free wall art.
4. DIY Terracotta Flower Seed Bombs
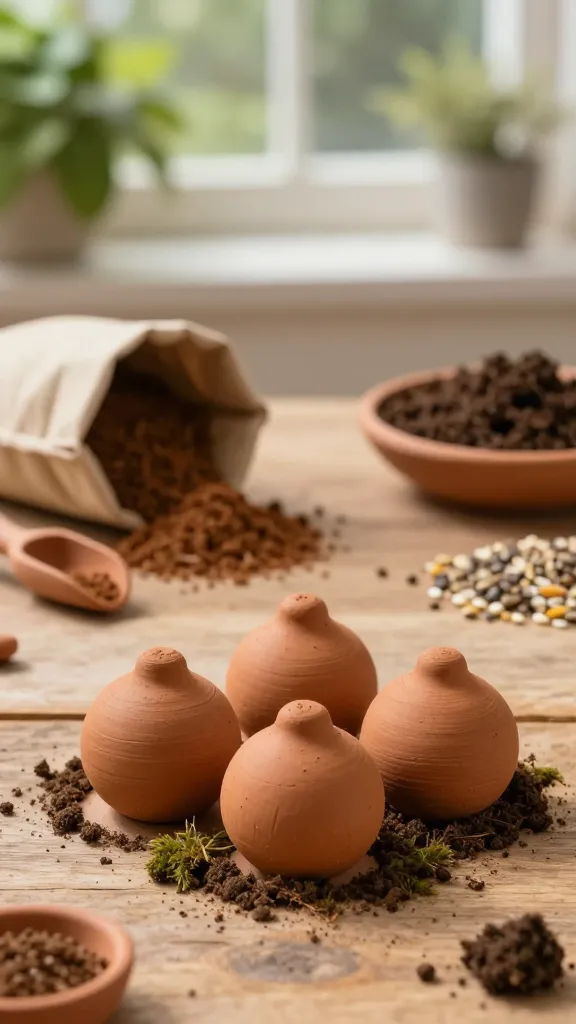
Turn soil and seeds into a playful, giftable surprise. These seed bombs are perfect for balcony planters, gifting to neighbors, or just adding a pop of greenery to your yard. It’s gardening meets candy-making vibes, minus the sugar rush.
Materials Needed
- Terracotta or brown-red clay powder
- Seeds of your choice (flowers or herbs)
- Compost or potting soil
- Water
- Optional: dried petals or glitter for a pretty finish
How to Make It
- Mix clay powder with water and compost to form a pliable dough.
- Roll small balls, press a seed into each, and smooth the surface.
- Dry completely in a sunny spot before gifting or planting.
Pro Tips / Styling Ideas
- Wrap in a small kraft bag with a label for a thoughtful gift.
- Scatter in a neglected corner of the garden to spark a mini bloom riot in a few weeks.
Who would love it? Green thumbs and eco-friendly gift-givers who want a tiny, tactile project with big garden payoff.
5. Painted Pallet Wood Coasters
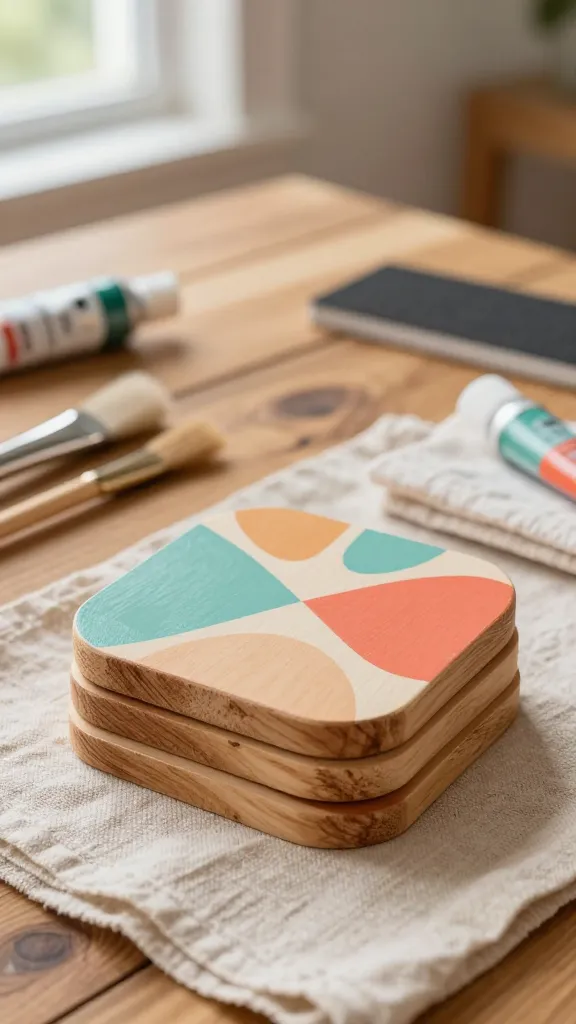
Get the warmth of wood and the pop of color in one stylish coaster set. These look designer, but they’re a breeze to craft. Sip, set, repeat—your coffee table just got a personality upgrade.
Materials Needed
- Pallet wood slices or square cuttings
- Acrylic paints in 2–3 coordinating colors
- Foam brushes
- Clear sealant spray or varnish
- Sandpaper (fine grit)
How to Make It
- Lightly sand the edges and surfaces for a smooth feel.
- Paint each coaster with abstract shapes or geometric patterns.
- Seal with a protective finish to resist moisture and daily wear.
Pro Tips / Styling Ideas
- Use a limited palette of warm neutrals for a cohesive set that fits any interior.
- Pair with a matching wall art piece or plant for a curated coffee nook.
Who would love it? Home decor lovers who want a tactile, handmade vibe without heavy construction time.
6. Soft Linen Wall Banners
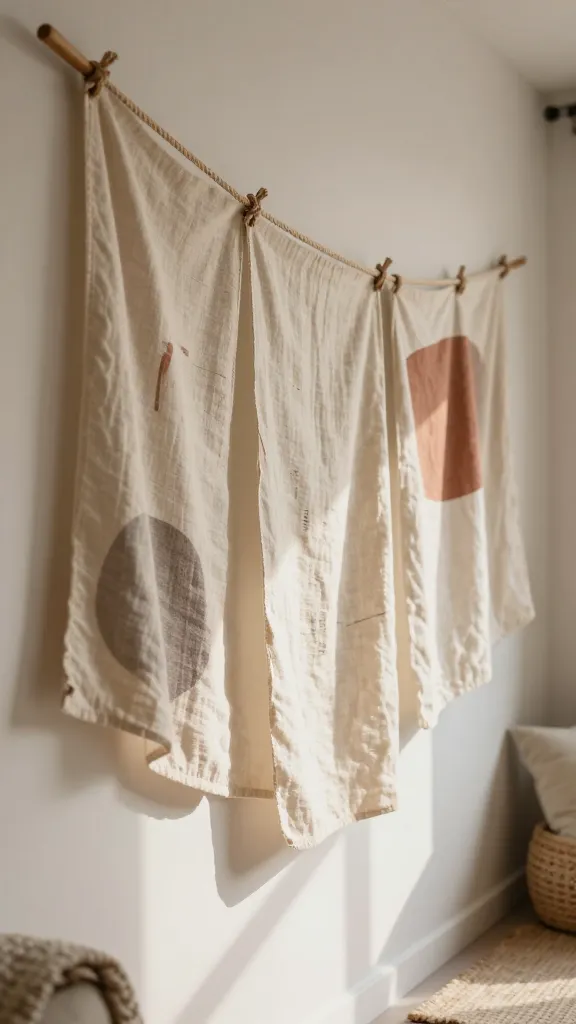
Whisper-thin banners that catch the eye with natural textures. This project adds a cozy, boho touch to any wall, and you can customize with words, motifs, or patterns. It’s easy, breathable, and seriously satisfying to hang.
Materials Needed
- Natural linen fabric panel or plain tote-sized fabric
- Acrylic or fabric paint in your chosen palette
- Painter’s tape for crisp lines
- Rope or twine for hanging
How to Make It
- Secure the fabric to a flat surface and tape off your design.
- Paint simple shapes, patterns, or a short inspirational word.
- Let dry, wash gently if needed, and hang with a loop of twine.
Pro Tips / Styling Ideas
- Create a trio of banners in varying lengths for a dynamic gallery feel.
- Hang near a sunny window to catch natural light and your eye at every glance.
Who would love it? Color lovers and minimalist-maximalists alike who want texture and warmth without heaviness.
7. Concrete Planter Stacks
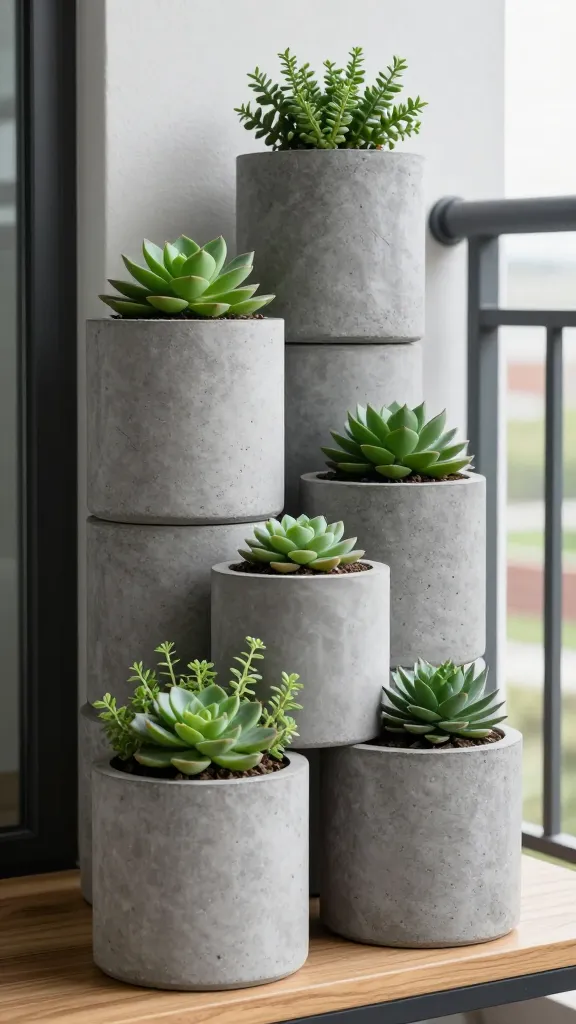
That urban, industrial vibe meets nature in a compact, stackable planter design. It’s sturdy, modern, and surprisingly versatile. Stack them on a shelf, or line them up on a balcony for a little urban jungle charm.
Materials Needed
- Small concrete planters or DIY concrete mix
- Potted succulents or tiny herbs
- Silicone mold or thrift-store bowls for shaping
- Sealant spray (optional for extra durability)
How to Make It
- Cast small concrete pots using a mold and let cure fully.
- Fill with soil and plant your chosen greenery.
- Stack or arrange on a tray, securing with a decorative rope if desired.
Pro Tips / Styling Ideas
- Intersperse with a few air plants for variety in texture.
- Use gray-blue tones or warm terracotta to match your interior palette.
Who would love it? Modern design fans who want architectural plant displays without a ton of fuss.
8. Personalized Hardcover Journal Jars
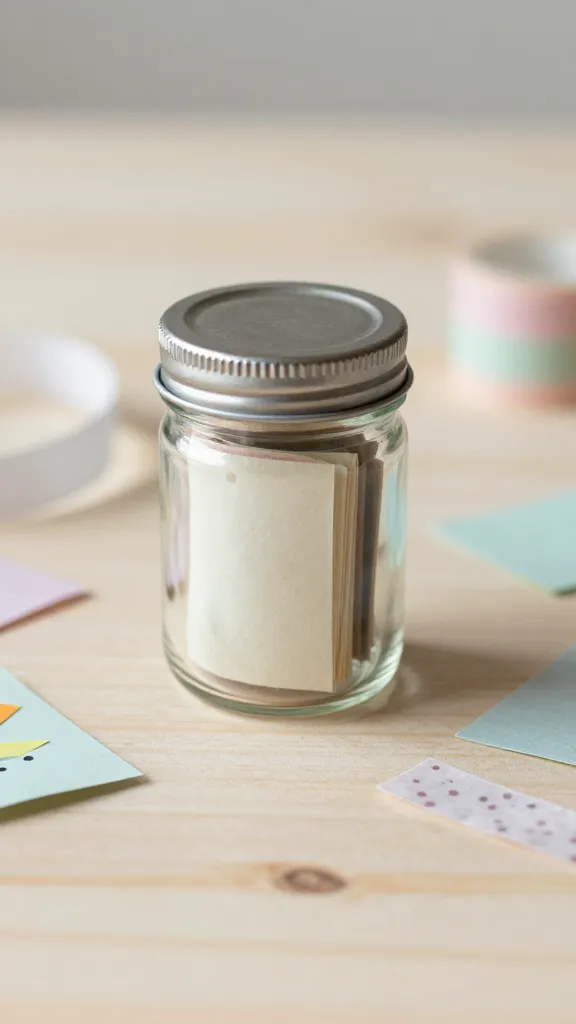
Preserve memories in a jar with a tiny, handmade notebook inside. A clever idea for gifting, journaling on the go, or a sentimental centerpiece. It’s compact, meaningful, and wholly you.
Materials Needed
- Small glass jars with lids
- Mini notebook or handmade mini-booklets
- Decorative paper, ribbons, and washi tape
- Glue or mod podge
How to Make It
- Roll a mini notebook and place inside the jar; secure lid.
- Decorate the outside with patterned paper, ribbon, and a sticker or tag for a personal label.
- Optionally add a note or photo tucked into the jar lid for a keepsake moment.
Pro Tips / Styling Ideas
- Gift with a plan for future entries—“Month of Gratitude” or “Travel Log.”
- Line a shelf with several jars in a color gradient for a striking display.
Who would love it? Sentimental crafters, journal lovers, and anyone who enjoys a tiny, thoughtful gift in a stylish package.
Conclusion
Ready to unleash your weekend crafting energy? These eight ideas are perfect for quick wins that still feel special. Pick one (or go all-in) and you’ll finish with stylish decor, thoughtful gifts, and a weekend you’ll happily pin again and again.