9 3d Craft Ideas for Preschool Classroom Activities: Spark Creativity
Ready to bring a burst of color, texture, and tiny triumphs into the preschool day? These 9 3D craft ideas for preschool classroom activities are playful, simple, and totally kid-friendly. You’ll love how quick they come together and how proudly little artists show off their work—trust me, you’ll see those adorable smiles light up.
1. Pom-Pom Planet Mobiles: Mini Space Adventures
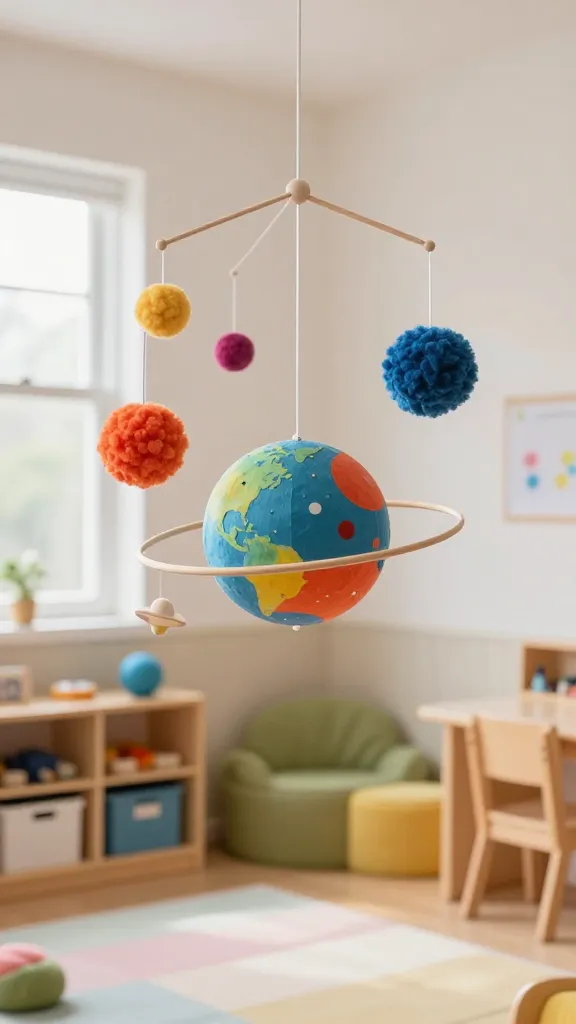
Picture a hanging mobile filled with fluffy pom-poms orbiting a cardboard planet—bright, bouncy, and unexpectedly educational. This 3D craft adds a splash of whimsy to the classroom corner and doubles as a tactile science moment about planets and space.
Materials Needed
- Foam or cardboard planets (pre-cut or DIY with markers)
- Assorted colorful pom-poms
- Yarn or string for hanging
- Hole punch or small eyelet tools
- Glue or hot glue (supervision required)
How to Make It
- Attach pom-poms to the bottom of each planet using light glue so they don’t shed too much fluff.
- Thread yarn through small holes to create a balanced mobile, spacing each planet at varying heights.
- Hang in a window or reading nook where sunlight makes the pom-poms sparkle.
Pro Tips / Styling Ideas
- Color code by planet type (terrestrial vs gas giant) for a quick science tie-in.
- Use metallic accents to catch the light and add a magical touch.
Who loves it? It’s perfect for a space-themed week or a classroom reading corner—seriously, kids will press their noses to the window to watch the planets spin.
2. Texture Box Castles: Sensory Storytime Towers
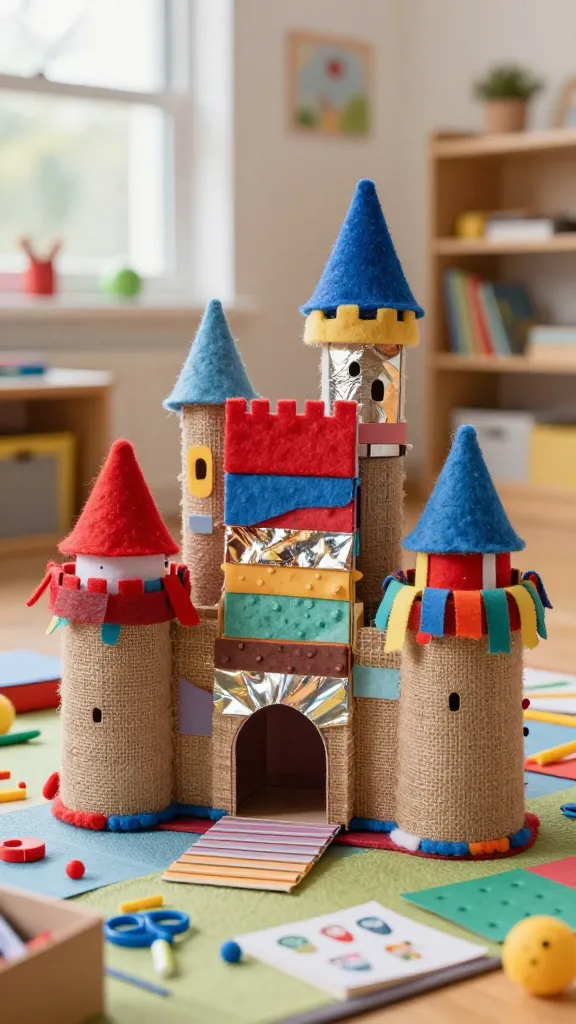
Imagine a tiny castle built from shoe boxes and lined with an explosion of textures—felt, foil, burlap, and ribbon galore. This 3D craft turns dramatic play into a tactile adventure and doubles as a storytelling prop during circle time.
Materials Needed
- Empty shoeboxes of varying sizes
- Assorted fabrics, felt, and textured papers
- Glue sticks and low-temp glue
- Scissors, markers, stickers
- Tape or hot glue gun (adult use)
How to Make It
- Stack and tape boxes to form a little castle silhouette.
- Cover each wall with a different texture, letting kids press shapes into the surfaces.
- Decorate towers with flags, windows, and tiny doors for story prompts.
Pro Tips / Styling Ideas
- Invite students to hide small toy figures inside as a scavenger element.
- Use neutral bases and bright textures to create a high-contrast, captivating look.
Who loves it? It’s a hit for dramatic play and a fantastic launchpad for imaginative storytelling sessions.
3. Bubble-Woosh Rain Sticks: Sound-Wave Crafts
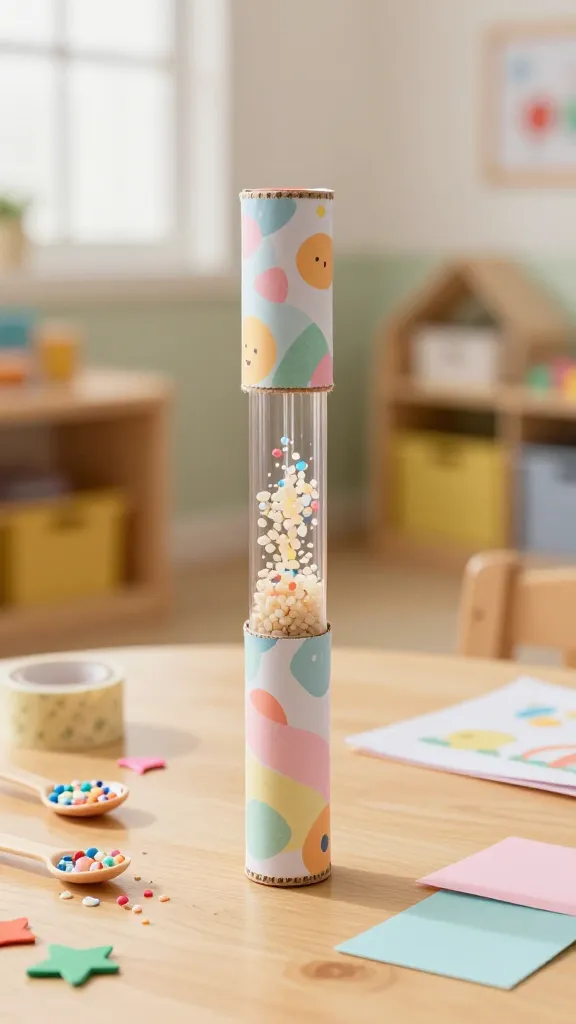
Make your own rain sticks using cardboard tubes and a shower of beads or rough-cut rice. This 3D craft isn’t just pretty; it introduces rhythm, sound exploration, and a bit of science about sound waves.
Materials Needed
- Cardboard tubes (from paper towels or wrapping paper)
- Rice, beads, or small dried beans
- Masking tape
- Decorative paper, stickers, paint
- Paper cups or caps for ends (optional)
How to Make It
- Seal one end of the tube with tape or a cap.
- Fill with a small handful of beads or rice.
- Seal the other end and decorate the outside with bright designs.
Pro Tips / Styling Ideas
- Decorate with kid-friendly patterns like rainbows or animals.
- Pair with a listening activity: who can imitate the rain best?
Who loves it? Music lovers and sensory seekers alike will press play on this one during circle time or quiet transitions.
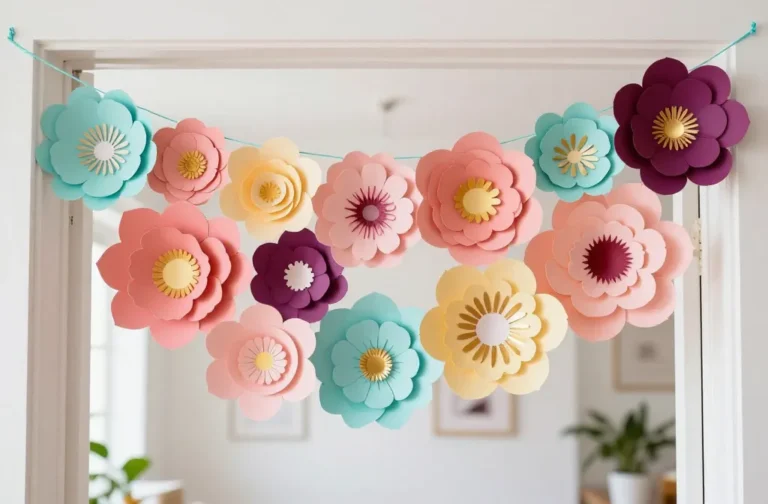
4. Paper-Plate Petal Phonies: Floral 3D Buds

Turn simple paper plates into cheerful 3D flowers with layered petals that pop off the page. These little blossoms brighten walls, doorways, and classroom desks, offering a sweet, seasonal vibe—perfect for spring or a garden-themed week.
Materials Needed
- Paper plates
- Colored construction paper or thick craft paper
- Scissors, glue, tape
- Candy: optional tiny sticker centers for extra sparkle
How to Make It
- Cut petals from colored paper in varying sizes and shapes.
- Layer petals onto a painted paper plate, securing with glue at the center.
- Add a center dot with a contrasting color or sticker.
Pro Tips / Styling Ideas
- Mount multiple plates on a wall to create a blooming 3D mural.
- Rotate colors seasonally to refresh the display.
Who loves it? Art-loving kiddos and teachers looking for a cheerful classroom border will adore these petals—FYI, they photograph beautifully for quick classroom updates.
5. Cardboard Animal Towers: Mini Zoo Climbing Challenge
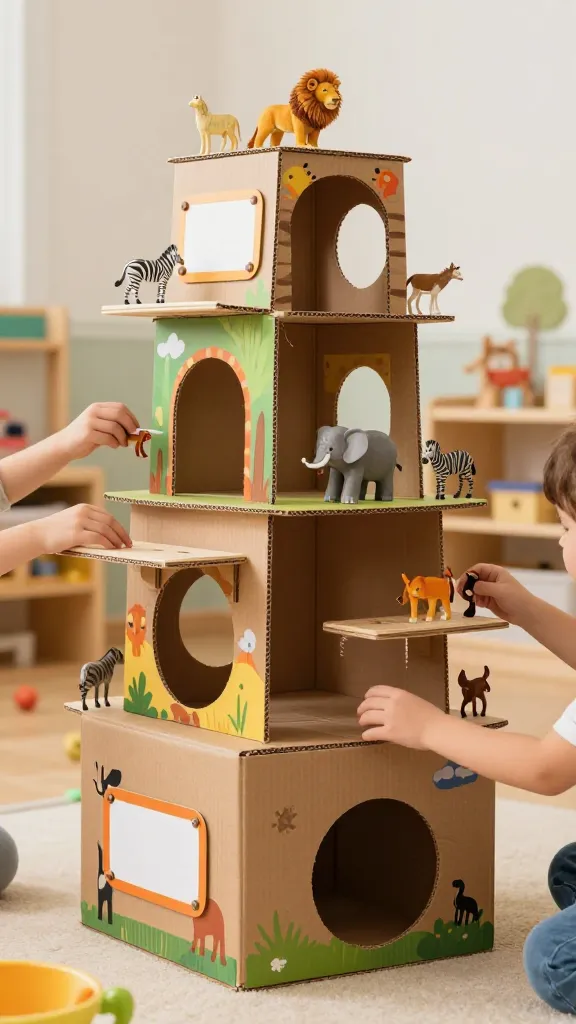
Transform a cardboard box into a tiny multi-tier animal observatory. Kids stack, balance, and place little animal figures on each level, learning balance, spatial awareness, and a dash of pretend play diplomacy.
Materials Needed
- Large cardboard box
- Colored markers, stickers, and tape
- Mini animal figurines
- Glue or double-sided tape
How to Make It
- Cut the box into several levels with gaps for crawling or climbing between tiers.
- Decorate each level with patterns, colors, and little animal names.
- Place animals on each tier and invite kids to navigate the tower with care.
Pro Tips / Styling Ideas
- Laminate or seal decorative surfaces for durability in a busy classroom.
- Pair with a storytelling prompt: which animal travels the tallest?
Who loves it? Budding zoologists and active learners will beg to explore this mini zoo again and again.
6. Felt Cookie Bakery: 3D Play Food Set
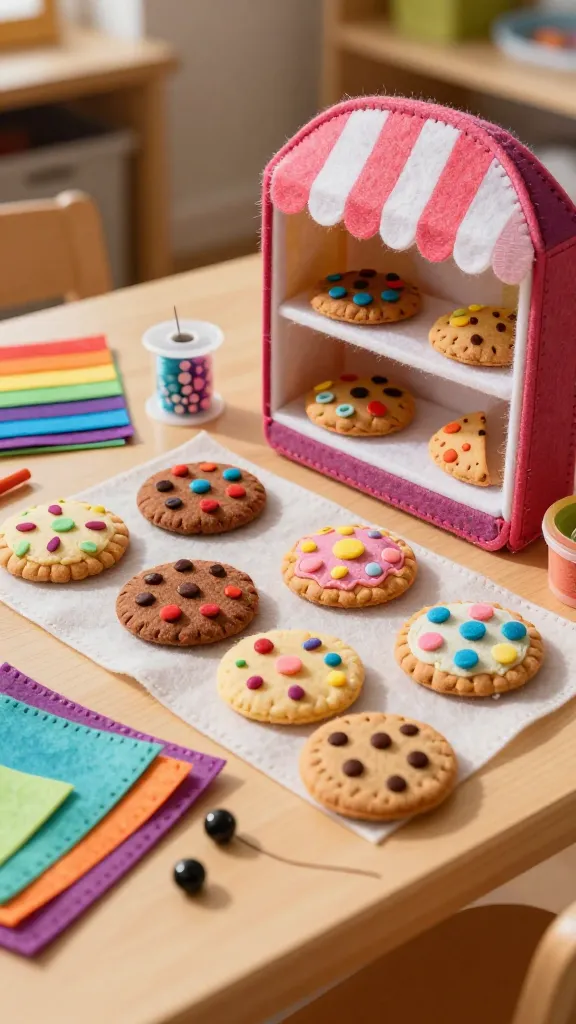
Whip up a cozy felt bakery where felt cookies puff up with soft texture and bright colors. This 3D craft becomes a ready-made invitation for role play, social skills, and math-ready counting games during snack-and-play moments.
Materials Needed
- Felt in assorted colors
- Needle and thread or fabric glue
- Black beads or embroidery thread for chocolate chips
- Velcro dots for interactive pieces
How to Make It
- Cut circular cookie shapes and use small felt bits to create toppings.
- Stitch or glue toppings onto cookies, adding texture with embroidery floss for chips or sprinkles.
- Attach Velcro to make interactive, stackable treats.
Pro Tips / Styling Ideas
- Catalog cookies by color for color-matching games.
- Use a simple felt oven or baking tray as a display stage.
Who loves it? Small bakers and role-playing fans will savor a bite-sized, soft-toy bakery in the corner.
7. Rainbow Ring Sticks: 3D Color Chains
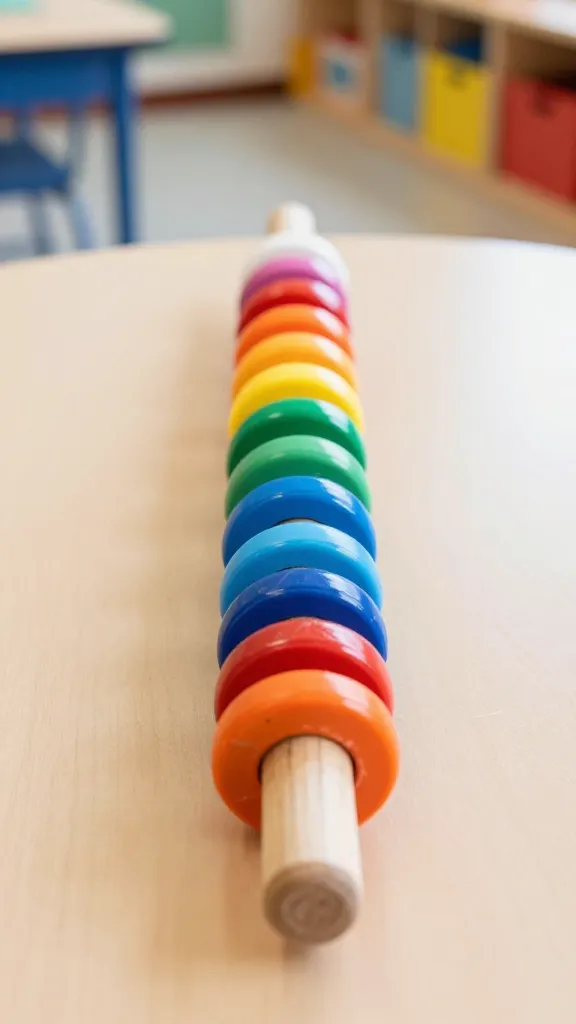
Slide bright colored rings along a paint-streaked dowel to create a 3D rainbow chain. It’s a quick, satisfying craft that reinforces color recognition, fine motor skills, and pattern making in a tactile, kid-pleasing way.
Materials Needed
- Colored plastic rings or colored felt shapes with holes
- Wooden dowels or sturdy sticks
- String or thin ribbon
- Hot glue (adult use) or strong tape
How to Make It
- Attach rings to the dowel in a rainbow order, leaving some space between for movement.
- Encourage kids to thread rings in a simple sequence or pattern on their own sticks.
Pro Tips / Styling Ideas
- Use as a classroom color chart or a simple name tag holder during a meal routine.
- Upgrade with glittery rings for a party vibe.
Who loves it? Color-hungry kiddos and early learners who adore hands-on tinkering will be obsessed with these moving color towers.
8. Sock Puppet Buddies: 3D Mini Puppets
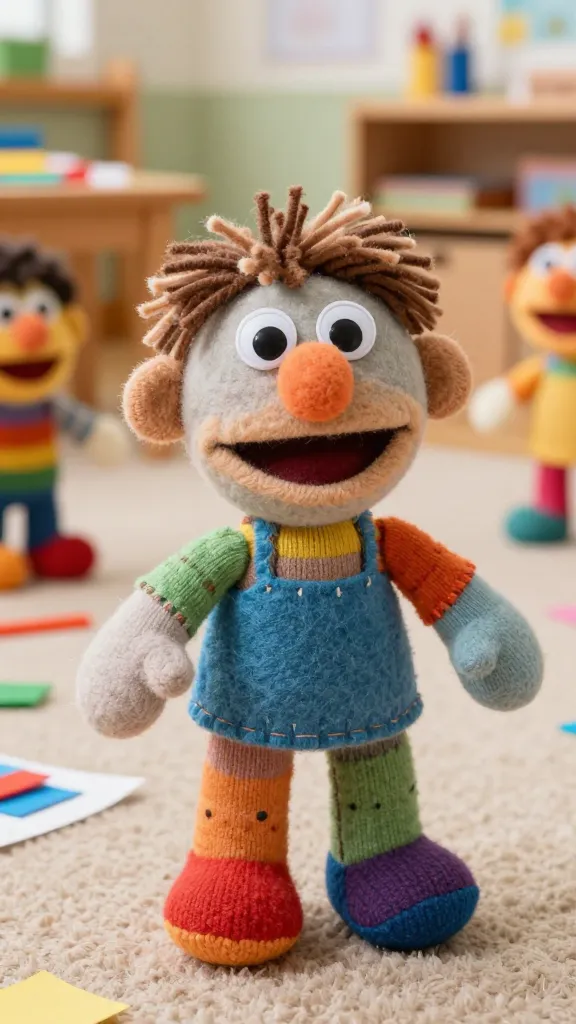
Turn cheerful socks into plush little puppets with eyes, hair, and tiny outfits. This 3D craft invites expressive storytelling, boosts language development, and makes group puppet shows a breeze for preschoolers.
Materials Needed
- Socks (kids’ sizes ensure quick access)
- Googly eyes or felt circles
- Yarn for hair, small felt pieces for noses and mouths
- Glue or small stitches to attach pieces
- Optional fabrics or buttons for outfits
How to Make It
- Decorate the sock with eyes, mouth, and hair. Add a small felt nose or mouth to give character.
- Stitch or glue on clothes to give each buddy a distinct personality.
- Stretch the puppet for a quick show during storytelling time.
Pro Tips / Styling Ideas
- Have a weekly puppet show where kids introduce a new buddy and a tiny story.
- Store puppets in a labeled basket for easy access during centers.
Who loves it? Dramatic readers, shy talkers, and any kid who loves a goofy face on a sock will be hooked.
9. Button-Branch Frame Ornaments: 3D Keepsakes
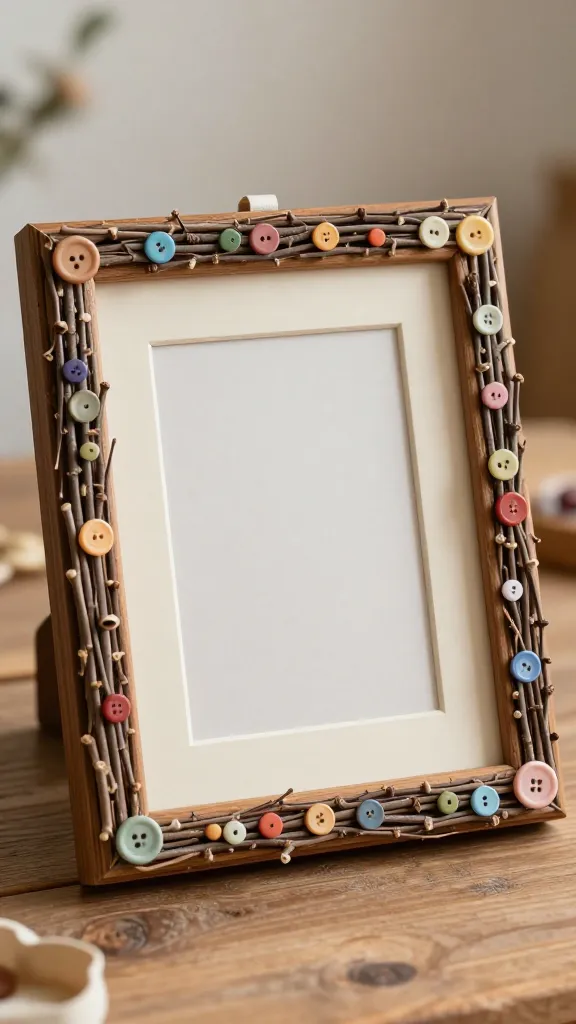
Create a tiny photo frame urban of twigs and buttons—an earthy, tactile piece that doubles as a keepsake for families. This 3D craft blends nature with craft and yields a charming display piece for the classroom or home.
Materials Needed
- Small wooden frame or cardboard frame
- Twigs or thin branches
- Assorted colorful buttons
- Glue and hot glue gun (adult use)
- Ribbon for hanging
How to Make It
- Glue small twigs around the edge of the frame to create a natural border.
- Glue colorful buttons onto the twig border for a whimsical pattern.
- Attach a ribbon loop for hanging and slide a favorite photo into place.
Pro Tips / Styling Ideas
- Make a seasonal batch: fall leaves and buttons for autumn; pastel buttons for spring.
- Pair with a class photo display to celebrate every kid’s milestone.
Who loves it? Nature lovers and those who want a warm, handmade gift-ready piece will eat this up.
Conclusion: Ready to dive in and craft with your preschool crew? Each of these 9 3D craft ideas for preschool classroom activities is designed to be quick, engaging, and proudly display-worthy. Pick one for today’s centers, or try them all over a week—your space will feel more playful, tactile, and welcoming in no time. Happy crafting, friends—your classroom—and your students—will thank you.