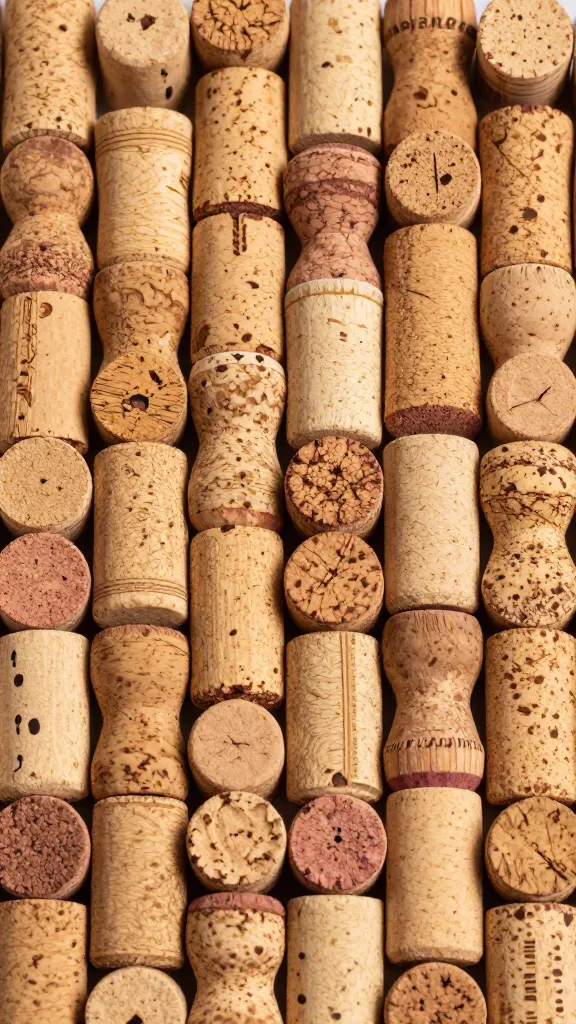
5 Craft Ideas with Wine Corks That Wow
The corks pile up, and you suddenly see possibilities bigger than the wine glass you just emptied. DIY with wine corks isn’t about recycling for the sake of it—it’s about turning tiny forest leftovers into big, goofy, gorgeous projects. You can craft usable stuff, cute decor, and even a few cheeky gifts. FYI, you don’t need a workshop full of tools to start; just a bit of imagination and a bag of corks. Ready to turn those corks into something you’d actually want to show off?
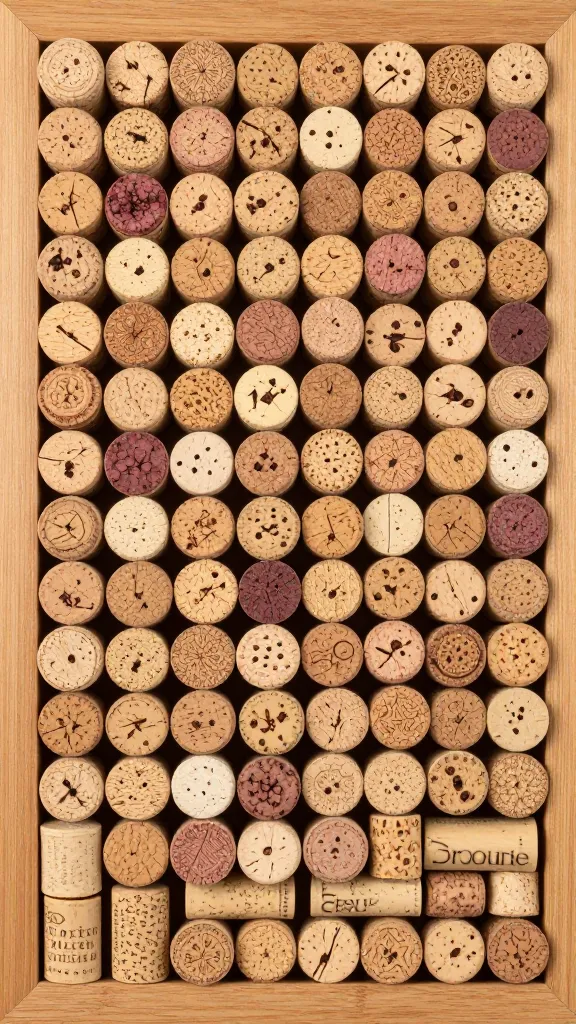
1. Corkboard Comeback: A textured, practical showstopper
A corkboard made from wine corks looks unexpectedly chic and surprisingly sturdy. You can mount it in a kitchen, home office, or entryway and use it for notes, magnets, and doodles.
– What you’ll need: corks, a wooden frame, hot glue, a backing (canvas or cardboard), and a foam sheet for depth.
– Quick process: arrange corks like bricks, glue them to the backing, then place inside the frame. You can cut corks to fit tricky edges or make a checkerboard pattern for extra flair.
– Pro tip: leave a few corks flat to carve initials or tiny messages with a craft knife. It’s the small details that make it feel personal.
- Design first, then glue placed rows for a tidy look.
- Seal with a light spray of clear acrylic to keep dust at bay.
Deep dive: Pattern ideas that pop
If you want texture without the fuss, go for patterns:
– Herringbone cork rows
– Circular rings for a sunburst effect
– A simple mosaic using mixed lengths for visual interest
This project scales with your cork supply. More corks, bigger board, bigger wow.
2. Cozy Cork Coasters: Practical, pretty, and conversation starters
Coasters are the easiest brag-worthy craft you can actually use daily. They protect tables and spark conversations about your latest thrift-store score or travel story.
– Materials: corks, hot glue gun, rubber feet or felt pads, optional cork sheet for backing.
– Technique: slice a few corks in half to create a more stable base, then glue them in an everyday geometric pattern. You can do a checkerboard, a honeycomb, or a simple rectangle.
– Personal touches: add a strip of fabric wrapped around the edge or a stencil with a witty quote.
- Keep a few corks uncut for variety in shapes and heights.
- Add a polymer sealant or glue a thin cork sheet underneath to prevent moisture soak-through.
Inspiration on the go: 3 quick patterns to copy
– Diagonal mosaic: staggered cork tiles for a dynamic vibe
– Circular inlays: create little “eye” shapes by carving rings
– Minimal rectangle: clean lines for a modern, Scandinavian feel
3. Wall Art that Speaks: Cork canvases with personality
Turn corks into a wall-ready piece that’s equal parts chic and cheeky. This one is perfect for a kitchen nook or a cozy dining corner.
– What you’ll do: arrange corks in a frame to form a silhouette, word, or abstract art. Glue onto a sturdy backing, then frame it or mount it directly.
– Wordplay option: spell out a favorite wine pun like “Sip Happens” or “Cork It If You Love It.”
– Finishing touch: seal the front with a matte acrylic spray to keep cork fibers from shedding.
Subsection: making a cork silhouette
Choose a simple shape—like a wine glass, grape cluster, or a bottle—and fill it with corks. Keep the inner negative space clean for readability. It’s surprisingly striking when done with bold contrast colors.
4. Upcycled Lighting: Cork lamps and lantern vibes
Yes, you can lamp without burning down the house. This one leans a little more on the “wow” side, but the results are worth it.
– How-to at a glance: create a lampshade by hot-gluing corks end-to-end around a circular frame or an existing shade. The corks diffuse light in a warm, cozy way.
– Safety note: use low-wattage bulbs and ensure the corks aren’t too close to the bulb to avoid heat damage. If you’re uneasy, shop for a ready-made lampshade frame—just wrap corks around it.
– Style variations: a rustic natural cork look, or stain the corks a uniform color for a sleek, modern vibe.
- Test a small section first to gauge heat tolerance.
- Leave tiny gaps between rows to create interesting light patterns on the wall.
5. Cork-Driven Planters: Tiny ecosystems, big charm
Planters made from corks are not only adorable; they’re surprisingly handy for drainage and support in small spaces.
– Quick build: glue corks into a hollow cube or rectangular prism shape. Line with plastic or a small plant pot to prevent soil leaks, then plant succulents or petite herbs.
– Water considerations: corks are natural insulators, so they’ll soak up a bit of moisture; keep an eye on watering so you don’t soggy-cheese your roots.
– Decor tips: wrap a twine around the outer shell, or paint the corks in complementary colors to your room.
6. Bonus: Cork Magnets and Tiny Keepsakes
If you want micro-projects that don’t demand much time, these tiny wins brighten any fridge or desk.
– Magnets: glue mini magnets to the back of halved corks. Use a hot glue gun for a quick, sturdy bond.
– Keepsake pins: glue a small metal pin on the back of a cork slice to create a wearable bit of nostalgia.
– Greeting cards: attach a cork-sized tag to a card as a rustic, tactile accent.
7. Practical Tips to Nail Any Cork Craft
– Sort and plan: layout your design on a table before gluing. That lets you tweak spacing and color balance.
– Mix and match: combine whole corks with sliced pieces for depth and texture.
– Prep matters: wipe corks with a damp cloth to remove dust before starting. Dry completely so glue sticks well.
– Safety first: use a hot glue gun with caution, especially if kids are involved or you’re doing a big project.
– Preserve the vibe: seal surfaces with a clear matte finish to keep cork fibers from shedding and to protect from moisture.
Conclusion
If you’ve got a stash of wine corks, you’ve got a toolkit for creativity. These projects prove that small, humble items can become bold, useful decor. The best part? You can customize every piece to fit your space, taste, and sense of humor. So, which cork craft are you diving into first—corkboard, coasters, wall art, lighting, or planters? IMO, start with coasters. They’re fast, functional, and won’t make you cry if you mess up.
FAQ
Are cork crafts durable enough for everyday use?
They can be, yes. Use a clear sealant or a backing to add sturdiness, and don’t rely on corks alone for heavy loads. For coasters and small decor, you’ll be fine.
Do I need special tools to work with corks?
Not really. A hot glue gun, basic craft supplies, and a bit of patience do the job. If you want precise cuts, a craft knife helps, but you can totally wing it with a steady hand.
What’s the best way to clean cork crafts?
Dust with a soft cloth or a gentle brush. For stubborn spots, a damp cloth works, then let air dry completely. FYI, keep them away from harsh solvents that can degrade the cork.
How long do these projects take?
Most simple cork crafts take a few hours or less. Bigger wall art or lighting projects might stretch to a weekend, especially if you’re painting or staining.
Can I use synthetic corks, or do I need real corks?
Real corks have a rustic charm, but synthetic corks work too. They’re often cleaner and come in uniform shapes, which can be handy for precise patterns.
What if I don’t have a lot of corks?
Scale down your project or combine corks with other repurposed materials like bottle caps, wood slices, or fabric scraps. The goal is creativity, not cork perfection.