9 Craft Ideas for School Occupational Therapy: Delightful Diys
Ready to make therapy feel like a crafty adventure? These nine unique DIY ideas are designed for school OT sessions—engaging, practical, and totally doable. Trust me, your students will light up when these projects blend fine motor fun with real-life skills.
1. Pencil Grip Plant Markers: Squeeze, Curl, Seal
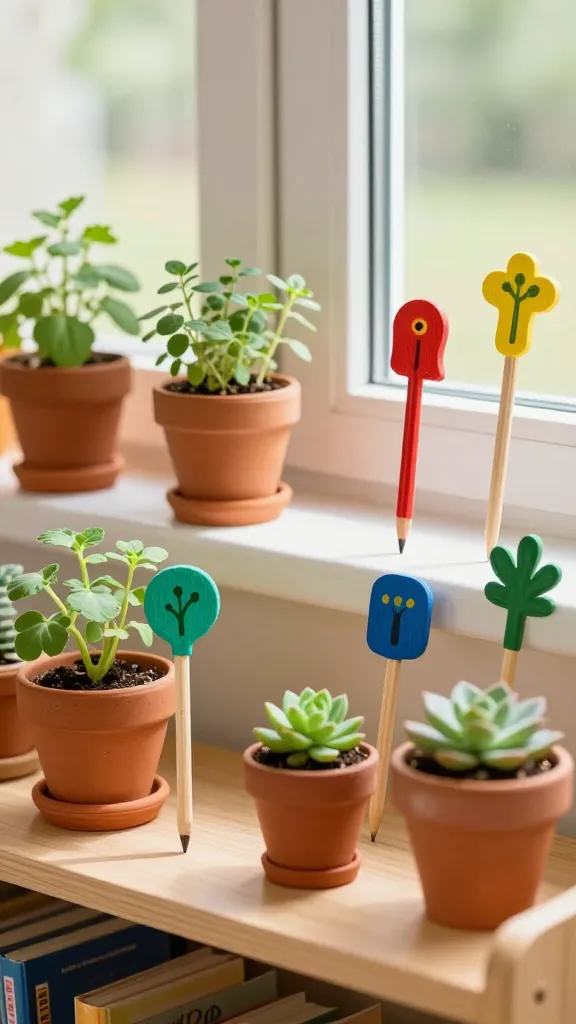
Picture a sunny classroom corner filled with cheerful markers labeling herbs or classroom plants. These plant markers are not only adorable but also excellent for practicing tripod grasp, pinch strength, and precision. The colors pop, the textures feel satisfying, and you’ll love how durable they become with a simple sealant.
Materials Needed
- Wooden craft sticks or Popsicle sticks
- Acrylic paints or markers
- Non-toxic sealer spray
- Alphabet stamps or tiny vinyl letters (optional)
- Small plant pots or a garden bed in the classroom
How to Make It
- Paint each stick with a bright color and let dry.
- Write or stamp the plant name on the stick, then seal lightly.
- Attach a tiny clay or foam accent at the top for extra grip and personality.
Pro tips
- Use different textures on the marker tips to encourage tactile exploration.
- Laminate or seal to withstand classroom wear—these markers will get used a lot!
Who would love it or when to use it: Perfect for elementary classrooms, home practice, or therapy sessions focusing on letter formation and fine motor control.
2. Sensory Bracelet Weaving: Colorful Tactile Tangles
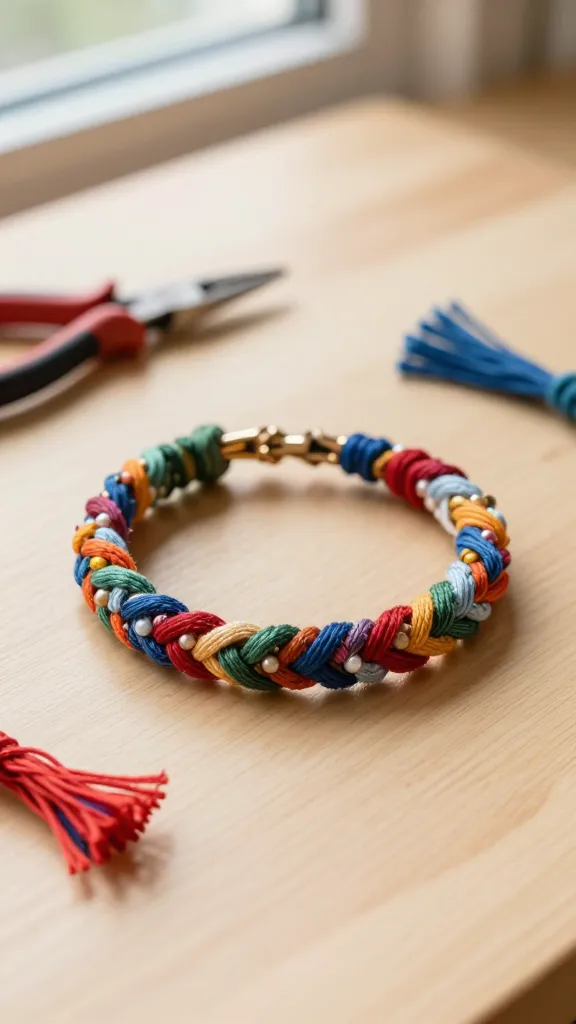
Imagine a bracelet that doubles as a therapy tool—texture, color, and motion all in one. This weaving bracelet project strengthens hand-eye coordination, bilateral coordination, and finger dexterity. It’s calming, satisfying, and incredibly giftable.
Materials Needed
- Embroidery floss in 5–6 colors
- Small plastic or wooden beads (optional)
- Plastic or metal clasps (for secure closure)
- Needle-nose pliers
How to Make It
- Cut floss into 18–24 inch strands. Tie them to a sturdy anchor or clipboard.
- Begin a simple over-under weave, swapping colors as you go.
- Thread beads on for extra resistance and texture.
- Finish with a clasp and knot secure ends.
Pro tips
- Encourage students to switch hands mid-project to build bilateral coordination.
- Let them select color palettes that reflect their interests for extra motivation.
Who would love it or when to use it: Great for quiet work periods, OT sessions targeting grip endurance and sequencing. Also a hopeful confidence booster for students who love fashion and accessories.
3. Tangram-Tile Sensory Board: Shape and Slam
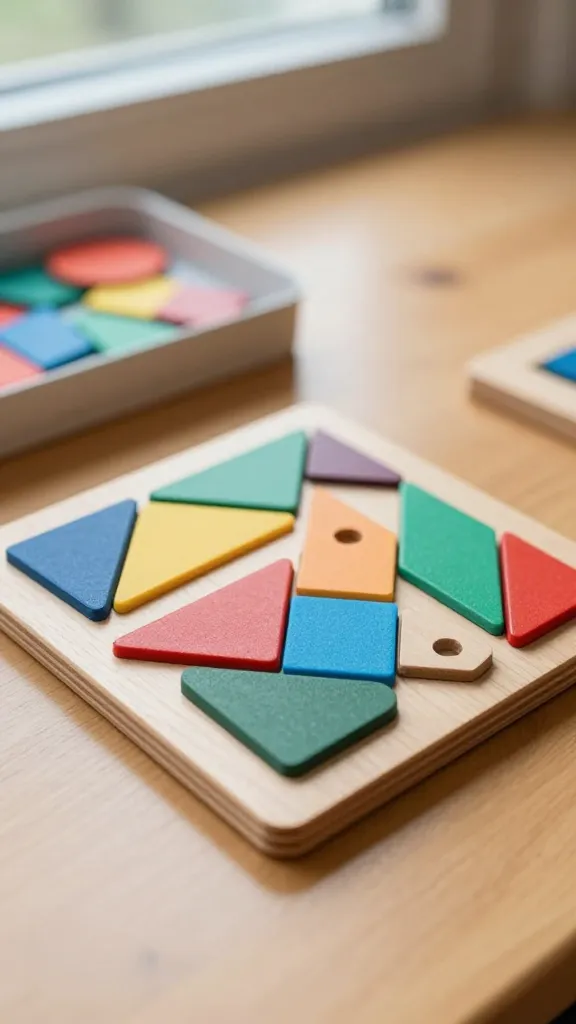
A small, portable sensory board that blends visual appeal with cognitive challenge. Students arrange tangram-like shapes to form a picture while refining pincer grip and problem-solving speed. It’s fast, focused, and seriously satisfying when the shapes click into place.
Materials Needed
- Wooden or cork tiles (2–3 inches)
- Colored foam shapes or wooden cutouts
- Non-toxic glue and a sealant
- Small container to hold extra shapes
How to Make It
- Glue foam shapes onto tiles in a fun, irregular mosaic.
- Laminate or seal to prevent chips and keep colors bright.
- Create a built-in tray or pouch to hold extra shapes.
Pro tips
- Offer a quick shape-matching challenge during the session for a friendly competition.
- Use contrasting colors to boost visual discrimination and engagement.
Who would love it or when to use it: Ideal for classroom extension activities, early math readiness, and sessions that blend cognitive load with motor skill work.
4. Button Quilt Coaster Set: Fine Motor, Big Impact
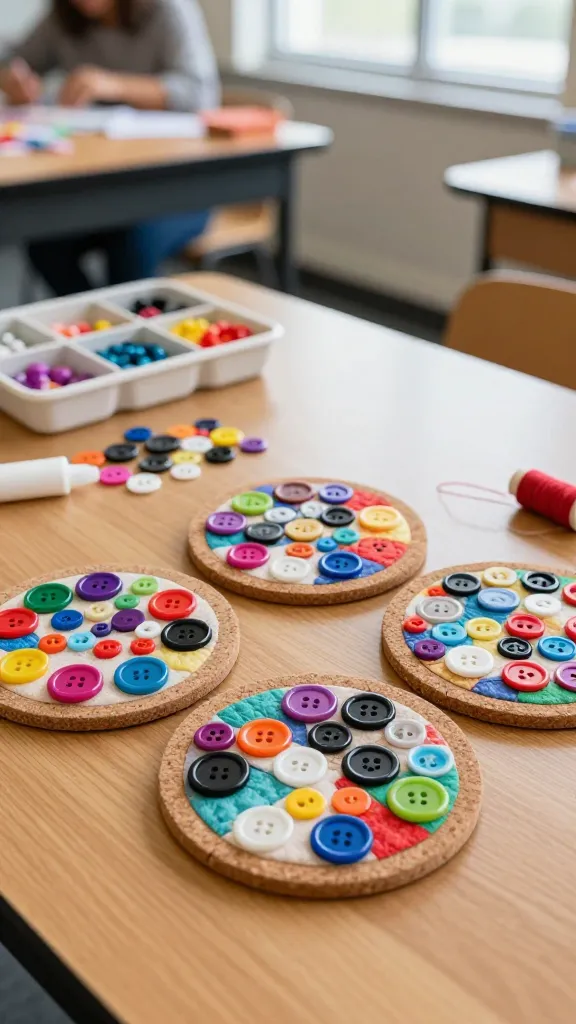
Think cozy, crafty, and totally practical. A button-quilt coaster set gives students a chance to practice pinching, threading, and color coordination while ending up with a charming set of keepsakes for the teacher’s desk or home.
Materials Needed
- Felt or cork coasters (4–6 per set)
- Assorted buttons (varied sizes)
- Strong glue or fabric adhesive
- Needle and thread (optional for stitching)
How to Make It
- Arrange buttons on the coaster in a playful pattern before gluing.
- Glue down the buttons, applying even pressure to avoid bulges.
- For extra durability, stitch some buttons around the edges as a decorative border.
Pro tips
- Mix large and small buttons to challenge fine motor precision.
- Seal with a clear varnish if you used fabric glue to prevent peeling.
Who would love it or when to use it: A sweet gift for caregiver appreciation, a class project showcase, or a practical desk accessory the kids are proud to claim.
5. Banana-Stem Pencil Pouches: Grasp-Gain Organizer
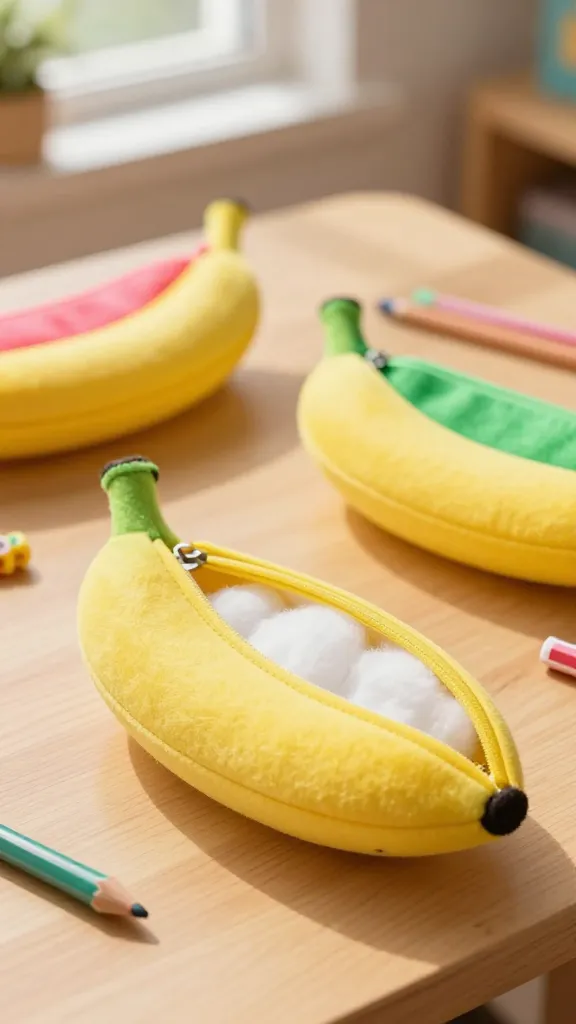
Yes, banana stems as inspiration—but this project uses them as a playful motif. Create soft, squeezable pencil pouches that encourage pinch grip development, hand strength, and independent organization for school days.
Materials Needed
- Felt sheets in bright colors
- Fabric stuffing or cotton batting
- Two to three zippers or Velcro strips
- Fabric glue or a simple sewing kit
How to Make It
- Cut felt into curved, banana-like shapes and stitch or glue along the edges.
- Fill with batting to create a soft, squeezable pouch.
- Attach a zipper or Velcro along the top to create an easy-access opening.
Pro tips
- Personalize with initials or symbols that motivate the student.
- Add a small inner pocket for erasers or tiny notes—functional and cute.
Who would love it or when to use it: Perfect for students who need frequent fine motor warm-ups before tasks like handwriting, drawing, or math manipulatives.
6. Mini-Mortise Storyboard Board: Snap, Build, Tell
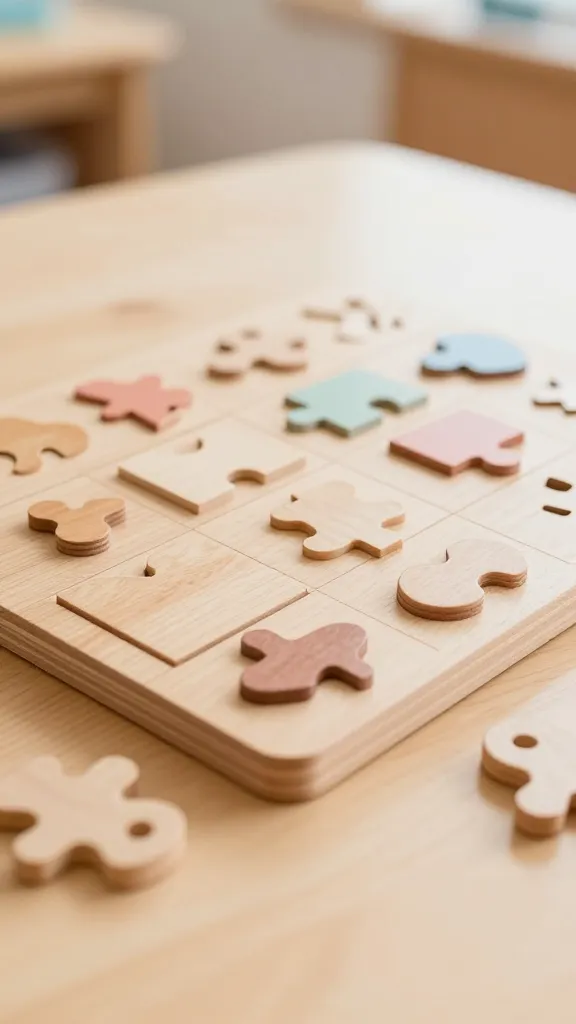
Turn a simple storyboard into a tactile storytelling tool that also hones hand control. This mini-board uses interlocking pieces that snap into place, encouraging precision, sequencing, and language skills during OT sessions.
Materials Needed
- Wooden dowels or peg shapes
- Interlocking puzzle pieces
- Mini dry-erase board or chalkboard surface
- Non-toxic paint and sealant
How to Make It
- Craft a small set of interlocking shapes that form a scene when assembled.
- Paint and seal to ensure durability in a classroom setting.
- Include a small storyboard panel on the board for narrative prompts.
Pro tips
- Use high-contrast colors to support visual tracking and focus.
- Integrate speech prompts to strengthen language engagement during assembly.
Who would love it or when to use it: Brilliant for language therapy days or when you want a quick, goal-oriented warm-up that doubles as a creative activity.
7. Fabric Button-Caw Card Holders: Texture, Texture, Texture
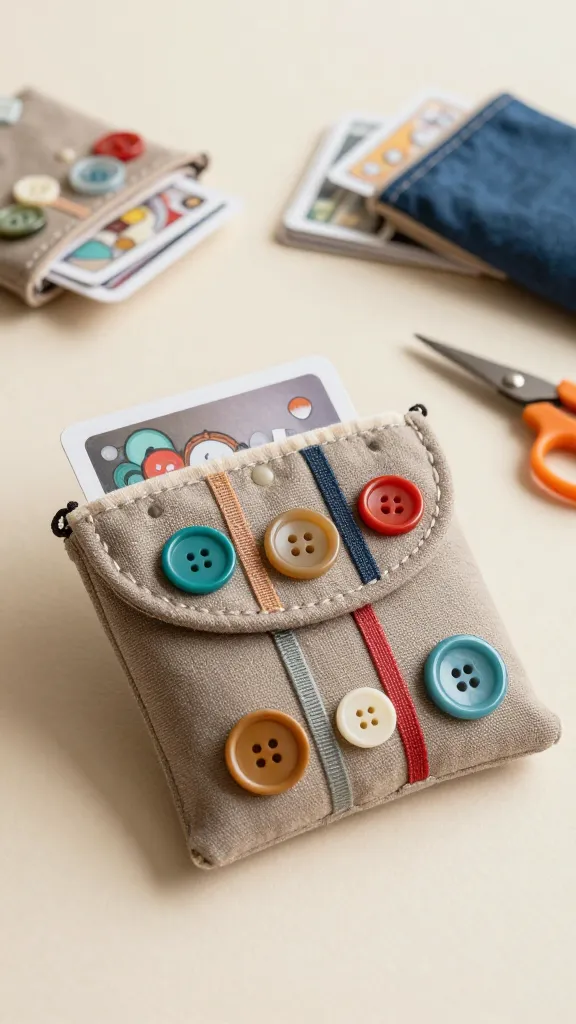
Soft yet sturdy card holders with a bevy of textured buttons create a tactile experience while teaching organization and fine motor control. It’s a practical gift for students to carry flashcards and study prompts to and from therapy.
Materials Needed
- Sturdy fabric or small canvas pouches
- A assortment of buttons, beads, and ribbons
- Needle and strong thread or fabric glue
- Optional magnetic snaps
How to Make It
- Sew buttons and beads onto the front flap or around the edges for decoration.
- Attach a magnetic snap or Velcro for secure closure.
- Line the inside with a soft fabric to protect flashcards.
Pro tips
- Match colors to the student’s preferences for a personal touch.
- Use this as a carry-along tool for between-class activities.
Who would love it or when to use it: A charming classroom helper for organizing study aids, perfect for students who benefit from tactile cues and personalized items.
8. Sound-Soothing Journal Covers: Write, Snap, Repeat
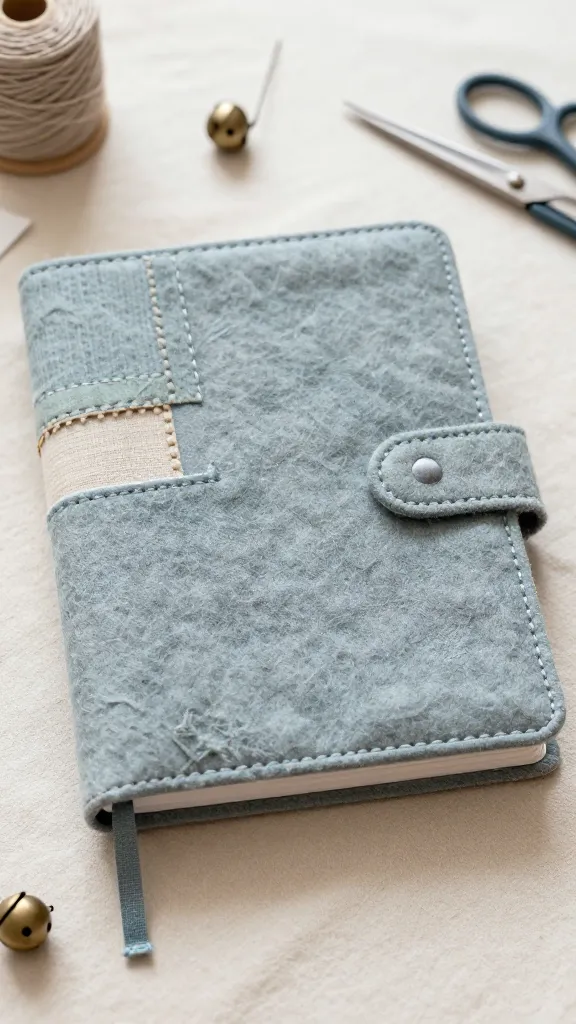
Journaling is a great way to process emotions and practice precision writing. A stitched, sound-themed journal cover gives students a calm, engaging finish to their writing tasks. It blends sensory-friendly textures with a practical outcome.
Materials Needed
- Plain hardcover notebooks
- Felt, fabric scraps, and decorative trims
- Needle and thread or fabric glue
- Small bells or textured patches (optional)
How to Make It
- Cut fabric to wrap the notebook, leaving a tidy seam allowance.
- Stitch decorative panels and add a textured patch or small bells.
- Wrap and secure with fabric ties or an elastic band to keep it closed.
Pro tips
- Choose soothing colors to promote focus during journaling sessions.
- Add a small pocket inside for felt-tip markers or a pen.
Who would love it or when to use it: Ideal for students who use journaling as a coping strategy, reflection activity, or daily writing routine.
9. Clip-Art Wall Pocket: Quick-Grab Organization
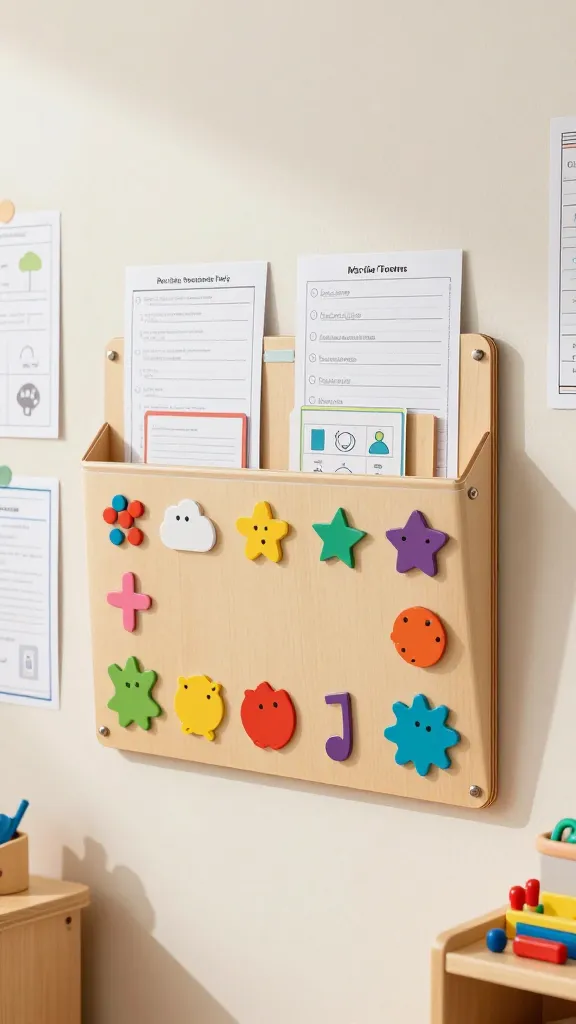
End the list with a functional, stylish organizer. A clip-art wall pocket keeps worksheets, flashcards, and small tools sorted and accessible. It’s bright, practical, and a perfect visual cue to stay organized during busy school days.
Materials Needed
- Sturdy poster board or lightweight wood
- Assorted clip art or magnetic shapes
- Binder clips or small Velcro strips
- Clear sealant or Mod Podge
How to Make It
- Cut the board into a pocket shape with a shallow front flap.
- Decorate with clip-art icons or magnetic shapes; seal to set.
- Attach binder clips or Velcro so students can organize worksheets and small items.
Pro tips
- Position where students can reach it easily during activities to encourage independence.
- Use bold outlines or high-contrast color schemes to aid visual search.
Who would love it or when to use it: A fantastic classroom helper for daily routines, homework packets, or therapy tools that need a quick, visual grab-and-go solution.
Conclusion
These nine craft ideas for school occupational therapy mix creativity with practical skill-building, delivering both engagement and growth. Grab a few materials, mix in some curiosity, and you’ll have sessions that feel less like “therapy” and more like a cozy, productive craft party. Try one today, or ignite a full-week project lineup—your students will thank you with focus, confidence, and joy.