12 Craft Ideas Birthday Rustic Vintage: 12 Inspiring Diy Party Tricks
If you’re chasing that cozy, rustic-vintage vibe for a birthday bash, you’re in the right corner of the internet. These ideas are easy, fun, and totally Pinterest-ready—trust me, your party guests will be wowed. Let’s dive into 12 unique crafts that feel handmade, heartfelt, and perfectly imperfect.
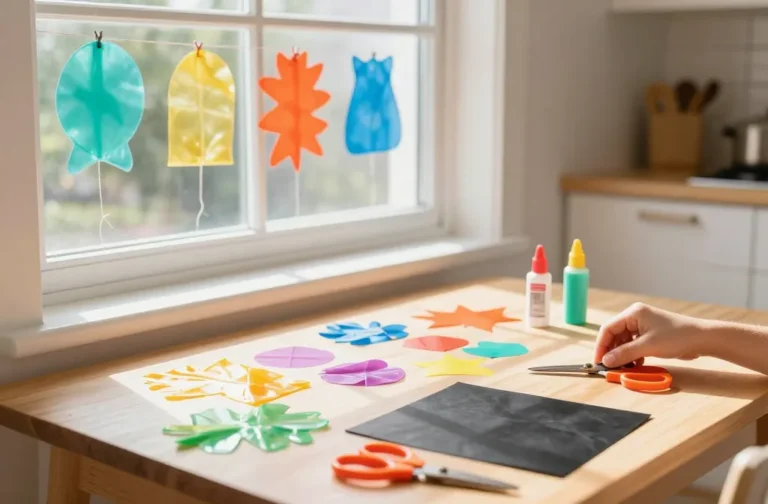
Ready to get your hands glitter-free and full of glue? Grab a cozy workspace, a playlist, and a big smile. These projects are designed to be approachable, with little-to-no-fuss steps and tons of personality.
1. Rustic Mason Jar Lanterns With Fairy Lights
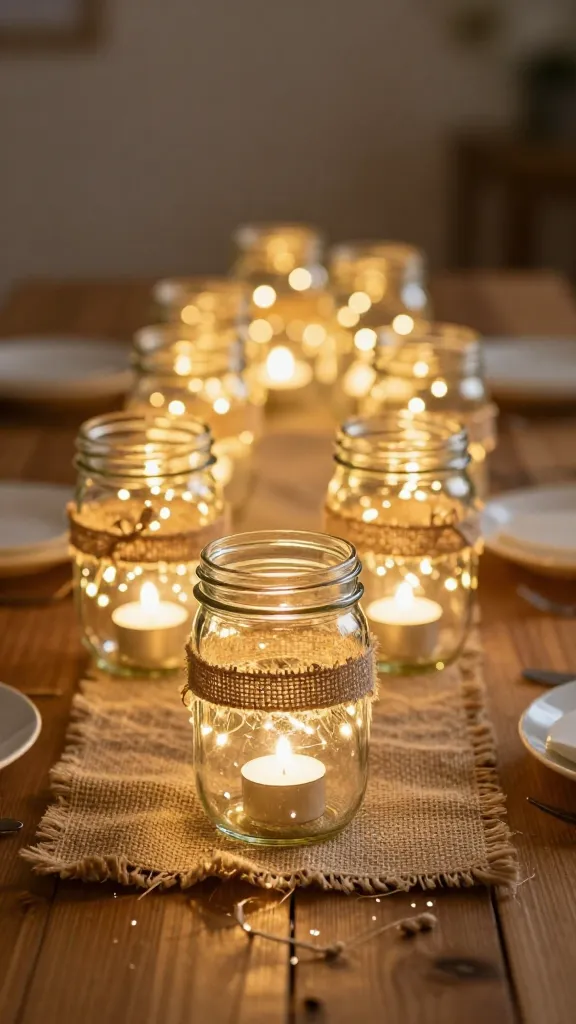
Picture a table lined with glowing mason jar lanterns, wrapped in burlap ribbons and a sprinkle of twine. The soft fairy lights glow like tiny stars, turning any birthday into a warm, intimate celebration. This project is simple, charming, and endlessly customizable.
- Materials: Mason jars, warm white fairy lights, burlap ribbon, twine, LED tealights, optional paint or stain
- Tools: Scissors, hot glue gun, paintbrush (if decorating), ruler
- Key steps: Wrap jars with burlap, tie twine around the neck, tuck in lights, add optional paint accents
Pro tip: Dip the lids in a bit of gold paint for a little vintage sparkle. Place these along a centerpiece for an inviting glow. You’ll love this for a cozy living room party or outdoor patio get-together.
Who’s it for: Anyone who craves warm, ambient lighting with a rustic twist.
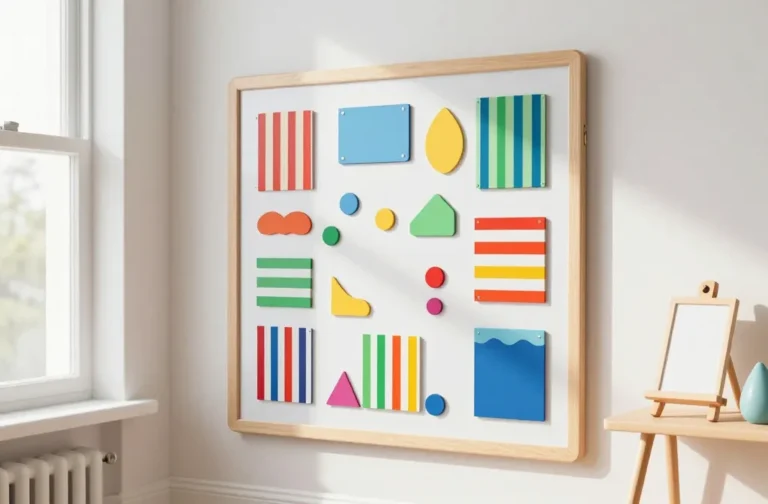
2. Vintage Ribbon Banner With Birthday Charm Tags
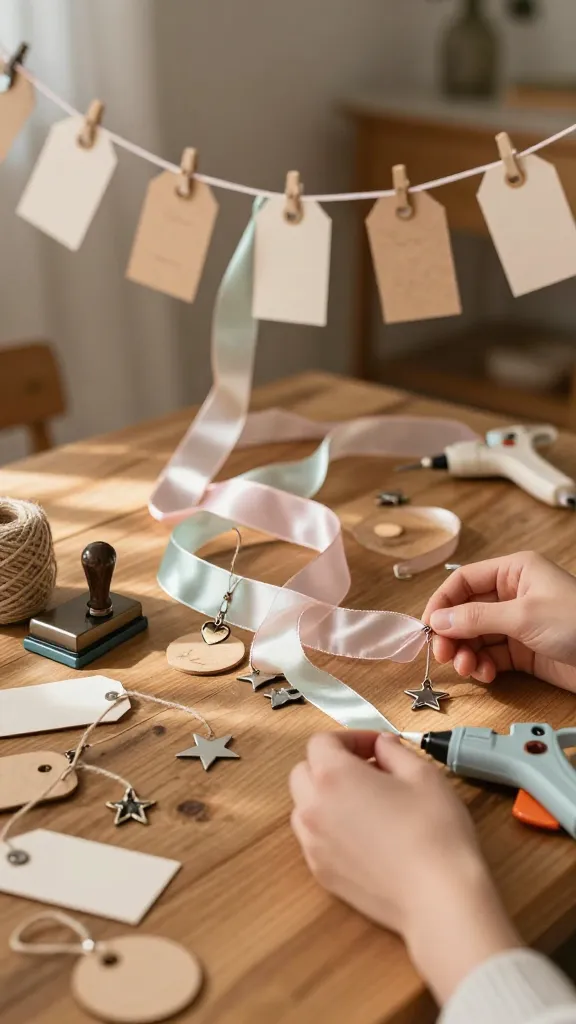
Think sweet vintage charm—soft ribbons, tiny metal charms, and hand-stamped tags that spell out a birthday message. It’s a playful, crowd-pleasing decor piece you can reuse year after year. The texture and color mix give depth to any table or wall.
- Materials: Assorted ribbon, small metal tags or wooden discs, sentiment stamps, ink, twine, scissors
- Tools: Hole punch, scissors, hot glue (optional)
- Key steps: Cut ribbon to length, stamp or write letters on tags, thread ribbon and tags, tie ends
Pro tip: Mix gingham with velvet ribbon for extra dimension. This banner is perfect for a kitchen wall or photo backdrop. FYI it doubles as a gift wrap accent.
Who’s it for: Vintage-loving celebrants who adore handmade tassels and tiny details.
3. Painted Crate Birthday Wall Display
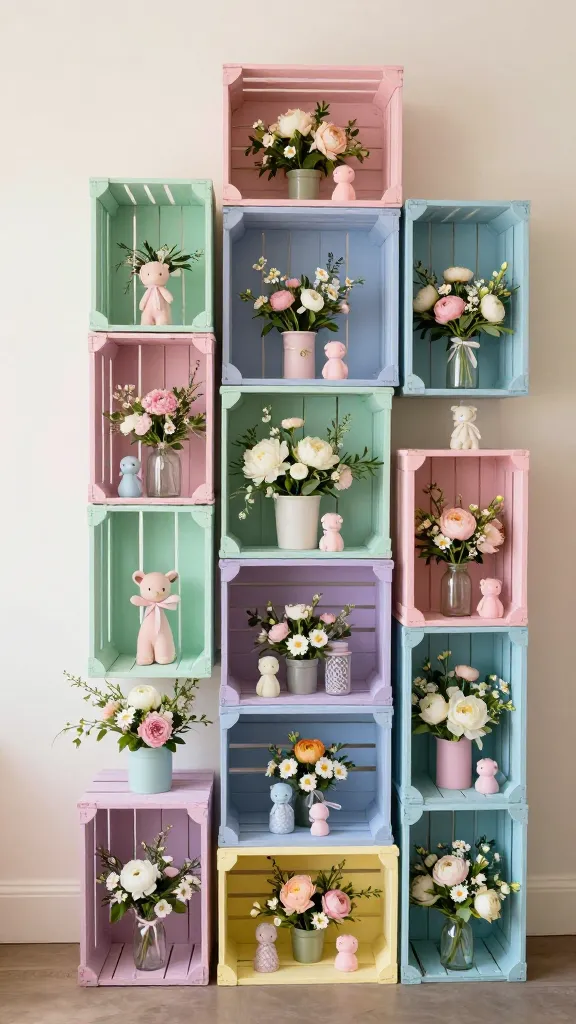
Imagine a staggered wall of repurposed wooden crates, each painted in a pastel shade and filled with seasonal blooms or adorable trinkets. It’s a dramatic, gallery-worthy centerpiece that doubles as versatile storage or a keepsake wall after the party. Seriously, it’s a showstopper.
- Materials: Wooden crates, acrylic craft paint, foam brushes, fake or real flowers, decorative items
- Tools: Sandpaper (optional), hot glue
- Key steps: Sand edges, paint in alternating pastels, arrange crates in a stepped display, fill with decor
Pro tip: Seal with a matte sealer to keep colors fresh. This display looks stunning in an entryway or living room beyond the party. You’ll love this if you adore farmhouse chic.
Who’s it for: Home decor enthusiasts who want a memorable, reusable display piece.
4. Burlap-Lined Dessert Stands
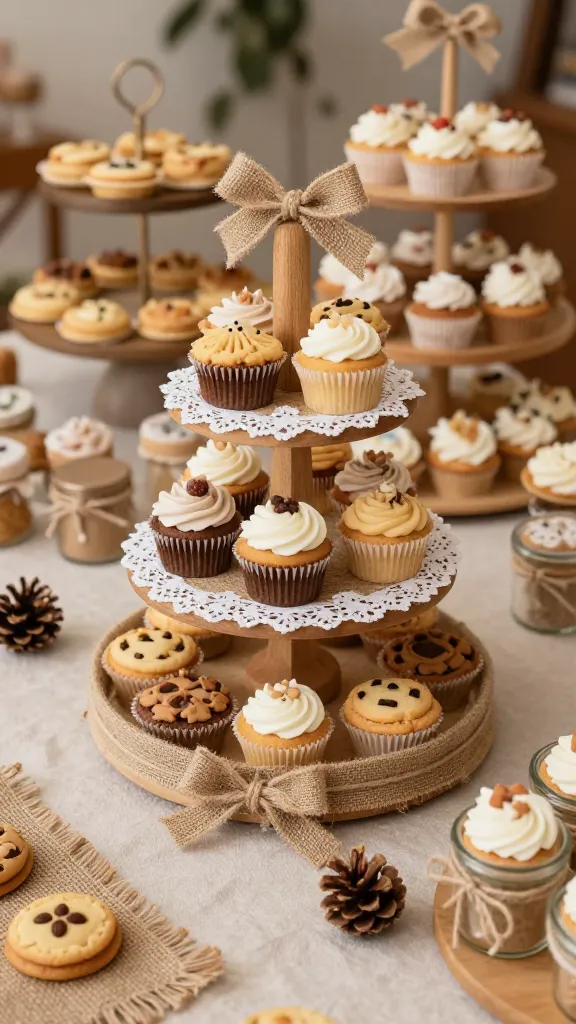
Rustic elegance meets sweet treats with burlap-lined dessert stands. Stack cupcakes, cookies, and mini pies on tiered platforms wrapped in burlap and twine for a warm, rustic dessert table that photographs beautifully.
- Materials: Wooden or cardboard tiered stands, burlap fabric, hot glue or craft glue, twine
- Tools: Scissors, ruler
- Key steps: Cut burlap to size, glue to stands, add twine bows for accents
Pro tip: Add a lace doily between tiers for a delicate romance. This is perfect for birthday celebrations with a cozy, home-baked vibe. Seriously deliciously photogenic.
Who’s it for: Hosts who want to elevate dessert displays with texture and warmth.
5. Upcycled Clock Face Centerpiece
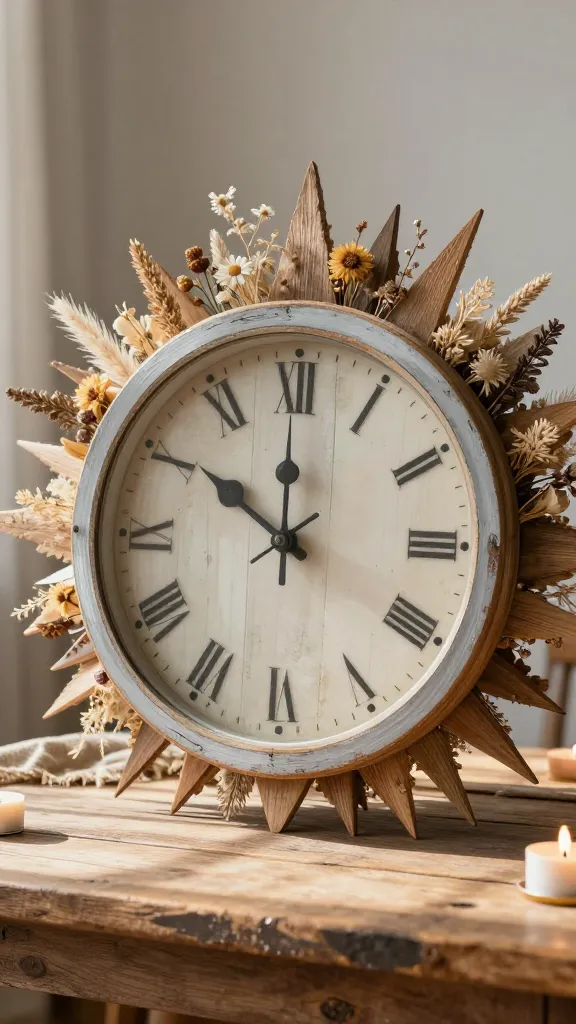
Turn an old clock face into a sunburst centerpiece with a few rustic accents. Empty a dial and fill with dried flowers, candles, or seasonal trinkets. It’s a nostalgic nod to vintage mornings and timeless birthdays.
- Materials: Old clock face or round wooden plaque, heat-resistant centerpiece filler (dried florals, candles), paint
- Tools: Painter’s tape, scissors, hot glue
- Key steps: Clean clock face, paint edges, arrange filler inside the frame, secure with glue
Pro tip: Paint the frame distressed white or cream for added vintage charm. It’s a unique focal piece on a coffee table or entry shelf. FYI it makes a fantastic gift display too.
Who’s it for: People who love nostalgia and a little DIY boldness.
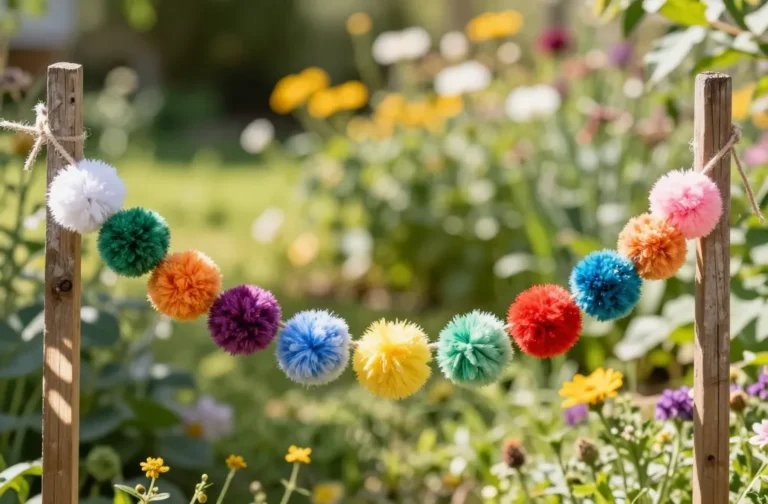
6. Scrap Fabric Lanterns
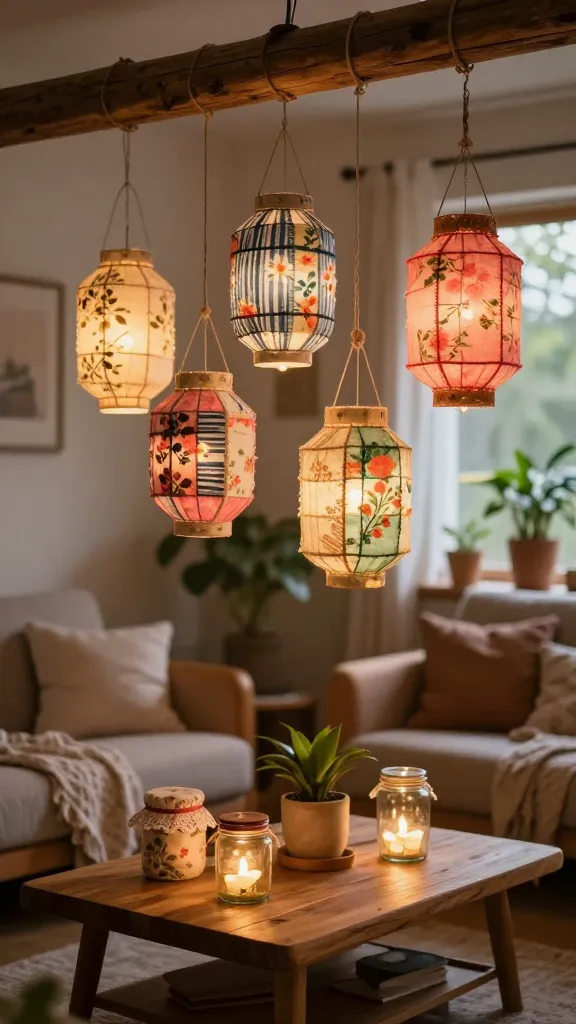
Repurpose fabric scraps into soft, glowing lanterns that bring color and texture to any room. Fold, stitch, or glue fabric around glass jars or paper lantern frames to create a cozy, handmade glow. It’s sustainable and adorable.
- Materials: Fabric scraps, glass jars or paper lanterns, LED lights, glue or small stitch
- Tools: Scissors, needle and thread (optional)
- Key steps: Cut fabric into strips, wrap around lantern, secure with glue or stitching
Pro tip: Mix patterns—florals with stripes—for a playful look. These lanterns glow beautifully along a backyard path or indoor mantel. You’ll love this if you crave colorful, tactile decor.
Who’s it for: Crafters who adore fabric textures and a soft, ambient glow.
7. Chalkboard Cupcake Stand With Personal Messages
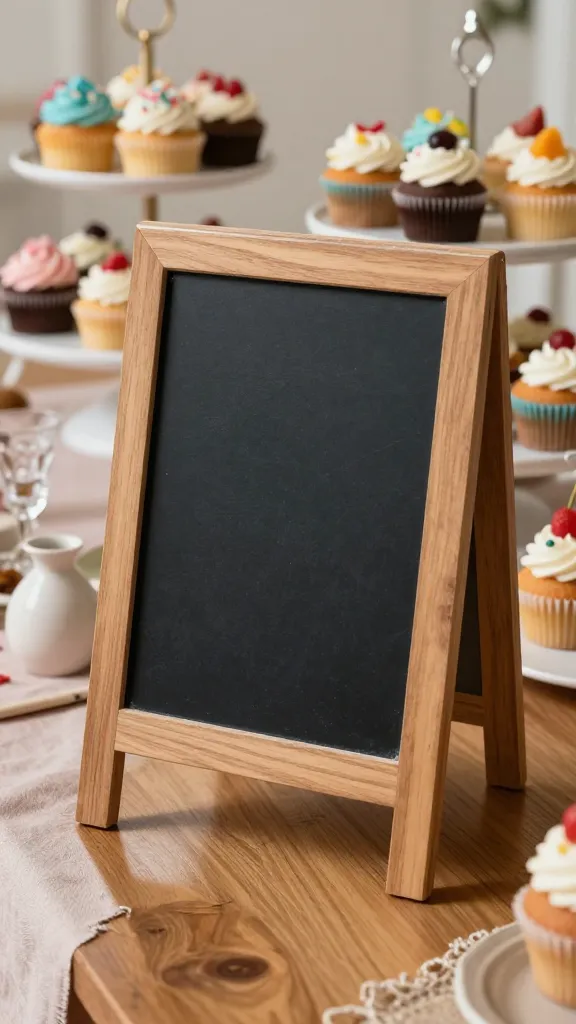
Give cupcakes a personal touch with a chalkboard-top stand. Write birthday messages, quotes, or doodles that guests can admire as they grab a sweet bite. It’s functional, adorable, and endlessly customizable.
- Materials: Small wooden stand or DIY base, chalkboard paint, chalk or chalk markers
- Tools: Paintbrush, sandpaper (optional)
- Key steps: Sand and paint base, seal if needed, write festive messages on board
Pro tip: Use erasable chalk markers for easy updates if the party spans multiple hours. This is perfect for a dessert table or a gift station. Seriously easy, seriously cute.
Who’s it for: Guests who love interactive, reusable party decor.
8. Terrarium Centerpiece With Mini Birthday Scenes
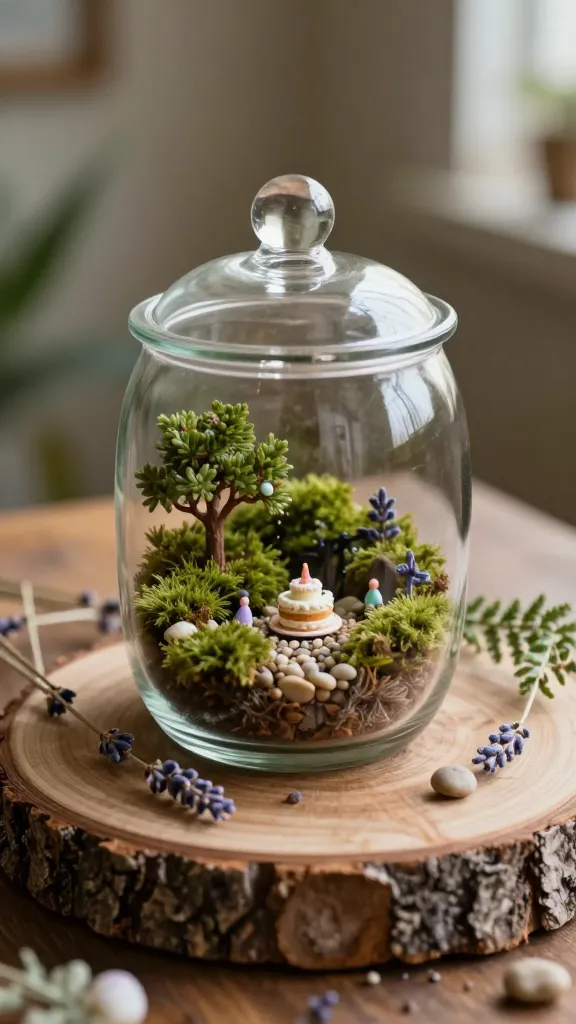
Step into a tiny world of glass, moss, and miniature birthday vignettes. A bevy of tiny trees, stones, and a tiny cake within a glass terrarium tells a story of rustic whimsy and vintage charm. It’s conversation-worthy and surprisingly simple.
- Materials: Glass terrarium or vase, faux moss, small figurines or minis, gravel, tiny birthday cake toppers
- Tools: Small tongs, glue (optional)
- Key steps: Layer gravel, moss, and minis; position focal piece in center
Pro tip: Use dried lavender inside for a gently fresh scent. This centerpiece works both indoors and on a porch table. FYI it’s a charming keepsake after the party ends.
Who’s it for: Lovers of botanical, tiny-world aesthetics and timeless vintage vibes.
9. Hand-Painted Seed Packet Confetti Ornaments
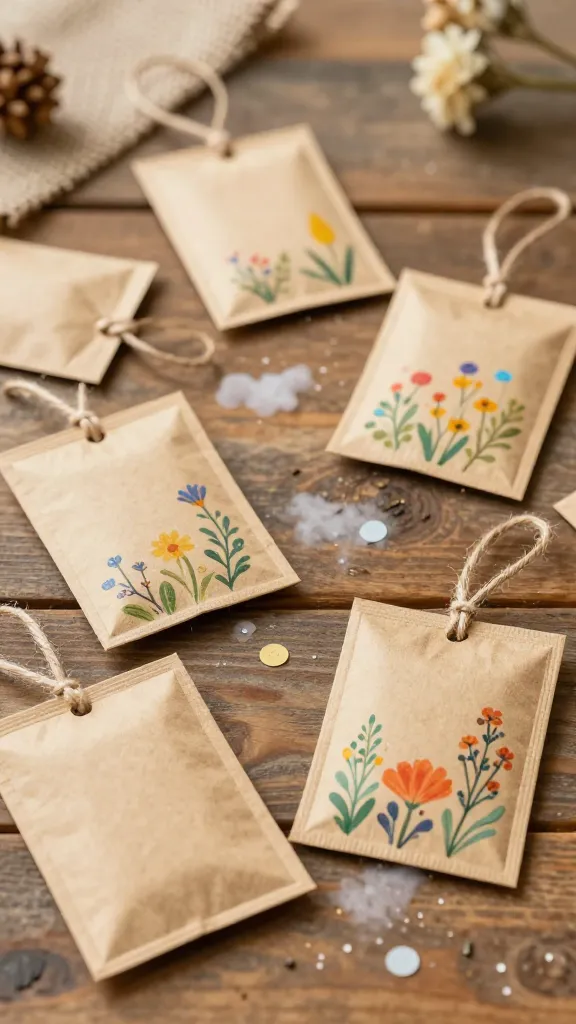
Celebrate with a pocketful of seed packet confetti turned ornaments. Hand-paint kraft seed packets with names or dates, fill them with biodegradable confetti, and seal for a delightful, rustic party favor or decor accent.
- Materials: kraft seed packet blanks, acrylic paints, twine, biodegradable confetti
- Tools: Small paintbrush, scissors, glue
- Key steps: Paint fronts, punch a small hole for twine, fill with confetti, seal
Pro tip: Include a tiny seed sticker as a bonus gift so guests can plant something later. It’s green, charming, and totally vintage-inspired. You’ll love this if you’re into tiny, portable art.
Who’s it for: Eco-minded guests who loves thoughtful party favors.
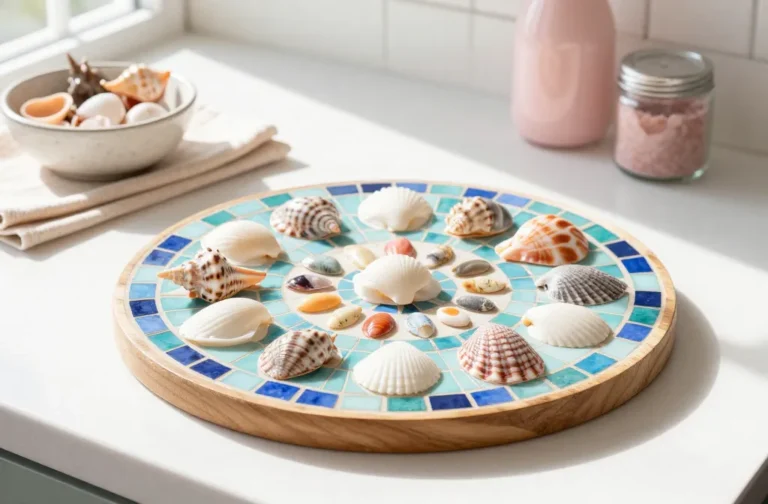
10. Driftwood Picture Frame With Monogrammed Photo Display
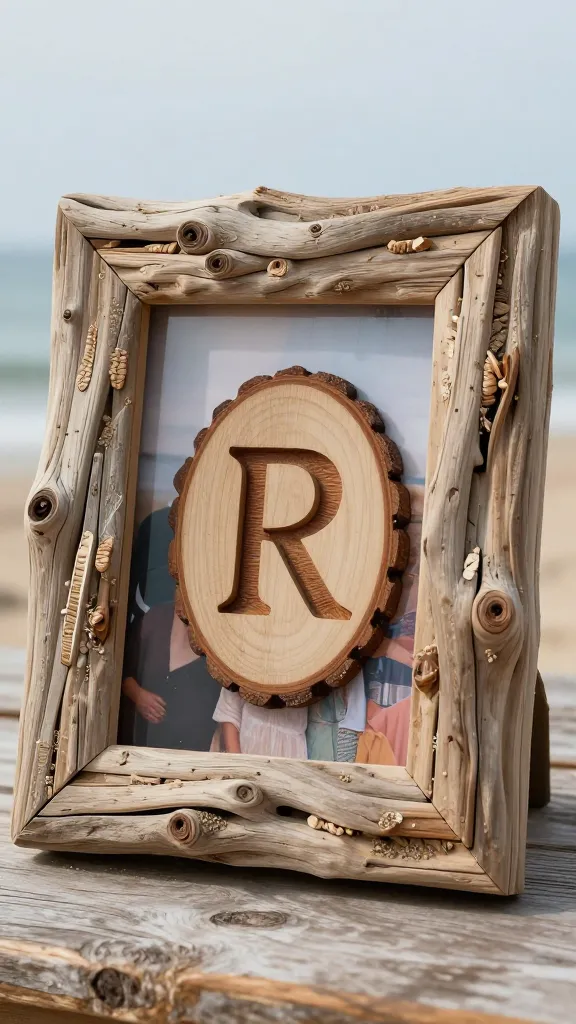
Collect a few driftwood pieces to frame a beloved birthday photo. Monogram a central letter on a wood slice and arrange the driftwood to frame a favorite moment. It’s rustic, coastal-flavored, and incredibly personal.
- Materials: Driftwood pieces, wooden photo frame or backing, resin or glue, monogram letter
- Tools: Hot glue gun, drill or punch (optional)
- Key steps: Arrange driftwood into a frame shape, glue pieces, attach photo and monogram
Pro tip: Finish with a light coat of matte sealer to keep the wood grain vibrant. This piece makes a heartfelt gift or a memory-filled centerpiece. FYI it’s perfect for a seaside or cabin-themed party.
Who’s it for: Gift-givers who adore memory-forward, nature-infused pieces.
11. Scented Pinecone Gardens
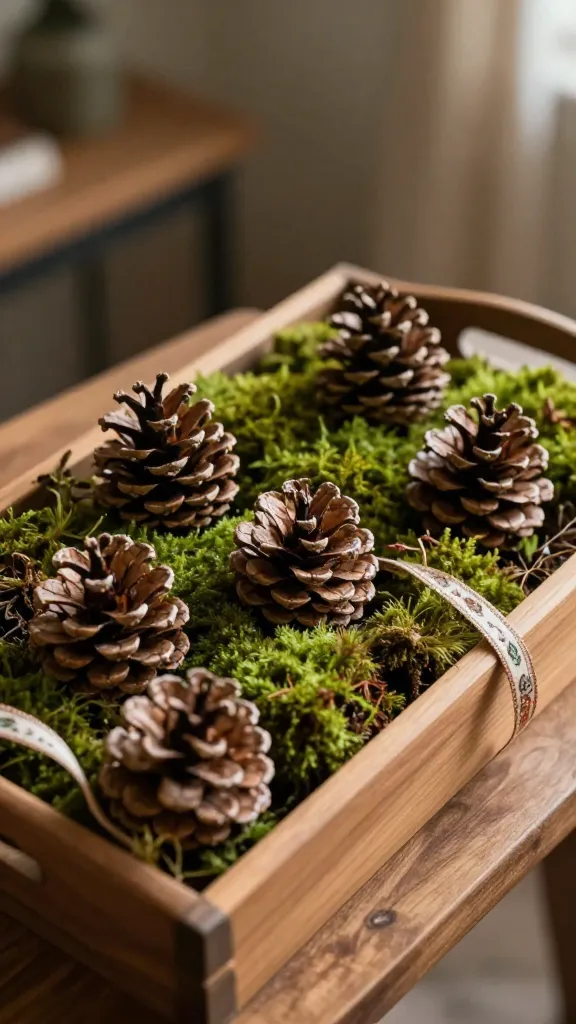
Harvest pinecones, add a scent with essential oils, and nestle them in a wooden tray with moss. It’s a tactile, autumn-wilted-vintage vibe that stays fresh on a coffee table or entry console all year round.
- Materials: Pinecones, essential oils, dried moss, tray, decorative ribbon
- Tools: Small bottle sprayer (optional)
- Key steps: Arrange pinecones on moss, drizzle with oil, tie ribbon accents
Pro tip: Use a mix of pinecones of varying sizes for greater depth. This is a subtle scent-forward decor piece that your guests will notice instantly. Seriously delightful and easy to refresh seasonally.
Who’s it for: Fans of natural textures and cozy, evergreen-inspired decor.
12. Vintage-Inspired Alphabet Coasters
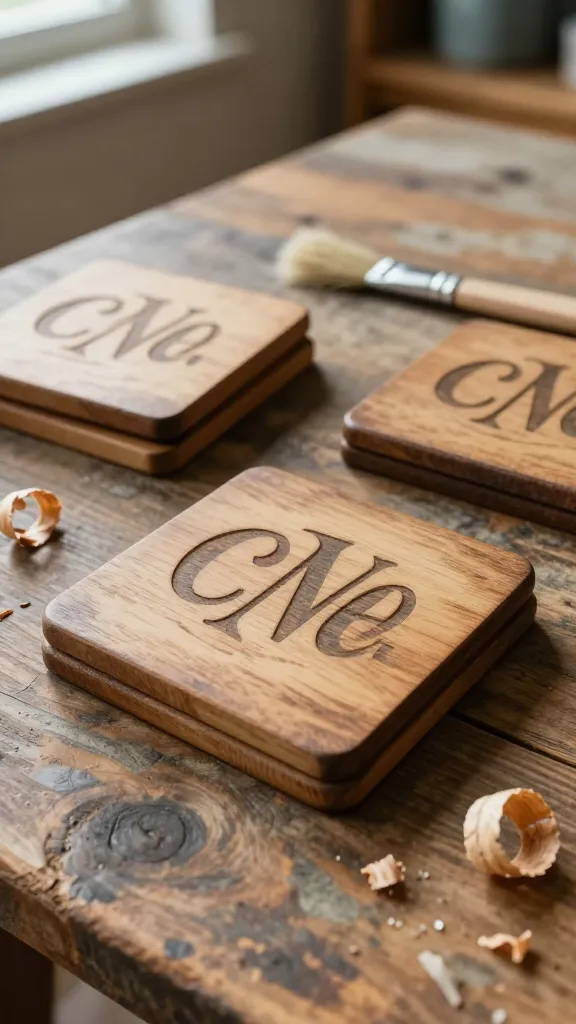
Turn old cabinet doors or wooden scraps into a set of monogrammed or lettered coasters. Paint retro typography and seal with a protective finish for durable, gift-ready coasters that scream vintage charm.
- Materials: Wooden squares, acrylic paints, stencils or freehand letters, clear sealant
- Tools: Paintbrushes, sandpaper (optional)
- Key steps: Sand wood, paint letters, seal edges, let dry
Pro tip: Pair with a rustic wood plate or a handmade coaster rack for a complete gift set. These coasters are conversation starters at any birthday gathering. You’ll love this for practical, stylish party essentials.
Who’s it for: Fans of typography, antique finds, and handcrafted home goods.
Conclusion
Those 12 craft ideas are your pass to a birthday that feels warm, personal, and delightfully rustic vintage. Each project brings texture, color, and a bit of whimsy to your celebration, all while staying friendly to beginners. Pick one that calls to you—or tackle them all for a truly cohesive party vibe. You’ve got this, and you’ll have so much fun seeing your space transform.