9 Halloween 3d Craft Ideas That Actually Work: Spooktacular Hits
Halloween craft heaven is here, and these ideas actually pull off in real life. You’ll love how doable each project is, with that wow-factor Pinterest users obsess over. Trust me—these 3D creations transform simple supplies into standout pieces that scream spooky chic.
1. 3D Paper Lantern Ghosts That Float in the Moonlight
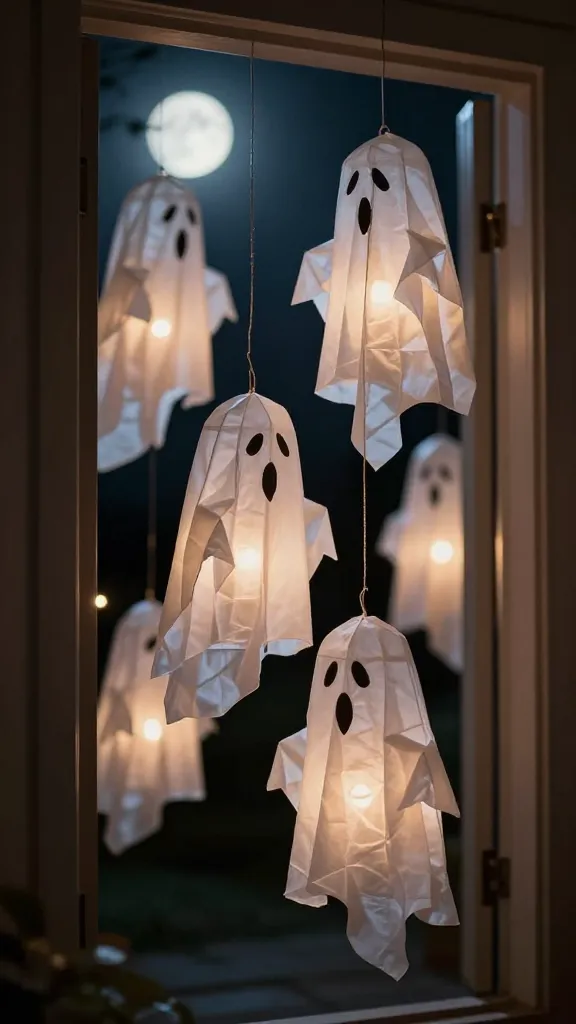
Imagine delicate, paper-made ghosts that look like they’re casually drifting through your doorway. The 3D effect adds depth and a dash of whimsy to any Halloween vignette. They’re lightweight, inexpensive, and surprisingly sturdy when you mount them right.
Materials Needed
- White vellum or lightweight card stock
- Black marker or cut-out eyes
- Thin wire or craft string
- LED tea lights
- Double-sided tape
- Scissors
How to Make It
- Fold a rectangle of vellum into a simple 3D ghost shape by creating two opposing panels that stand apart when opened.
- Draw eyes, or cut out small black circles for a playful expression.
- Attach a small loop of wire to the top so it can hover between a ceiling or doorway.
- Place an LED tea light on the inside to give a soft, spooky glow.
Pro Tips / Styling Ideas
- Pair in odd numbers for the best visual rhythm.
- Hang at varying heights near windows so they catch natural light during the day and glow at night.
- Mix sizes for a layered, haunted-hang vibe.
Who would love it? Anyone who loves airy, whimsical decor and a touch of ghostly charm. These are especially adorable in a kids’ room or an entryway nook.
2. 3D Cardboard Skull Plaques
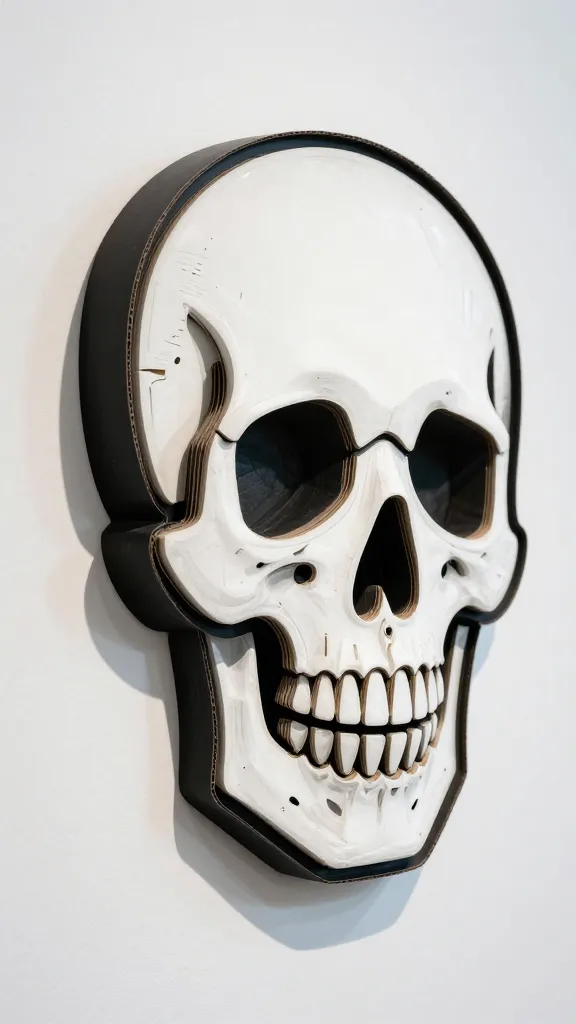
Sharp lines, bold contrast, and a pop of texture—these skull plaques bring a modern, artsy vibe to any wall. The 3D effect comes from layered cardboard pieces that build a striking relief without needing heavy tools.
Materials Needed
- Corrugated cardboard sheets
- Acrylic paints (black, white, metallic accents)
- Glue gun and craft glue
- Jute twine or wall hangers
- Masking tape
How to Make It
- Sketch a bold skull outline on cardboard and cut into several decorative layers.
- Paint each layer with alternating colors to create depth, then stack and glue with spacers between layers.
- Attach a hanger on the back and display as a striking wall sculpture.
Pro Tips / Styling Ideas
- Use metallic accents to make it pop under pouncing lighting.
- Nail or command-strip it in a gallery wall with other Halloween pieces.
Who would love it? Craft lovers who enjoy bold, sculptural decor with a contemporary twist. It’s perfect for a living room accent or front-door gallery wall.
3. Pop-Out 3D Paper Bats Garland
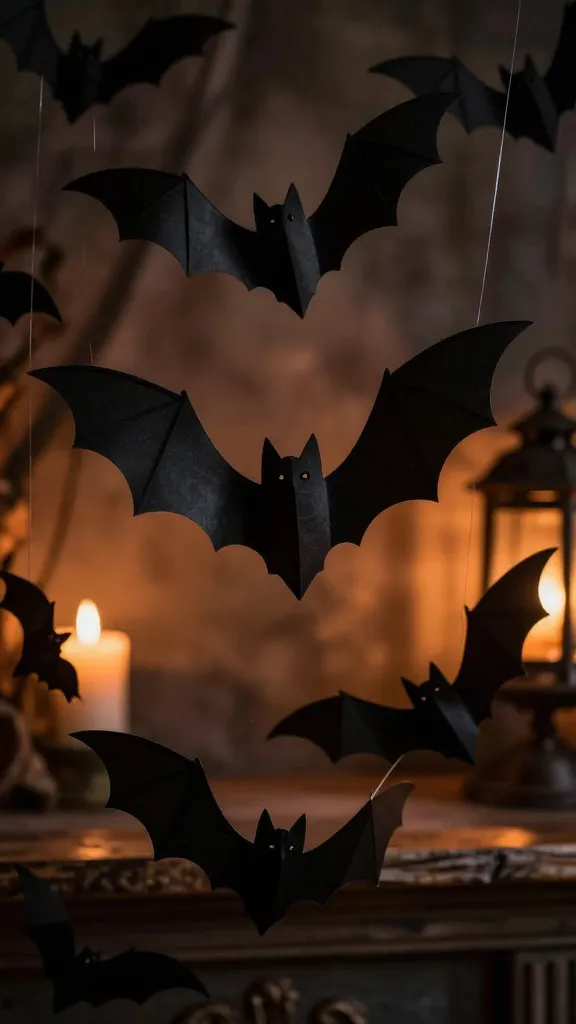
Giant, dimensional bats that appear to fly off the string? Yes please. This garland adds drama to mantels, stair rails, or a pirate-ship style party setup.
Materials Needed
- Black construction paper or cardstock
- Scissors
- Clear fishing line or thread
- Fold- or pop-out templates
- Glue or double-sided tape
How to Make It
- Cut bat silhouettes and score a small fold along the center to create a pop-out effect.
- Attach each bat to a strand with a tiny bit of double-sided tape so they appear to hover.
- String across a doorway or mantel for a fluttering, 3D effect.
Pro Tips / Styling Ideas
- Vary the bat sizes for depth and movement.
- Intersperse with string lights for an eerie glow at night.
Who would love it? Party planners and anyone who wants a playful, budget-friendly decor element that still reads high-impact in photos.
4. 3D Cotton-Wad Pumpkin Centerpiece
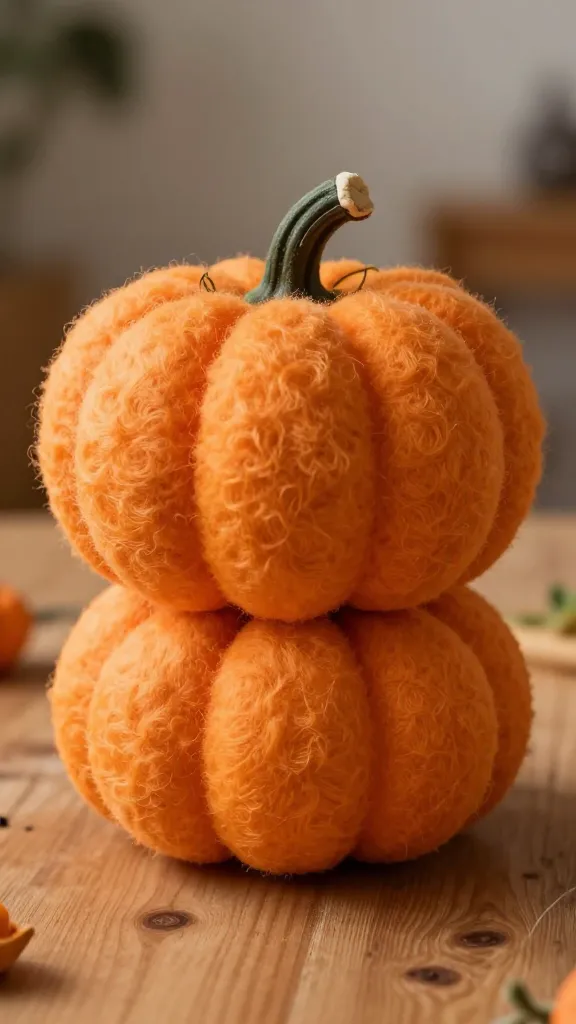
Soft, fluffy pumpkins crafted from cotton pads or wads give a cozy, whimsical twist to classic jack-o’-lanterns. They’re fluffy, tactile, and surprisingly sturdy when assembled with a cardboard or foam base.
Materials Needed
- Cotton pads or wads
- Orange acrylic paint
- Cardboard or foam pumpkin base
- Green floral wire or felt for stems
- Hot glue gun
How to Make It
- Form a foam or cardboard pumpkin silhouette as your base.
- Layer cotton pads and glue them to the base, creating a full 3D pumpkin shape.
- Paint the exterior orange and add a stem with a touch of green wire or felt.
Pro Tips / Styling Ideas
- Place on a rustic wooden tray with seasonal gourds for a cozy tablescape.
- Pair with white ceramic pieces to keep it airy yet festive.
Who would love it? This one’s a cuddle-worthy centerpiece for anyone who loves tactile, cozy Halloween decor and a soft color palette.
5. 3D Shadow Box Monster Scenes
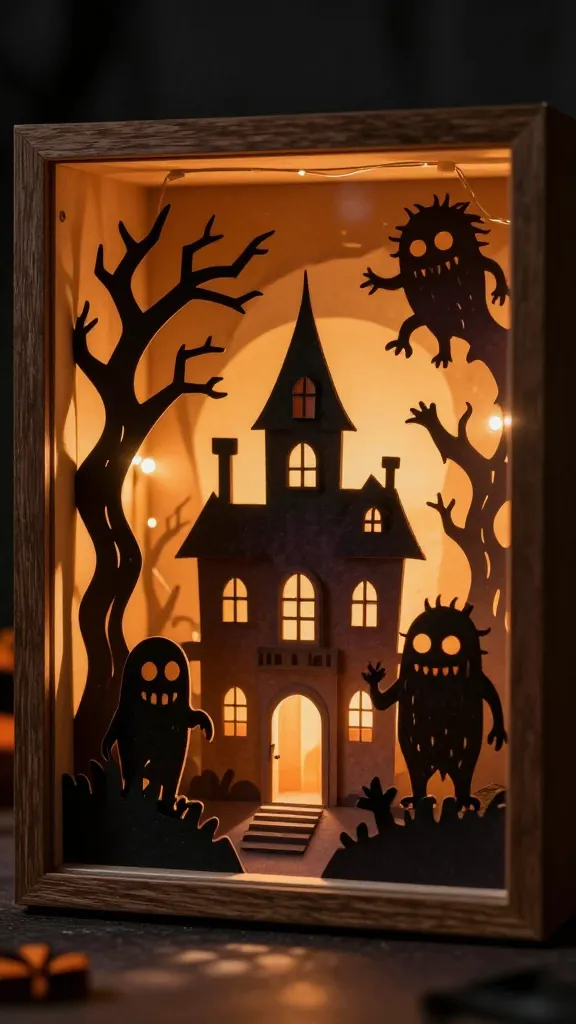
Shadow boxes become tiny dioramas with a spooky twist. Build mini layers that cast dramatic shadows when backlit by a lantern or fairy lights for an eerie, cinematic effect.
Materials Needed
- Wooden shadow box or deep frame
- Colored paper, foam sheets, and felt
- Craft knife and glue
- Miniature LED light strip or fairy lights
How to Make It
- Cut silhouettes of monsters, trees, and haunted houses in layered pieces.
- Glue the layers inside the frame with spacing to create depth.
- Backlight with a small LED strip for dramatic shadows.
Pro Tips / Styling Ideas
- Choose a monochrome or limited palette for a chic look.
- Display near a doorway to greet guests with a cinematic vibe.
Who would love it? Movie buffs and design lovers who crave storytelling through small, tactile scenes. It’s a conversation piece that also doubles as wall art.
6. 3D Felt Mummy Wreath
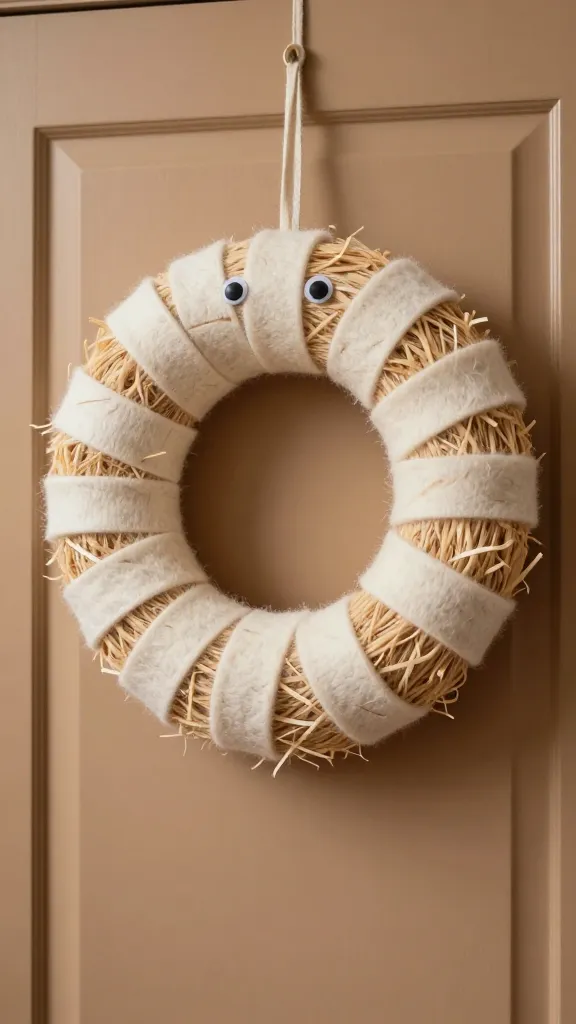
A friendly, not-too-spooky mummy wreath made from felt strips and lightweight tubing. It sits warmly on doors and walls, offering a handmade charm rather than a scary scream.
Materials Needed
- Foam wreath form
- Felt in off-white, cream, and beige
- Fabric or craft glue
- Googly eyes (optional)
- Thin foam tubes or packing straw for wraps
How to Make It
- Wrap the wreath with foam tubes or shredded packing straw for texture.
- Layer felt strips around the form, tucking and gluing to mimic mummified bandages.
- Add tiny eyes peeking through the strips for character.
Pro Tips / Styling Ideas
- Pair with a neutral entryway palette for a playful contrast.
- Hang using a rustic ribbon to keep the vibe cozy and warm.
Who would love it? Anyone who wants a non-threatening, charming Halloween welcome sign with handmade warmth.
7. 3D Glow-In-The-Dark Skeleton Wall Garden
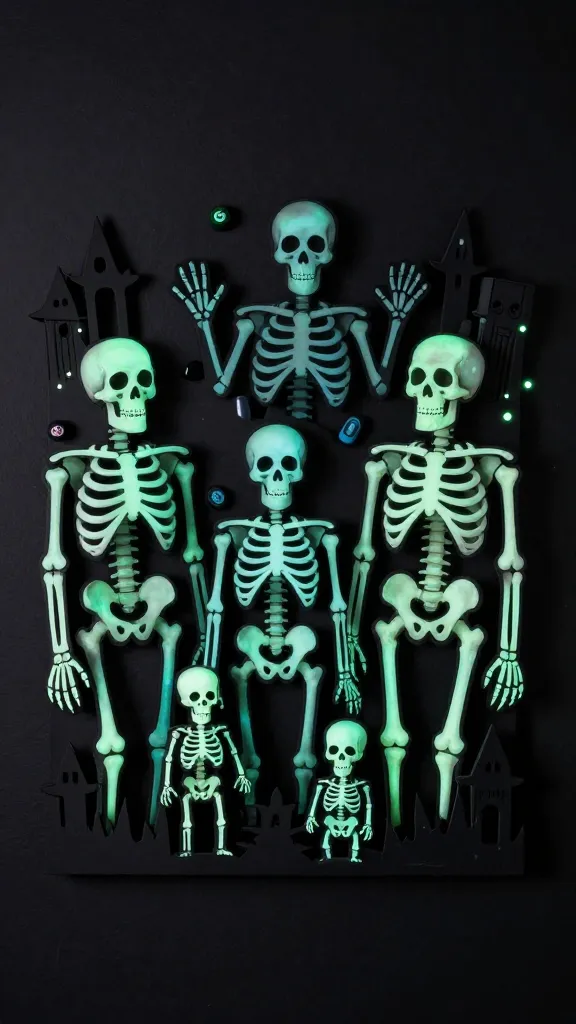
Turn a boring wall into a glow-in-the-dark skeleton garden that’s both spooky and whimsical. The 3D effect comes from layered cutouts and a few small props that create a little neon graveyard vibe.
Materials Needed
- Black poster board or foam board
- Glow-in-the-dark paint or tape
- Skeleton cutouts (pre-made or printable)
- Hot glue or craft glue
How to Make It
- Arrange cutouts in a scene on the board, layering some pieces to create depth.
- Paint accents with glow-in-the-dark paint or outline with glow tape for extra pop.
- Mount on the wall in a garden or graveyard layout with a few small props for context.
Pro Tips / Styling Ideas
- Place near a window where natural light charges the glow paint for extra brightness after dark.
- Keep it simple—two to four figures with a focused focal point for maximum impact.
Who would love it? Night owls who adore glow effects and a stylish, slightly eerie aesthetic that still feels curated and chic.
8. 3D Coral-Tone Ghost Garland

Bright, friendly ghosts with a textured, coral-like finish bring a pop of color to Halloween. This one is all about 3D layering to create a playful, warm ambiance rather than a spooky vibe.
Materials Needed
- Colored tissue paper or crepe paper
- White cardstock for ghost shapes
- Wire or string
- Glue sticks or mod podge
- Scissors
How to Make It
- Cut ghost shapes from white cardstock and crumple tissue to form a textured body.
- Attach tissue bodies to the cardstock cutouts, layering for a 3D surface.
- String them together and hang across a window or ceiling line for a friendly float.
Pro Tips / Styling Ideas
- Alternate with small paper lanterns for a dreamy, festive effect.
- Use softer pinks and oranges to keep it bright and non-gloomy.
Who would love it? Families with kids and anyone who wants a cheerful Halloween mood without scary vibes.
9. 3D Fabric-Curled Spider Vase
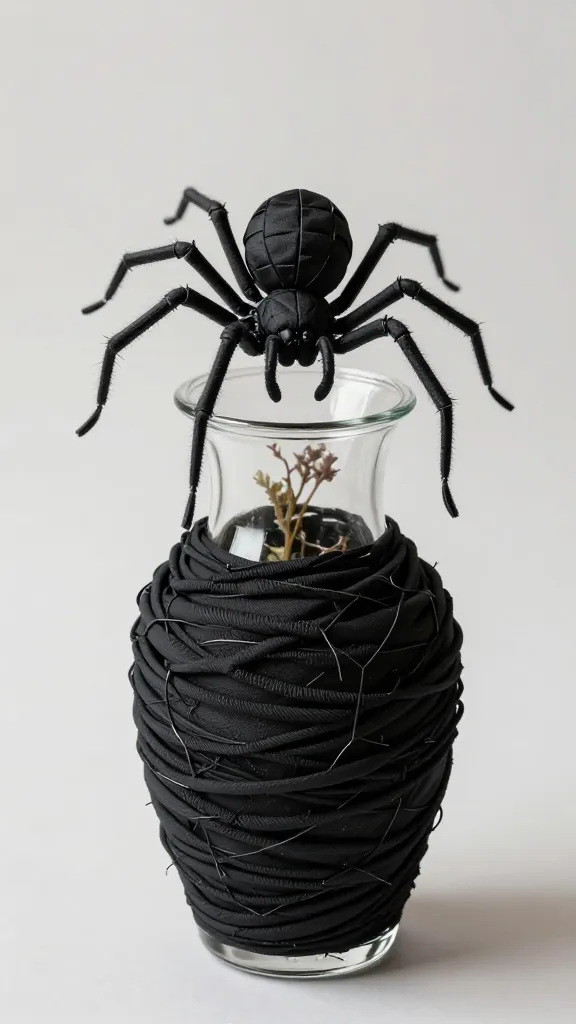
A quirky, sculptural spider perched atop a vase created from folded fabric coils. It’s a conversation starter and a surprisingly sturdy piece that can hold seasonal flowers or faux stems.
Materials Needed
- Wide-mouthed glass vase
- Black fabric or felt
- Wire for legs
- Glue gun and fabric glue
- Fake florals or twigs
How to Make It
- Coil strips of black fabric around the rim to form a textured body.
- Attach eight wire legs and a small fabric head to create a spider perched on the vase.
- Fill with florals or decorative branches for a Halloween centerpiece with a wink.
Pro Tips / Styling Ideas
- Place on a dining table with short candles to mirror the legs’ lines and shadow play.
- Pair with matte black or amber tones for a moody, stylish table setting.
Who would love it? Craft lovers who want an unusual, fashion-forward accent piece that transitions from Halloween to year-round decor with ease.
Conclusion
These nine 3D Halloween craft ideas prove you don’t need a giant budget to make a big, wow-worthy statement. Each project is crafted to be doable, visually striking, and totally Pinterest-ready. Pick one to start, or challenge yourself to try all nine—you’ll have a captivating, cohesive Halloween look that’s as fun to make as it is to display. Ready to get crafty and wow your friends? Let the 3D magic begin, and happy haunting!