8 Quick Crafts Ideas for Halloween
Hey crafty pals, ready to spooky up your space without turning your world upside down? These eight ideas are fast, fun, and totally doable—perfect for a Saturday craft sprint or a cozy weeknight wind-down. Trust me, you’ll love how instantly festive they feel.
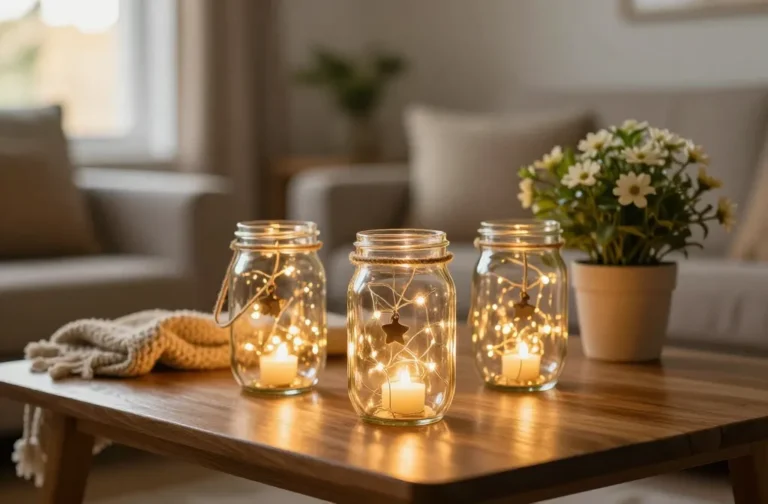
1. Glow-In-The-Dairy-Farm Halloween Mason Jar Luminaries
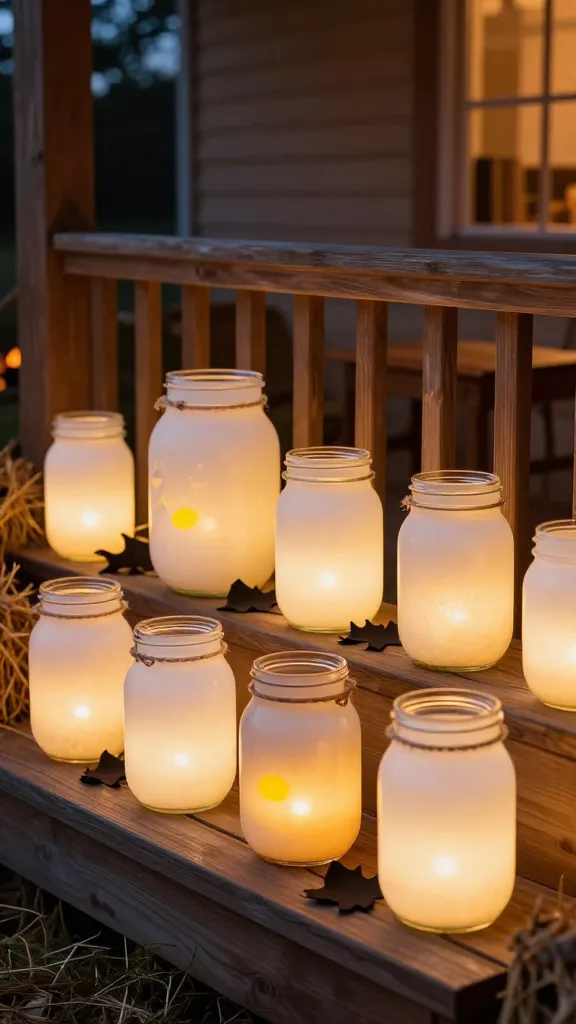
Imagine glass jars glowing softly with eerie charm along your porch or bookshelf. These luminaries blend rustic, cozy vibes with a hint of spectral glow, absolutely perfect for a Halloween night in. They’re simple, stylish, and endlessly customizable.
Materials Needed
- Glass jars (varieties sizes optional)
- Varying colors of battery-operated LED tea lights
- Frosted glass spray or white acrylic paint
- Yellow, orange, and black craft paper
- Fine black marker
- Thin twine or ribbon
How to Make It
- Paint the jars with frosted spray or dab on white paint to soften the glass.
- Cut spooky shapes (bats, ghosts, pumpkins) from craft paper and adhere to the outside with a touch of paint or glue dots.
- Slip a LED tea light inside and string a skinny ribbon around the neck for a finished kiss of fall charm.
- Line them along steps or a table for a warm, lantern-lit scene.
Pro Tips / Styling Ideas
- Mix jar sizes on a wooden tray; add pinecones and mini gourds for a woodland Halloween vignette.
- Try amber lights for a vintage look or cool white for a modern glow.
End note: This is a cozy, “you’ll love this” setup. Great for entryways and mantle decor—especially for guests who love a gentle glow rather than full-on fright.
2. Spooky Window Shadow Sillhouettes
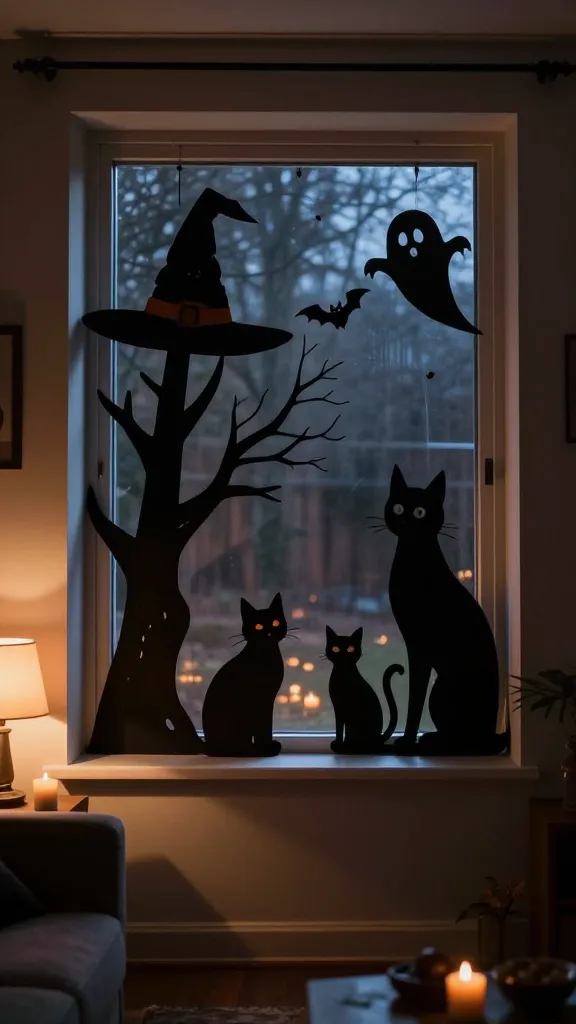
Turn ordinary windows into a Halloween story with simple silhouettes that cast dramatic shadows at night. It’s a budget-friendly, high-impact decor move that makes your space feel mysterious and magical.
Materials Needed
- Packed black craft felt or cardboard
- Scissors and craft knife (with adult supervision if needed)
- Acrylic paint or chalk markers
- Thin wooden dowels or sturdy sticks
- Clear tape or removable adhesive
How to Make It
- Cut classic Halloween shapes—witches hat, haunted tree, cat, ghost—into bold silhouettes.
- Attach silhouettes to dowels and position in front of window so the light casts a lot of drama at night.
- Sketch a simple landscape or moon behind them for added depth if you want.
Pro Tips / Styling Ideas
- Group silhouettes in a staggered line for a cinematic effect.
- Switch shapes weekly to keep the vibe fresh during October.
End note: This is the “wow” moment with zero mess and maximum mood. Perfect for apartment dwellers who want a show-stopping focal point without permanent changes.
3. Candy Corn Citrus Scented Candles
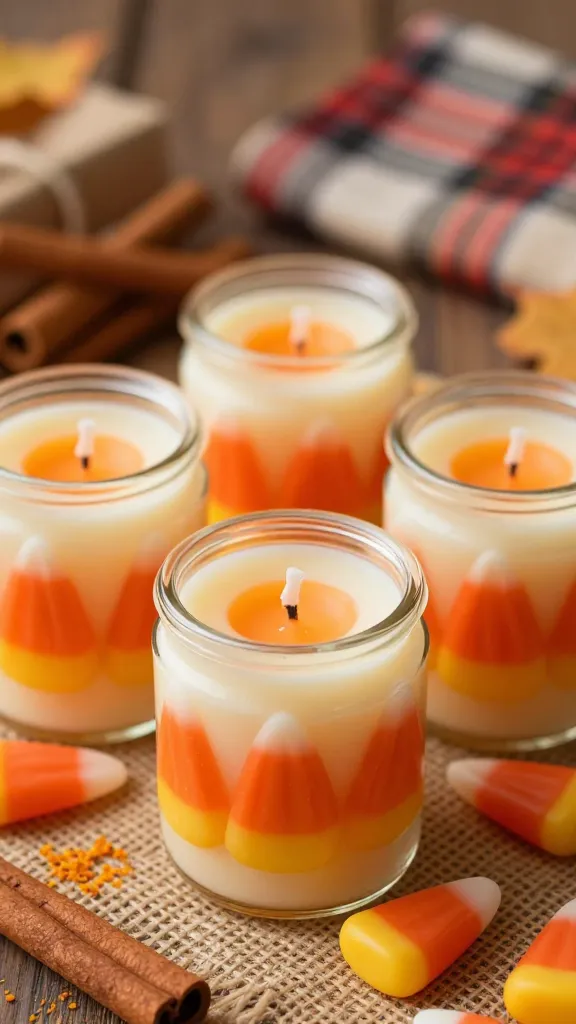
Yes, you can make candles that look like candy corn and smell delightfully autumnal. These are delightful as gifts or a warm desk companion for late-night crafting sessions. They’re adorable, sweet-smelling, and surprisingly simple.
Materials Needed
- Small jar candles or tealight holders
- White, orange, and yellow wax or lava beads
- Wick stickers and wicks
- Caux (or soy) wax melts in colors
- Orange zest or cinnamon stick garnish (optional)
How to Make It
- Layer melted wax in the jars: white on bottom, then orange, then yellow on top for that candy corn stripe!
- Place a wick in the center before the wax fully hardens; secure with a wick sticker.
- Let set, then add a little zest or a cinnamon stick for a spicy finish.
Pro Tips / Styling Ideas
- Pair with neutral pumpkins and warm-toned textiles for a cozy Halloween tablescape.
- Light one during a spooky movie night for a subtle seasonal ambiance.
End note: Bright and friendly—these are the kind of Halloween touches that feel approachable rather than intimidating. You’ll love how quickly they come together.
4. DIY Haunted Photo Garland
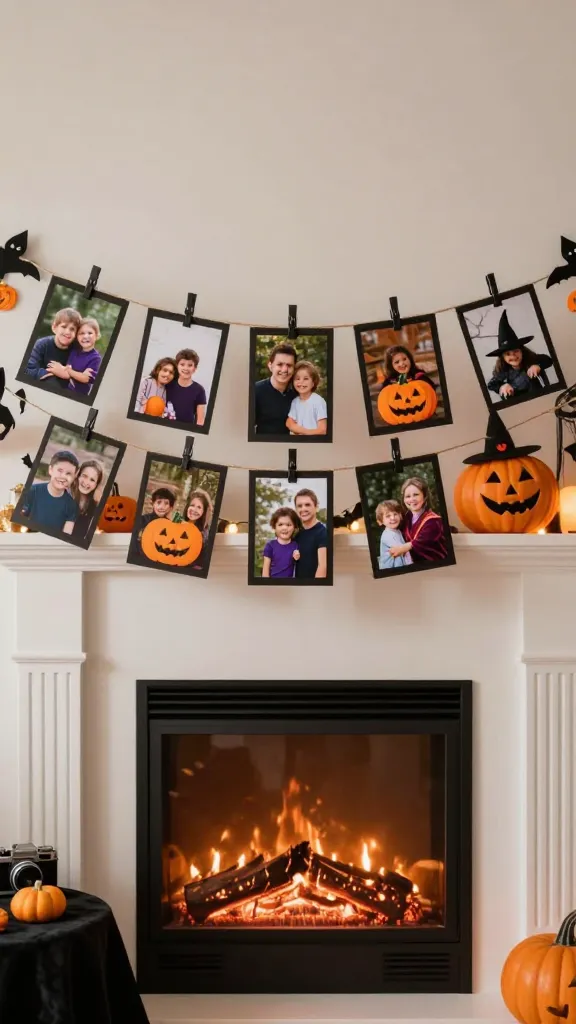
Create a personal, whimsical Halloween garland using favorite family photos transformed with spooky embellishments. It adds a playful, nostalgic touch that’s totally share-worthy on social media.
Materials Needed
- String or twine
- Mini clothespins
- Old photos or print-outs with Halloween-friendly filters
- Black cardstock for silhouettes
- Glue or glue dots
- Scissors
How to Make It
- Print photos in a smaller, square shape; mount on cardstock for a crisp edge.
- Cut silhouettes (bats, pumpkins, witches) from black cardstock and affix to the corners of the photos.
- Clip photos to the twine with the clothespins and hang across a mantel, doorway, or window frame.
Pro Tips / Styling Ideas
- Alternate monochrome photos with color pops for visual rhythm.
- Swap out photos year after year to keep the garland evolving.
End note: A sentimental, stylish decor piece that invites guests to stop and smile. It’s a memory lane with a Halloween twist—warm, charming, and seriously cute.
5. Ghostly DIY Doily Lanterns
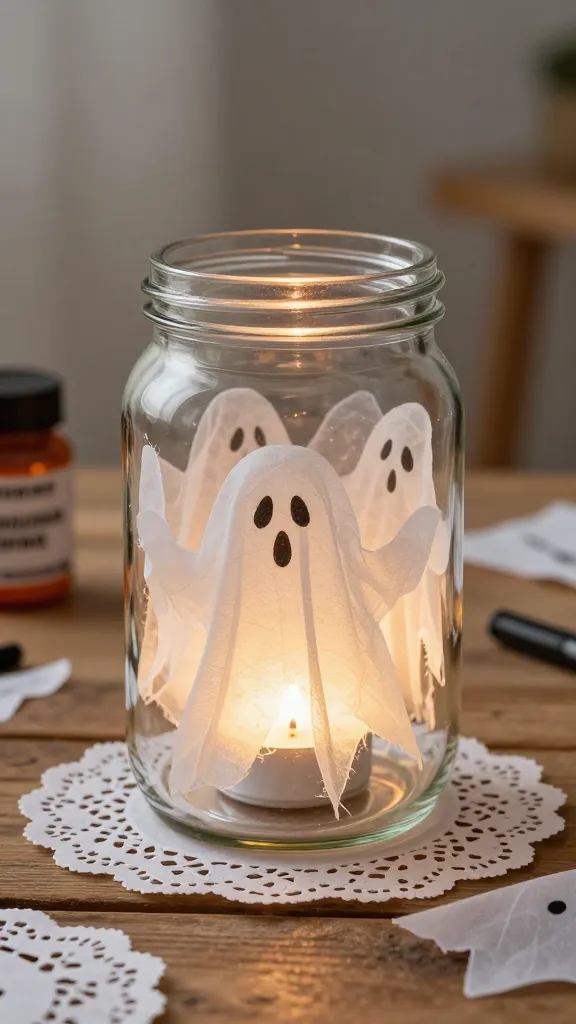
Delicate yet spooky, these lanterns bring a soft, ethereal glow to any room. They’re delicate-looking but sturdy enough for real use, and they look stunning filled with tea lights or LED candles.
Materials Needed
- Paper doilies (white or off-white)
- Colorful or white tissue paper
- Glass jars or lantern frames
- Mod Podge or craft glue
- String for hanging
- Black marker for eyes and mouths
How to Make It
- Coat the jar or frame with Mod Podge.
- Layer tissue papers with doilies to create a ghostly pattern, leaving space for a glow to escape.
- Draw subtle ghost faces on the doily portions with a marker.
- Place a LED candle inside and hang or set on a table for a delicate glow.
Pro Tips / Styling Ideas
- Hang in clusters at different heights for a floating, magical effect.
- Pair with lace or burlap for a vintage Halloween vibe.
End note: This crafts lighter-tone, elegant Halloween decor you can reuse year after year. You’ll adore the soft, warm vibe and the easy clean-up.
6. Cutest Black Cat Door Hanger
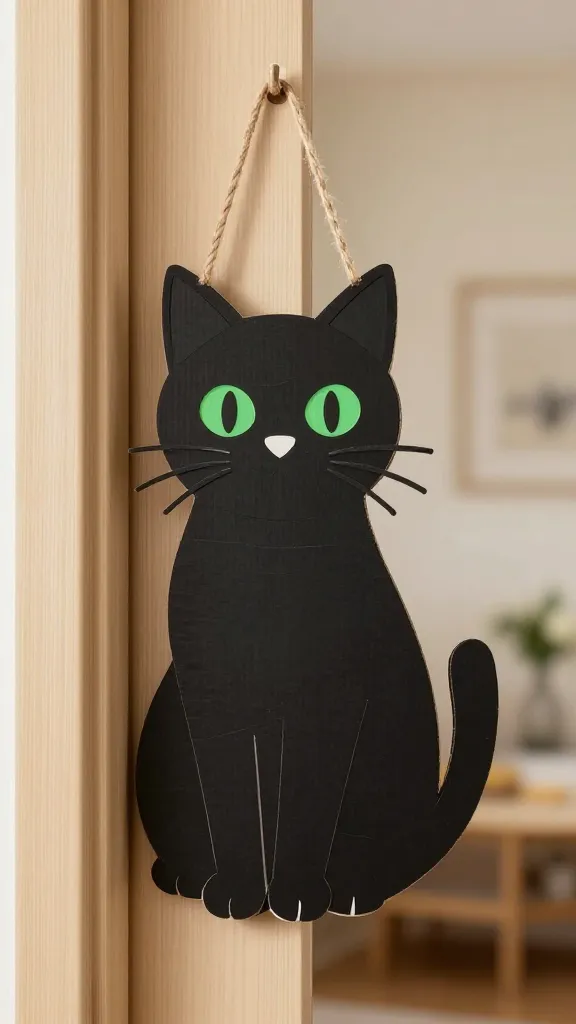
Turn a simple door into a playful focal point with a cheeky black cat door hanger. It’s friendly, totally Pinterest-ready, and adds a friendly whimsy to any space.
Materials Needed
- Cardboard or thick poster board
- Black acrylic paint or marker
- White and green paint for eyes and accents
- Ribbon or string for hanging
- Scissors or craft knife
How to Make It
- Sketch a cute cat silhouette and cut it out as your base.
- Paint or draw the features—green eyes, whiskers, a playful smile.
- Attach ribbon or string to the top and hang on your front door or inside closet doors for a playful greeting.
Pro Tips / Styling Ideas
- Add a little Halloween bow or a tiny red collar for a pop of color.
- Use a chalkboard sticker on the back for changing messages seasonally.
End note: It’s a charming, approachable project that suits kids and adults alike. Your door just earned a new best friend.
7. Harvest-Hued Spider Web Wall Art
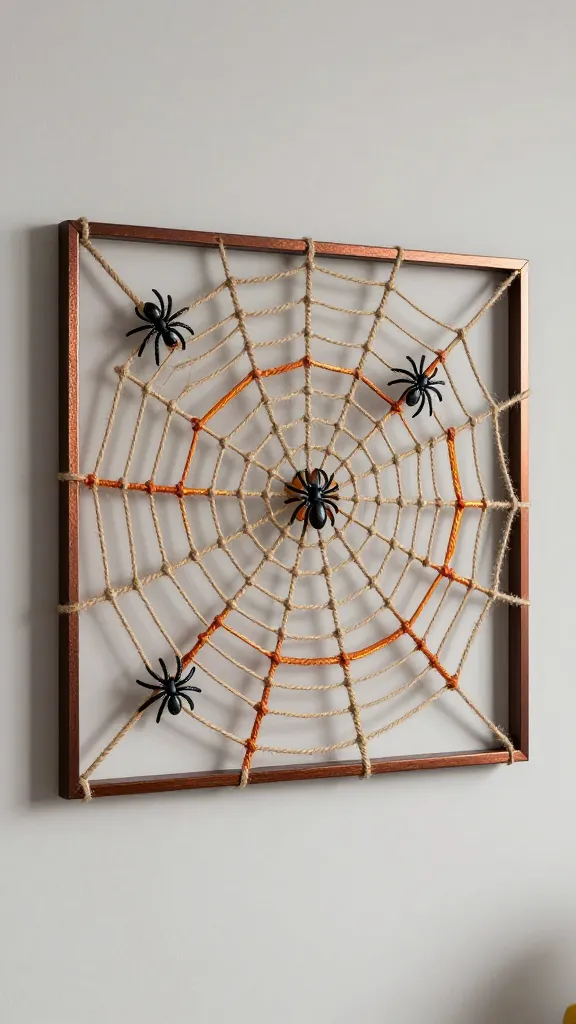
This is the art you hang with pride—bold, graphic, and a little edgy. A spider web made from twine and a splash of autumn colors creates a striking wall statement that’s modern and playful.
Materials Needed
- Sturdy frame or canvas
- Fine twine or jute
- Paint in copper, gold, and deep orange
- Hot glue gun or strong Glue Dots
- Small black plastic spider or DIY spider embellishment
How to Make It
- Create a web pattern by weaving twine from center to edges in a circular design. Secure with glue.
- Paint some twine strands in metallic autumn colors to add dimension.
- Affix a small spider centerpiece at the web’s core.
Pro Tips / Styling Ideas
- Hang against a muted wall to maximize contrast and drama.
- Change the color palette each year for a fresh look—richer tones for a grown-up vibe, brighter for a playful vibe.
End note: It’s bold, chic, and surprisingly easy. The wow factor is real, and you’ll love how it anchors a room with Halloween flair all month long.
8. Pumpkin Patch Pillow Covers
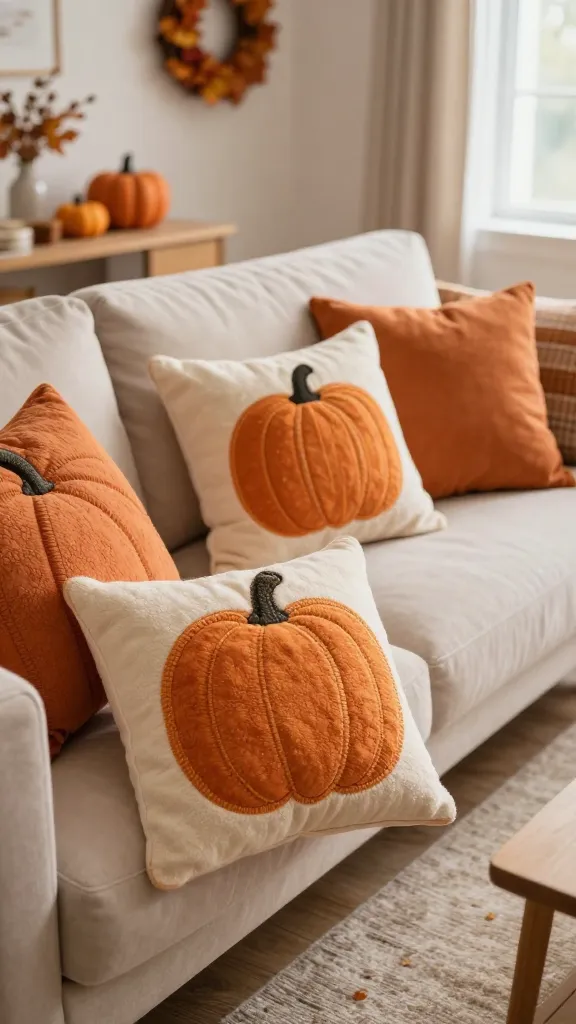
Seasonal textiles are a quick, high-impact way to shift a room’s mood. These pumpkin-inspired pillow covers brighten couches and chairs with cozy, soft texture—no sewing marathon required.
Materials Needed
- Plain pillow covers or thrift-store pillow cases
- Fabric paints or iron-on transfer paper
- Pumpkin stencil shapes (or freehand designs)
- Protective craft mat
- Iron or heat press (if using transfer paper)
How to Make It
- Place pumpkin stencils on the pillow covers and apply paint or transfer the designs.
- Heat-set if required by your materials.
- Let dry completely before use, then toss onto a couch or bed for instant autumn vibes.
Pro Tips / Styling Ideas
- Pair with textured throws in cream, sage, or burnt orange for a layered look.
- Rotate designs across seasons for ongoing freshness.
End note: Quick, friendly, and incredibly cozy—these are the “you’ll want to curl up with a book and a hot drink” kind of crafts.
Conclusion
Eight unique, totally doable Halloween crafts that fit into any busy schedule. Each project brings its own charm—whether you want warm candlelight, playful whimsy, or modern drama. Pick one (or all eight) and start creating a month of festive, your-own vibe decor. Ready to get crafty and pin-worthy? Let’s make Halloween your most stylish season yet.