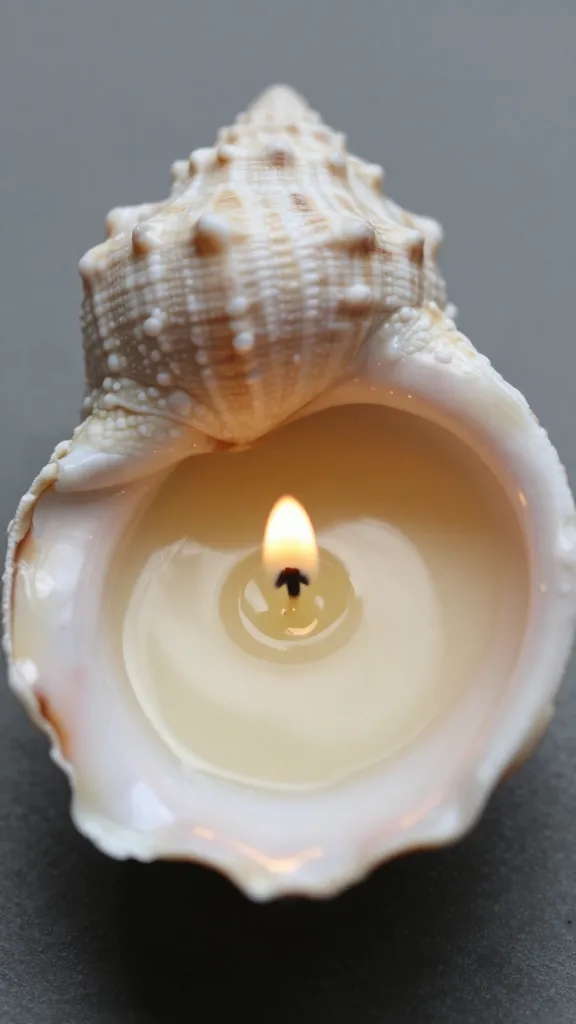
How to Make Diy Seashell Candles That Spark Joy
Ready to turn conches into cozy glow? DIY seashell candles are the perfect beachy project that looks fancy without the fuss. You’ll get a little sun, a little salt, and a lot of glow. Let’s dive in and make something that screams vacation vibes, even if you’re stuck at your kitchen table.
Why seashell candles? A quick, sunny rationale
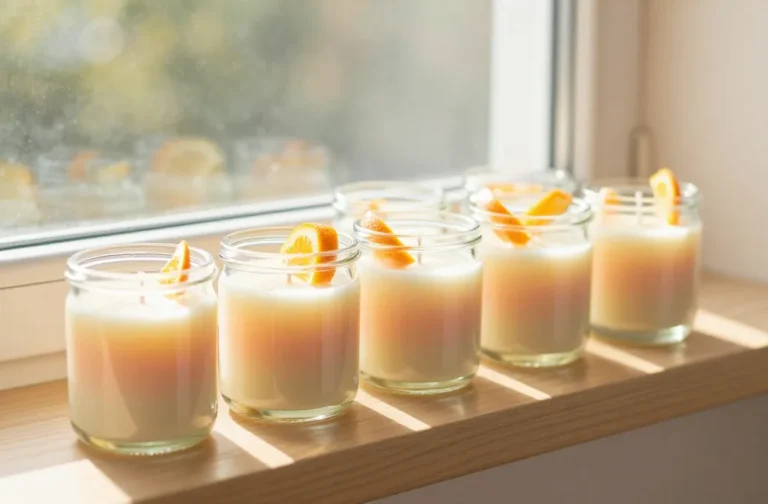
Seashell candles are basically portable shoreline vibes. They fold ambience, scent, and a splash of whimsy into one tiny package. You get a personalized souvenir, a conversation starter, and a candle you actually want to burn (crazy, I know). If you’ve got a stash of shells from a beach trip, this is the perfect excuse to repurpose them into something useful and pretty.
What you’ll need (the bare minimum and the goodies)
– Shells that are clean and dry
– Wax (paraffin, soy, or a blend)
– Wicks with sustainer or glue dots
– Double boiler or a sturdy heatproof bowl over a pot
– Fragrance oil (optional, but delightful)
– Color dye or crayons for a tint (optional)
– Thermometer (not mandatory, but helpful)
– Pouring pitcher and a skewer or chopstick
– Adhesive or hot glue to fix the wick
– Newspaper or parchment to protect your surfaces
Optional goodies:
– Sea salt for texture
– Dried seaweed or small shells for garnish
– Labels or twine for a giftable finish
Quick tip: give your shells a quick wash and bake them at 200°F for 10 minutes to dry out any moisture before you pour. FYI, damp shells = problems for your wick.
Step-by-step: the clean, simple process
1. Prep the shells: Make sure each shell is dry and free of any grit. If your shell opening is narrow, widen it gently with a clean skewer so the wick can sit centered.
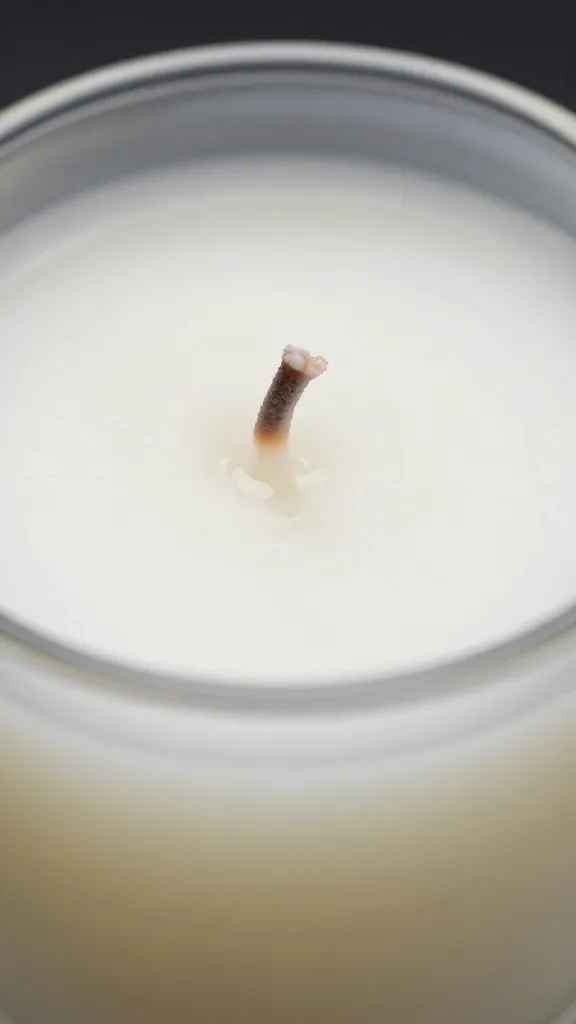
2. Set up the wick: Put a dab of hot glue or a tiny drop of melted wax at the base of the wick to anchor it. Position it dead center at the bottom of the shell. You want a straight shot of flame, not a wonky diagonal.
3. Melt the wax: Use a double boiler to melt wax slowly. Keep the heat gentle; nobody wants a wax fireworks show. If you’re adding color, stir in dye a little at a time until you love the shade.
4. Add fragrance (optional): If you’re adding fragrance, wait until the wax hits around 170°F before stirring in fragrance oil. Stir gently; don’t whip it like you’re making meringue.
5. Pour and steady: Pour the wax slowly into each shell. Leave a small headspace for contraction as it cools. If you notice air bubbles, a light tap on the table helps them pop.
6. Secure the top and cool: If your shell has a lip or you want extra stability, press a small shell fragment or a wick stabilizer against the wick to hold it in place. Let the candles cool undisturbed for several hours or overnight.
7. Trim and finish: Trim the wick to about ¼ inch above the wax. If there’s a sinkhole around the wick, top it off with a little more melted wax once cooled. Add a dusting of sea salt or a decorative shell on top if you’re feeling fancy.
Design ideas to level up your seashell candles
– Layered hues: Pour a thin layer of wax, let it set, then add a second color for a sunset effect. It’s like a tiny, edible hue cake.
– Fragrance waves: Pair citrusy notes with airy florals for a beachy breeze; try lavender with vanilla for a calmer vibe.
– Texture play: Sprinkle a pinch of sea salt or crushed shell on the top after the second layer has set. It adds tactile interest and a beachy shimmer.
– Monochrome chic: Stick to one shell family (all white, all pinks, all blues) for a cohesive look that fits minimalist decor.
Troubleshooting: common seashell candle hiccups
– Wick drift danger: If the wick drifts to the side, pause, re-center it, and pour a thin layer after it hardens to anchor again. Pro move: use a dab of melted wax to fix center.
– Sinking or tunneling: This happens when you pour too fast or the wax is too cool. Reheat the remaining wax, top up the hollow, and let it solidify slowly.
– Poor scent throw: If you don’t smell anything, consider upping the fragrance load a bit or choose a fragrance with stronger notes. FYI, some wax blends hold scent better than others.
– Cracking: If the surface cracks as it cools, keep the temperature steady and avoid moving the shells while it cures. A light spritz of rubbing alcohol on the surface can help during layering (careful, not too much).
Safety and maintenance: keep things cozy, not chaotic
– Always work on a heatproof surface with a layer of newspaper or parchment underneath.
– Never leave melting wax unattended. It’s basically liquid napalm for candles if you turn your back for two seconds.
– Use gloves if you’re handling hot shells or wax.
– Keep away from pets and curious kids until everything’s cooled and set.
Creative packaging ideas for gifting
– Tie a few shells together with baker’s twine and attach a tiny, handwritten note.
– Slip the candle into a seashell-inspired jar or a small glass container with a cork lid.
– Add a scented sachet or a mini bottle of sea spray as a little gift bundle.
Conclusion: your beachy glow starts here
Seashell candles are not just decorations; they’re tiny, portable reminders of shoreline strolls and sun-kissed afternoons. With a few shells, wax, and a dash of patience, you can craft candles that feel custom-made for any space. So unroll that parchment, spill some waxy sunshine, and light up your creativity. You’ve got this.
FAQ
Can I use any type of wax for shells?
Candles made in seashells work with many types of wax—soy, paraffin, and blends all behave nicely. Soy is clean-burning and easy to work with, but paraffin often gives a stronger scent throw. Pick what you prefer and adjust fragrance accordingly.
What size shells work best?
Medium to small shells work best for beginners. They’re easier to center the wick and control the pour. Large shells can be dramatic, but you’ll need more wax and a steadier hand to prevent sinking.
How do I fix a wick that won’t stay centered?
Anchor the wick with a bit of hot glue at the bottom, then use a skewer to hold it in place while you pour. If it still drifts, let the wax cool a bit and gently reposition with a clean tool.
Is it OK to scent a seashell candle?
Absolutely. If you want a stronger scent, choose a fragrance oil with good cold and hot throw. Just be mindful of the recommended fragrance load for your wax type to avoid overwhelming the candle.
How long do seashell candles take to cure?
Most seashell candles cure in 4–24 hours for a basic set, but full cure can take a few days depending on wax and size. If you’re stacking layers, give each layer time to harden before adding the next.
Any tips for cleaning up leftovers?
Let leftover wax cool completely, then peel or scoop it out. You can reuse clean shells for more candles or as decorative bowls. Wash with warm soap and water, dry thoroughly, and store for your next project.
If you want, I can tailor this with your favorite scents, shell types, or a specific color palette. Tell me your vibe—tropical, sunset, or coastal calm—and we’ll craft a plan that glows just right.