11 Easy Autumn Craft For Kids
11 Easy Autumn Craft For Kids
As the days grow shorter and the nights draw in, autumn is a time for gathering with friends and family.
But what can you do to ensure that everyone has fun? While we love baking apple pies and roasting marshmallows by the fire, it’s always nice to have some simple craft ideas up your sleeve.
These 11 easy autumn crafts are perfect for kids of all ages. So grab some tissue paper and get ready to get messy!
Toilet Paper Roll Scarecrows
Toilet paper roll scarecrows are a great way to use up toilet paper rolls and make your own fall decoration.
You can make one or many, depending on how much time you have and how many toilet paper rolls you want to use.
Materials: A few toilet paper rolls, some paint or markers for decorating, fabric scraps for clothing (optional), a glue gun (optional)
Handprint Tree
Shaping the trunk.
Make a cone shape out of paper and tape it together. The length should be no longer than the child’s hand, and the width should be as wide as their palm.
Cut off any excess paper from around the cone to make it flat on both sides.
Fold up one side of the cone so that it’s at an angle (the top will be straight up and down). Tape this corner in place securely with masking tape or glue! Your tree trunk is now complete!
Tissue Paper Leaves
Tissue paper leaves are a fun way to make a fall decoration. They’re easy to make and you can use them for many different craft projects.
You can make your tissue paper leaves in any color you want. You could make them green, orange, or red if you’re going with the traditional colors of autumn, or use other colors like blue or purple to add some flair!
Tissue paper leaves are perfect for making wreaths and garlands because they’re lightweight but sturdy enough that they won’t tear easily once they’ve been hung up on your wall or door frame.
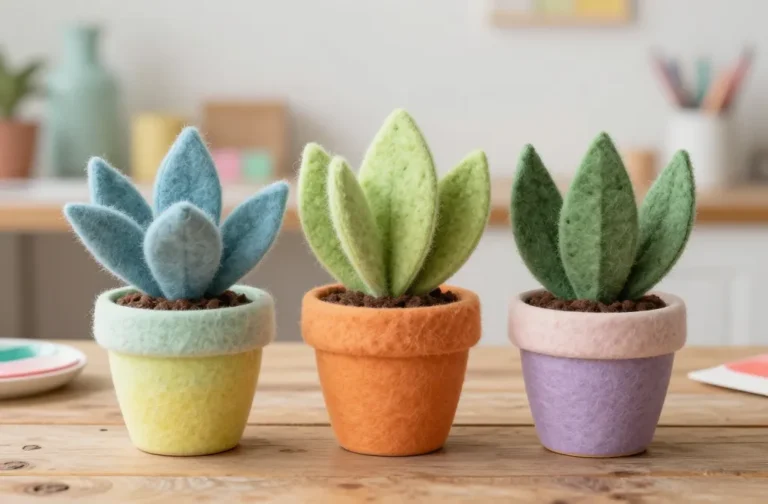
Felt Autumn Leaves Garland
Materials.
- 5 sheets of felt (or your choice) in different colors
- craft glue and paint brushes, sponges, or rollers (optional)
DIY Calendar Flip Book
If you’re looking for a fun and easy craft that can be done in two hours or less, this is the one!
This project is great for kids who are just learning how to read and write. It’s also an excellent way for older kids to practice their handwriting skills.
We’ve included detailed instructions below on how to create your own calendar flip book. If you have any questions about our process, please feel free to contact us!
Apple Stamps
Apple stamps are the easiest way to get crafty this autumn, and they’re great for a variety of activities—from painting and printing to counting. Here’s how you can make your own apple stamps.
Peel an apple (or potato, or clay). Remove the core and seeds.
Use a sharp knife to cut the peeled fruit into quarters. Then cut each quarter into slices alternately with another fruit or vegetable—like bananas, pears, or potatoes—and keep alternating until you have one-inch thick pieces of fruit scattered across the base of your stamp mold.
Press down firmly on each slice so that it sticks together in one layer on top of its neighbor slices (this will help prevent leaks when using an ink pad).
If desired, use scissors to cut out one half or third from some corner pieces so that only half is left sticking above ground level once pressed all together into place inside the mold cavity; this will act as an anchor point for other slices in order keep them from sliding sideways during use later on!
Apple Print Tea Towels and Napkins
Wash and dry your apples thoroughly.
Thinly slice the apples with a food processor or sharp knife, then layer the slices into one another to make them even thinner.
Cut out stencils from cardboard, tissue paper, or construction paper that are roughly the size of your tea towels and napkins. Tape them over the apple slices using small pieces of tape so they don’t shift around during printing—you may need an adult for this part!
Use a paintbrush to lightly dab water onto each stenciled area on your apples, then set them aside to dry overnight before ironing them flat.
Pumpkin Rice Krispy Treats
- Use a muffin tin to make the Rice Crispy treats.
- Use a large pumpkin to make the jack-o-lantern face.
- Cut out the jack-o-lantern face with a sharp knife and use toothpicks to attach it to your rice Krispy treat
In this craft, you’ll need.
- A muffin tin (or any round metal or glass container) lined with foil to make individual servings of Rice Krispies treats.
- A large pumpkin for decorating purposes.
- Sharp craft knife for cutting out faces from the pumpkins and using as stencils for cutting out eyes and mouths on your treats.
Spider Web Craft
This spider web craft is super simple and fun to make, and it’s a great way for kids to work on their fine motor skills. To get started, you will need construction paper, glue and pipe cleaners.
You can use any type of paper you want for this craft but if you want a more durable spider web then we recommend using cardstock or cardboard instead of regular construction paper.
Lay out your paper with two pieces overlapping, as shown in the picture above. Use a pencil to lightly trace an outline of one side onto the other piece of paper (you don’t have to be exact). Cut along this line so that you have two identical pieces of paper with an outline on each side—one will be used as your background color and one will be used as your spider web design.*
Tissue Paper Sun Catcher
To make a tissue paper sun catcher, you’ll need.
- Colored craft paper or construction paper (for the background)
- Scissors
- Glue stick or school glue
- Tissue paper in various colors and patterns (such as red, yellow, orange and brown)
Handprint Fall Tree Canvas
Materials.
- canvas (regular or pre-stretched)
- paint
- paintbrushes
- acrylic craft glue (not water-based) and a small brush to apply it with
Instructions.
Paint the background of your canvas in a light color that matches the season—white for winter, green for spring, etc. Let dry completely before continuing.
Take your child’s handprints and place them on the canvas where you want them to go. If they have trouble holding their hand up, you can help by holding their fingers down while they press them down; or you can use tape to secure the prints in place if they’re going to be young children who aren’t able to hold their hands up long enough yet. You’ll want at least two hands but no more than four per canvas piece,
I suggest 3 if you’re planning on doing this activity with multiple children so that each one has roughly equal exposure/space on the piece but not too much so that it looks crowded/confusing when complete! Now let these dry completely again before continuing onto step 3 below…
This Fun And Easy Fall Craft Ideas Will Keep The Kids Entertained This Autumn!
Autumn is a lovely time of year. The leaves are changing color, the air is crisp and fresh, and there’s just something about it that makes you want to get creative with your kids!
Here are 10 fun autumn crafts for kids that you can make this season:
1} Create a leaf rubbing
2} Make an autumn paper chain
3} Decorate your own fall door hanger
4} Make a leaf print collage
5} Paint acorns with watercolors or markers
6} Use the kids’ handprints as leaves on a canvas wall hanging or picture frame
7} Turn the kids’ drawings into their own personal autumn collage (or use them as decorations on handmade cards!)
Conclusion
I hope these ideas have inspired you to create some fun and easy autumn crafts for your kids. If you’re looking for even more inspiration, check out our Crafts section!